Sep 1, 2015
Build Time Today: 3 hours
Total Build Time: 207 hours
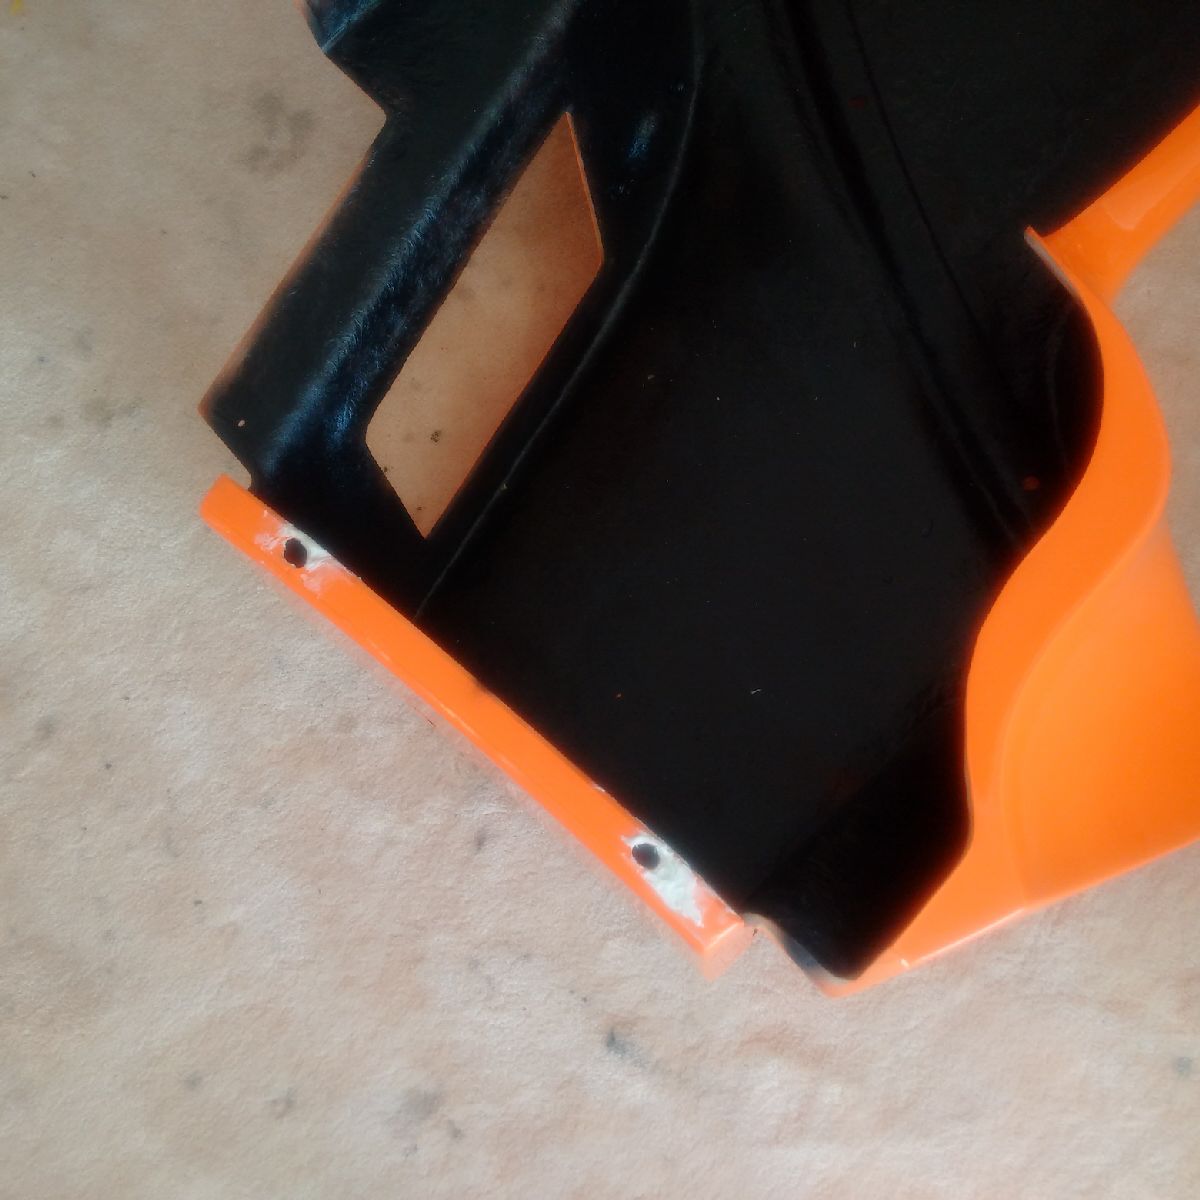
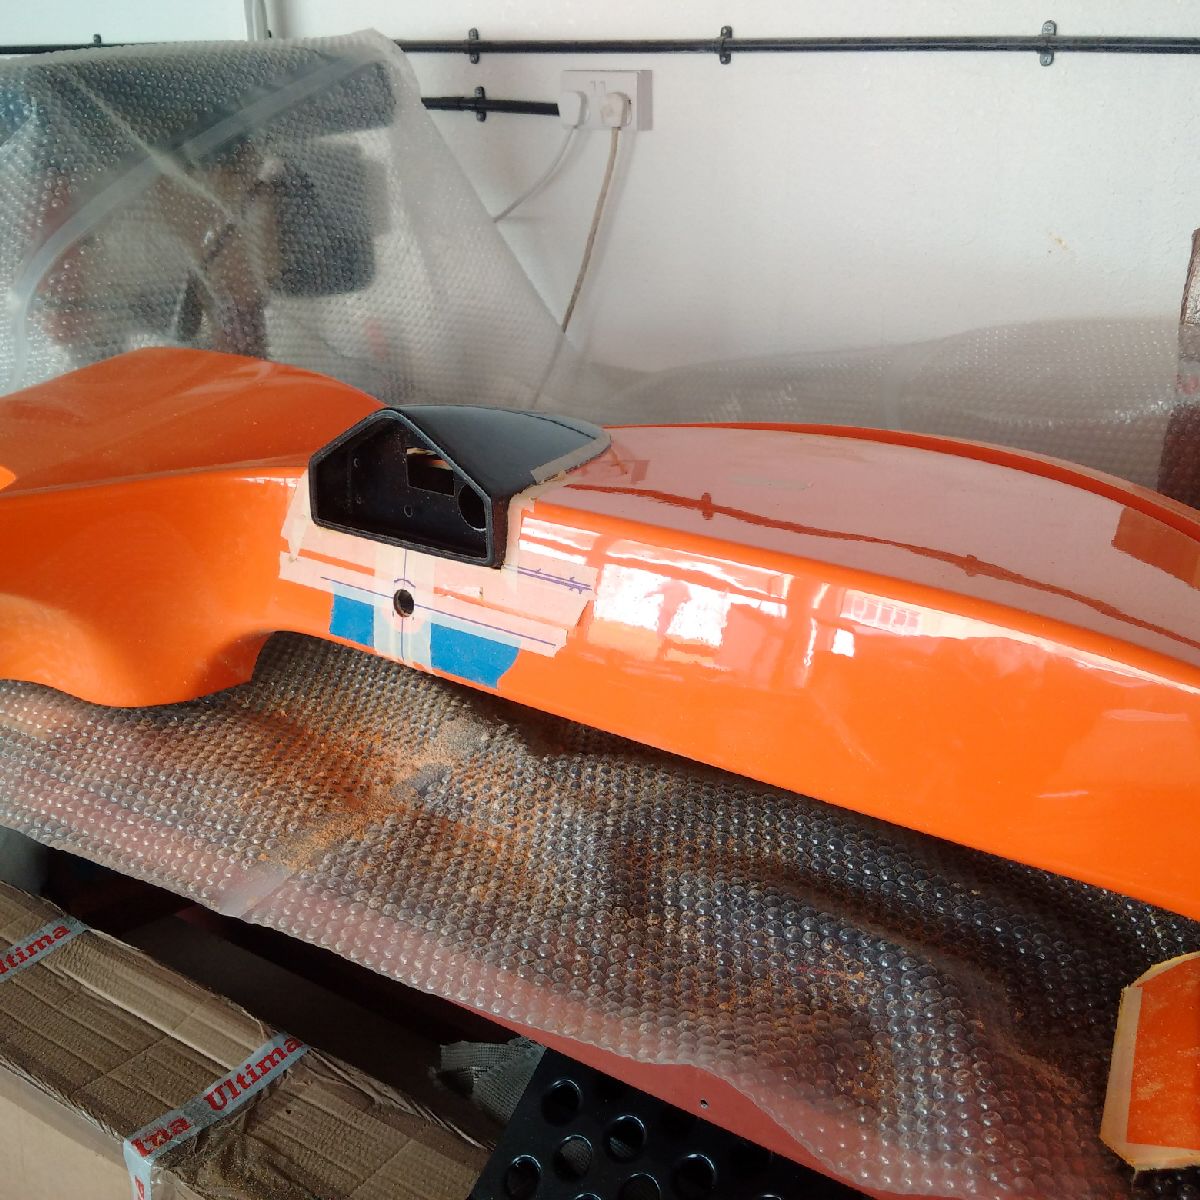
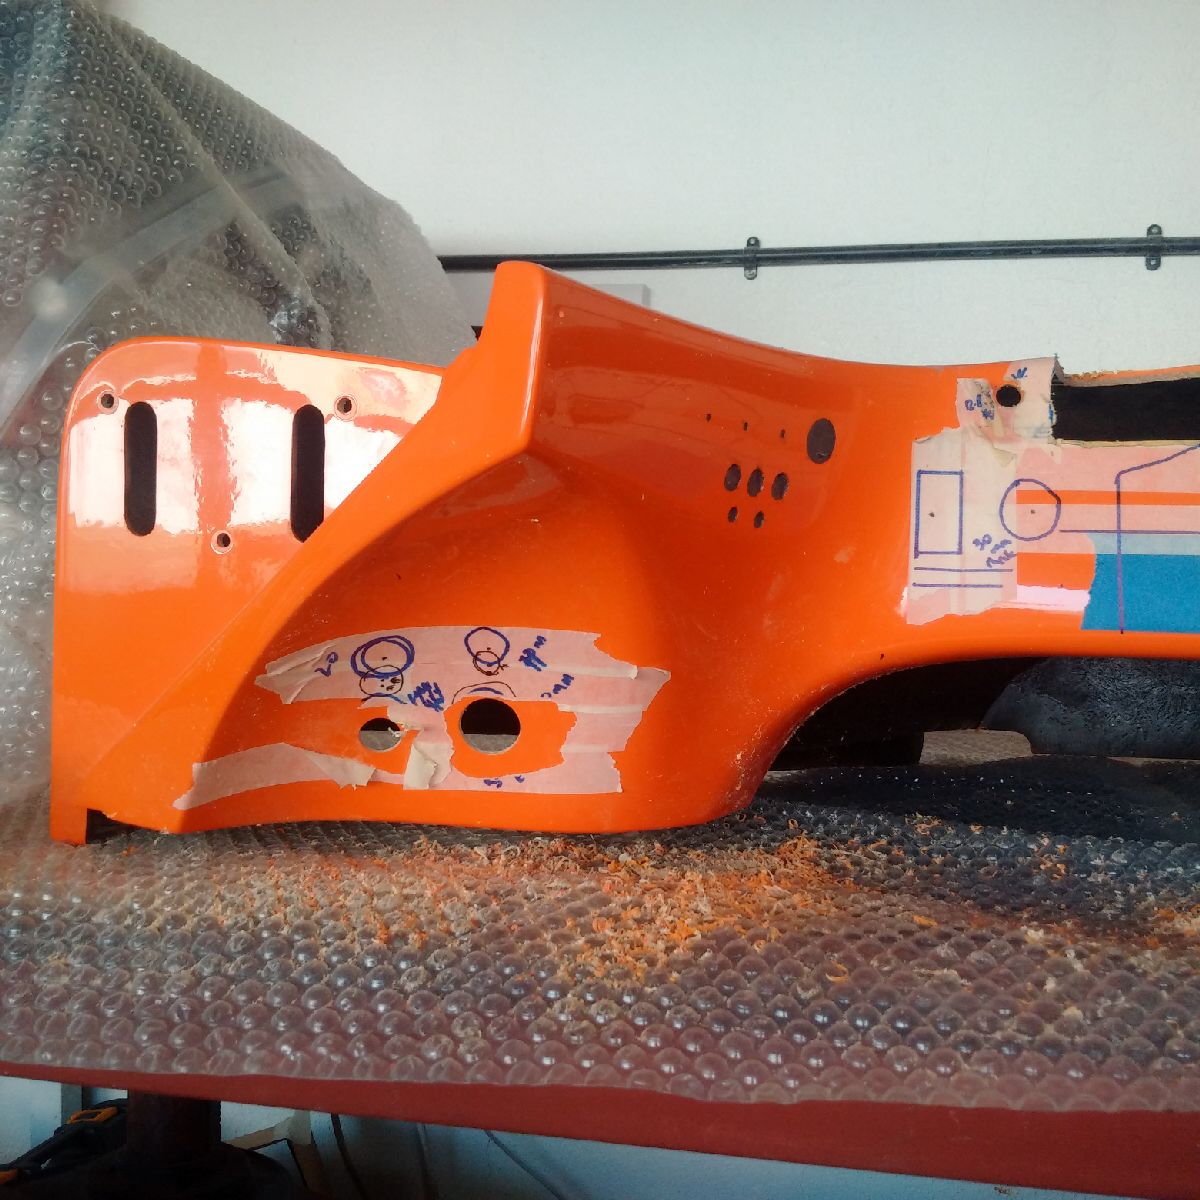
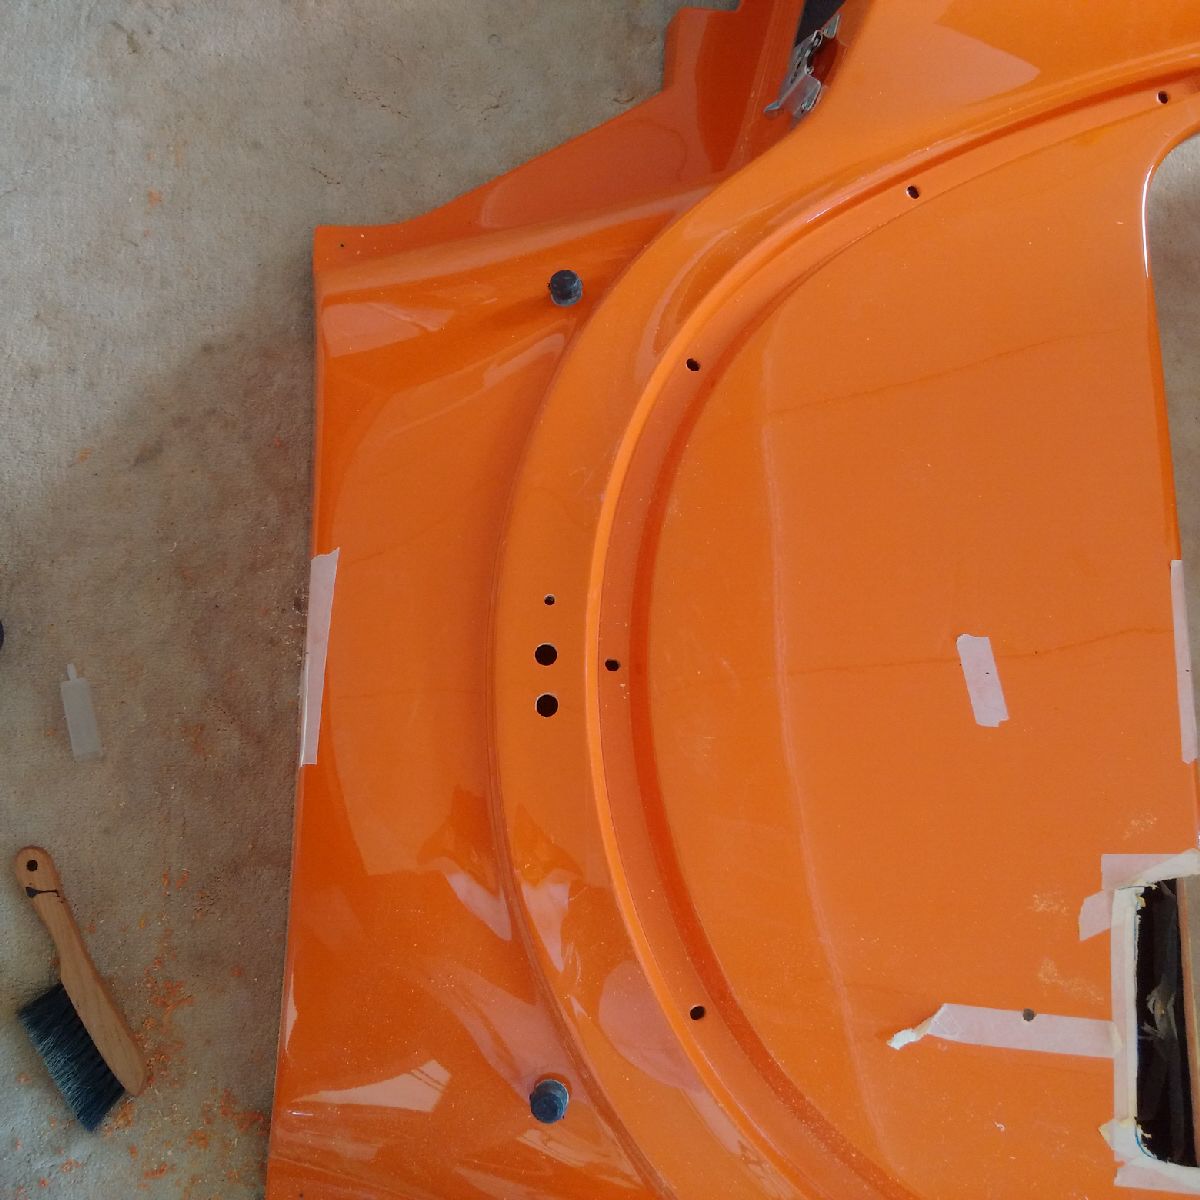
I was able to get some answers on getting the dash to fit correctly - it was pointed out that I had tie wraps holding the wiring loom to the chassis rail, and that the tie wraps may prevent the dash GRP from sliding over the rail. The tie wraps were removed, and the dash was fit onto the car - still took a long time, and it is a very tight fit. However, I was able to get the dash on and confirm all the pre-fit markings were still intact. In addition, I was able to mark the steering column hole location, and verify that the AC blower was positioned correctly to allow the wiper motor to fit behind it. Once this was done, the dash was removed from the car so that I could start working on it - however, during the disassembly, the hole in the GRP that hold the dash to the side pods cracked and GRP material broke off. Although there is still some holding the shape of the hole, I decided to reinforce the area so that future installation will be easy. Marine epoxy was used to toughen the area, and the dash was left for a day to harden.
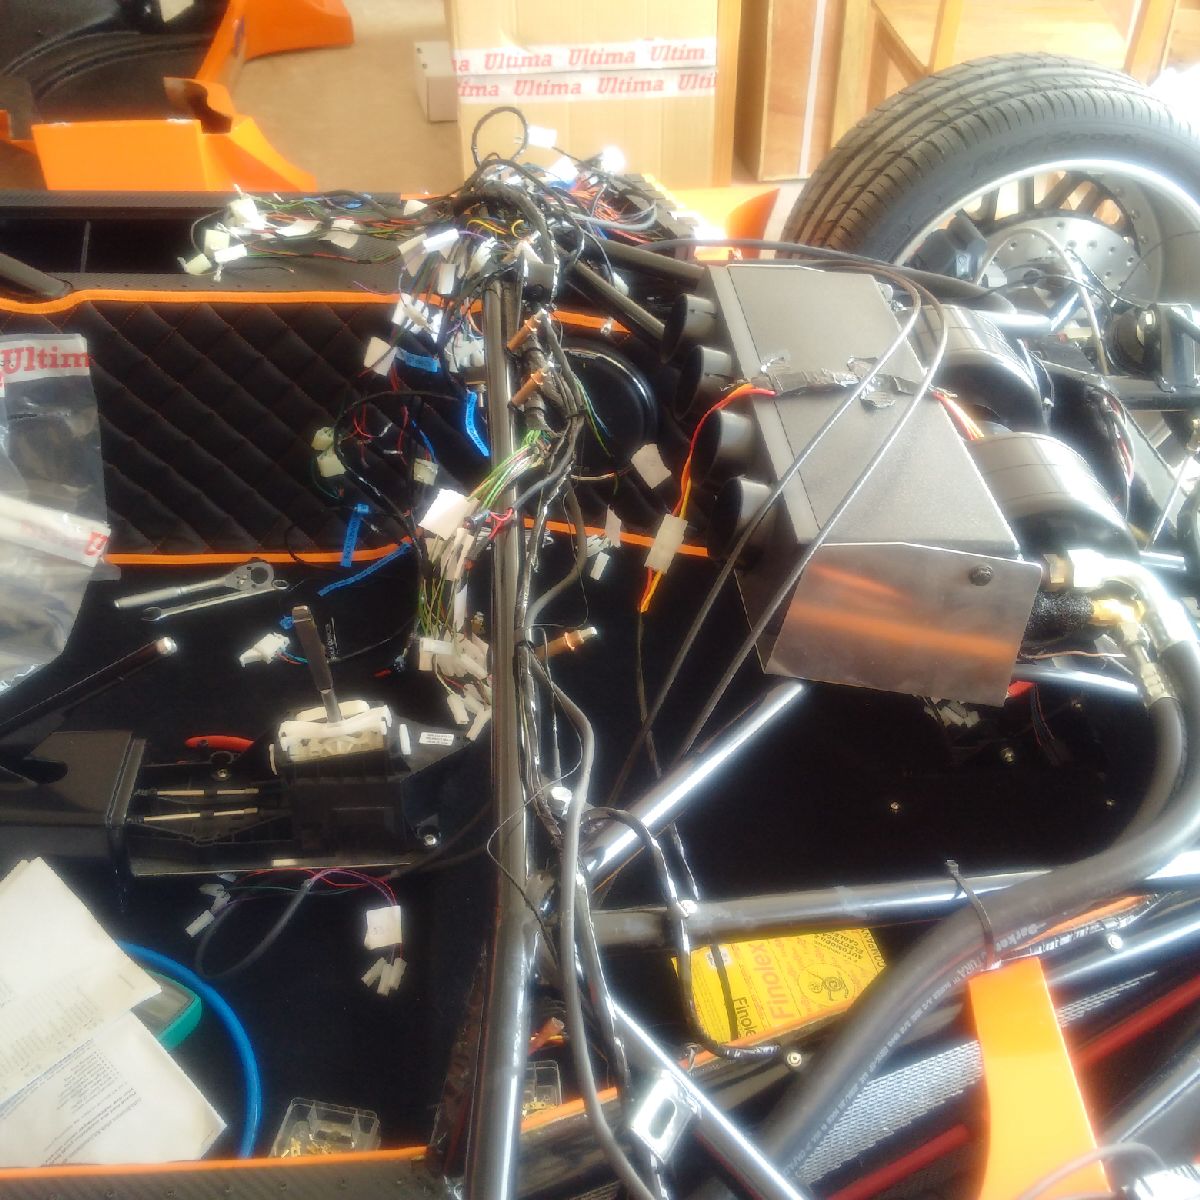
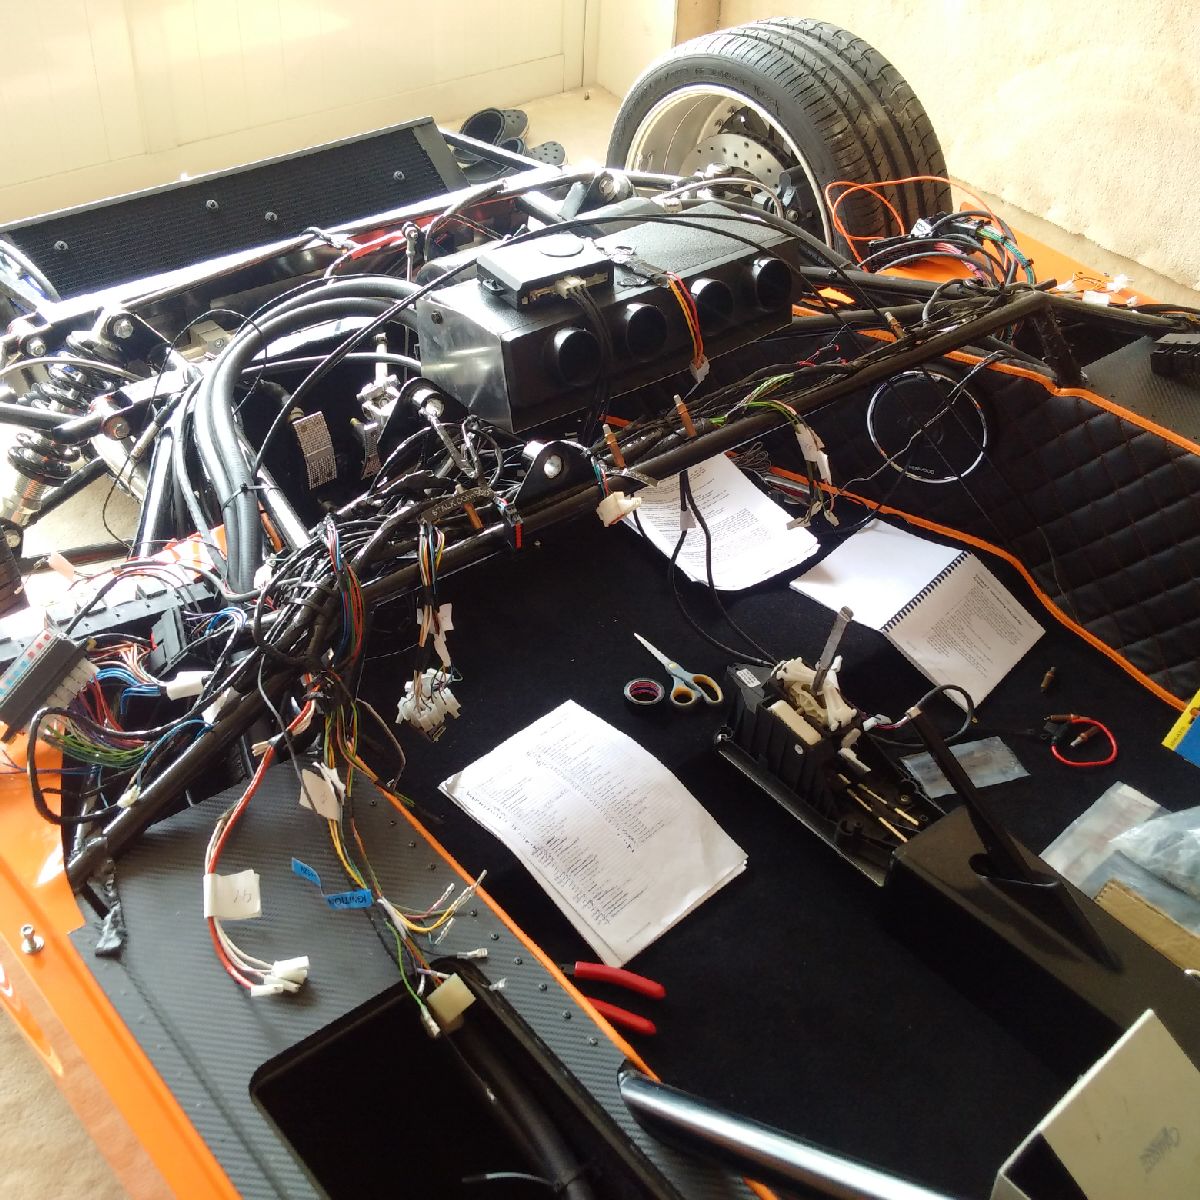
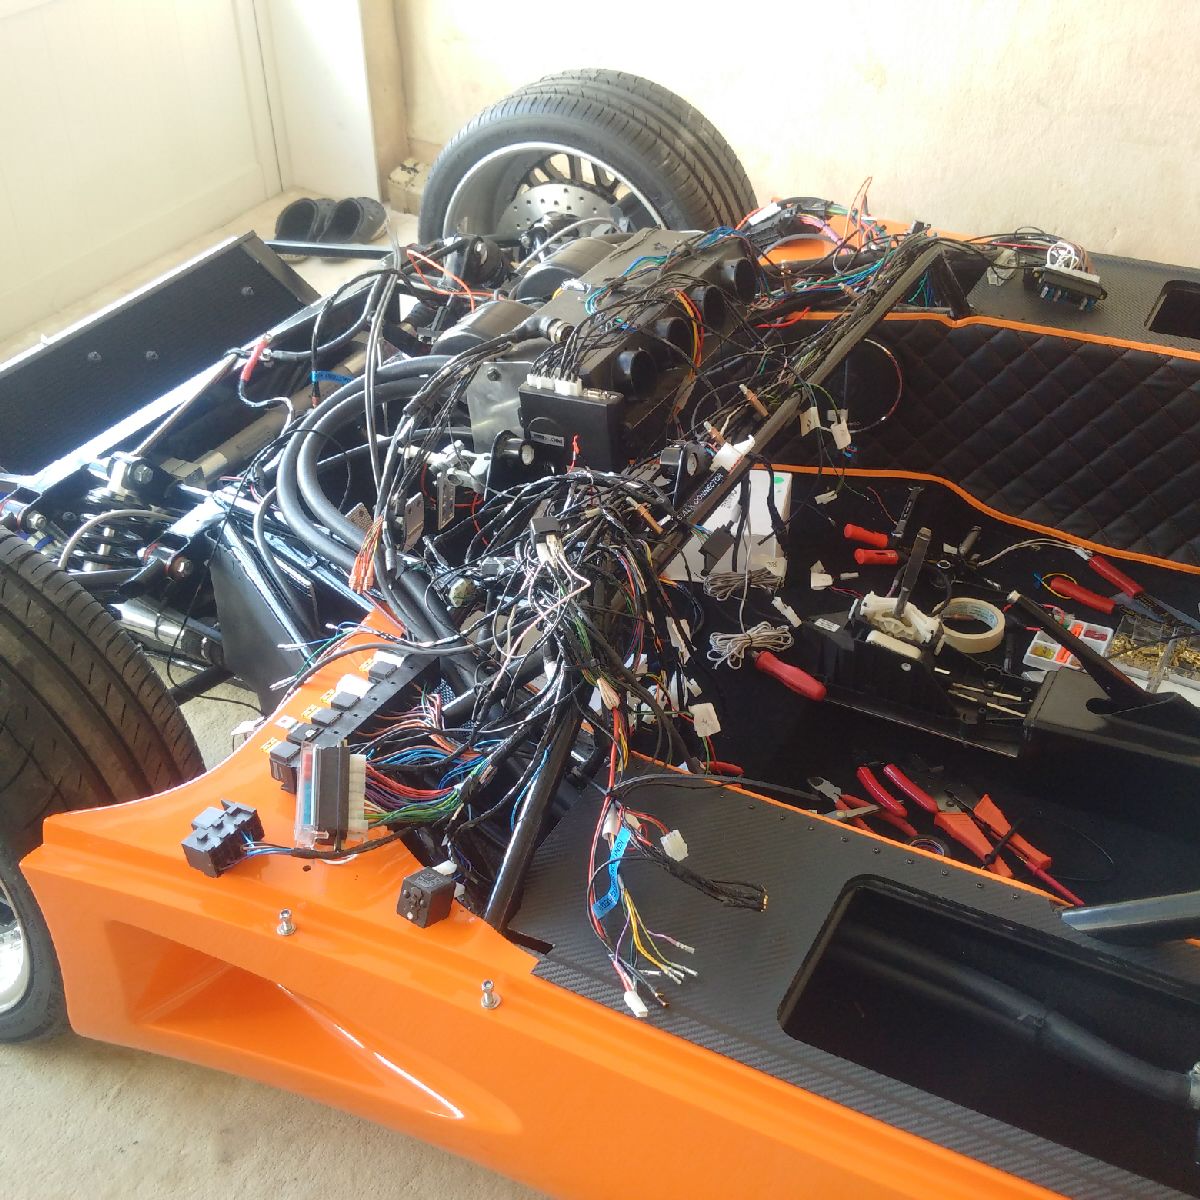
I turned my attention back to the car. Since I had removed all the tie wraps holding the wiring loom to the chassis, my entire dash area was now a mess of wires. I spent the better part of 2 hours starting to tidy up the area. Holes were drilled, and the wiring loom was P-clipped with clecoes. However, I did not have time to finish the tidying up of wires, and it will be the first thing on the list of things to do tomorrow.

Sep 2, 2015
Build Time Today: 4 hours
Total Build Time: 211 hours
I finished wiring up the mirror housings today - the wires were passed through the support stem and the mirror GRP, and then crimped to terminals and installed in the motor. The motor was then reinstalled onto the GRP.
I then decided to finish up tidying up the wiring and test the loom - that meant going over every connection to make sure there are no shorts, and then connecting only the basic things I wanted to test - mirrors, lights, stalk, wiper, washer. It took a long time to go over everything, and I had to jerry rig an ignition switch since I didn't want to be holding the ignition switch in my hand... all said and done, it took me a long time to be satisfied that I (hopefully) won't be having an shorts or smoke. I will leave the testing till tomorrow, as I plan on getting a fire extinguisher first for safety. Big test day tomorrow!

Sep 3, 2015
Build Time Today: 4 hours
Total Build Time: 215 hours
First order of the day was to test the electrical system after it had been jerry rigged yesterday. All safety precautions were taken, and the battery was attached to the loom - positive first, and then negative to the chassis. A deep breath, checking for smoke and/or burning smell, and all seemed ok. I proceeded to test the lights (side lights only), hazard and horn - all work with ignition off. I then flipped to ignition on, and checked the horn, side lights, main lights, high beams, turn signals, hazards, mirrors, washer pump and wiper motor. Everything works except the side turn markers. Some head scratching, and I decided to swap the terminals around (connected as black-to-black and white-to-green/yellow)... Swapping the terminals, and the side markers worked as well! All seems ok!! YES!!!! The battery was disconnected, and all temporary connections/switches/stalk/parts/lights were removed and stored back in their respective boxes.
Second job for the day was finishing up the mirror work - only thing left was to was attach the ally plate with sikaflex. That job done, the mirrors were put aside till final install in the door. Only the mirror glass needs to be attached, and that too with velcro, so it will be a last minute job.

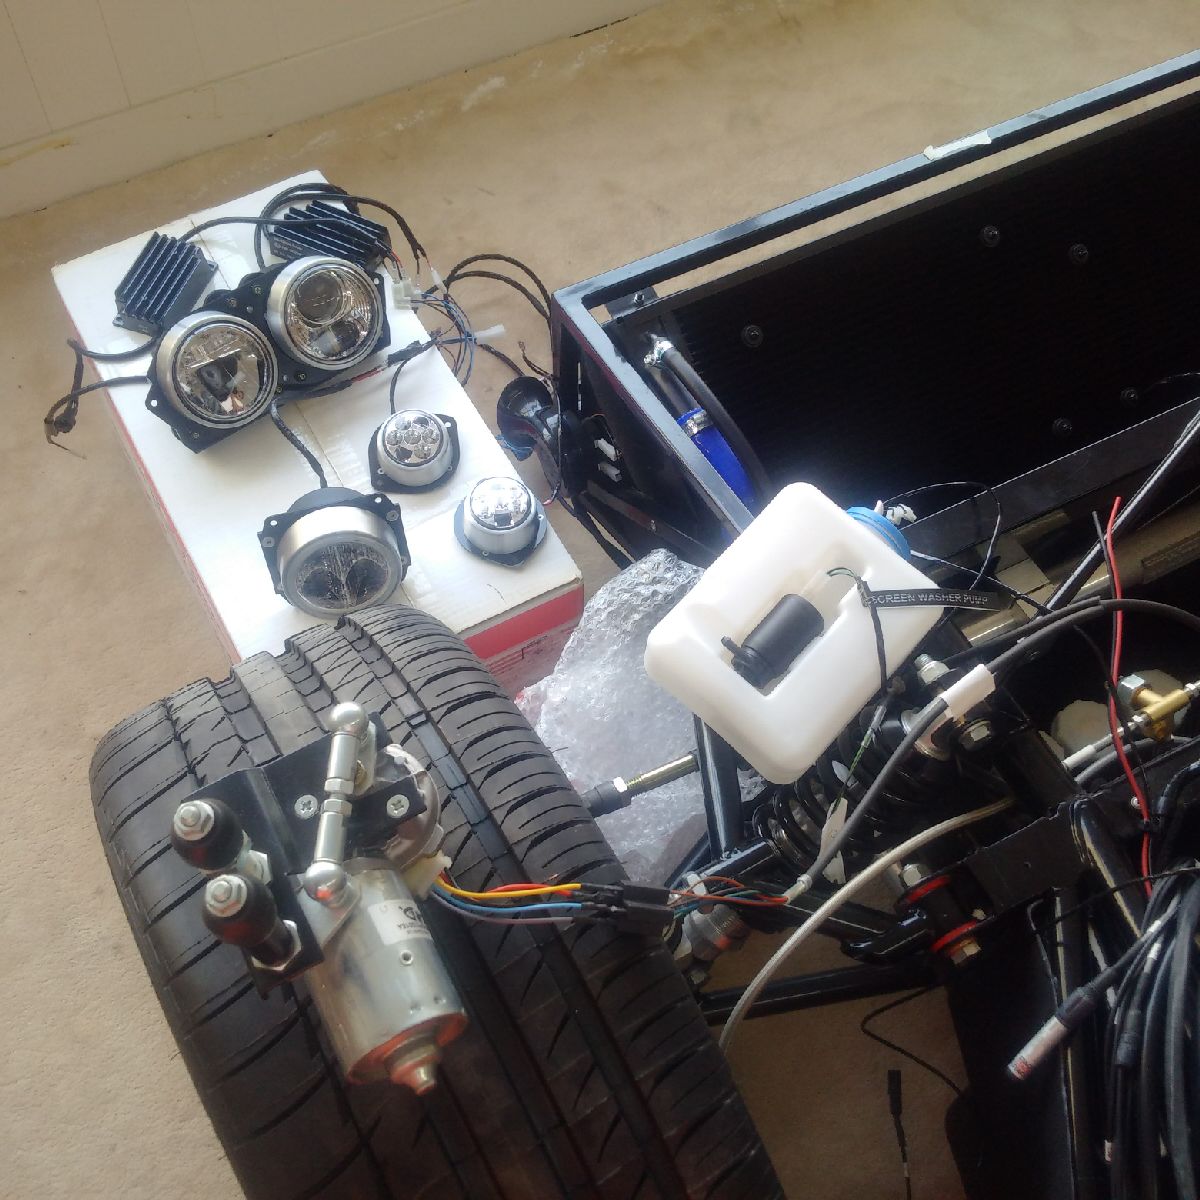
Next job was figuring out how I will make my new LED front lights work - basically, I have the old CanAm wiring loom which is setup for the old style headlights: which include (per side) a turn signal, a main beam, 2 high beam bulbs, and a side/parking bulb built into one of the high beam units. Now, the new EVO style bulbs are: turn signal, a main beam, side/parking bulb, and 1 high beam with a DRL built into the unit... For the test above, I was able to get the turn, parking, main and high beams to work as needed using the hold wiring. Now the issue is how to get the DRL to work - the only wire connection available on the loom is for a second high beam - which I don't need. A lot of head scratching, following wires using a multimeter, checking wiring diagrams and cross checking relays to terminals, I finally figured out that there are 2 high beam relays - each connects to 2 high beam bulbs (since 4 on the old Canam) - I plan to use one relay for the high beam, and the second for the DRL... the high beam will continue to work as is, but the DRL will be changed (from normal open to normal closed relay) with the same trigger (high beam) - this way, the DRL will be always on and only cut off when the high beam is used! Now the issues - I need to source a normal closed relay to replace the relay already in the Ultima relay box.. and also, the 4 old high beam wires - are sided! Which means, one relay is currently suppling the left and the other relay the right... I need to swap wires at the connectors so that each relay supplies one wire to each side!! I tried to remove some of the wires from the connector, but they would not buldge, so that will be something I try later on again...
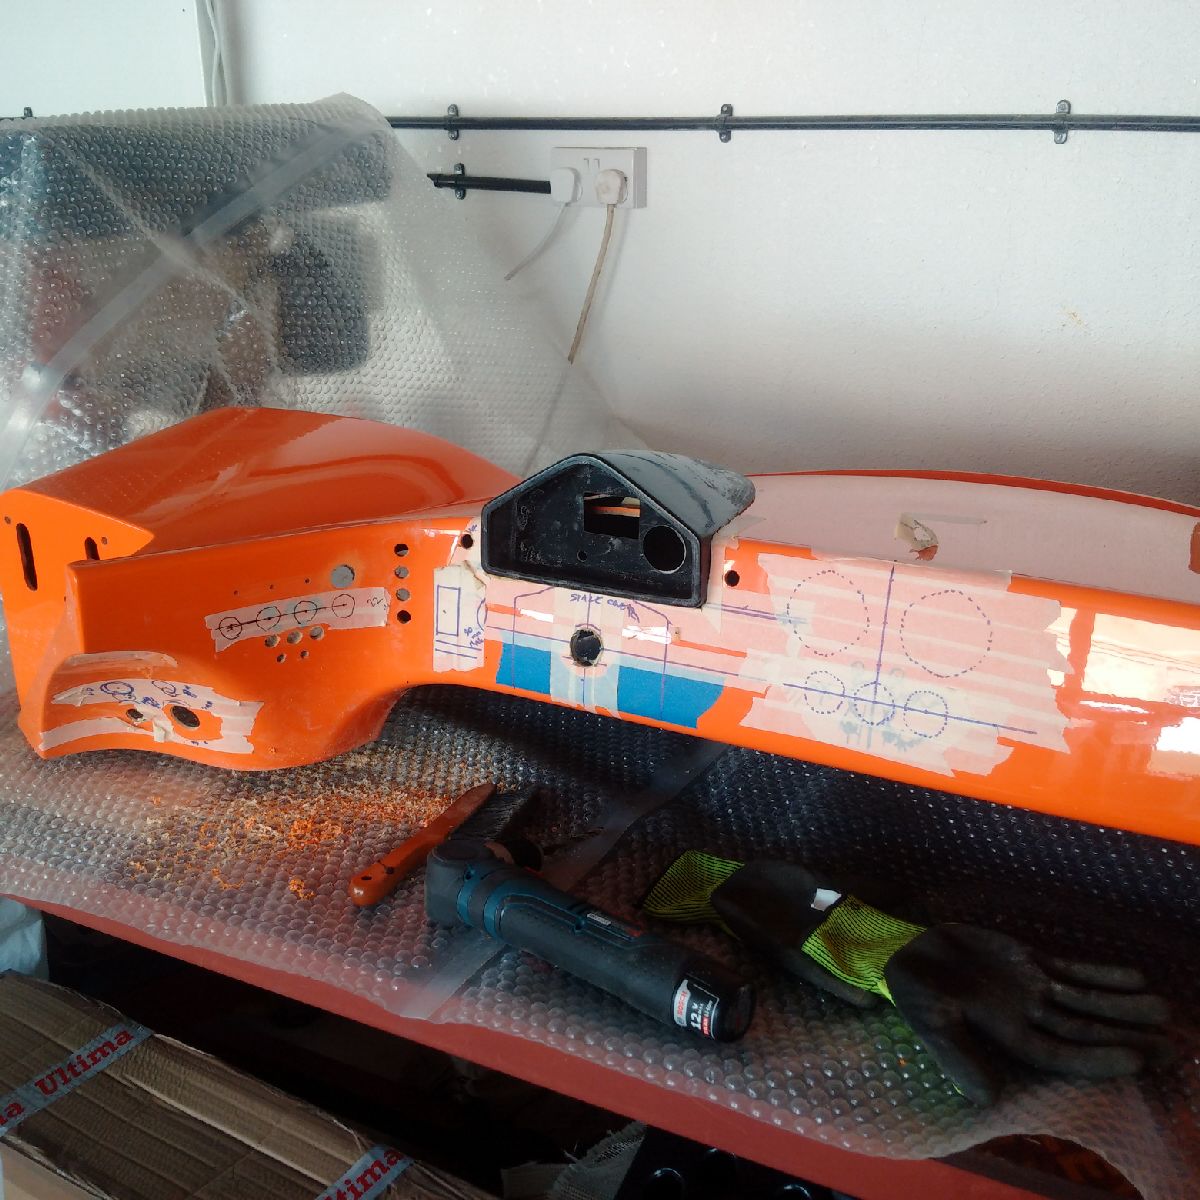
Finally, I spent the last part of the day working on the dash - today's target was to get the stack pod installed... using the Ultima template, and a lot of trial fitting, marking, filing/sanding, and repeat, I was able to get the pod in... it is still not 100% as the dash slopes on the side.. but it's a good start to the dash work!

Sep 4, 2015
Build Time Today: 6 hours
Total Build Time: 221 hours
A long day in the workshop getting quite a few things (none visible) accomplished.
First, I decided to test out the immobilzer/starter system I will be using. For obvious reasons, there will no mention of brand, how it works, or pictures :) However, it take me almost 2 hours to rig up a test sytem (using the side lights/repeaters) as test units for the ECU, fuel pump, starter motor, etc. Once I was happy with the way it worked, I took the system apart and labeled it for future install.
Second job for the day was starting to mark all the holes needed on the dash. I was able to finalize locations for the Stack buttons, warning lamps, radiator/fan switch, brake test switch and fuel change over switch. I also finalized the location for the mirror switch and the electric heater knob. Remaining are the ignition/starter system and the AC vents/switches, as I need to replace the dash on the car to check for clearances, and also how I will be adding the ICE screen.

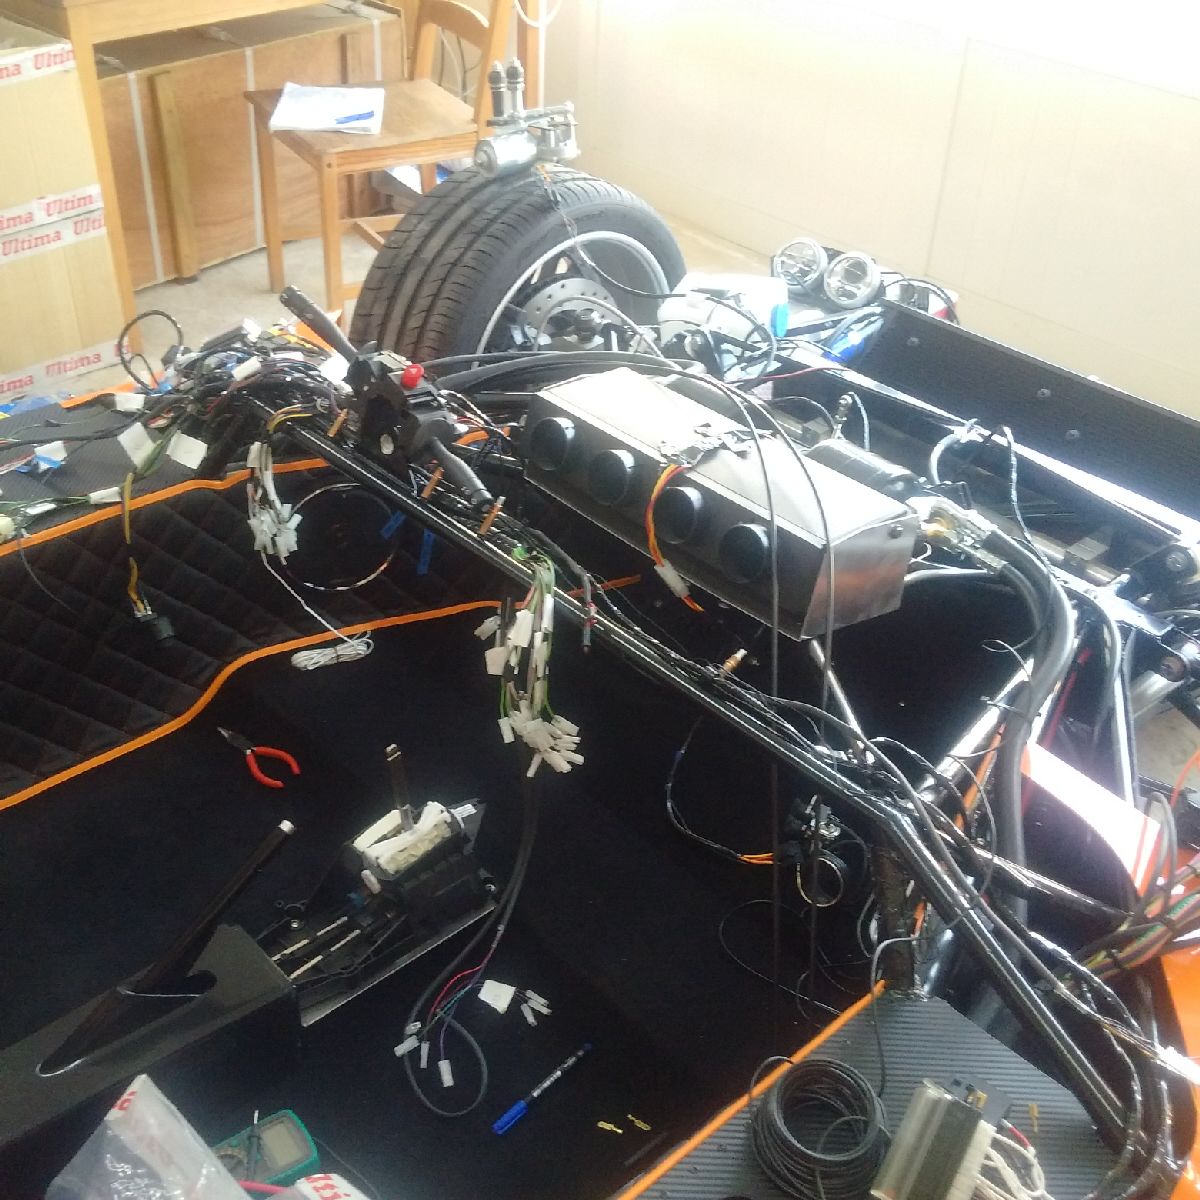
Finally I also worked on the wiring loom. All redundant wires from the Stalk and Stack systems (redundant on Ultima loom) were carefully checked, cut, heat shrink wrapped and taped away. The wiring looks a lot more pleasant now - for the time being. I still to wire in the security system, central locking, ICE, etc...
Sep 5-6, 2015
Build Time Today: 6 hours
Total Build Time: 227 hours
Quite a bit of time was spent the last couple days on the car, but it doesn't look like anything was accomplished!
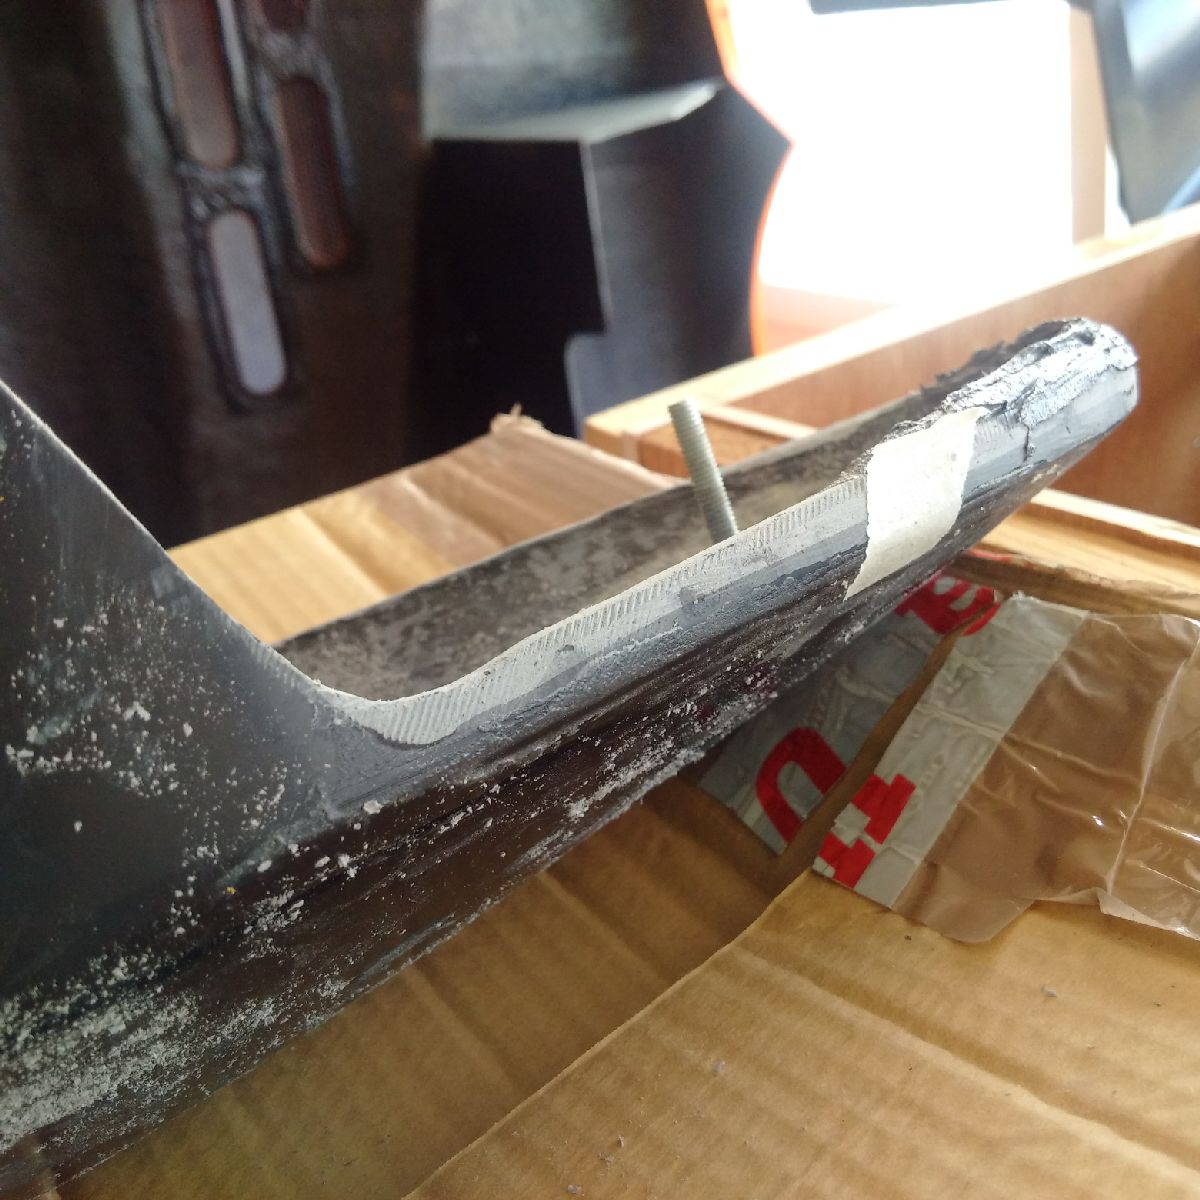
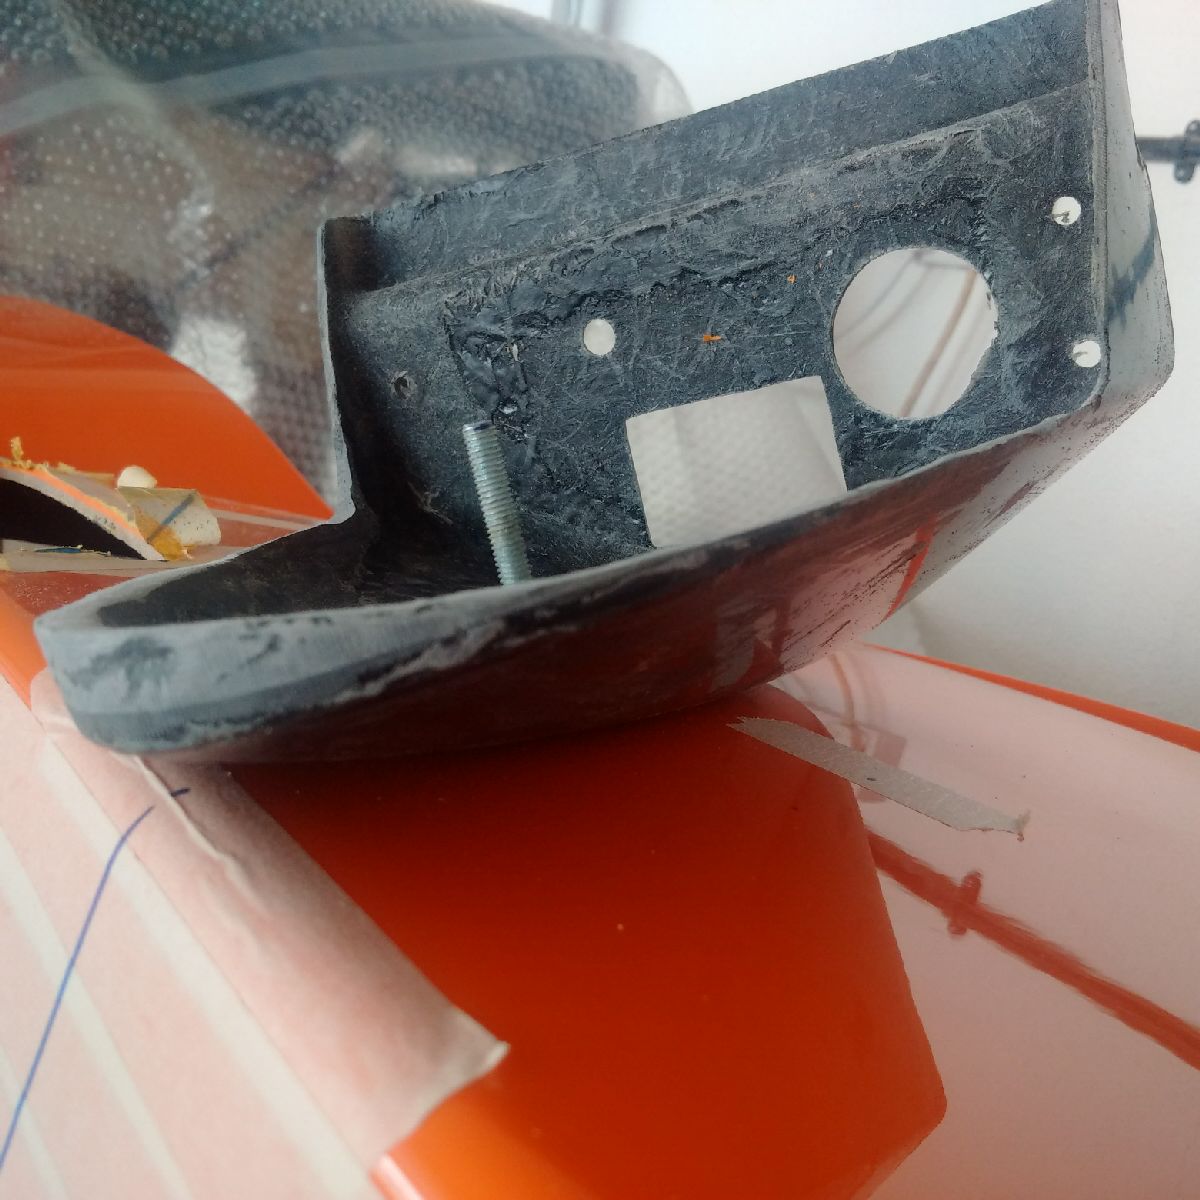
First, I worked on the Stack pod - since it is not sitting perfectly, I had to figure out a way to make it look good - the final approach that seemed workable was to build the whole outer side with epoxy putty and then shape it down as needed - marine epoxy was used. The paste was applied to the pod, shaped as much as possible, and left to dry. Once cured, sandpaper and files were used to shape it to the original pod shape (just longer on one side so its sits flush with the dash top). It is now 95% there, and there are still high spots, so more epoxy was applied today and left to set. This will hopefully be completed by tomorrow.
I spent some more time cleaning up the electrics - the central locking kit was also installed. The motors in the door have already been installed - today was just fixing the ECU to the AC unit (velcroed to the side) and then attaching the wires.
I was also able to drill out some of the holes I had previously marked - holes for the canopy warning and the warning lamps were drilled. Then I hit a roadblock - after drilling 8 holes, I realized that my switches were too LONG!! They would not fit inside the GRP as they hit the back!! That means I will have to relocated and re-draw all my holes. But it also means that my GRP now has holes I don't need!! AARRRGGHHHHH!! Luckily, I still had wet epoxy from the stack pod useage, so that was used to fill up all the holes. Back to square one tomorrow!

I also measured the wiper motor and washer holes, and was able to drill those (correctly!)
Sep 7, 2015
Build Time Today: 4 hours
Total Build Time: 231 hours
I started the day with finishing up the work on the Stack pod. The epoxy had dried from yesterday, so it was shaped with a file till a perfect fit was achieved on the dash. You can see the amount of material added - the light grey is the additional material I needed to add to get a perfect fit with the dash GRP.

Next, I went back to the dash and checked the holes that had been filled yesterday. They were sanded down using wet and dry to get a flat surface finish. Now the GRP is back to the original shape (color nonwithstanding) and I went back to the process of redrawing the hole locations. Once I was happy with the look (and after double checking that there was sufficient room on the inside for the switches, I started to drill the holes. Holes for the Stack buttons, Canopy Warning lights, warning lamps were drilled. Also, I have now marked the AC vents and switches as well.
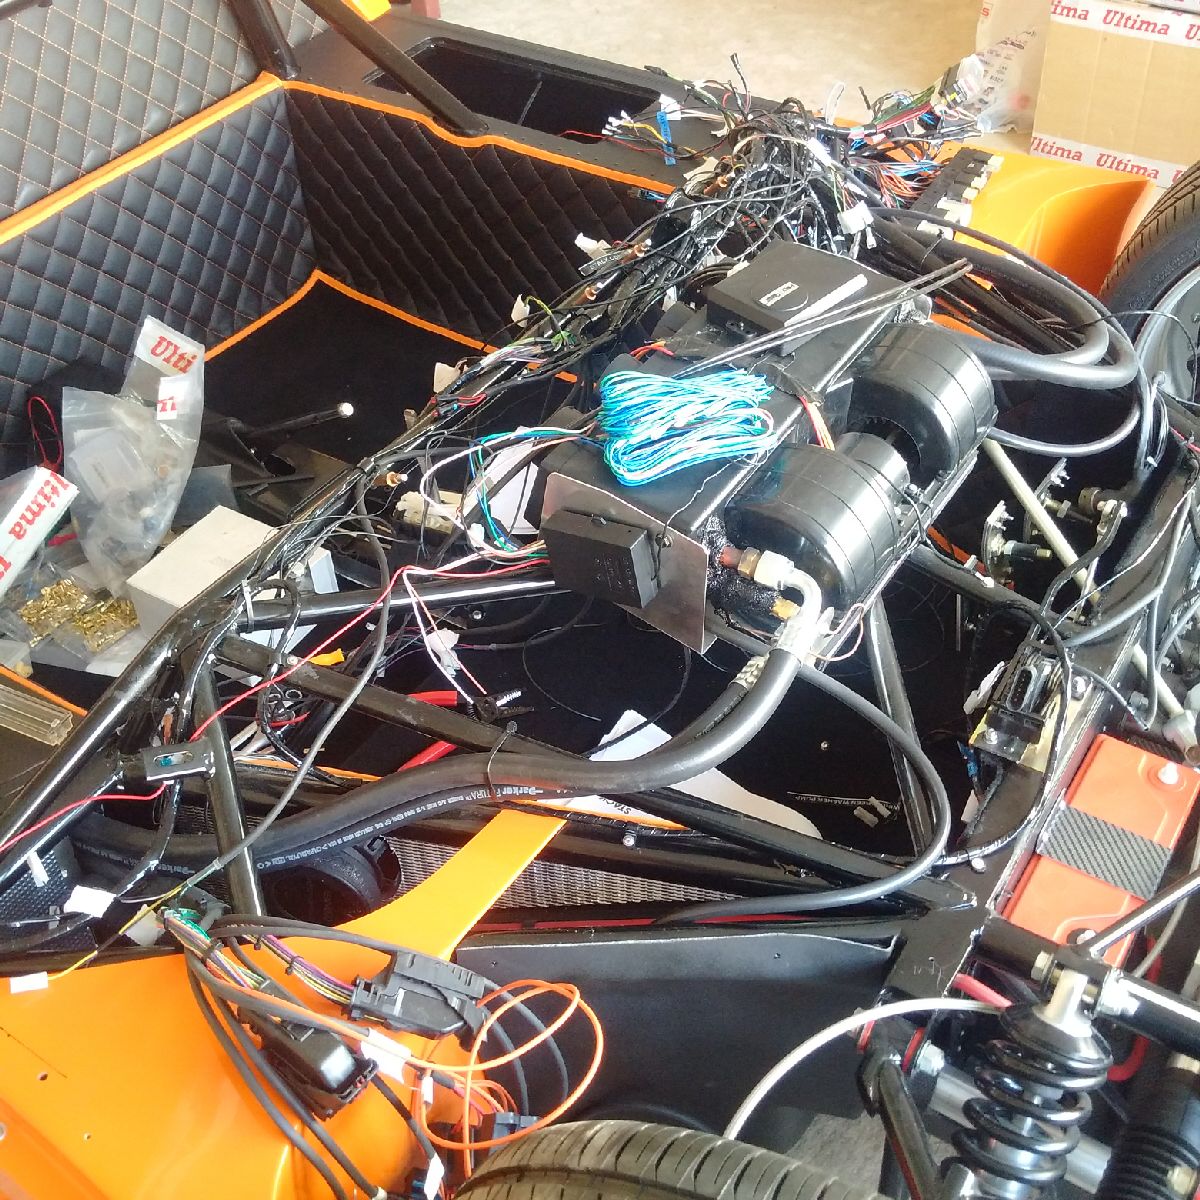
With enough GRP dust flying around, I spent the final part of the day once again working with the electrics. This loom has become a nightmare - I have sub looms from Stack, Stalk, Ultima, LS/ECU, Central Locking, AB Power Loom, Security System, ICE... Still, I sorted out some more wires, and I hope the wiring work will be finished by this weekend!
Sep 8-9, 2015
Build Time Today: 5 hours
Total Build Time: 236 hours
Another couple days with just wiring on the agenda - most of the wiring is now in place, including the above mentioned sub looms and the low pressure pump relay connection (supplied by Ultima in the Surge tank kit).. Only wires remaining to sort out now is the conversion from old rocker switches to the new EVO style ally button - those switches need to be figured out and then wires correctly. Also remaining will be to cable tie, zip, and P-clip all the wires running across the dash chassis rails at proper intervals...

Sep 10-11, 2015
Build Time Today: 3 hours
Total Build Time: 239 hours
Not much time spent on the build last couple days... Work and family commitments have kept me busy... However I was able to cable tie and finish cleaning all the dash area wires! Only EVO switches need to be sorted out...
Instead I spent some time on the dash drilling out holes for the EVO switches - the 22mm holes were drilled, but then another problem cropped up - the dash is thicker than the switch - so the retaining plastic on the back cannot be installed and the switch keeps falling out! I ended up using a sander to thin out the GRP from the back (about 3mm) so that there is a small place for the plastic bit to lock onto...
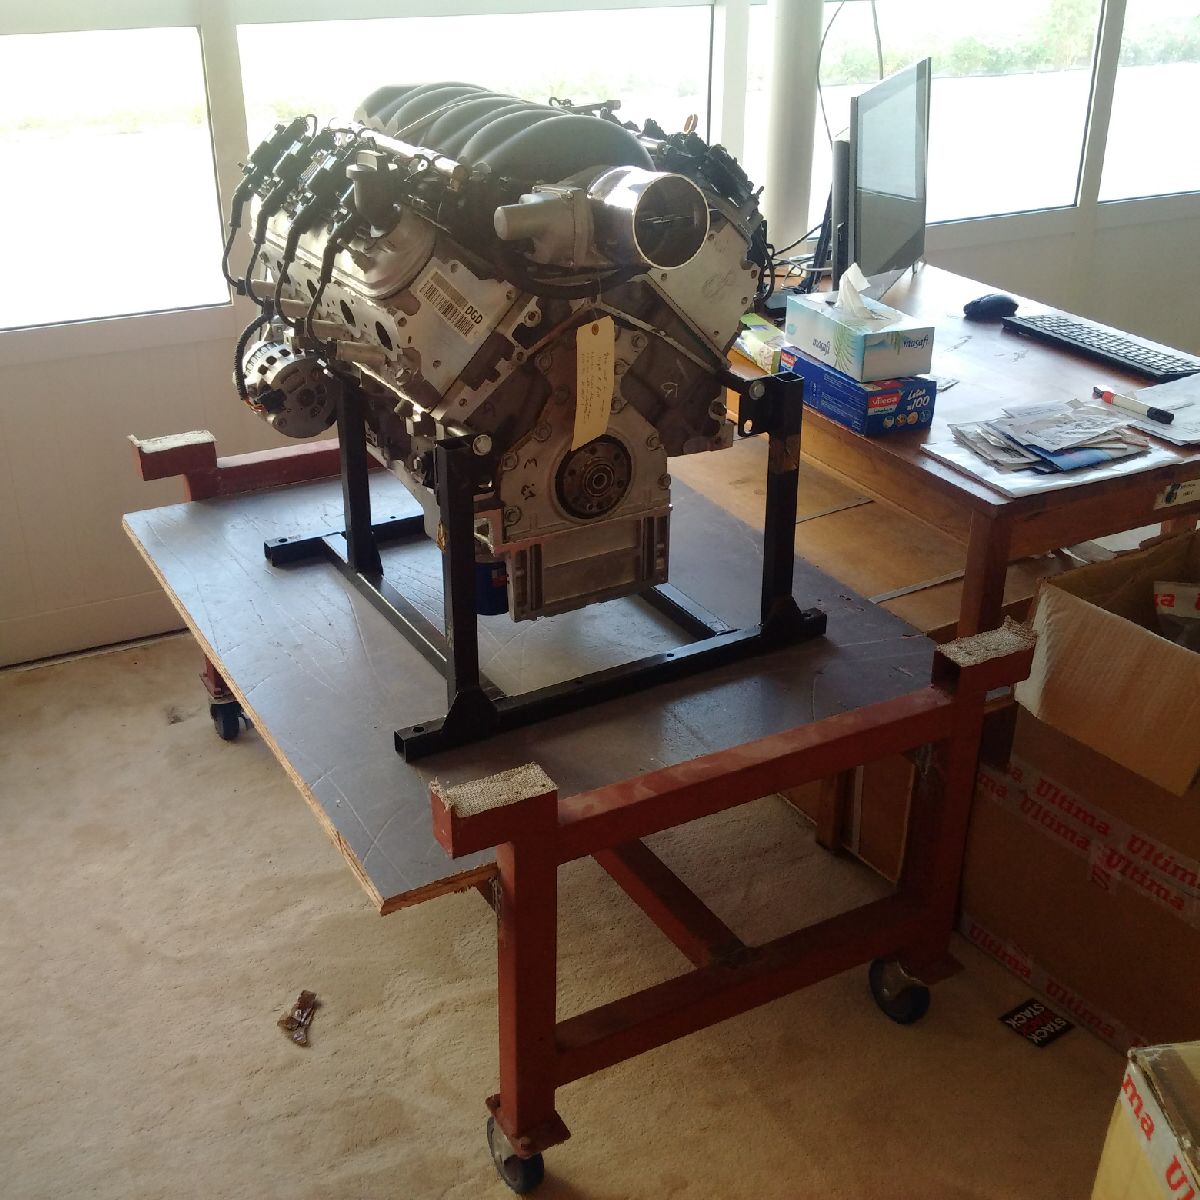
I also had enough with wiring and GRP dust, so I decided to have a look at the heart of the build - the engine was pulled out of the crate and kept on the build dolly, which has now been cut short and is the engine dolly! Work on the engine is still a few weeks away, but atleast having it out will give me incentive to keep proceeding...
Sep 12, 2015
Build Time Today: 2 hours
Total Build Time: 241 hours
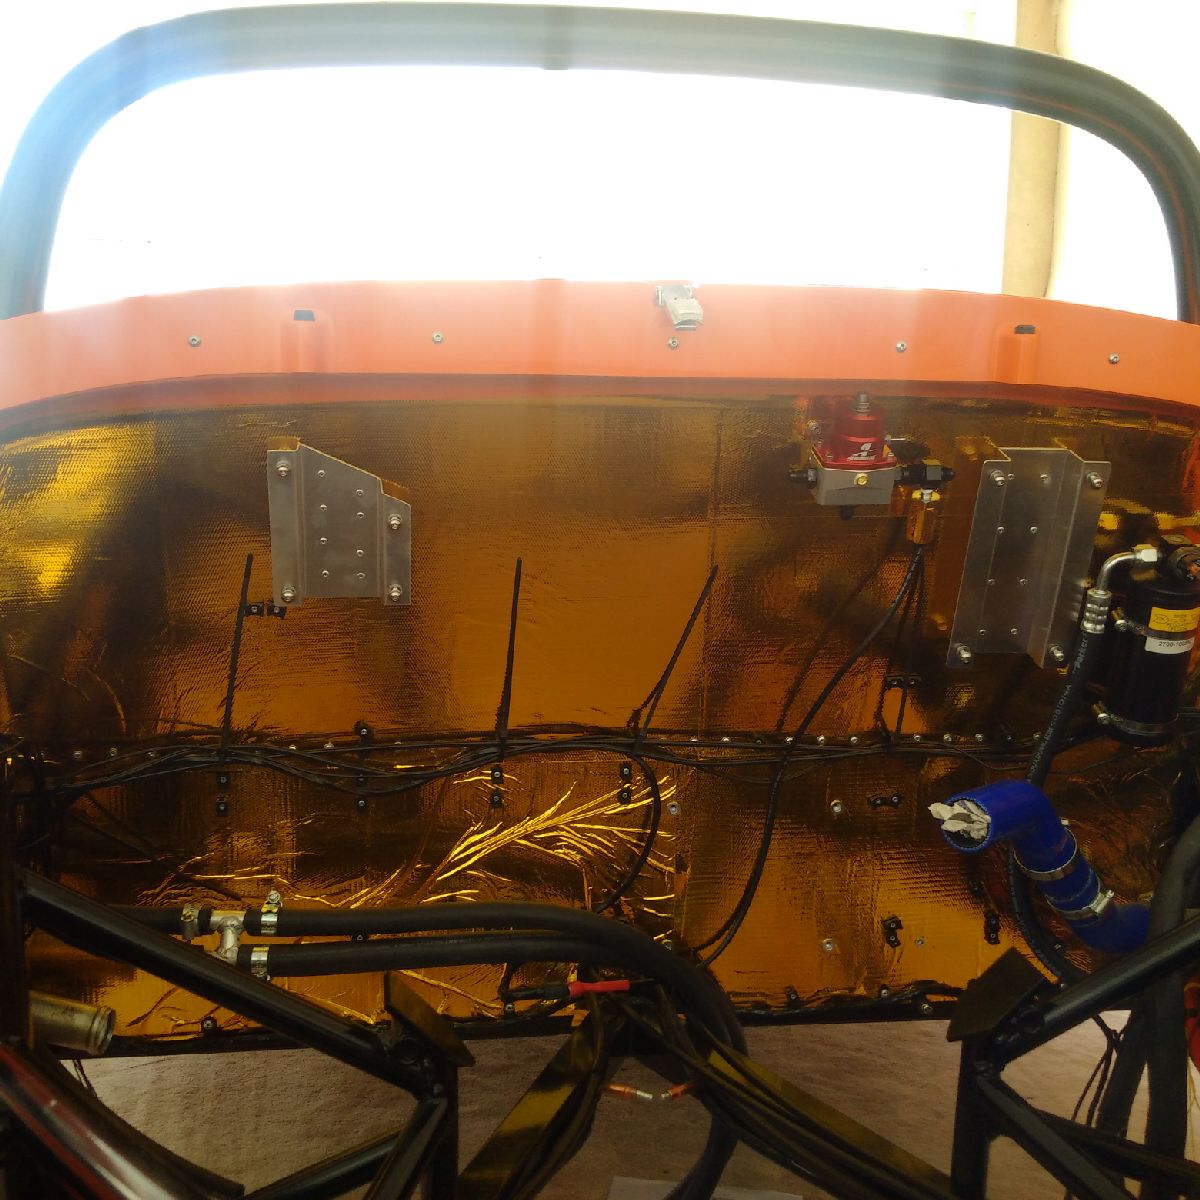
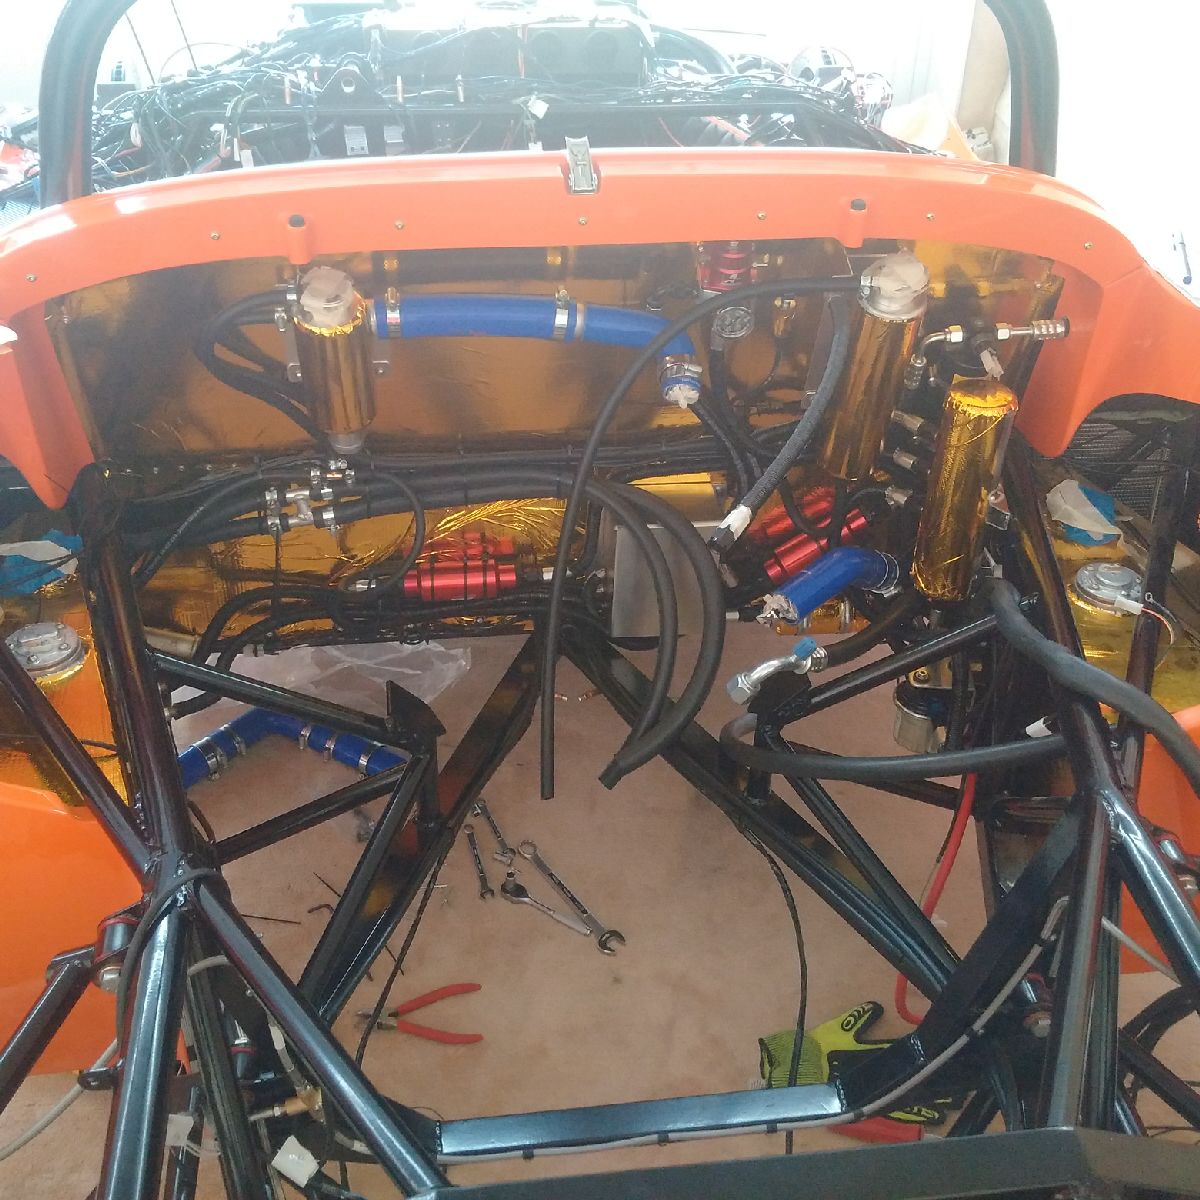
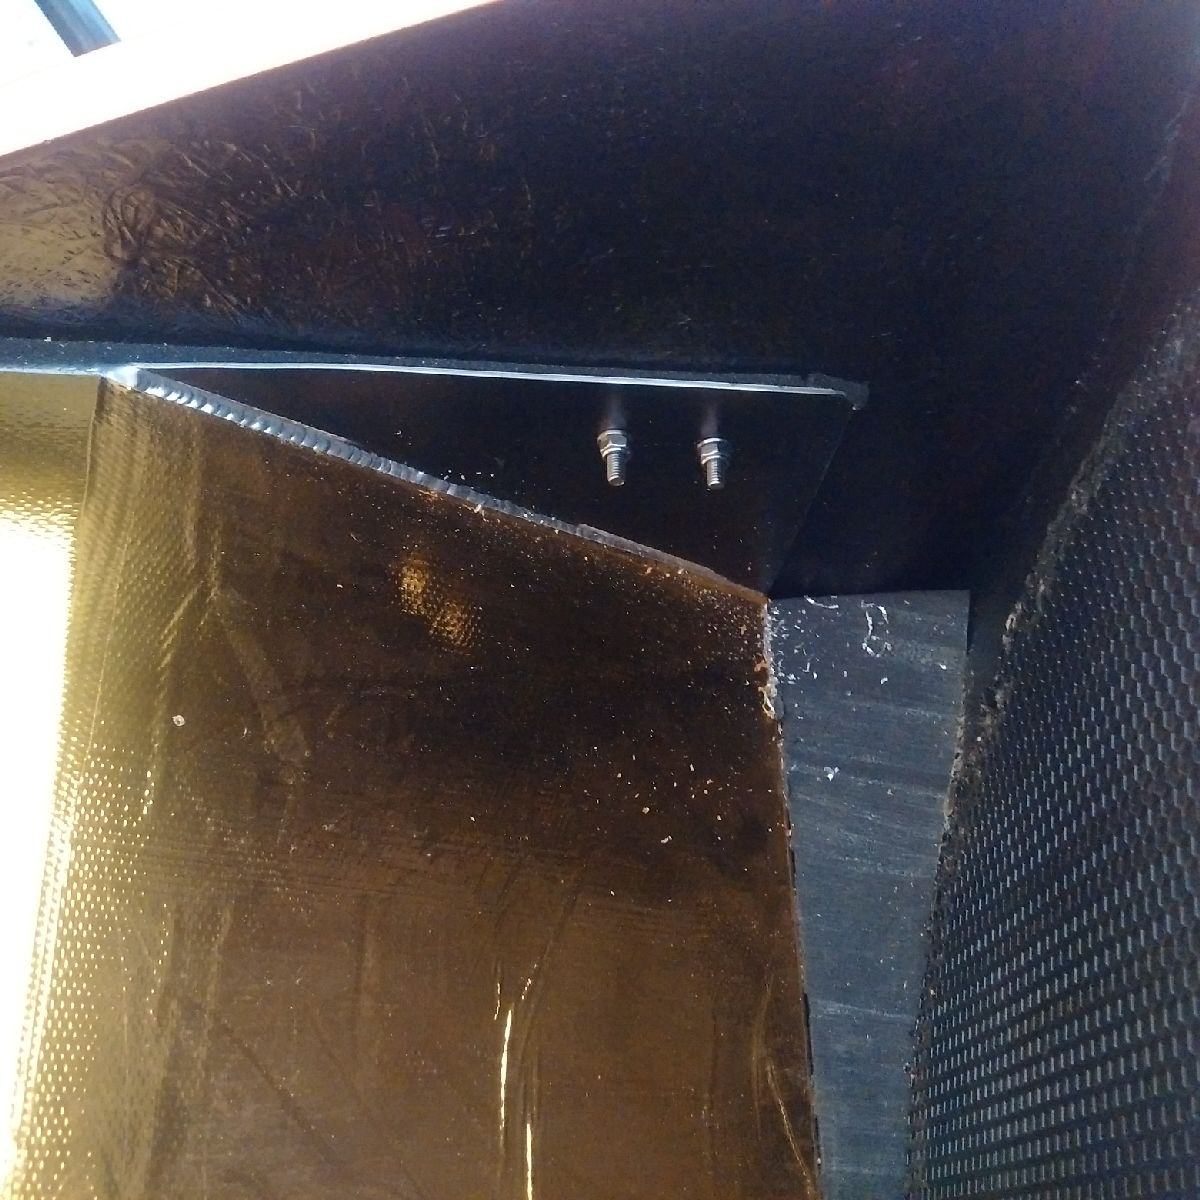
A really short day in the garage today - I started to work on the bulkhead (from where we had left off exactly a month ago)... The swirl pot and expansion tank were removed for heat insulation installation, and the rest of the bulkhead holes were riveted with a plastic tie wrap holder.
I then started installing the heat insulation - starting with the HP fuel pump and the fuel surge tank.
Sep 13, 2015
Build Time Today: 4 hours
Total Build Time: 245 hours
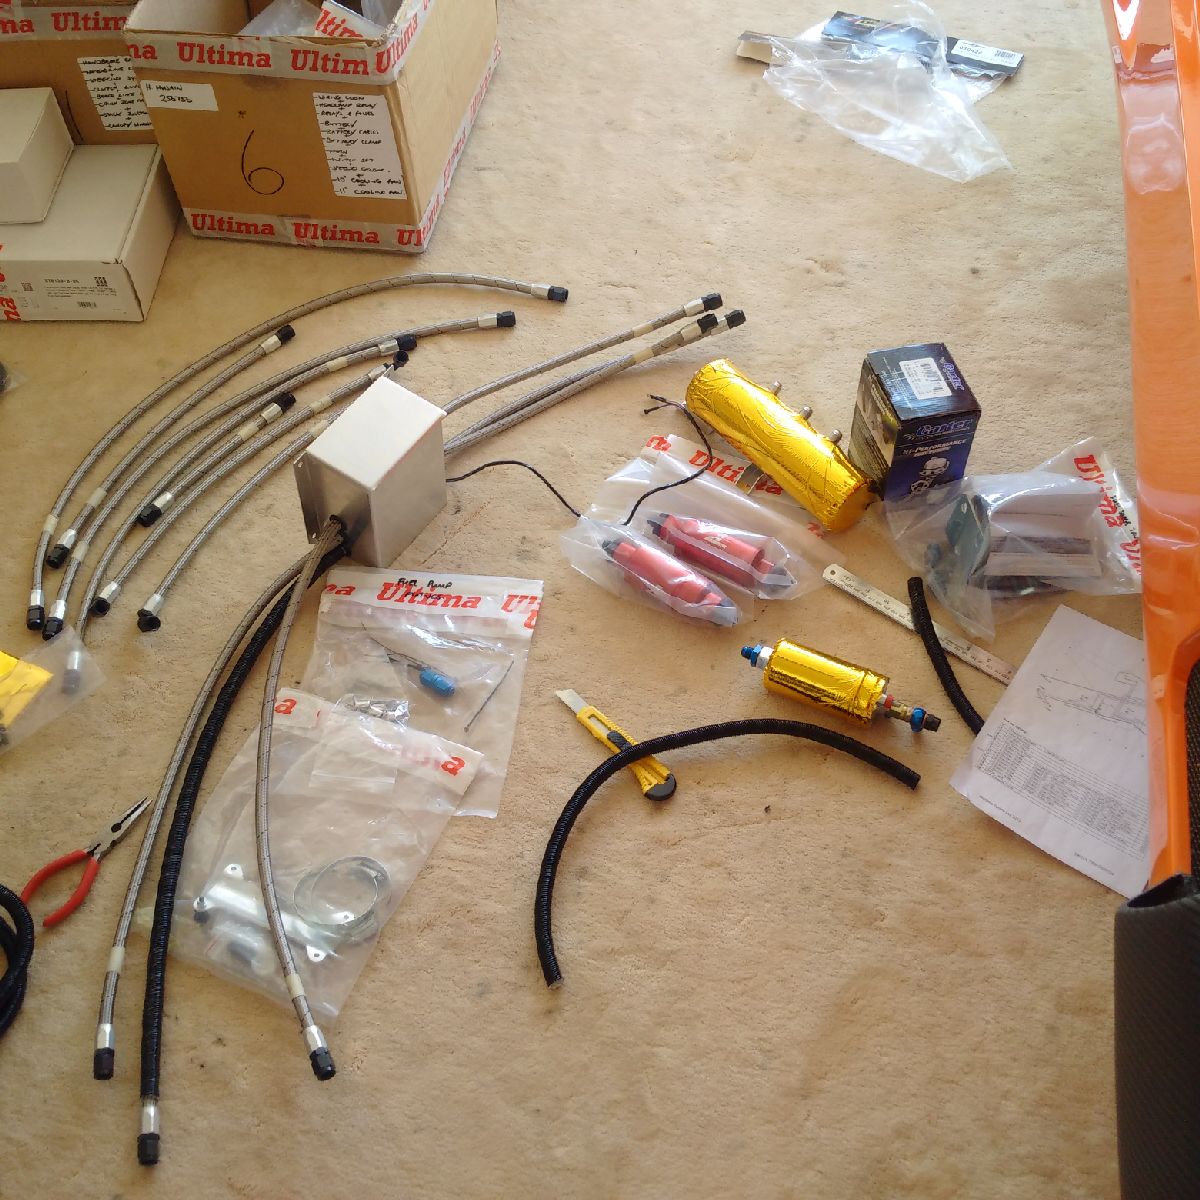
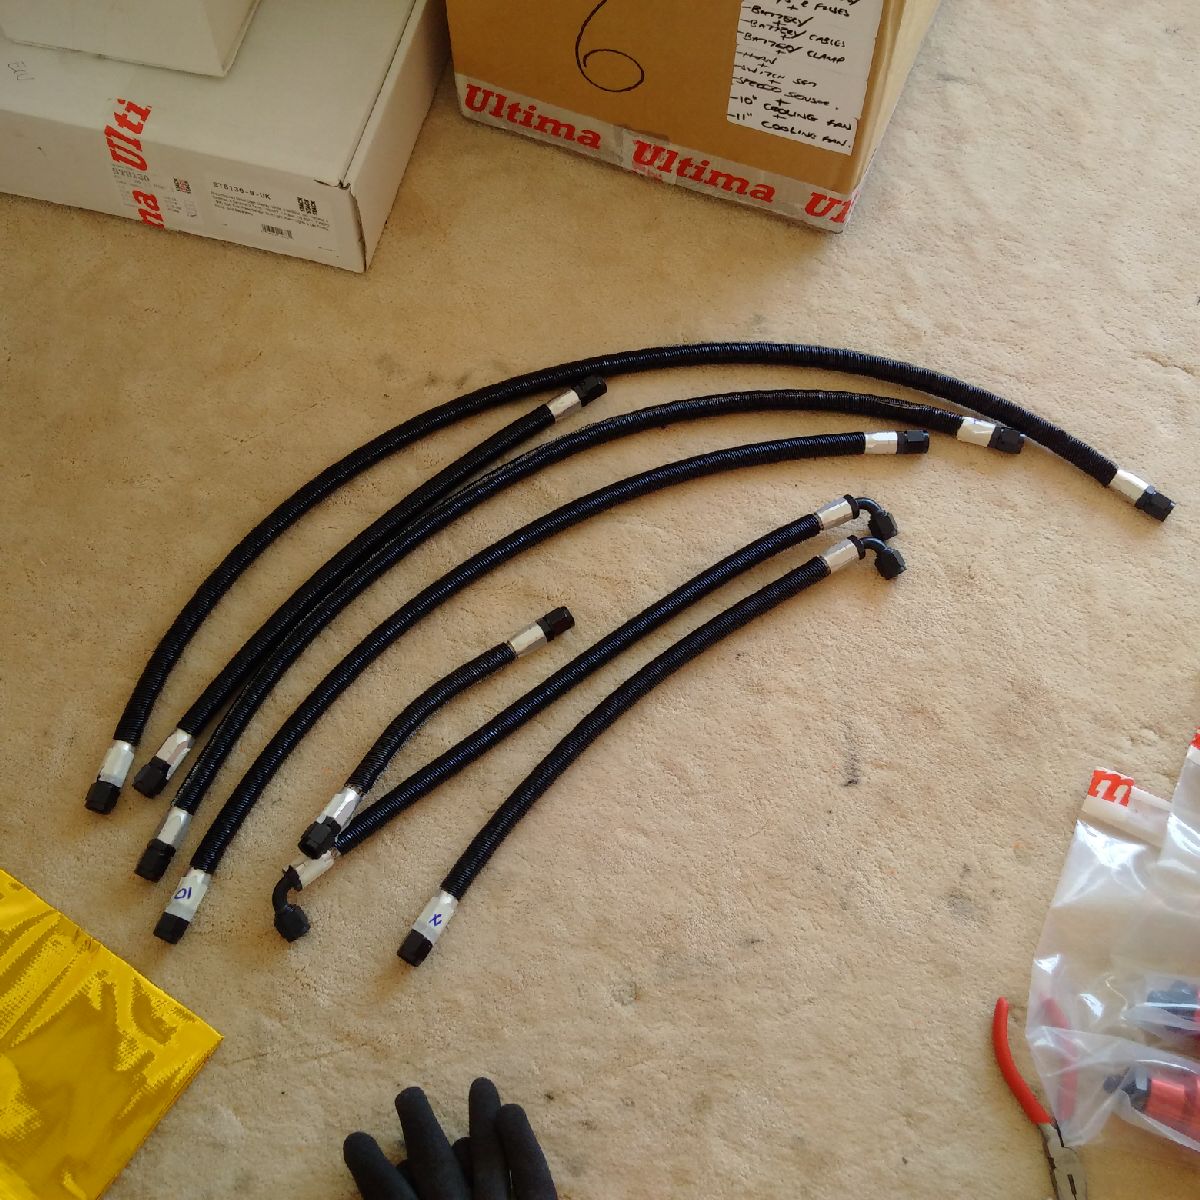
Today I continued with the heat insulation - the swirl pot and expansion tank were covered with insulation. I then started insulating all the fuel pipes - I am using DEI Cool Tube Extreme - so the insulation was cut to size, and then slit with a blade. It was wrapped around the pipe and then folded over onto itself to seal the pipe inside. It took a long time to insulate all the various fuel pipes.
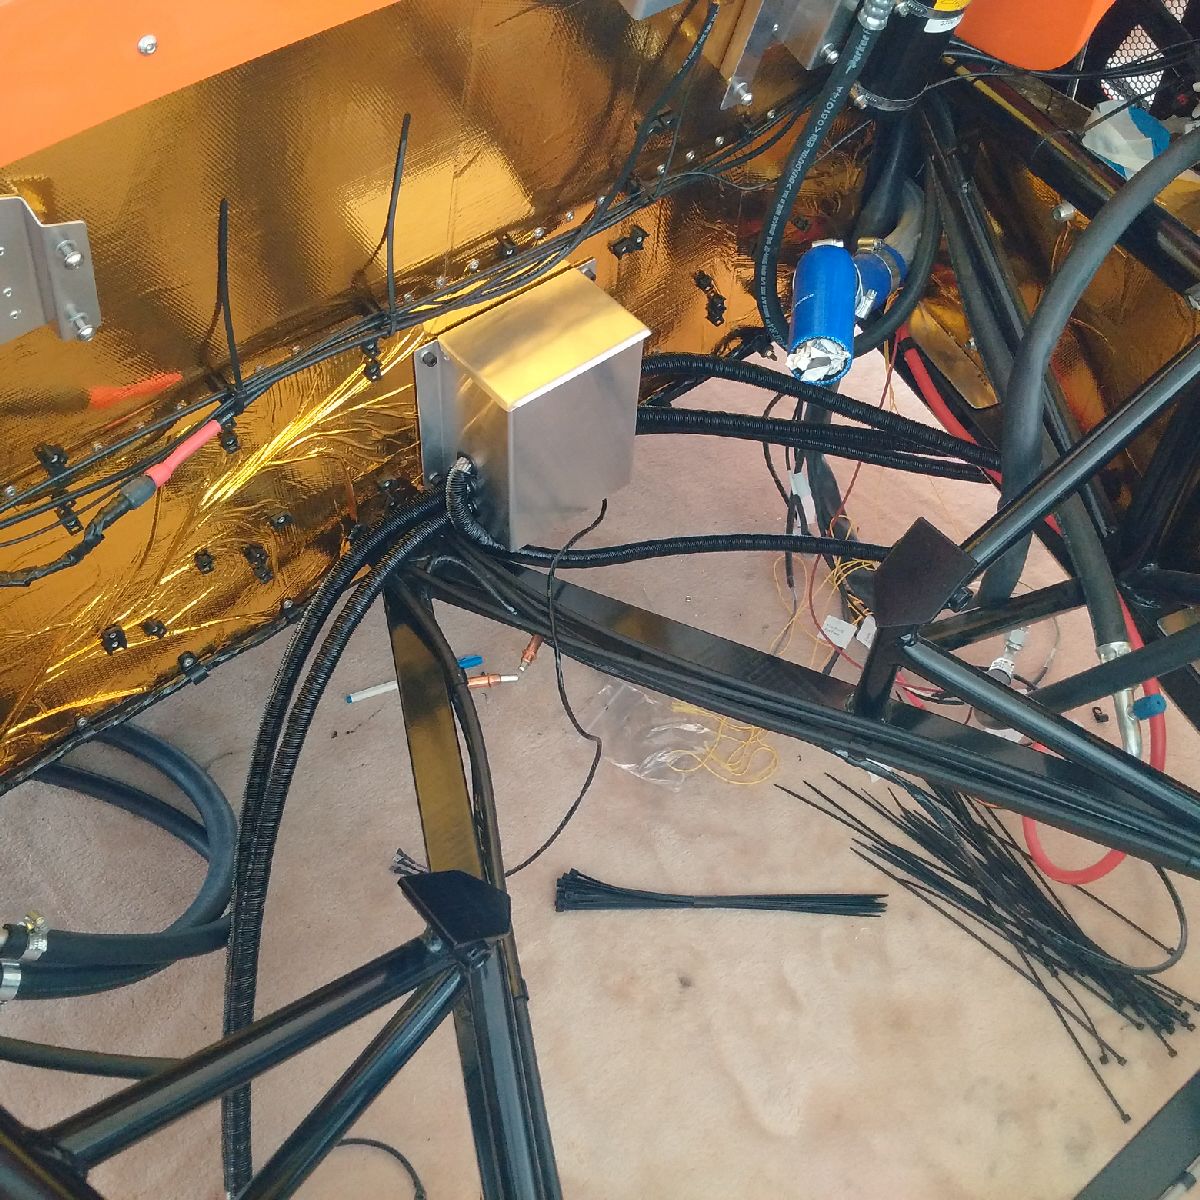
After insulation, I started the bulkhead installation - first the fuel pump change over valve was installed, and the wiring connected and P-clipped. Then the heater pipes were cable tied to the bulkhead. Finally the swirl pot and expansion tank were bolted on, and all the various pipework and wires running down the center of the bulkhead cable tied. The silicon hoses were removed for ease of installation of the other items. The silicon pipes will be reinstalled after all the fuel pipes are installed and routed tomorrow.
Sep 14, 2015
Build Time Today: 3 hours
Total Build Time: 248 hours
I spent the day working on the fuel system - the passenger side tank was first drilled and riveted to the chassis. Fuel lines from the change over valve to the tanks were installed. Holes for the LP pump and surge tank were drilled, widened, and rivnuts installed. The 100-micron filter and fuel lines for the left side of the bulkhead were installed and cable tied. My back finally gave out after having leaned into the lower engine bay for 3 hours, and I decided to call it a day.
Sep 15, 2015
Build Time Today: 4 hours
Total Build Time: 252 hours
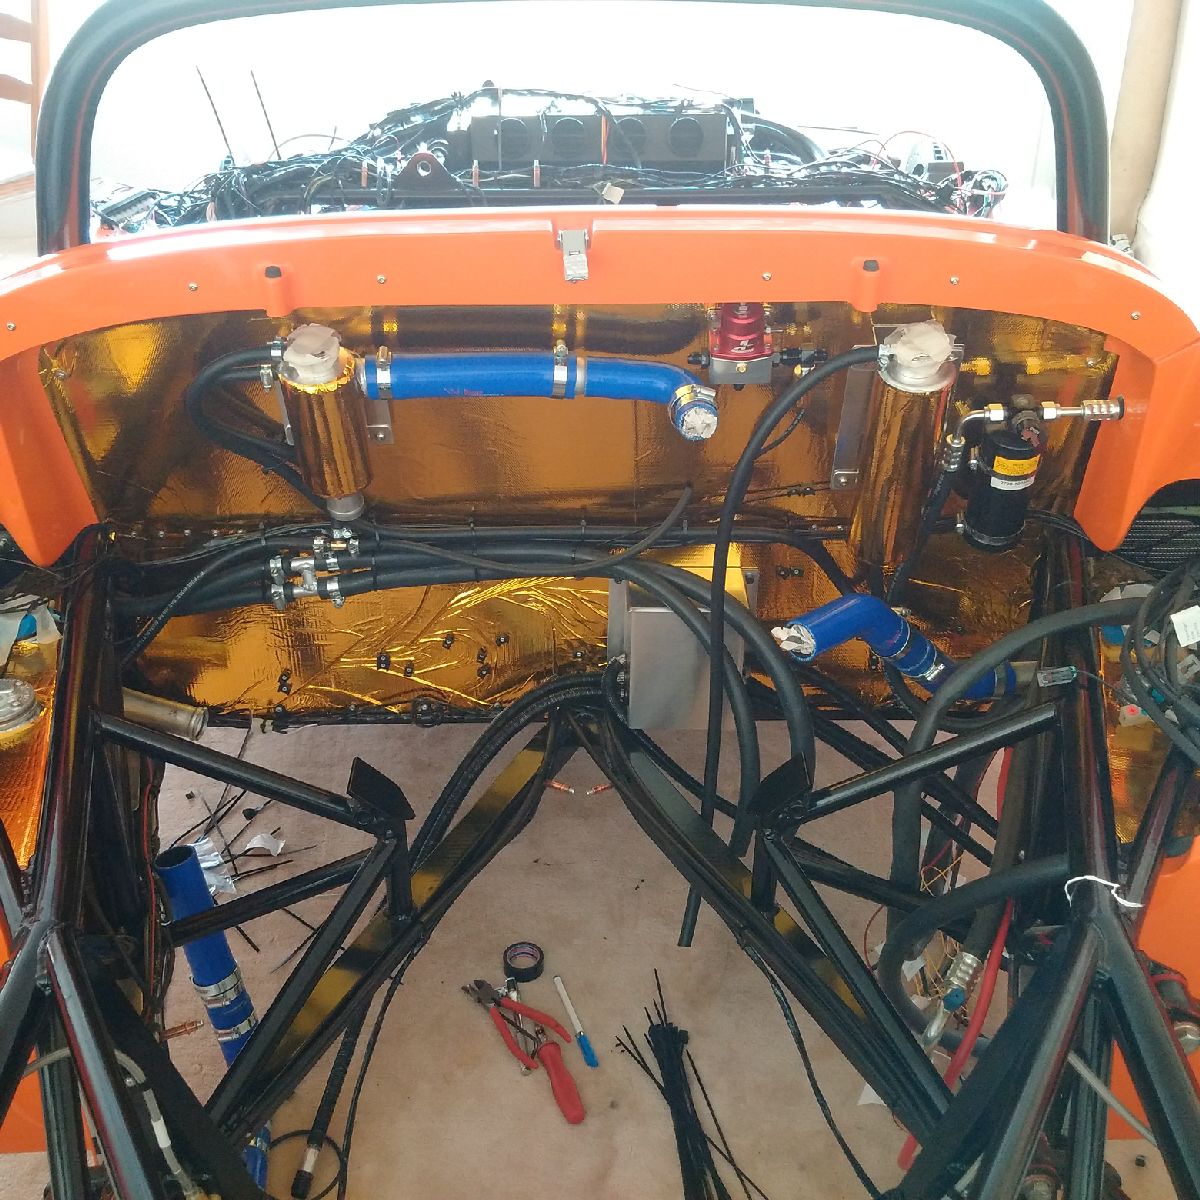
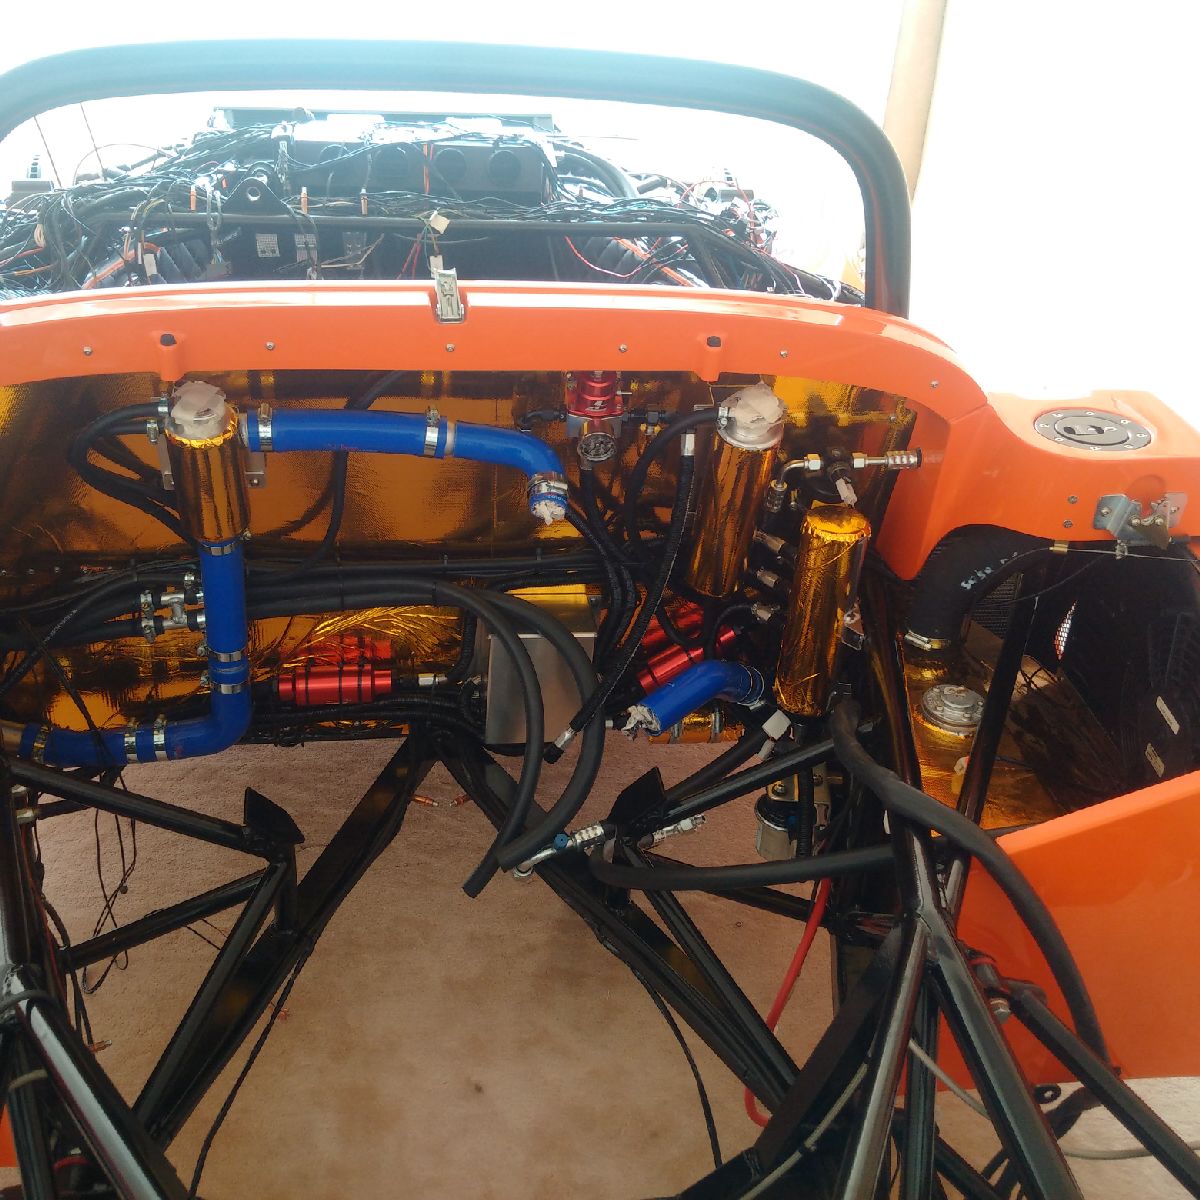
Back to the fuel system - the rest of the fuel lines were installed, and the LP pump, HP pump, 10-micron filter, Surge tank and Regulator all fitted with their respective pipes. It took a long time to get the pipes in correctly and tied in place. The silicon kit was reinstalled on one side, and the bulk head is almost ready - should be done tomorrow.
Sep 16-17, 2015
Build Time Today: 6 hours
Total Build Time: 258 hours
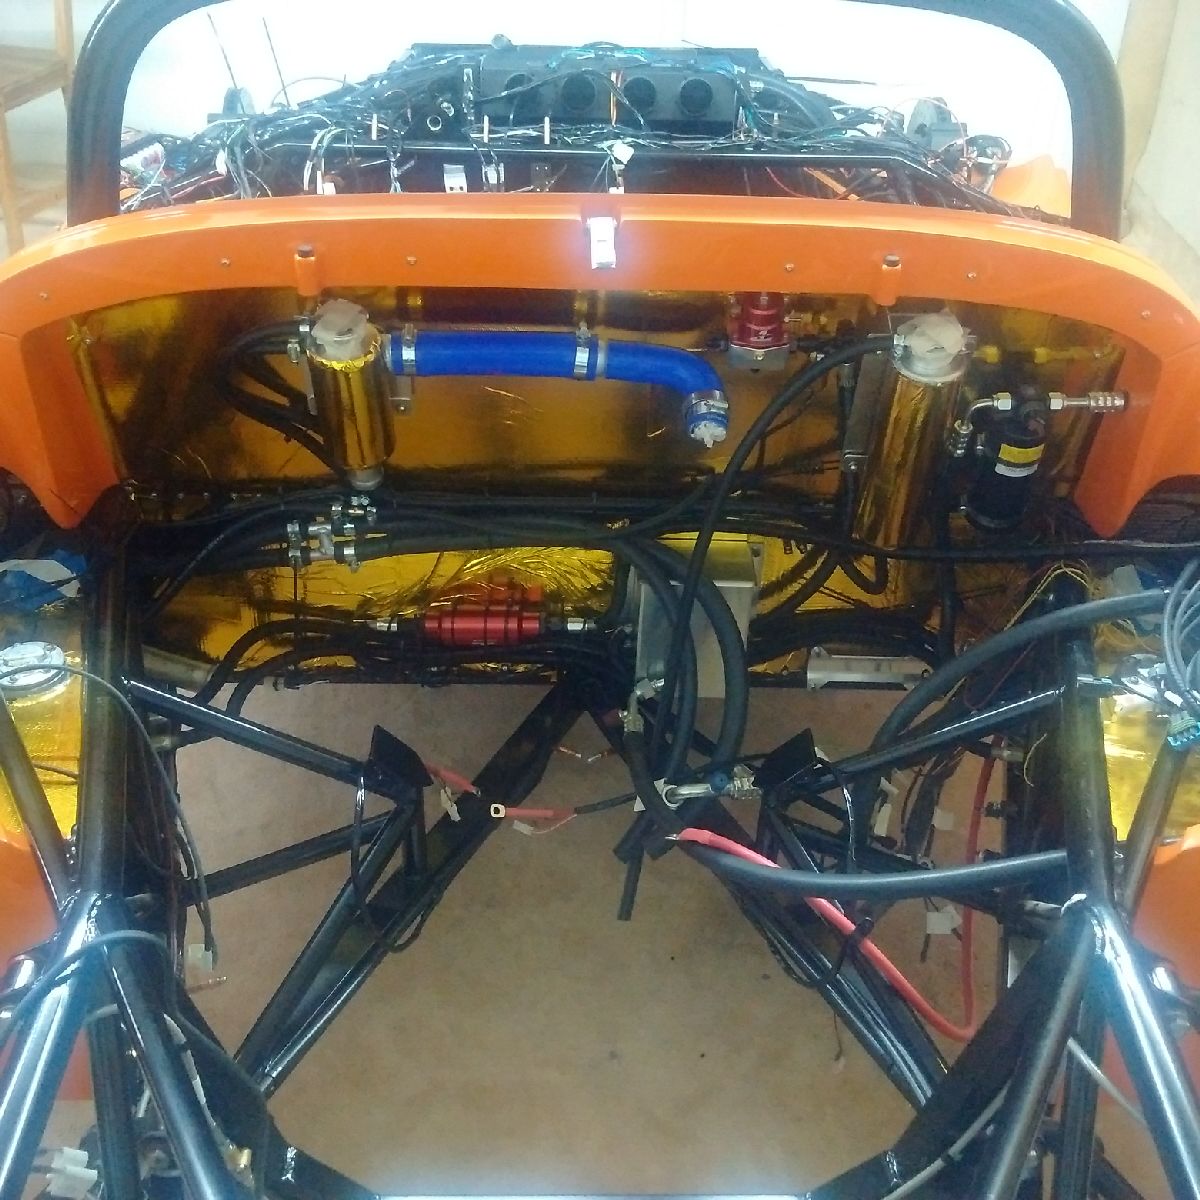
The engine bulkhead is now ready - all the fuel pipes, heating/cooling system, and wiring across the engine bay has been finalized on the bulkhead.
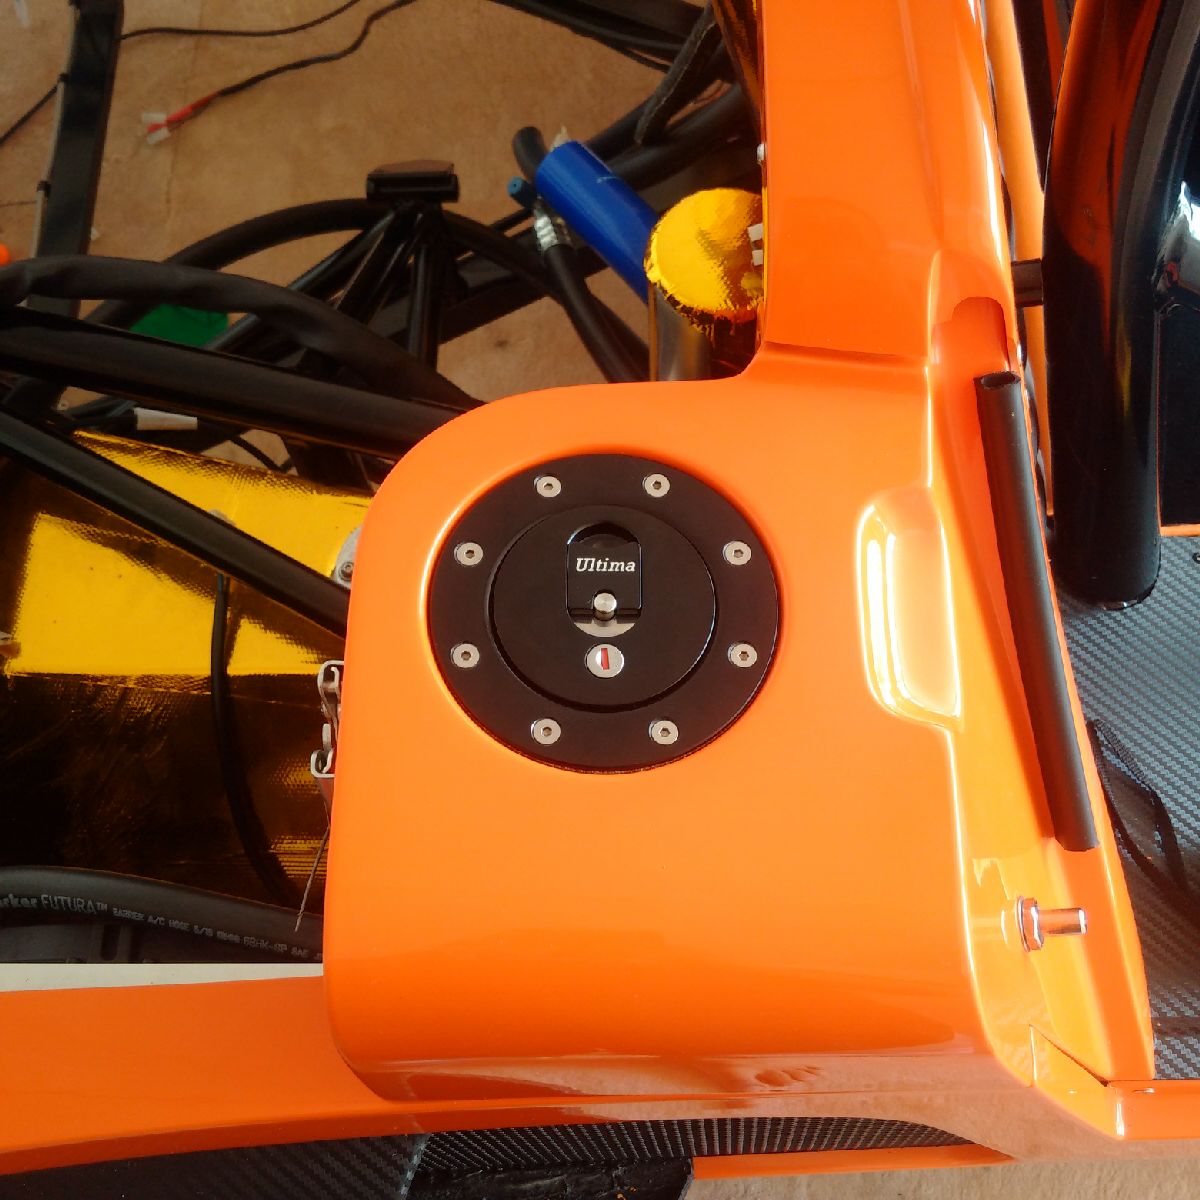
I then installed both the fuel fillers - caps, filler necks, etc... This took A LOT longer than it looks - the fuel filler cap is first oriented as needed (I have it setup so that the 'Ultima' is readable from the side you are standing at) - the holes are marked in the GRP and drilled. The cap is then installed as: cap - cork gasket - funnel - cork gasket - GRP... It then took about 2hours a side to get EIGHT (8) nuts/nylocks secured because of the almost zero access from below with the fuel filler pipe also plugged in - this was done because it will be impossible to plug the fuel filler pipe later on as it will not bend as needed to secure over the two outlets on the funnel and tank... However, a lot of struggling and cussing later, both caps are now on securely!

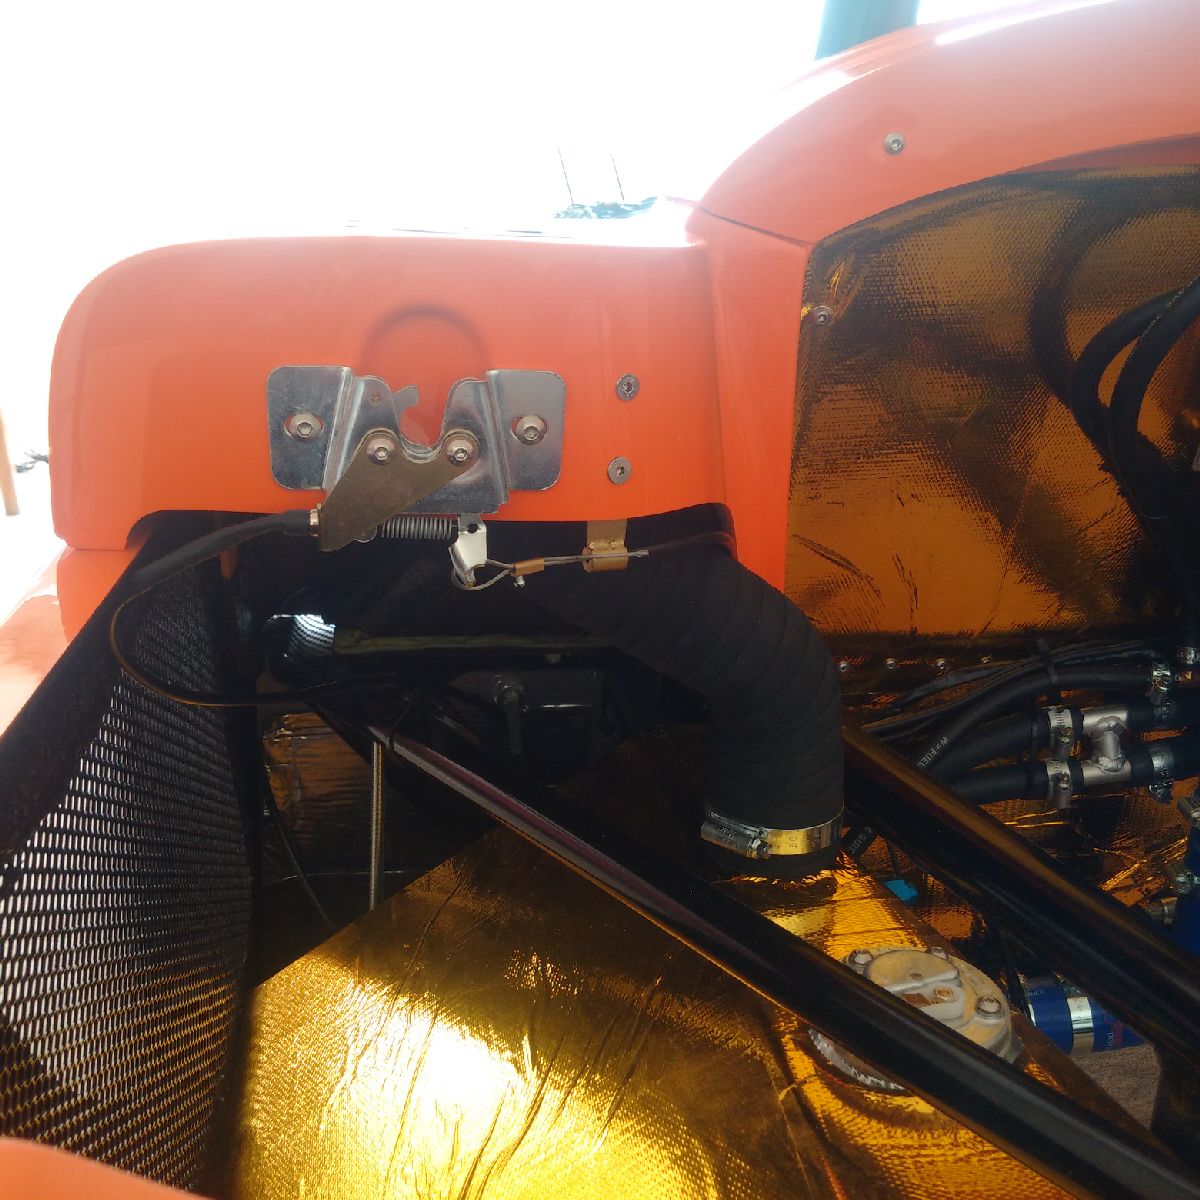
I also attached the canopy warning system and the latch release cables.
Sep 18, 2015
Build Time Today: 3 hours
Total Build Time: 261 hours
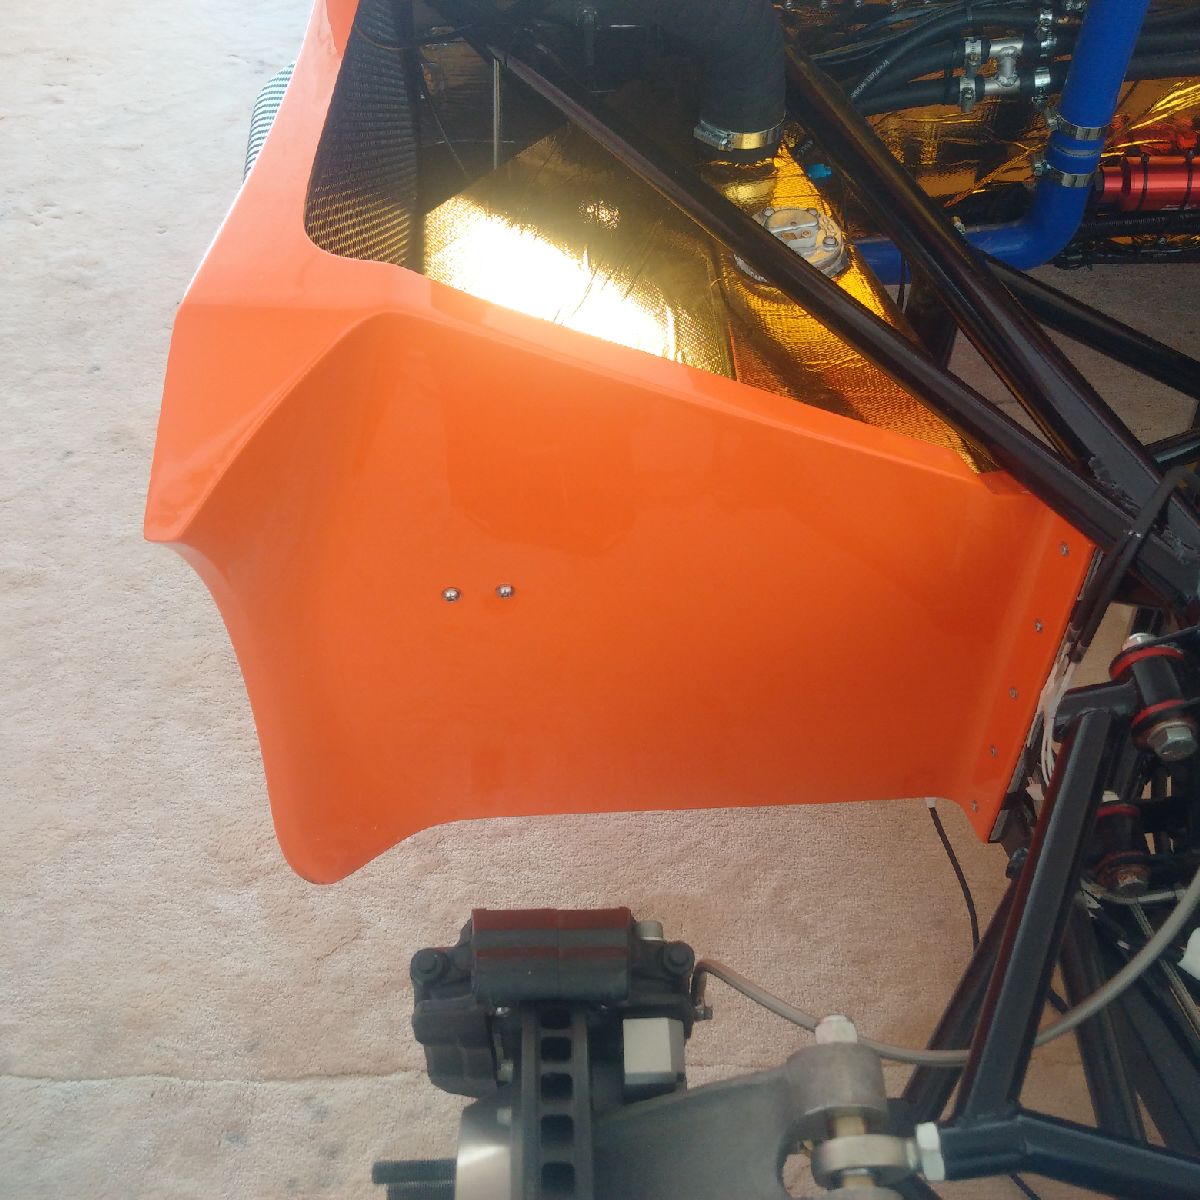
I got the petrol tanks final fitted with the installation of the 2 bolts through the sidepod GRP from the tire area into the tanks flap.
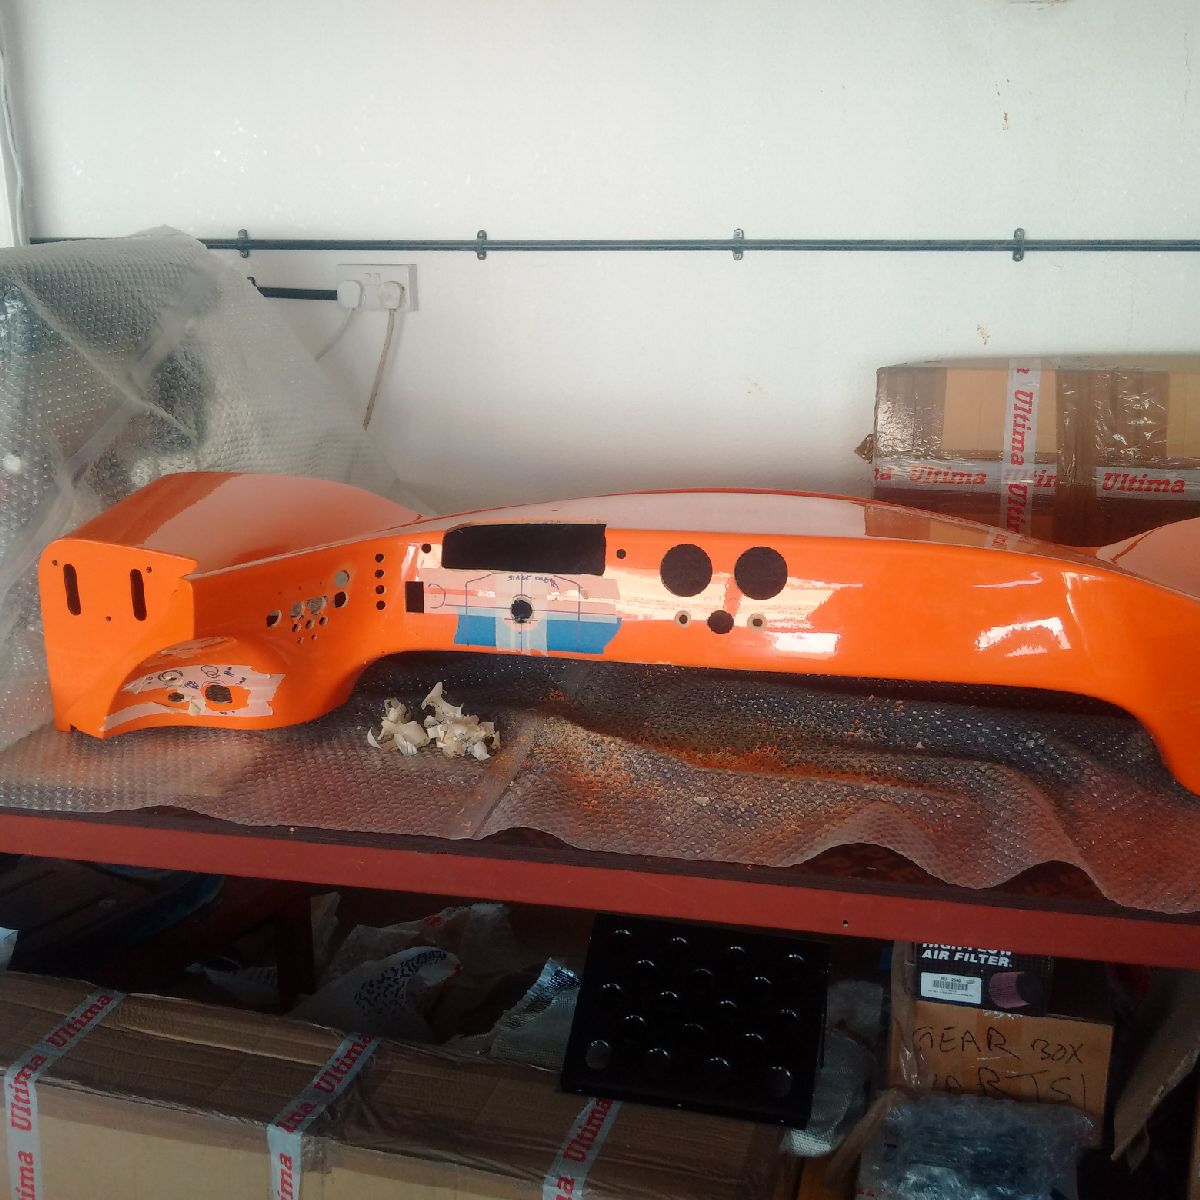
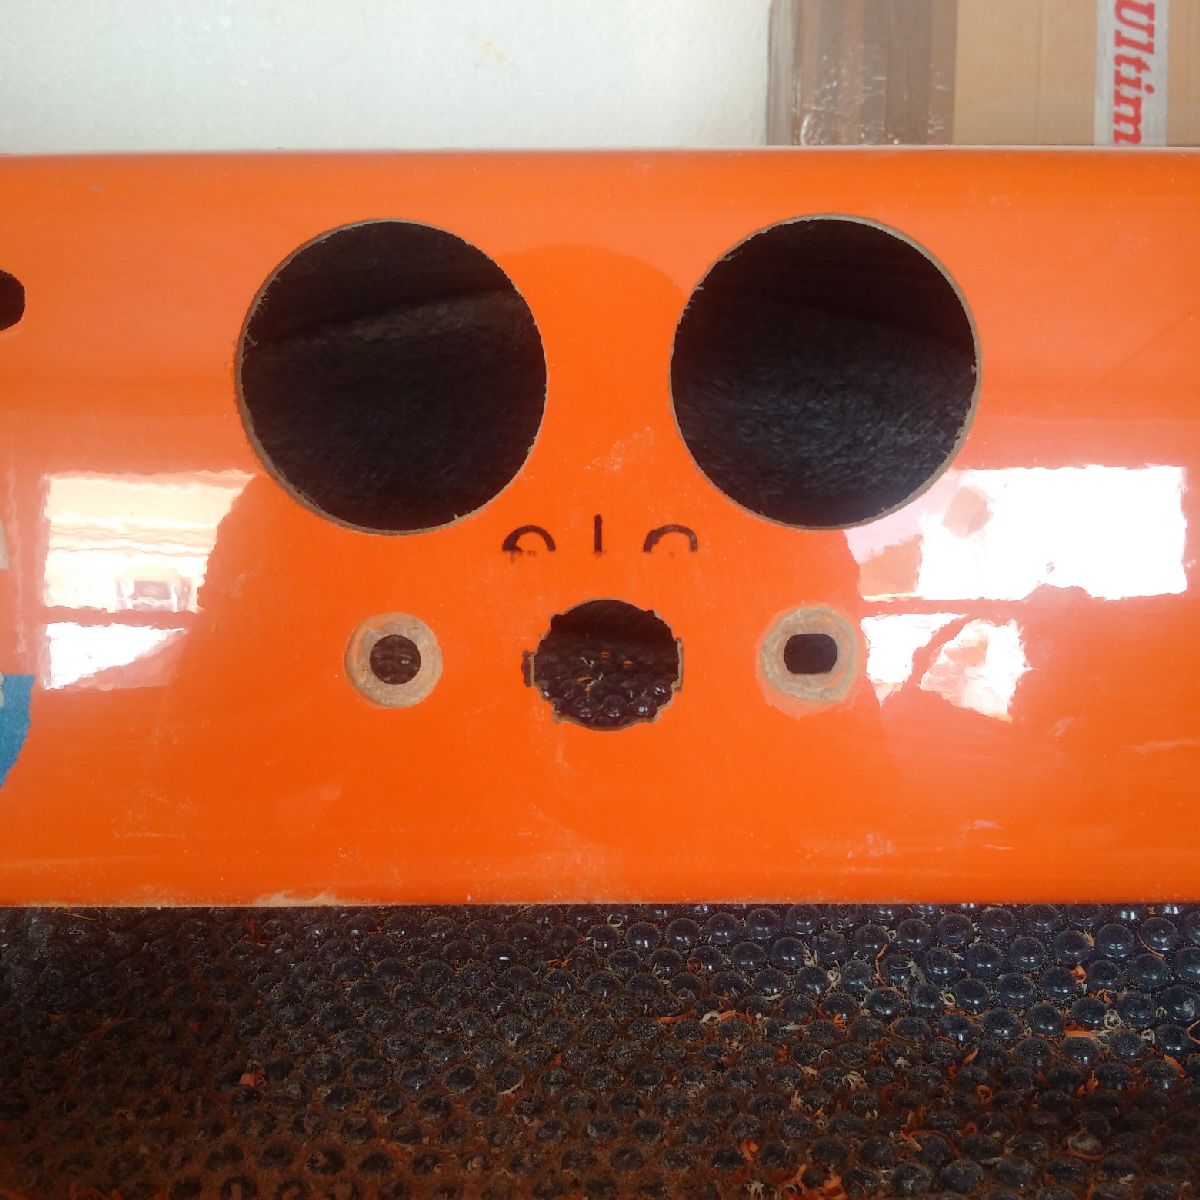
I also decided to go back to the dash GRP and cut out some more holes - it has been pending for a few days, and I need to finalize the dash and send it to the trimmers. Holes for the AC vents, start button, AC knobs, security system were cut out - there is still more drilling and sanding left for some of these as they are not 100% fit yet. However, with a lot of GRP dust flying around, it was time to call it a day.
Sep 19-20, 2015
Build Time Today: 6 hours
Total Build Time: 267 hours
I got back to the wiring - this time focusing on the wiring in the engine bay area. The wires for the pumps, fuel senders, AC fan/drier were connected. Other wires in the Ultima loom that are redundant (sensors/senders) or pertain to SBC were cut and blocked off.
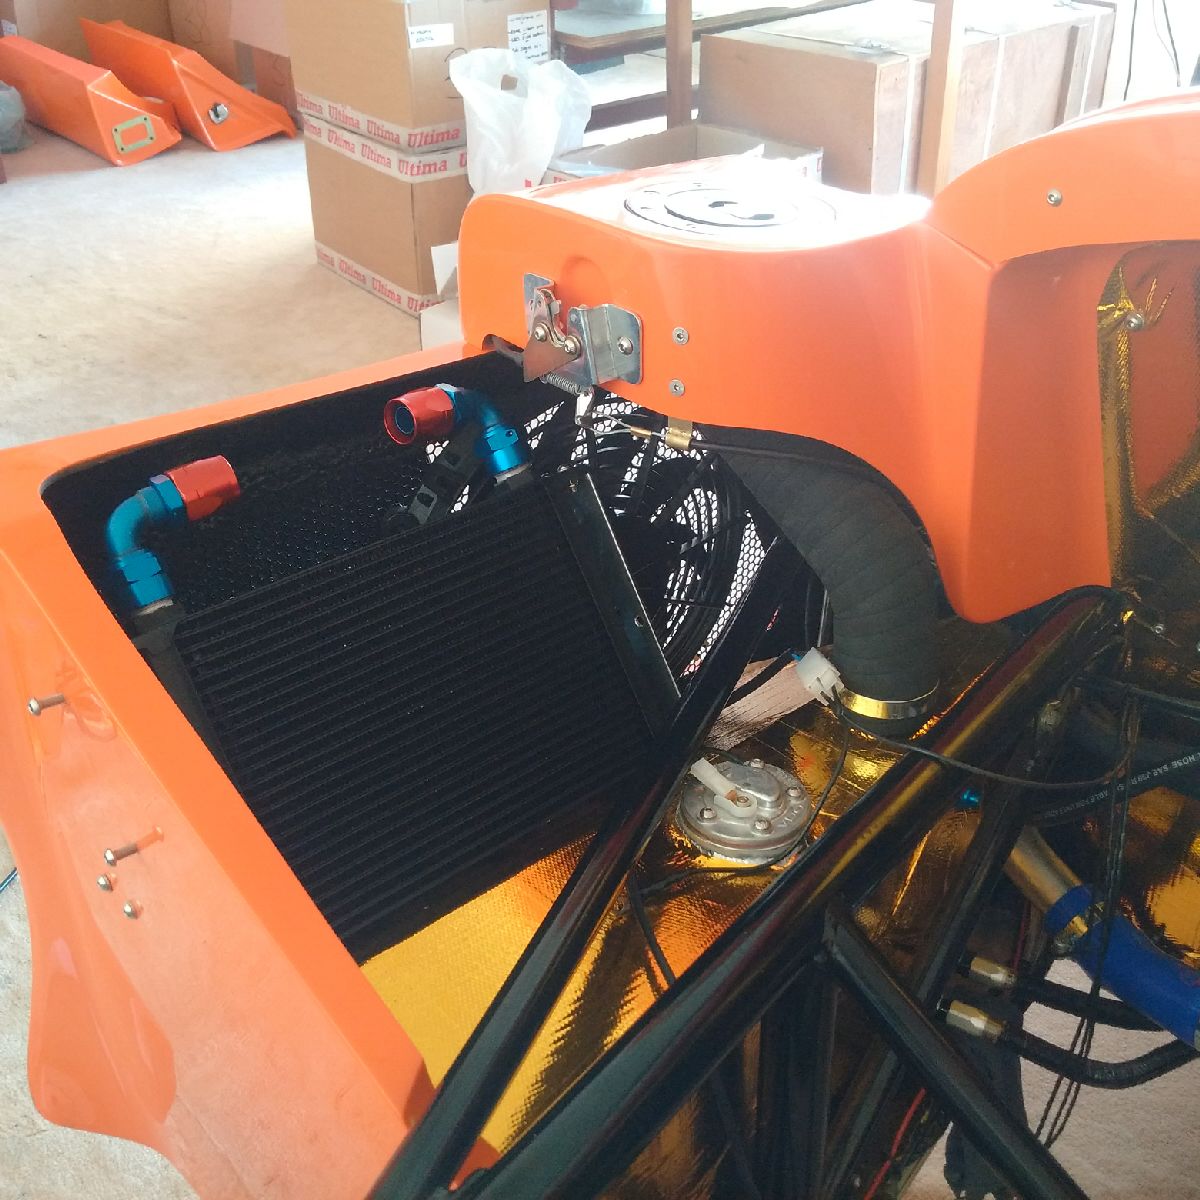
I then decided to install the two extra fans I have ordered, which will help in keeping the under clam temp cool and also hopefully help keep the fuel and engine cool. These two fans were installed in the side pods, right behind the mesh grills. They were attached with nylon ties, and wired to a separate switch that I have already pre-wired in the dash area. This way, I will only need to flip a switch to turn these fans on and off.

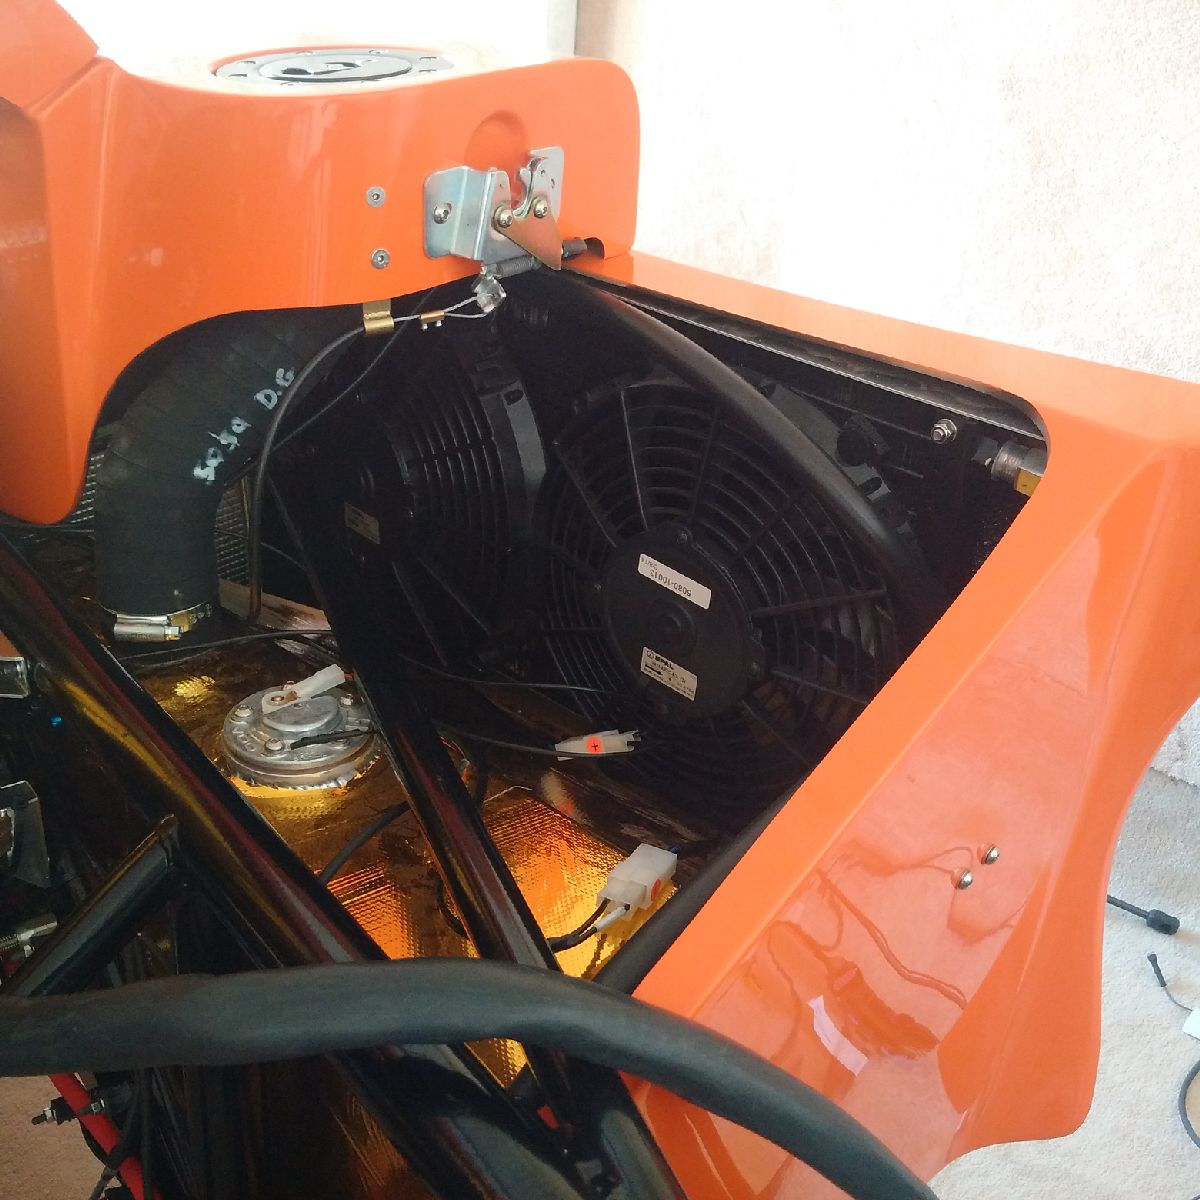
The oil cooler was also pre-fit at this stage.
I also decided to test my fuel system. I want to make sure there are no leaks before I drop the engine in, and I also want to set the regulator to 60psi before access becomes difficult. However, I ran into trouble at the start on this test. I poured 20L of petrol into the driver side tank (5L at a time), and somewhere between 15-20L, the tank started leaking!! The joint at the bottom which is the pickup port for the pump was leaking. I slowly emptied the tank back into the container, and undid the pipe work - this will have to be studied tomorrow to find a possible solution.
Sep 21-26, 2015
Eid Mubarak! The family and I decided to make a quick trip to Egypt over the long weekend and spent 5 days in Cairo! I am finally back today, so hope to get back to the build tomorrow!
Sep 27, 2015
Build Time Today: 3 hours
Total Build Time: 270 hours
I got back to the build with the concern over the leaking fuel pipes. On careful study, it appears that the pipe is leaking because I have buggered up the connection - it appears to have been cross threaded, and didn't fully seat/seal. When I opened the connection up, the thread on both the tank and the pipe have been damaged, so I will need new fittings/new thread died/taped. I need to first get a 9/16-18 tap/die set, so that I can start loking for a possible solution - this SUCKS!
Leaving the engine compartment, I went back to the dash wiring as I have finally figured out how the new EVO switches work - there are 5-8 small connectors on the back (Depending on the switch) and the switch basically switches the throw between 2 poles on each side (4 contacts, 2 on / 2off). Working with the Ultima wiring diagram of PH, the Ultima build manual wiring diagram, and a multimeter, I was able to figure out how to wire the switches - now I need to remove all the old connectors and crimp on new mini-connectors. I also need to name each wire so I know where to connect it on the EVO switch once the dash is installed. This process took a while as new wires also needed to be run for ground/IGN for the backlight on the switches. Once done, all wires were tied into groups and numbered and left ready for the dash install.
Sep 28-29, 2015
Build Time Today: 2 hours
Total Build Time: 272 hours
Not much time in the garage as I need to catch up with work left over from the Eid holidays... however, I did get time to find possible solutions to the fuel leakage issue... I found a 9/16 die and had to create a custom wrench to use it - since the tanks are already installed, a regular die handle does not fit in the space between the tank and chassis members... the die was run over the two outgoing tank connections and the top upper link connection as those are all buggered up... The fuel lines were then connected and they slip on MUCH easier than before! Will have to test them tomorrow!
Sep 30, 2015
Build Time Today: 5 hours
Total Build Time: 277 hours
Now that the fuel lines were connected, I went back to testing the fuel system - I also decided to test the Stack connection for fuel pressure, and the speedometer sensor... Relevant connections were made, and then I started the test:
Fuel was filled in the driver side tank - the previous leak (or flow from leak) was not there - however, there is still a minor leak from the fitting (about 1 drop every few seconds).. However, this will not prevent me from testing the system so I continued with the test - about 20L was filled in the tank, and then the LP pump was switched on for 2 minutes - using a temporary override of the power at fuse.... A few loose connections were found at the 100-micron filter and the HP pump inlet and those were tightened... The HP and LP pump were then run together for a few minutes to build pressure, and a few more minor leaks were found at the regulator connections which were tightened to seal them up... The pressure on the pressure dial attached to the regulator showed 55psi, and the Stack fuel pressure sender was showing 56 psi (so close enough!!)... The regulator was adjusted so that the dial read 61 psi and the Stack read 60.4psi... The regulator adjustment screw was then tightened and regulator re-installed on bulkhead ready for use! The driver tank was drained of fuel using the LP pump...
The same fuel was then filled in the passenger tank, and the same result: a minor leak in the fitting of the take-off pipe, which will need to be rectified with the drivers side issue... The tank was then emptied using the LP pump...
End result: All fuel pipes, fittings at pumps, filter and regulator have been tested and no leaks are found... the regulator has also been set to 60psi... Only the two fittings at the tanks need to be replaced, and the relevant fittings, concial seals and sealant have been ordered (should be here in about 15 days)...
The Stack was also tested for the speedometer sender - which was held by hand and the front hub turned to see the distance required to get the sender to activate... Once I was happy the sender is working correctly, the sender was removed and repacked and now I can make the relevant brackets using some alloy/steel plates...
I then spent some time working on the dash again - holes for the mirror switch, interior light and ignition switch were drilled and sanded, and the start button switch hole was also finished. I am now done with making all the holes for the various dash gear - only thing remaining is drilled holes for the stalk mounting bolts and the stalk cover, which can only be done after the dash is back on the car... so in preparation for putting the dash back on, all the wires and temporary connections were removed from the dash chassis area so that the dash GRP can be put back on tomorrow...