Jan 1-8, 2016
No build as I am travelling again for work...
Jan 9, 2016
Build Time Today: 3 hours
Total Build Time: 435 hours
Back from my trip, and here starts the last part of my build (hopefully)!
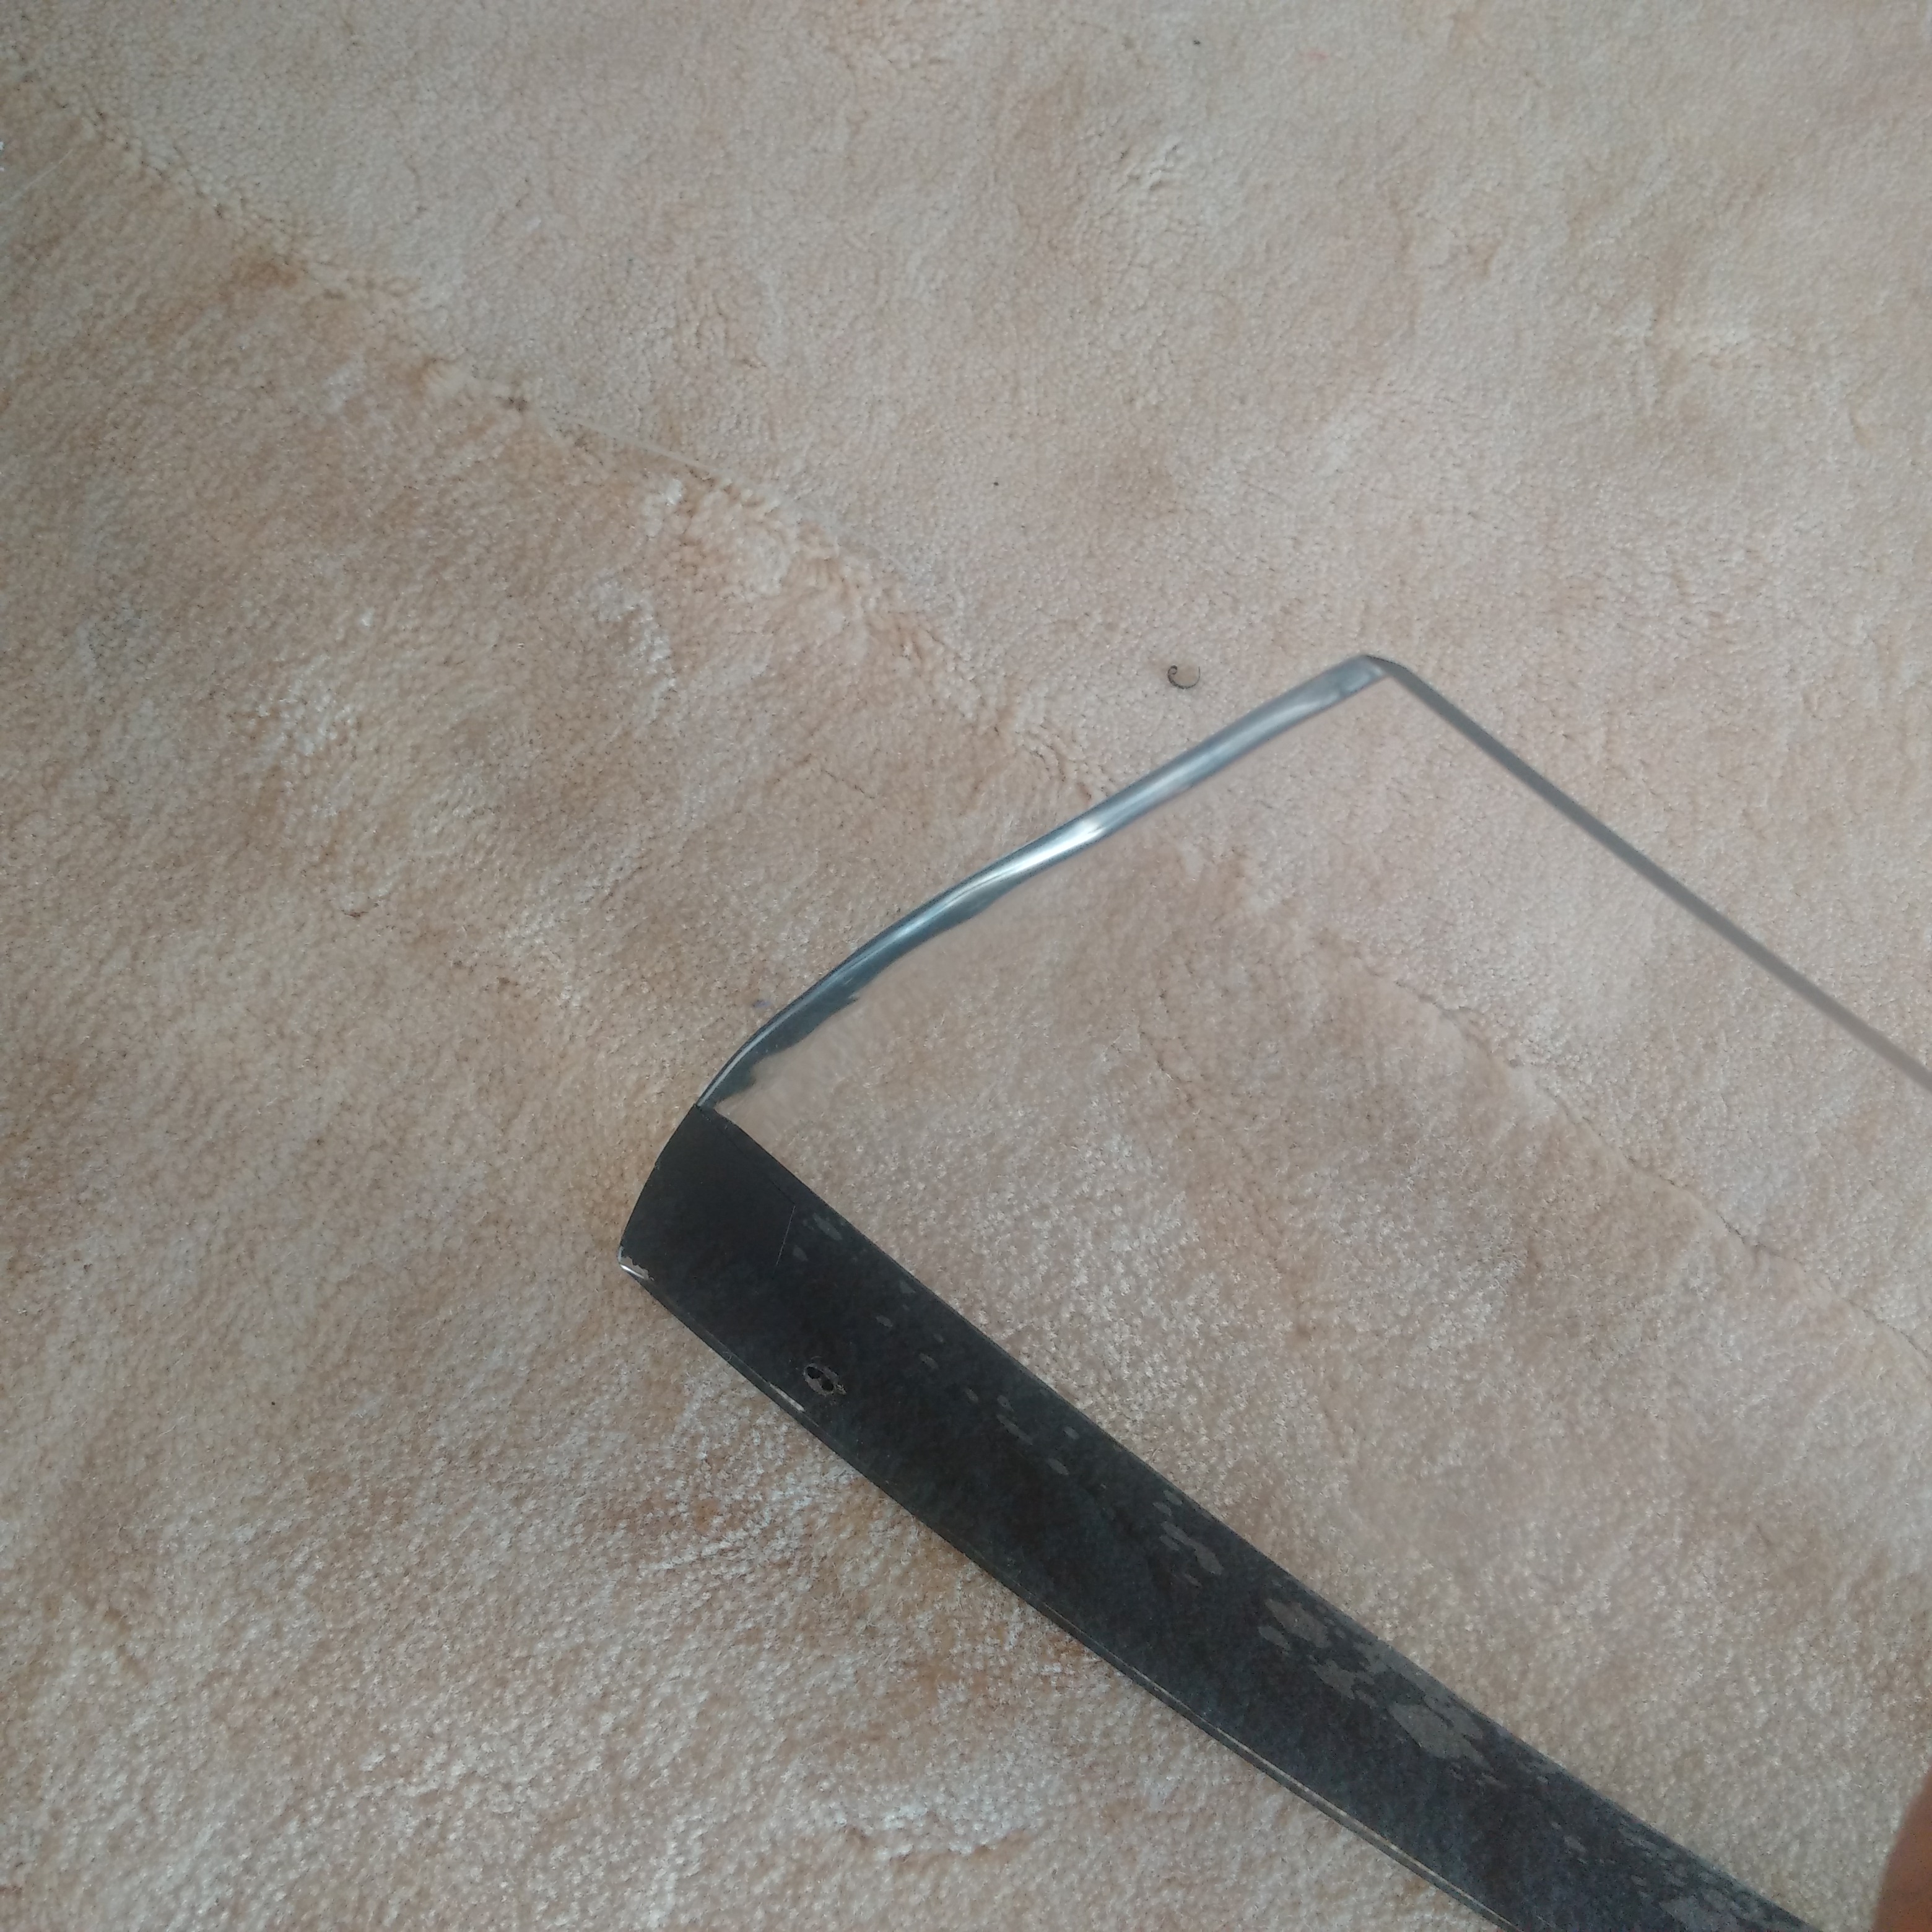
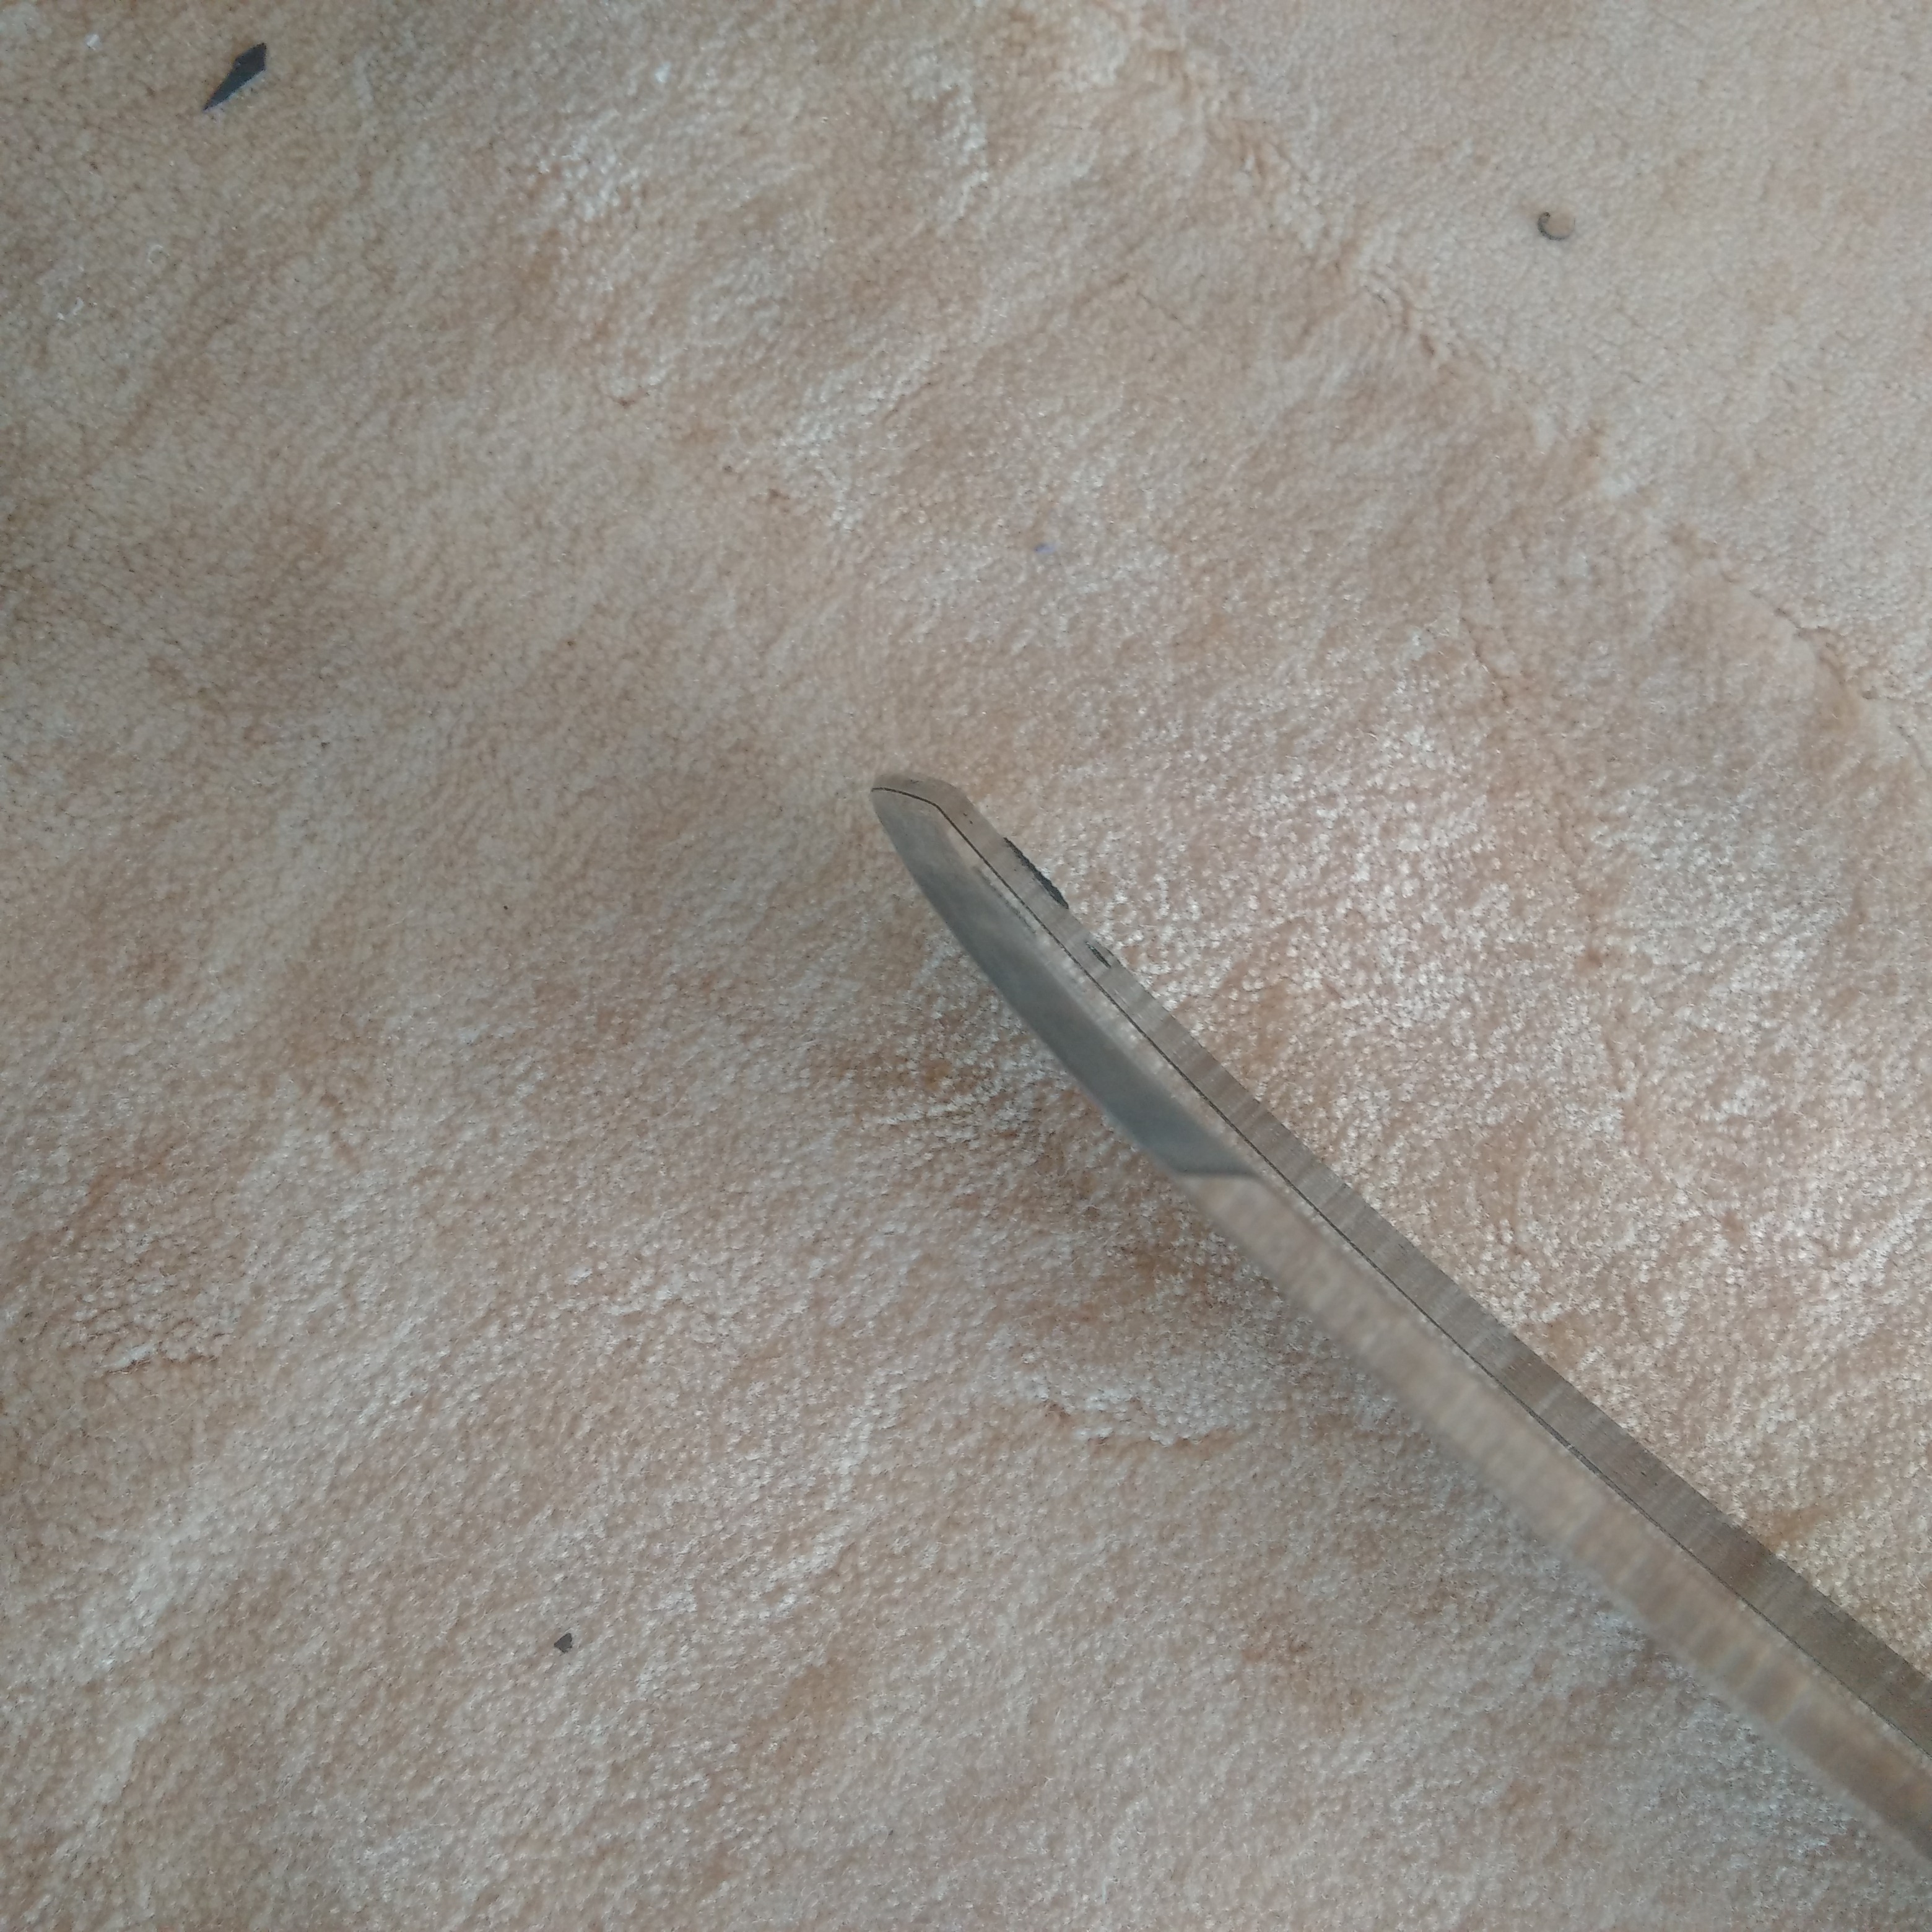
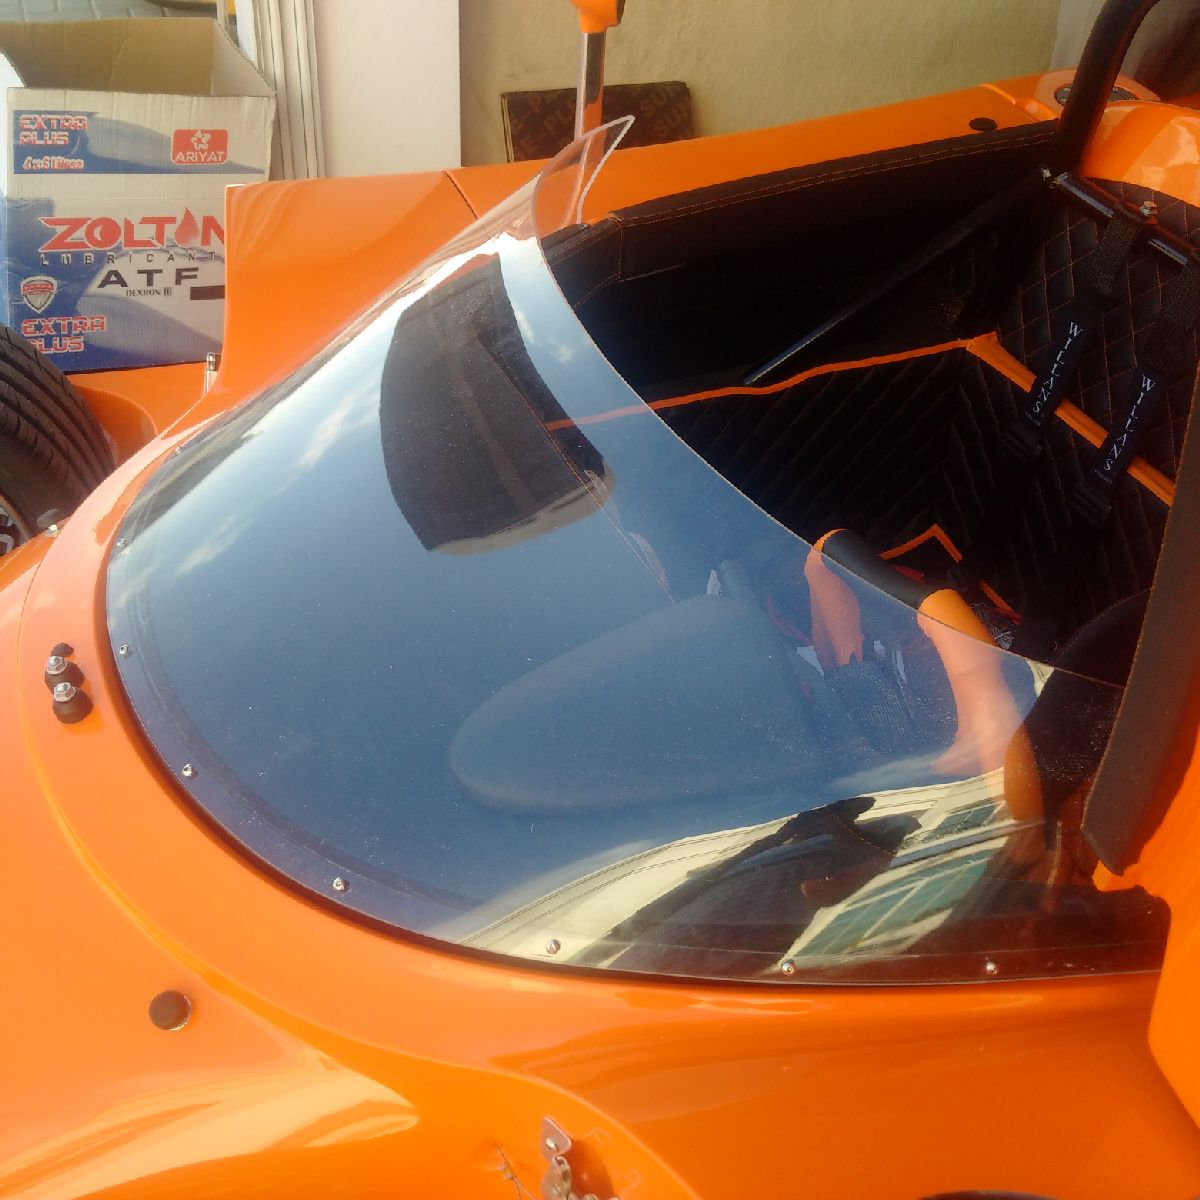
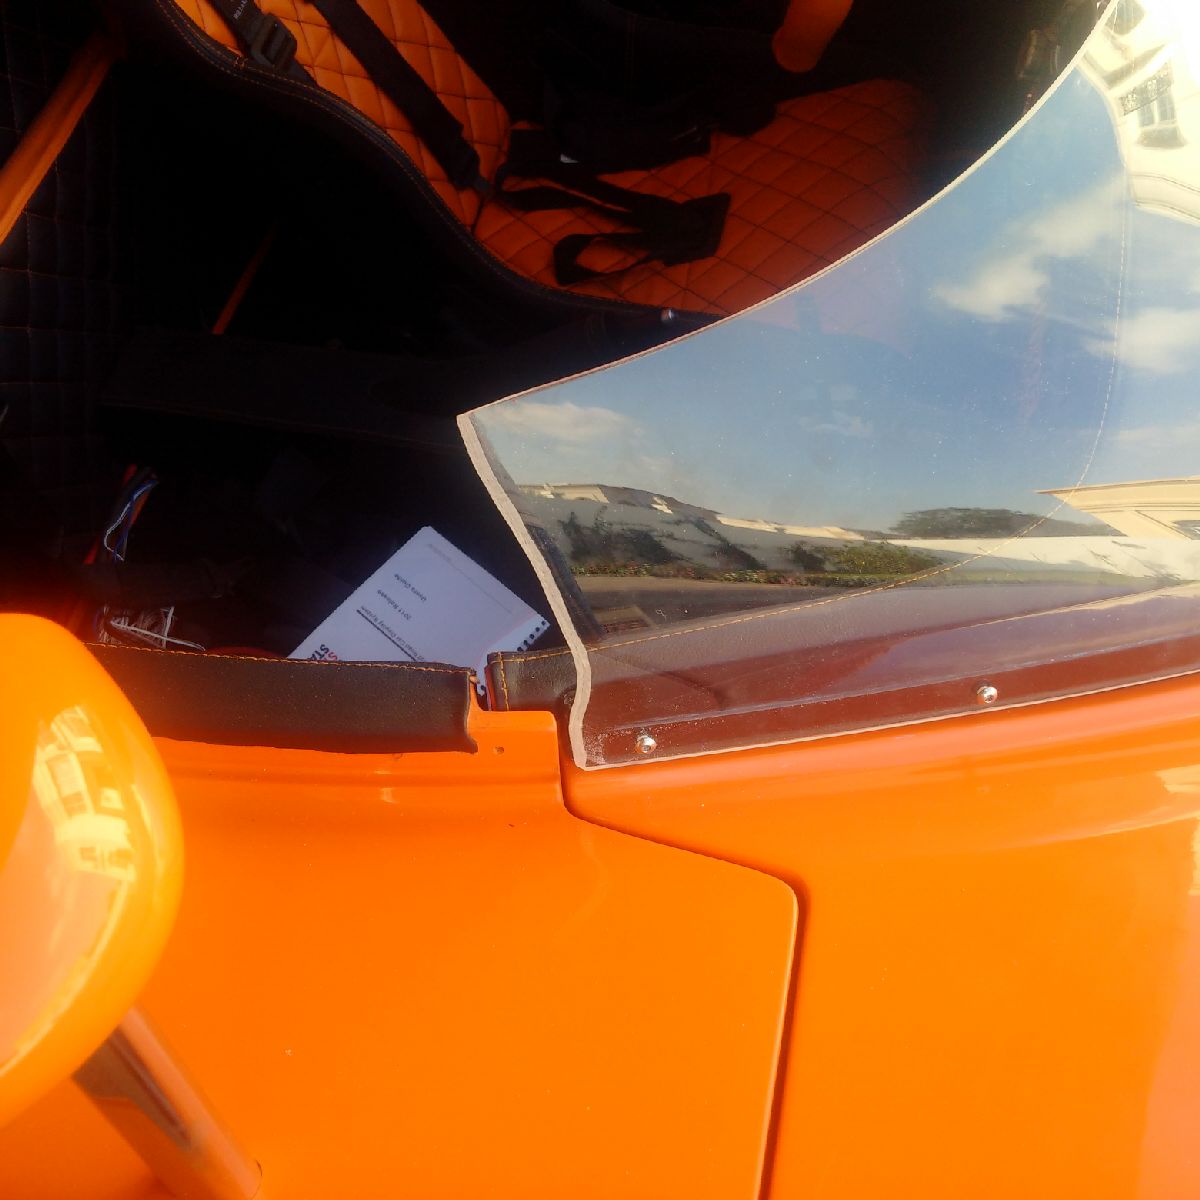
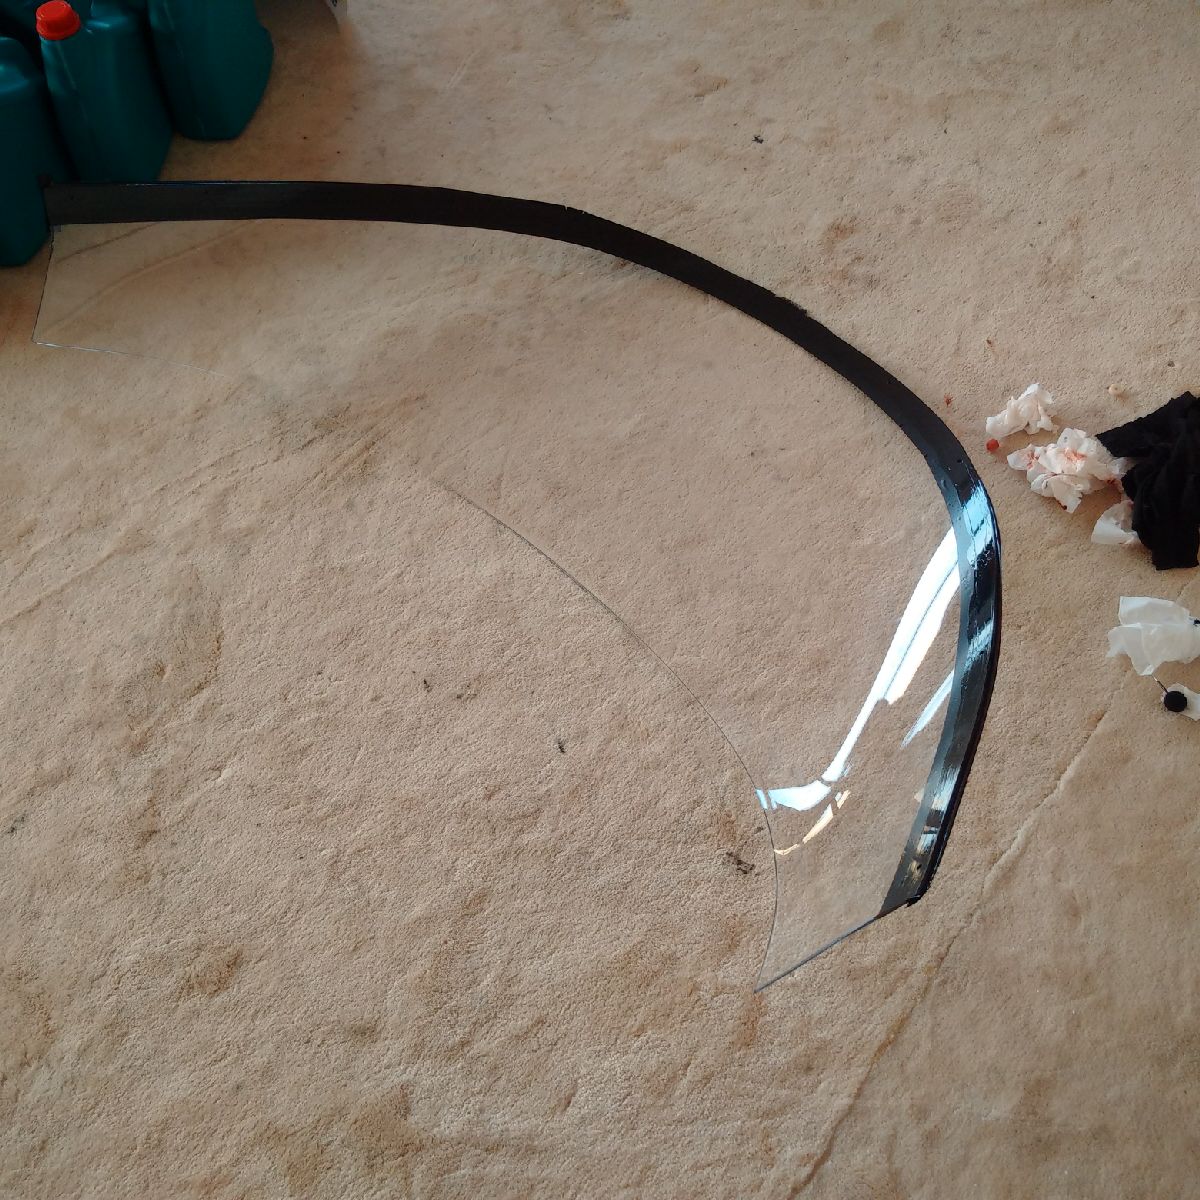
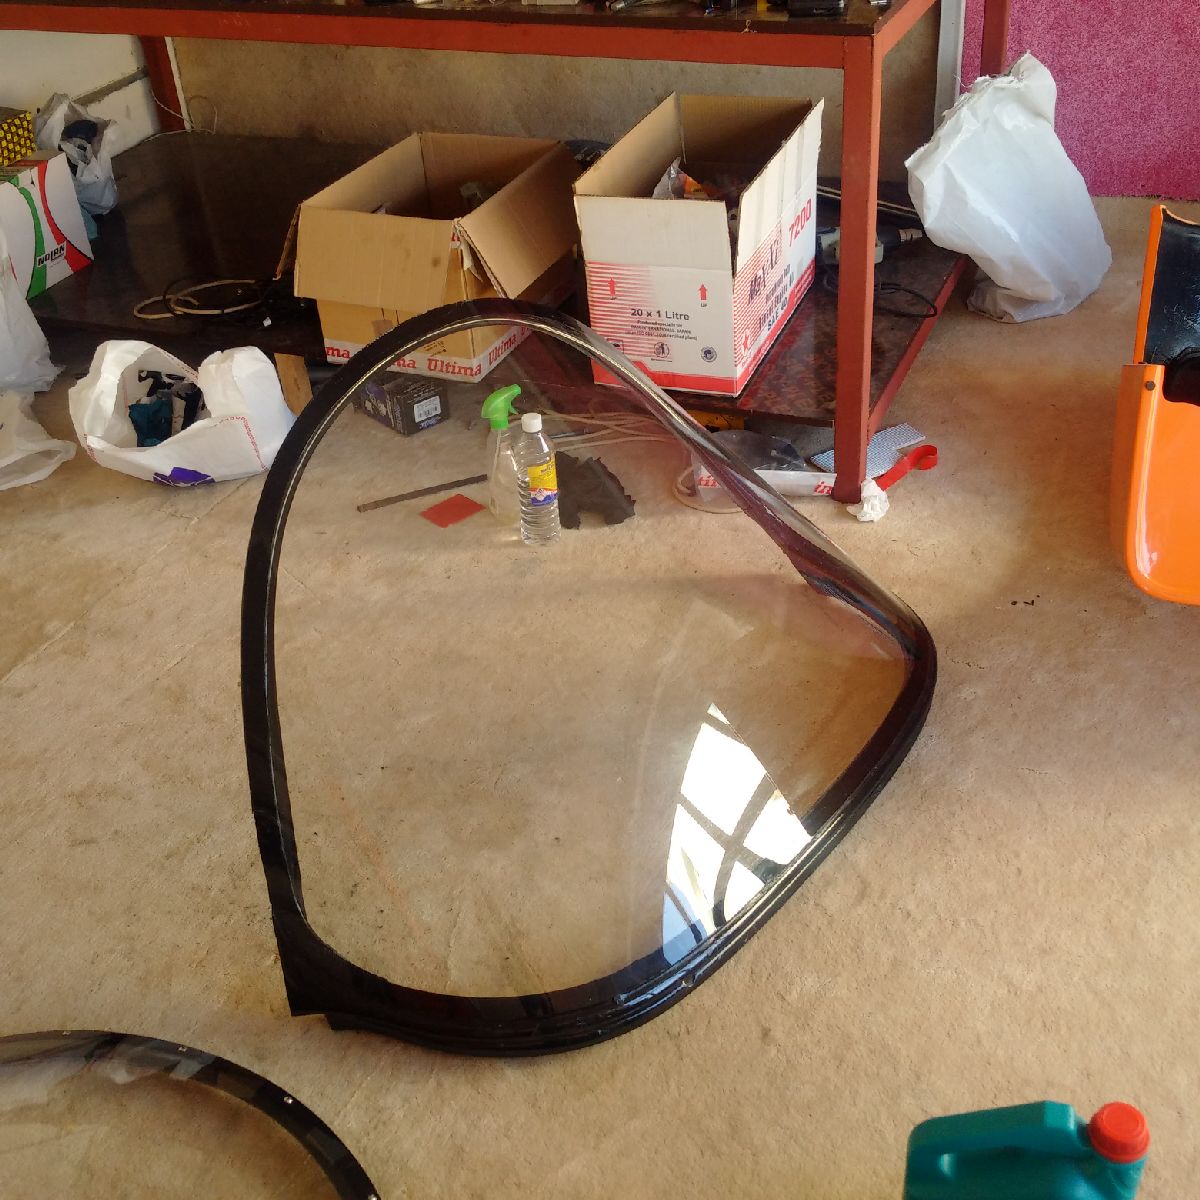
The priority today was measuring and trimming the small side screens. The windscreen which has been curing for the last week should now be steady enough to allow me to work on the side screens. The driver side screen was placed in position, and the fitment was checked so that it forms an even gap with the front windscreen frame, and clears the frame when the door is opened. The screen was perfect in size, and only needs to be trimmed on the front edge at an angle to let the screen clear the frame. The screen was also marked for the drill holes, and then 4mm holes were drilled in the screen. The screen was replaced on the car, and the 4mm holes were drilled into the body using the screen as a template. The screen holes were then enlarged to 5.5mm, and the body holes tapped for M5 screws. The front edge of the screen was carefully sand papered away - using 100 grit, then progressively larger grit to get a smooth finish. The final steps were applying and buffing using a polishing compound to get a high luster finish to the screen edge. The screen was then marked off with electrical tape in preparation for painting the lower edge.
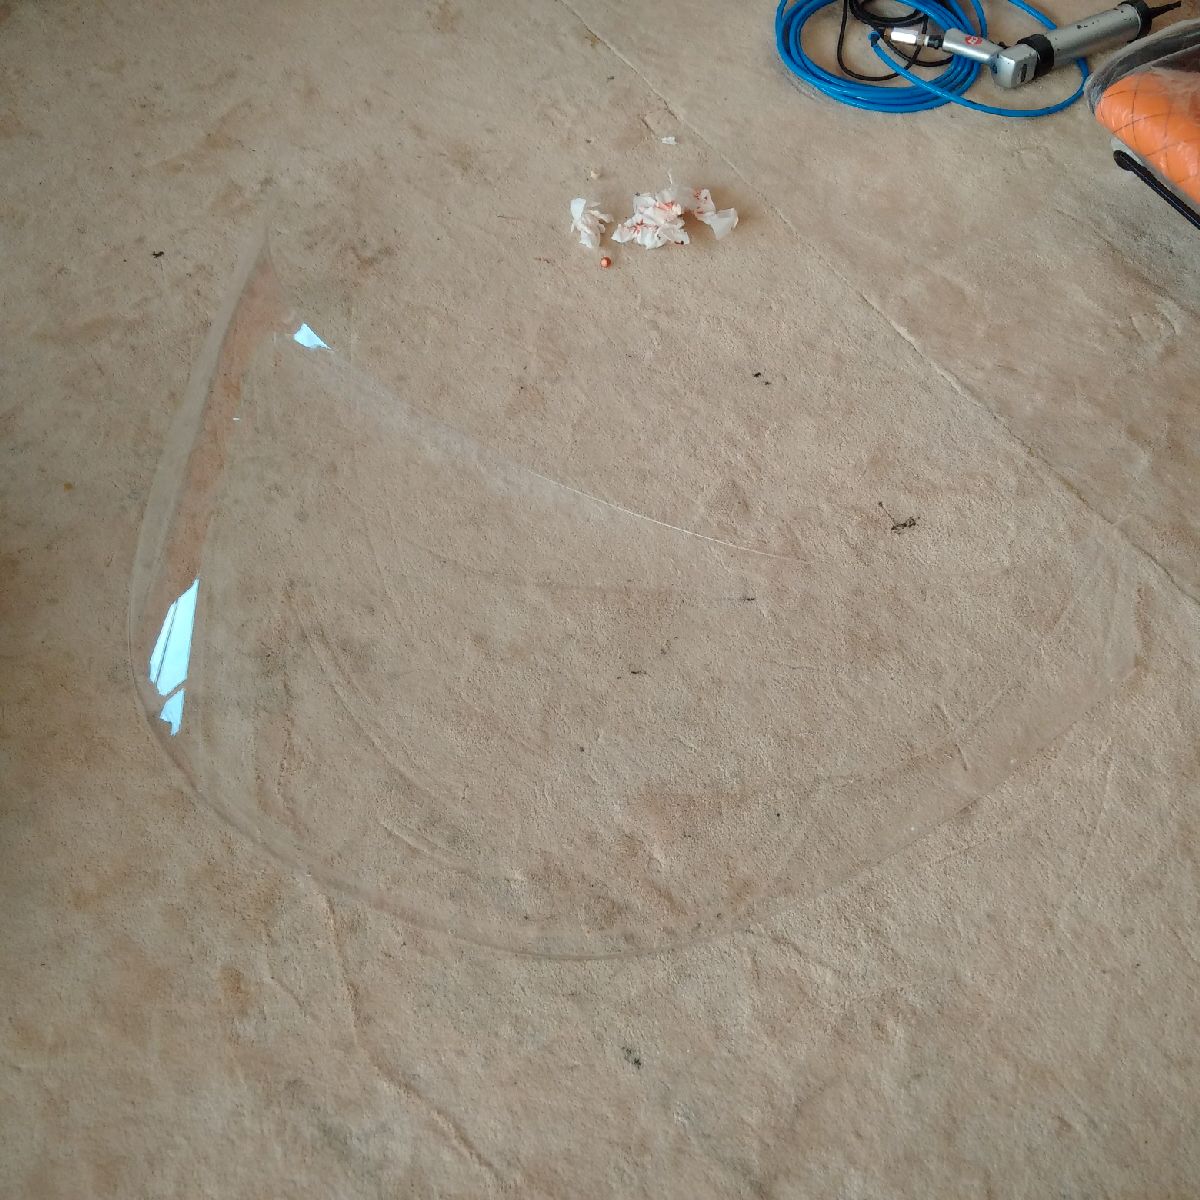
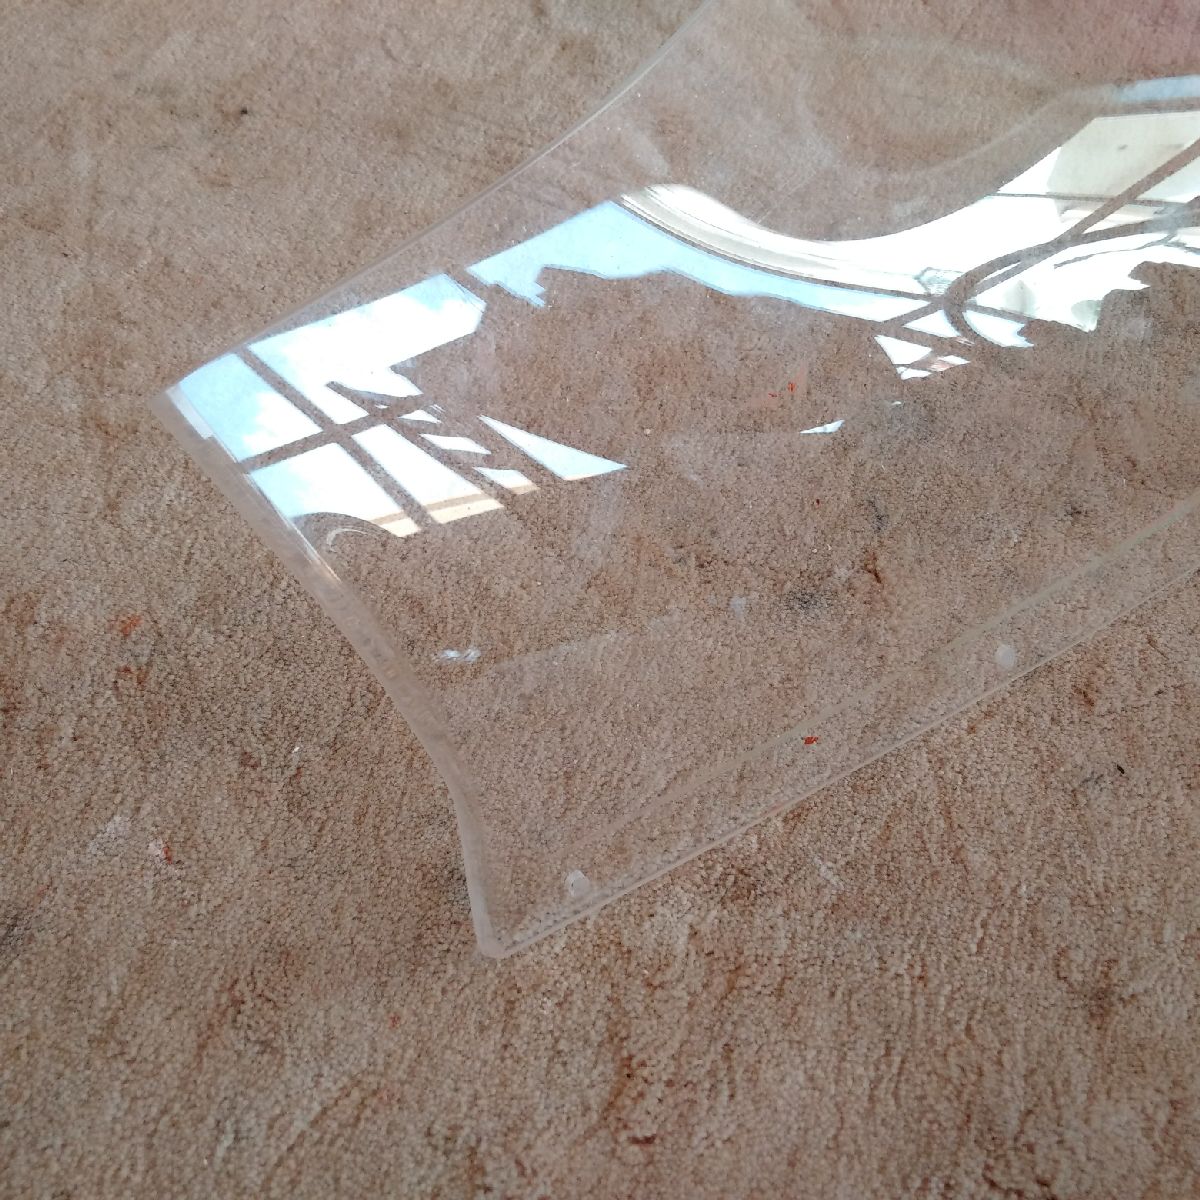
Next the passenger side screen was placed on the chassis for a similar process - however, it quickly became apparent that the screen size was incorrect - it was too large to fit between the frame and the rear center body GRP!! Some measuring and careful opening off the door and checking for clearances showed the screen to be too large by about 3mm. Therefore the first job before marking any holes/edges was to get the screen to the correct size. Once again, careful sanding down and polishing resulted in a perfectly fitting screen. However, with the amount of plexi-dust in the garage, I decided to call it a day as the dust started to cause itching...
Jan 10-12, 2016
Build Time Today: 5 hours
Total Build Time: 440 hours
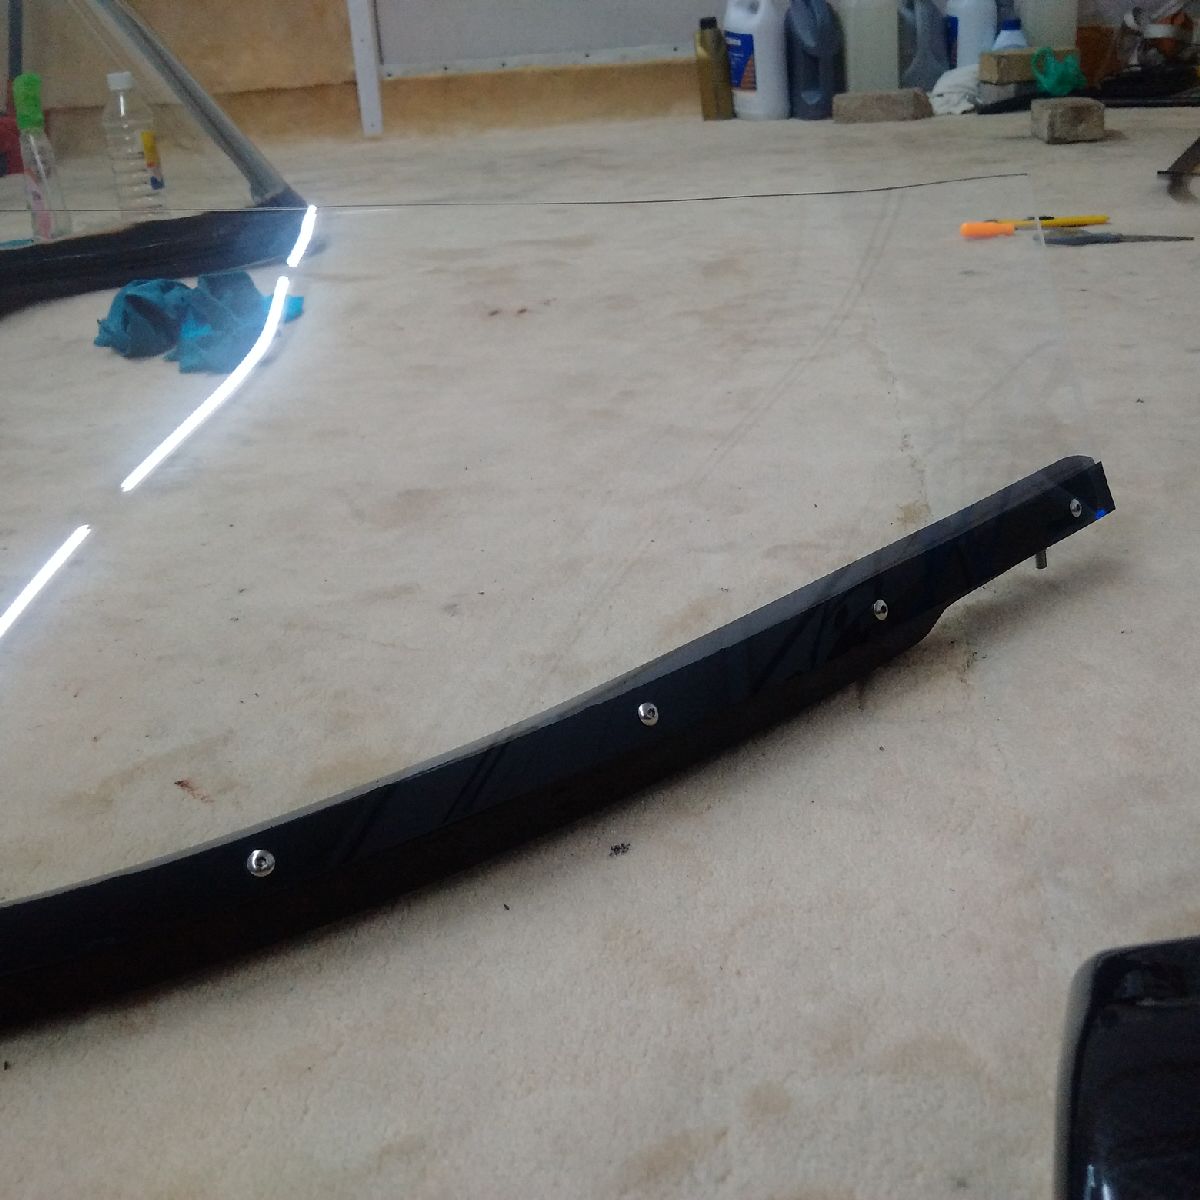
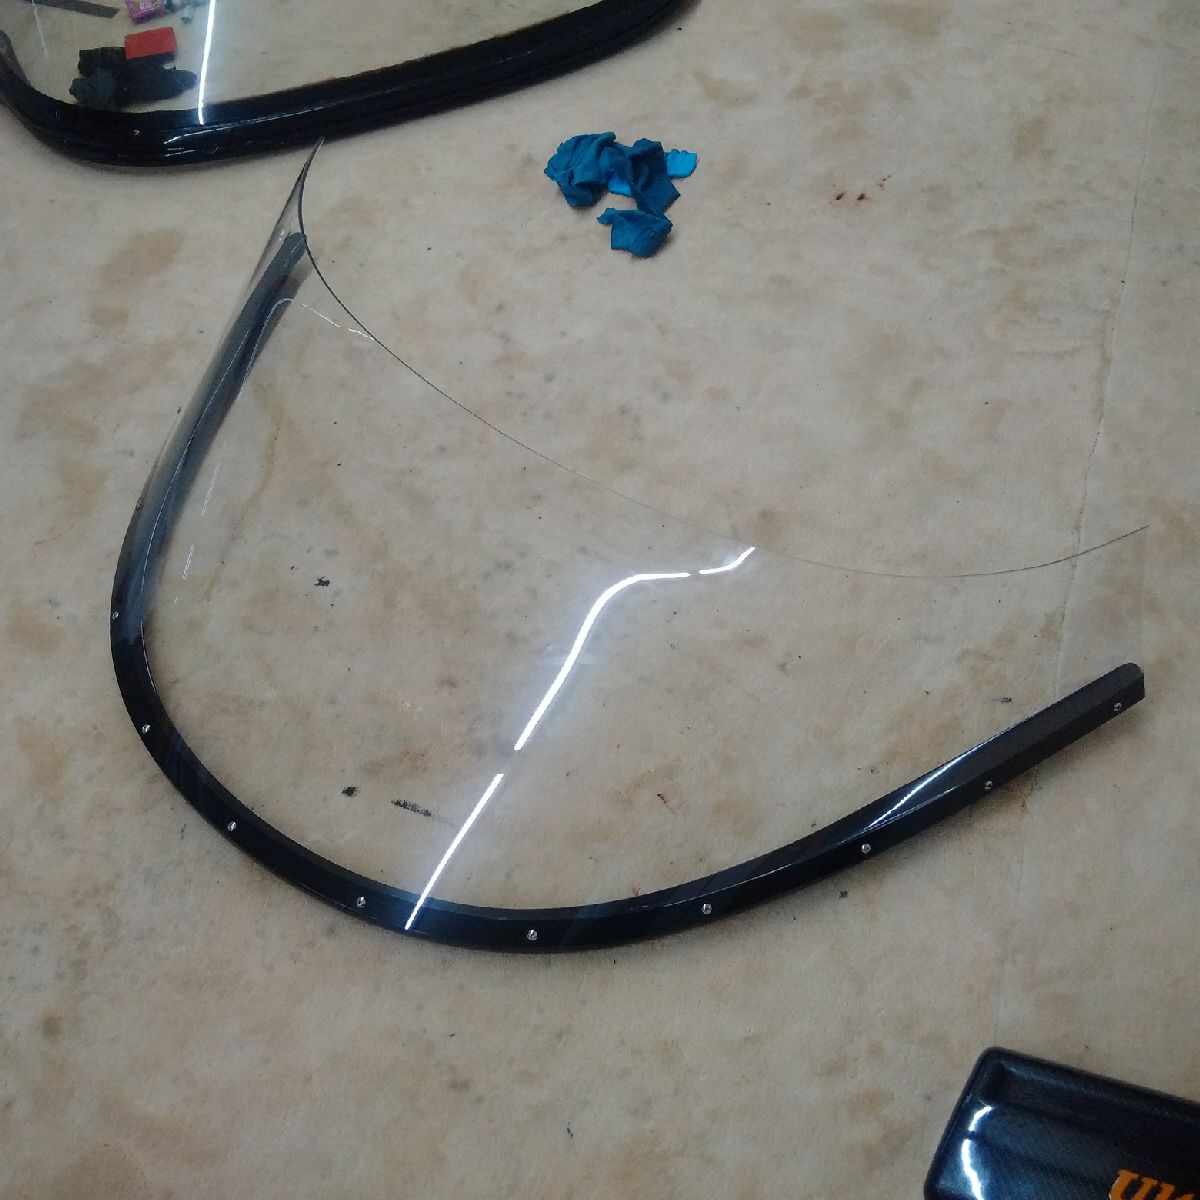
The passenger side screen edge was sanded, polished and finished to get a good fitting screen with the front windscreen. The holes were then drilled in the side screen and then in the door, and the holes taped for M5 screws.
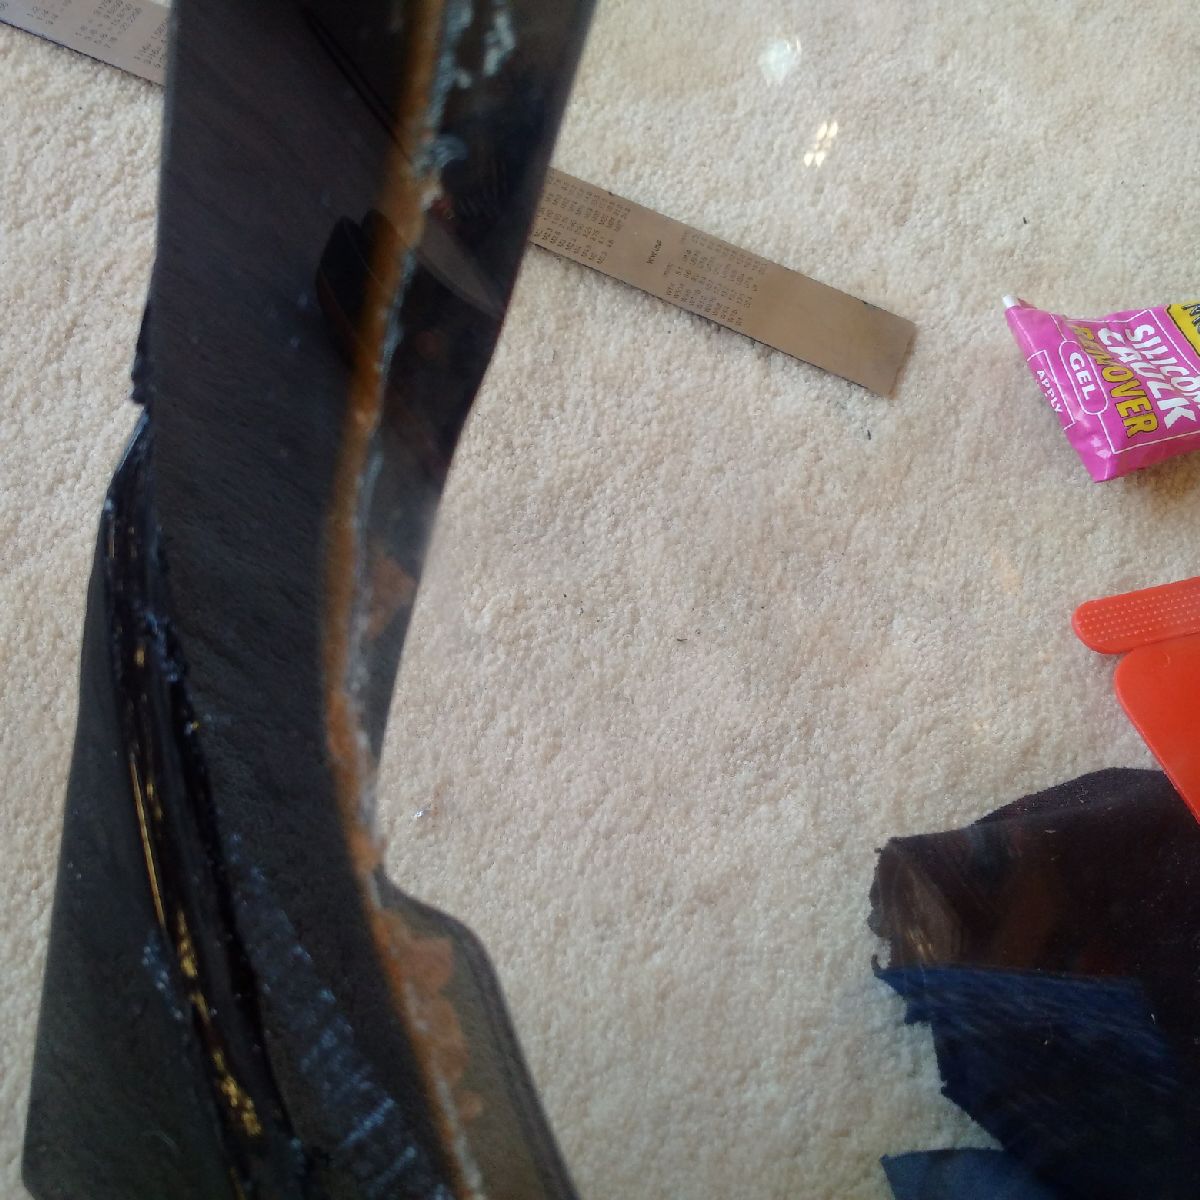
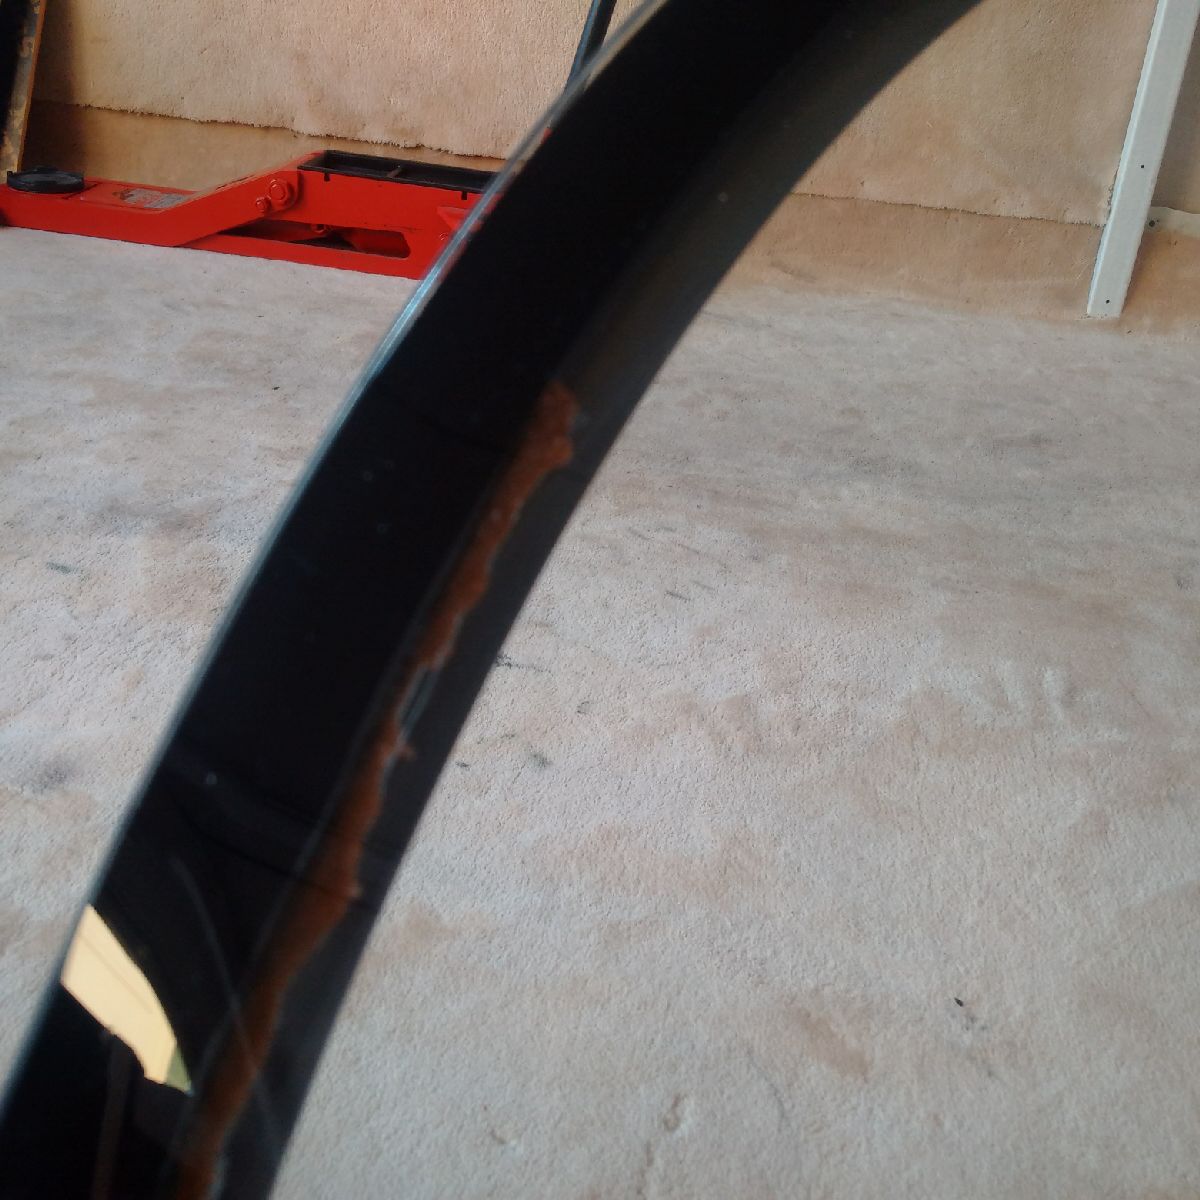
Next job for today was getting the front windscreen down, and checking the fitment of the glass to the frame... the windscreen was carefully removed and placed on the ground, and the butter paper was removed - this was a good idea because the adhesive had trickled down in about 3 places and the butter paper was stuck to the frame, but easily removed by tearing it apart - however, if I had directly installed the frame on the body, I may never have been able to remove it as such! There is a little spillover of the adhesive in some places - all that can be cleaned up with some elbow grease in a few days...
I also decided to fit the small wind deflector since I have been working with plexi glass the last few days... the deflector frame was positioned on the chassis, and the deflector carefully placed on its recess... It quickly became apparent that the deflector is also a little bit too large - and will need to be trimmed away. However, before trimming, I decided to fit the deflector to the frame so that the amount needing to be trimmed will be exact when measured with the aid of the side screen... The deflector was drilled - one hole at a time, with the corresponding hole in the frame being tapped, and the deflector fitted to the frame with each progressive hole to ensure the deflector and frame spacing remains intact... Once the deflector was secured in the frame, the side screens were placed on the doors and the overlap between the side screen and deflector marked - now I know how much of the deflector will need to be trimmed... However, once again having had too much plexi-dust in the garage, I decided to wait a day before continuing with the trimming work...
Instead, I spent a little bit of time marking and cutting out the holes in the rear mesh for the exhaust tips and the rear view camera...
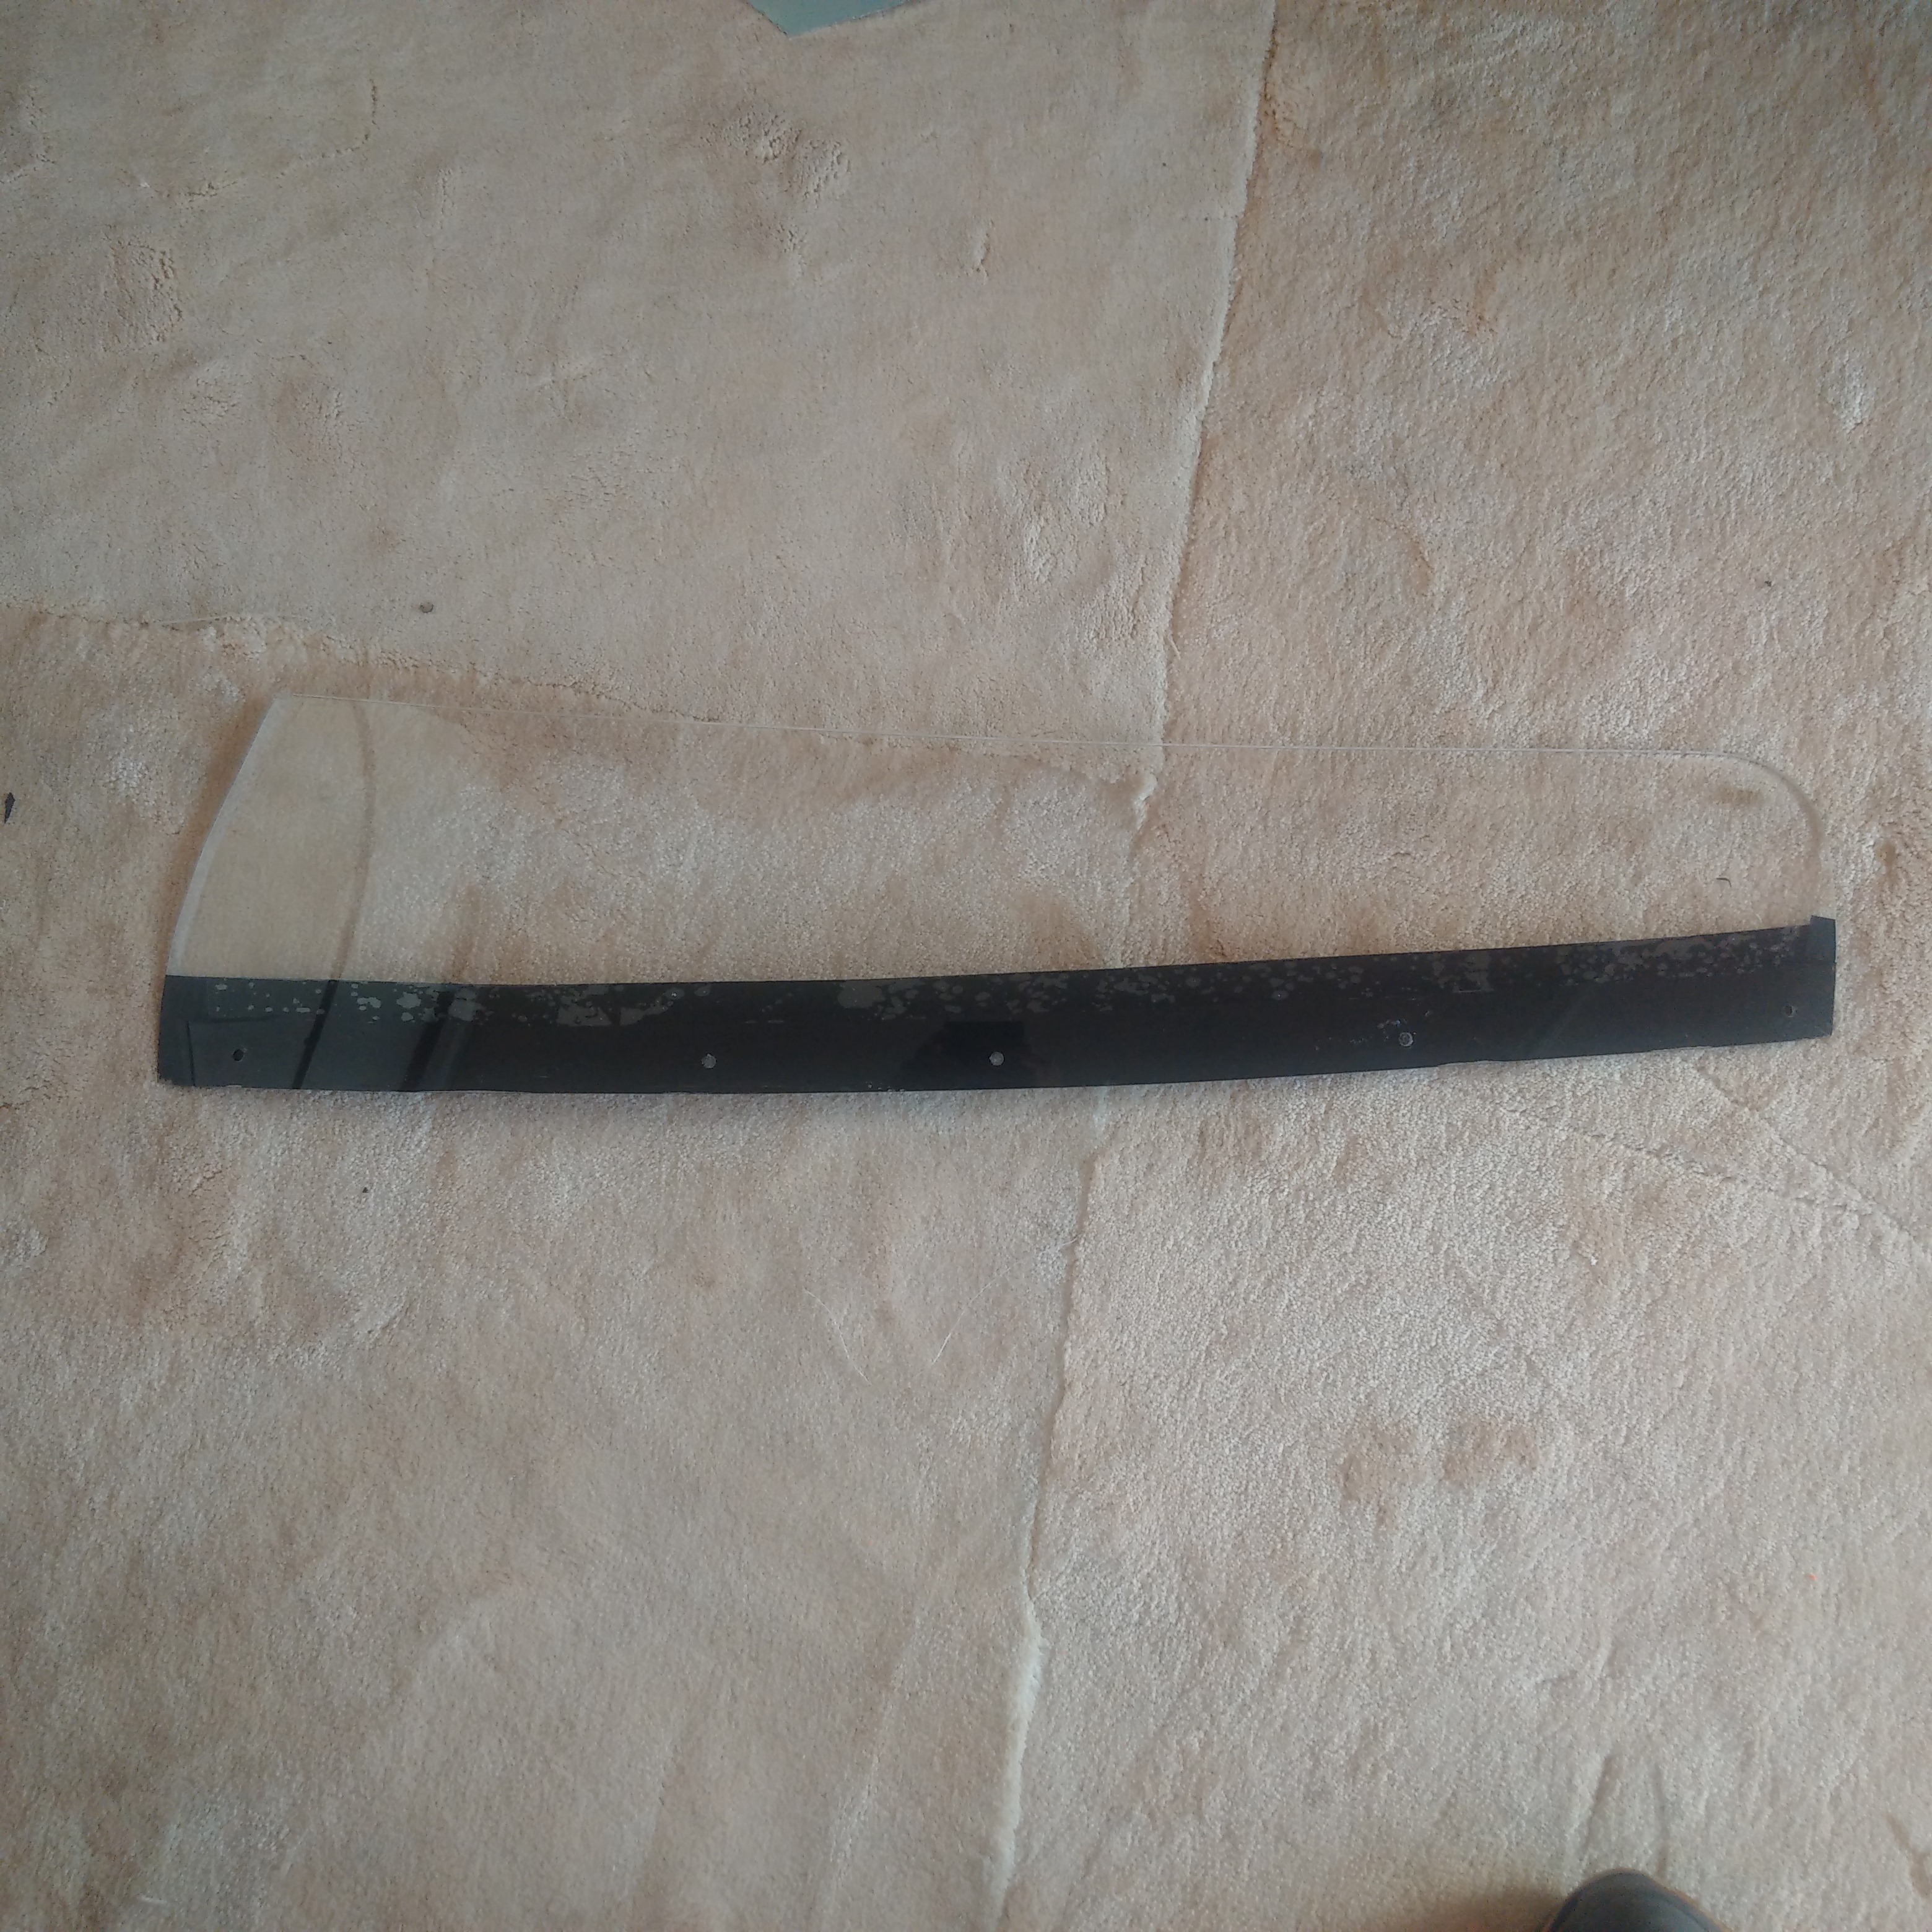
Finally, the side screens that had been marked with tape previously were painted black with glass primer and left to dry...
Jan 13-17, 2016
Build Time Today: 9 hours
Total Build Time: 449 hours
A cumulative update for the past few days:
The side screens were given a second coat of the primer and are now ready for installation... The edges of the door were also painted with the primer to add the finishing touch needed for after the screens are installed...

The windscreen was trimmed from both ends so that it will clear the door, and was then installed on its bracket and positioned back on the car... However, the door still contact the windscreen on both sides and will need further sanding down... Both sides of the screen were reduced as needed, and the door edge was also reduced to a slant to allow the door to open with the screen in position - it was basically a repetitive process of trimming the screen, placing in the car and checking if the door opens without any hindrance... it took a while but finally the fit was achieved... The sides of the deflector were then sanded down progressively with higher grade wet and dry and polished to a glass finish using polishing compound... The lower edge was then masked off, and primer applied to bottom to create a black band similar to the side screens...

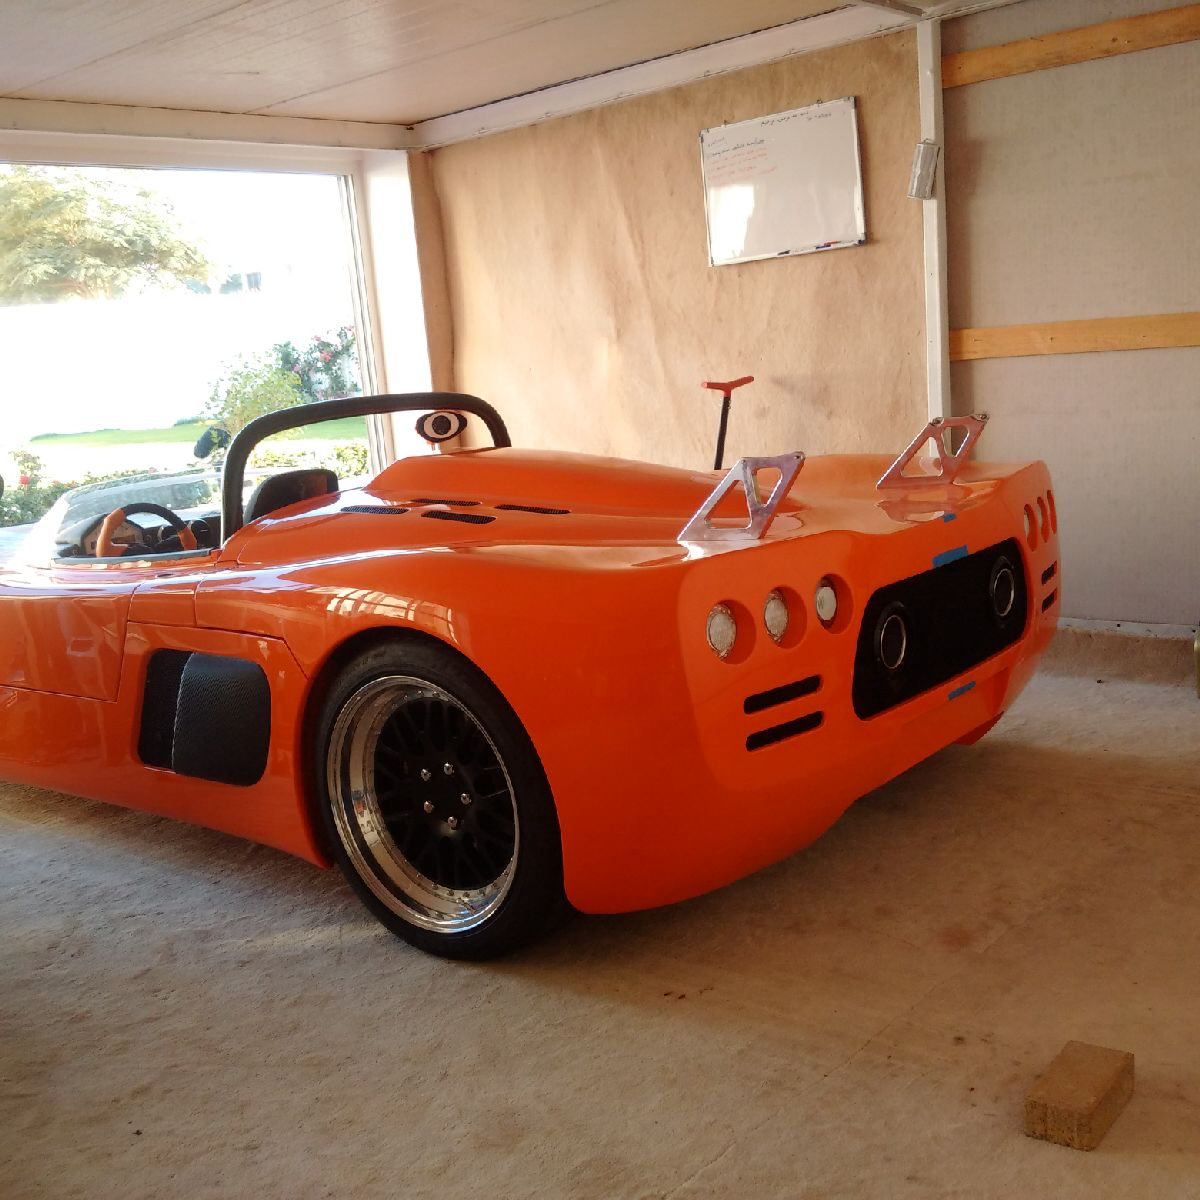
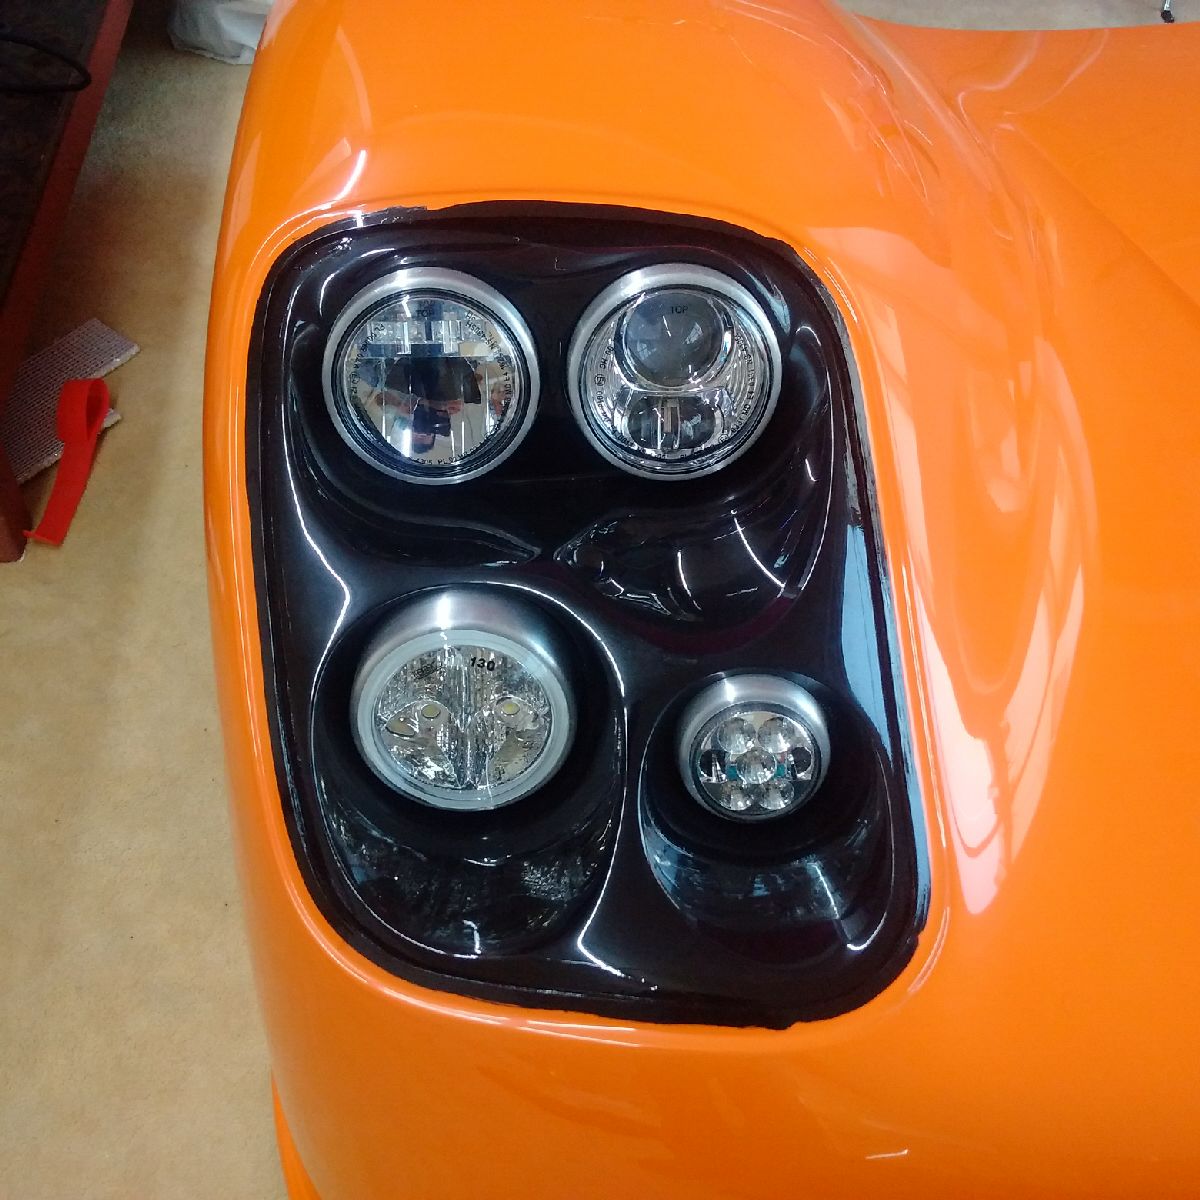
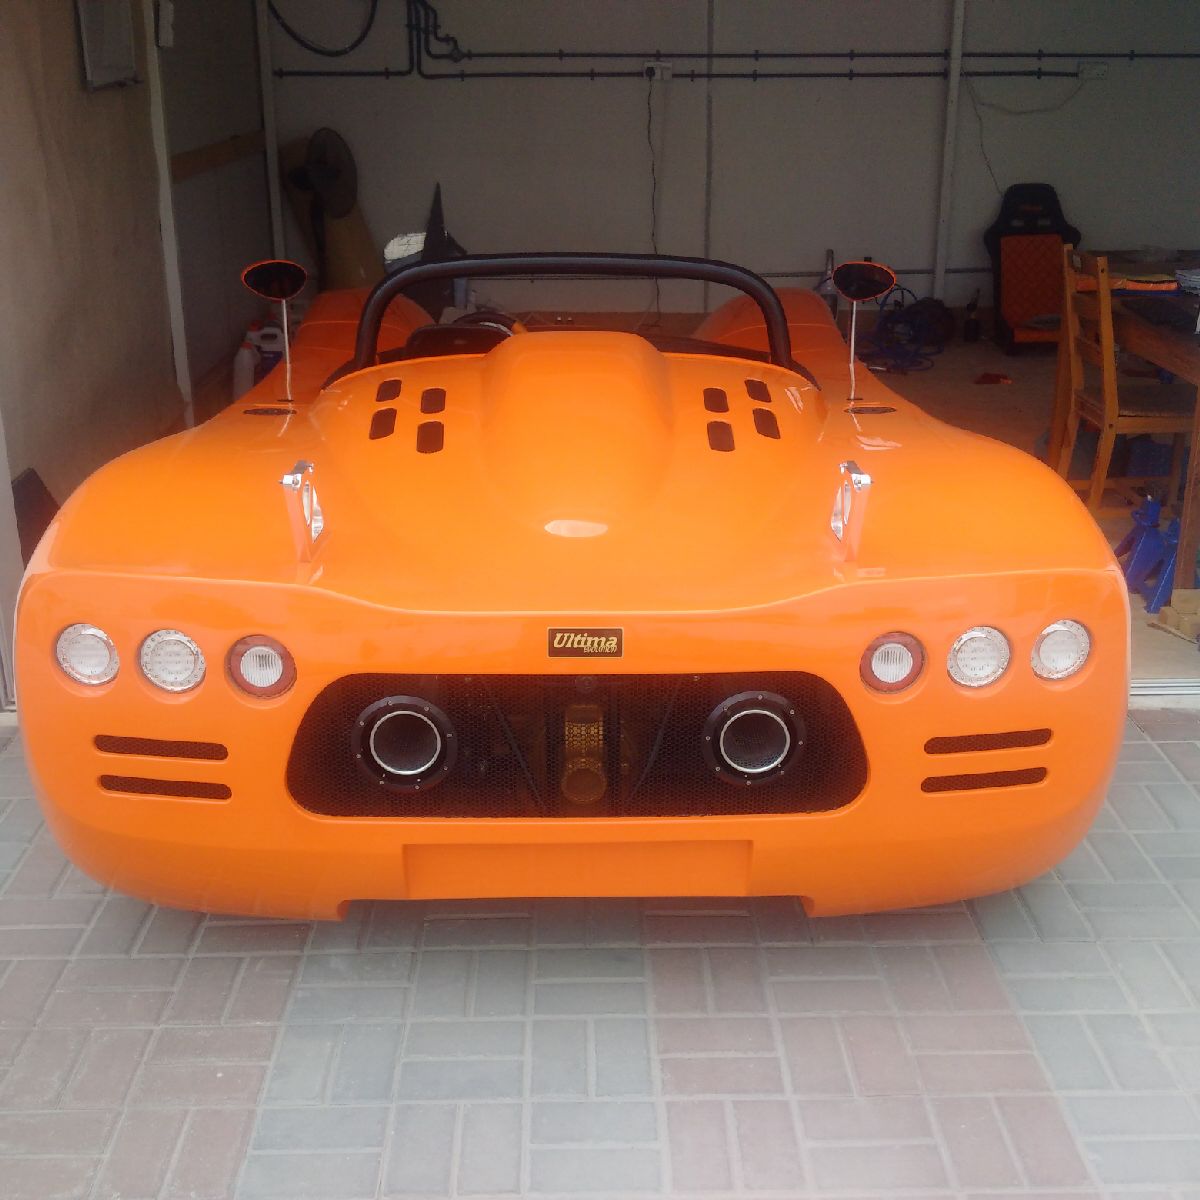
The rear canopy was installed as the plexi-work takes a back seat... the canopy was positioned in placed and the two lower bolts attached... the canopy rams were installed and the canopy closed carefully while removing little material from the mesh to get the correct size to allow the exhaust tips to fit through... The exhaust trim rings were then installed... The rear lights were leveled and finally tightened, and the rear wiring was connected to the main loom.. The rear end is almost complete!! (still a few small things left, but its starting to look like the back of a car)....

Jan 18-26, 2016
Build Time Today: 4 hours
Total Build Time: 453 hours
Once again a cumulative update as work has been extremely slow since the car was not available to work on... confused? read on...
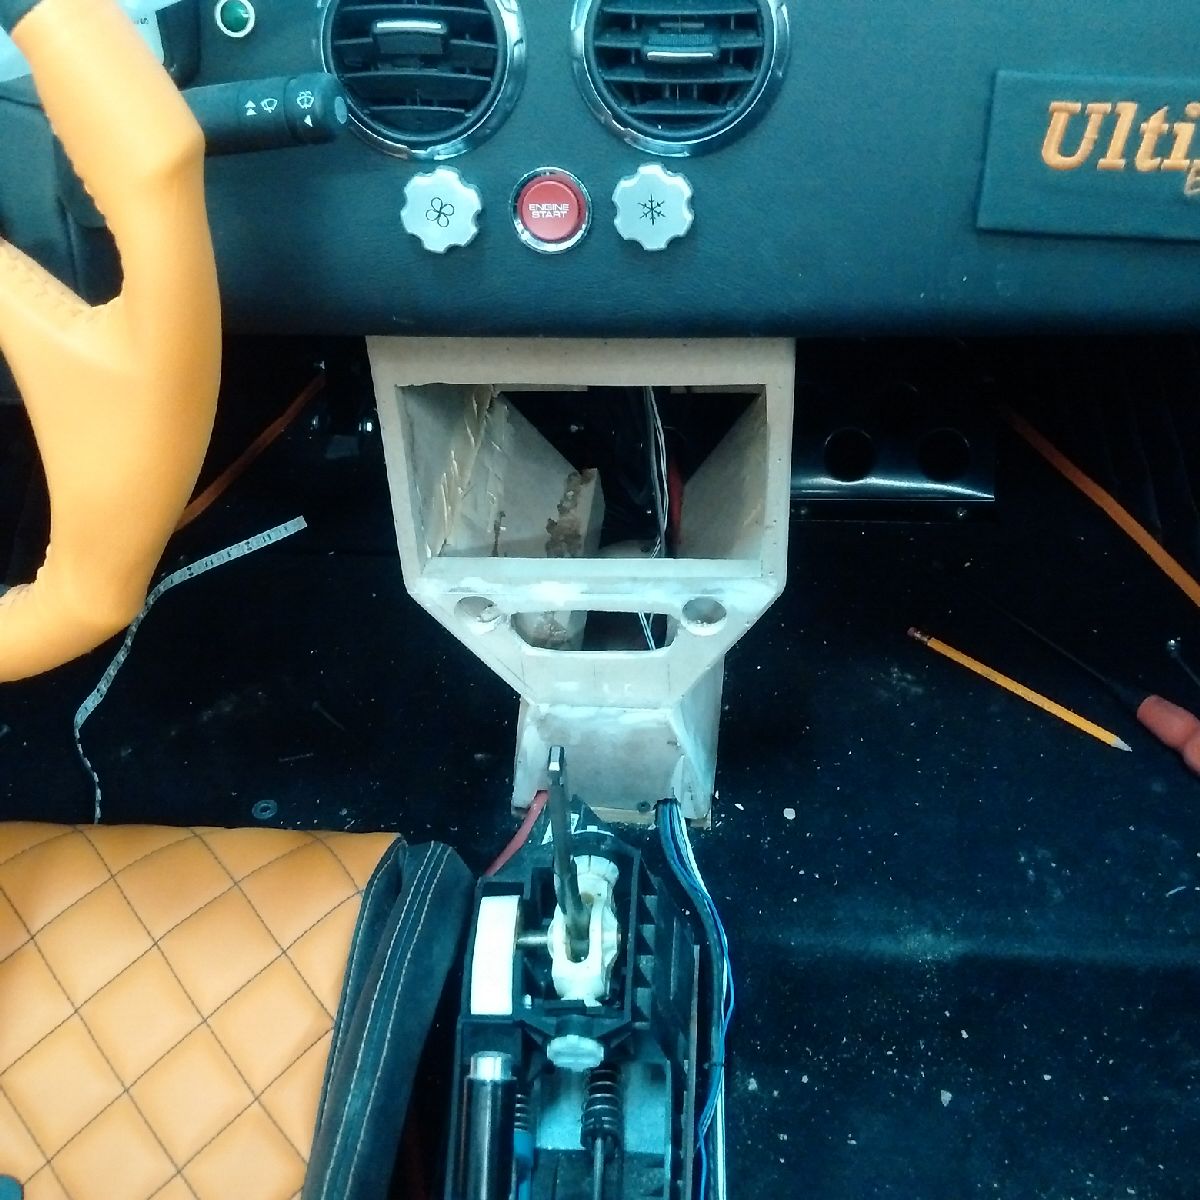
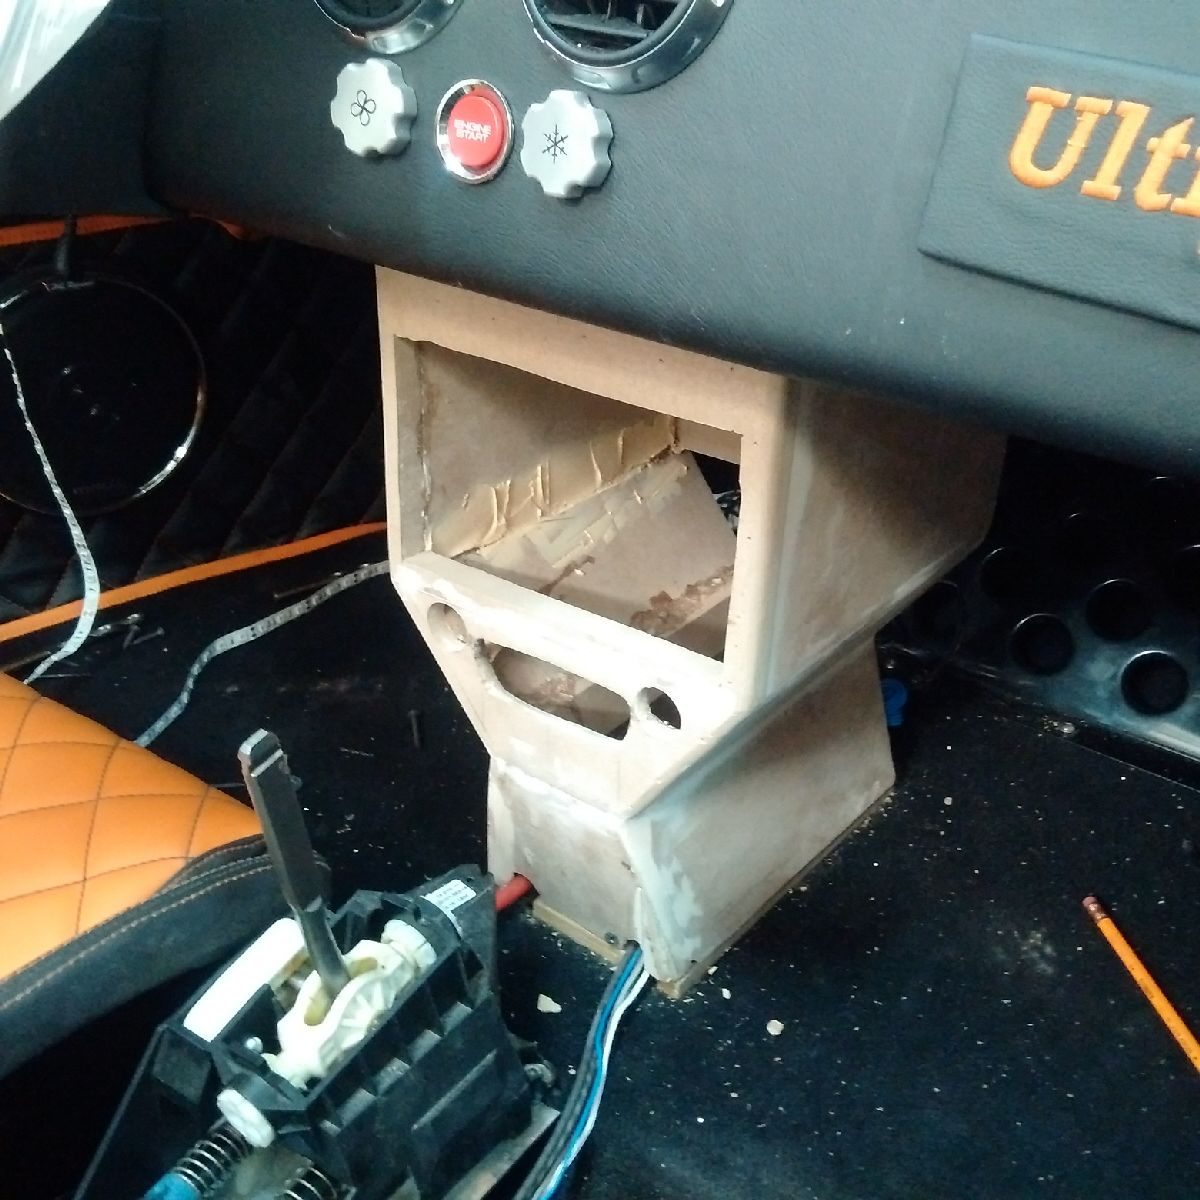
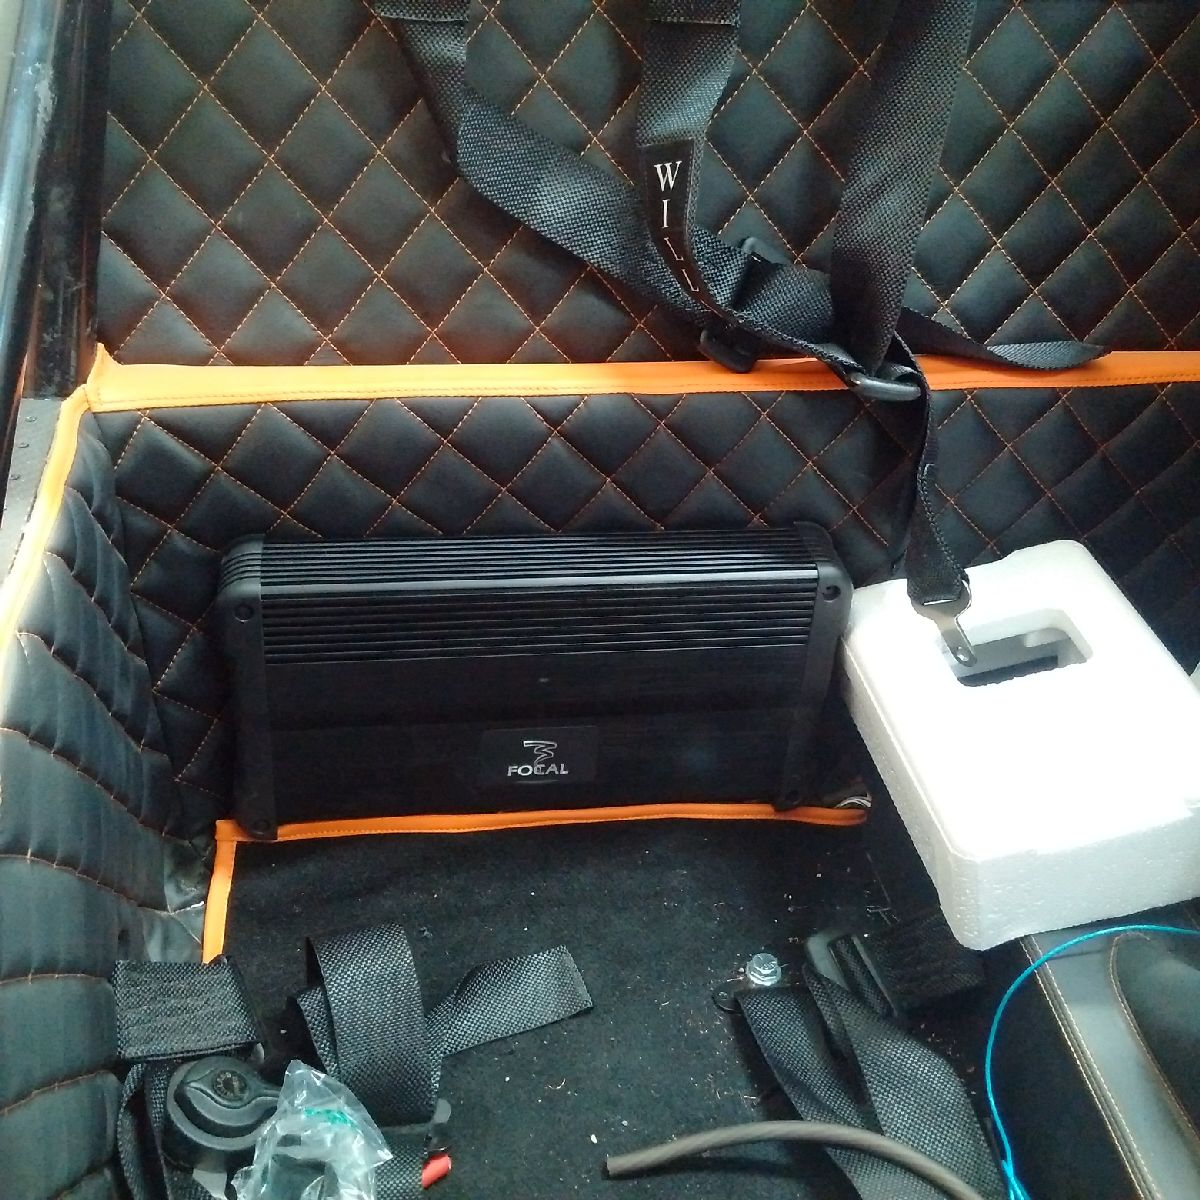
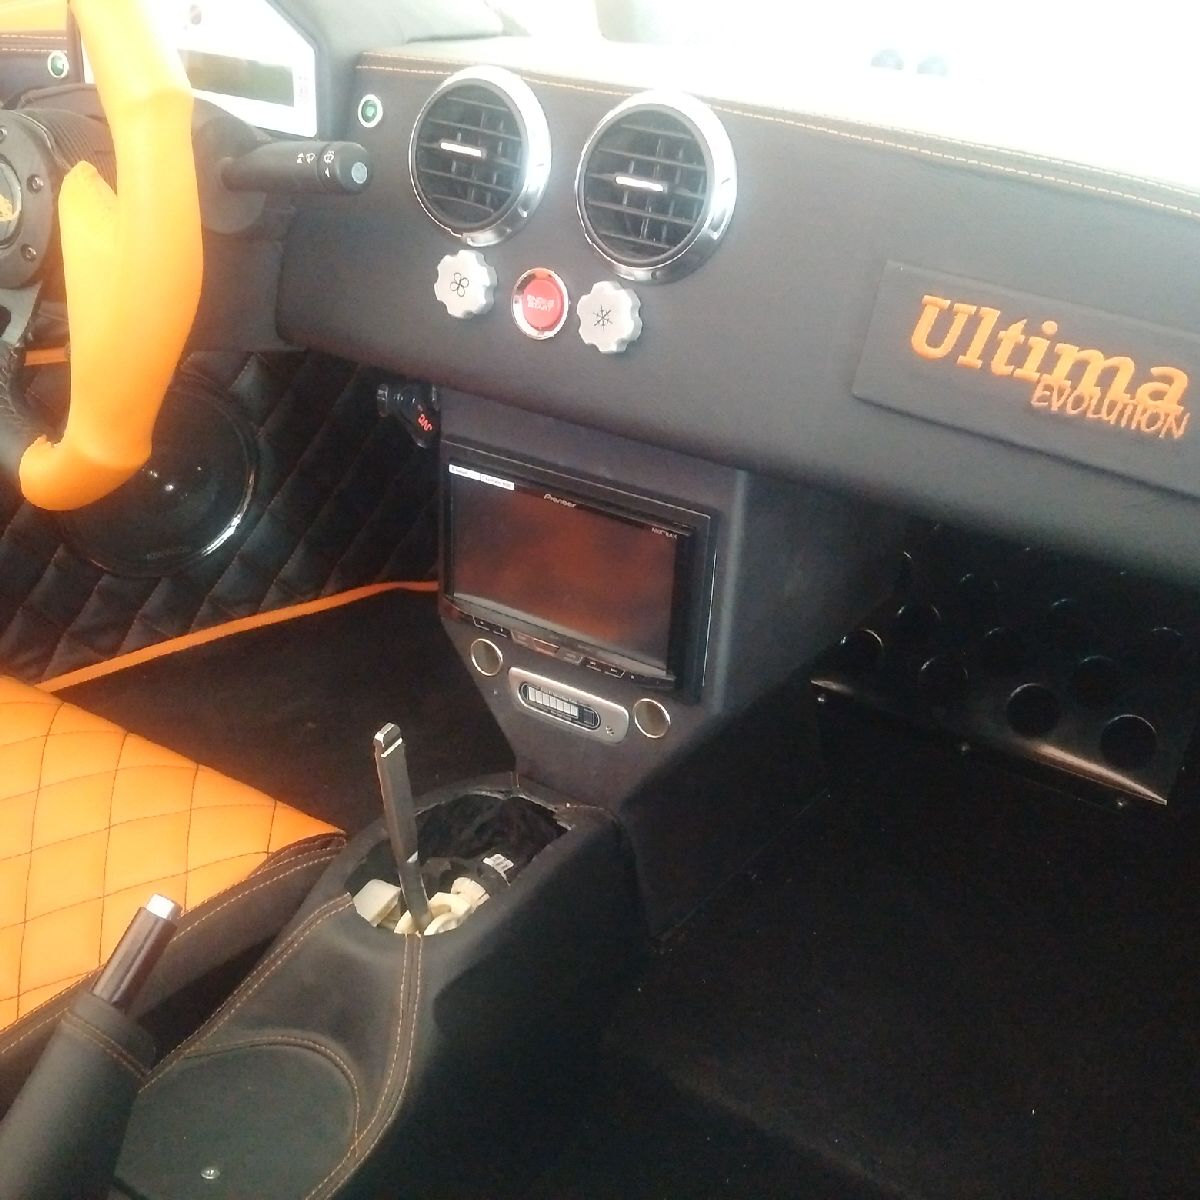
The car was sent by recovery to FOS Dubai (Thanks guys!!) to get a custom build dash section installed that will house the ICE unit... they needed a week to build and install the system - the section was built with pdf, some fibreglass, and finally covered with leather.. It is a unit that is housing the radio screen, the parking sensor display and the 12V power/cigarette lighter pods... A Pioneer touch screen unit, with navigation, reverse camera connection, and MirrorLink capability was installed... An amp was also installed to the previously installed wiring and the entire ICE system was tested - and everything is working as it should!
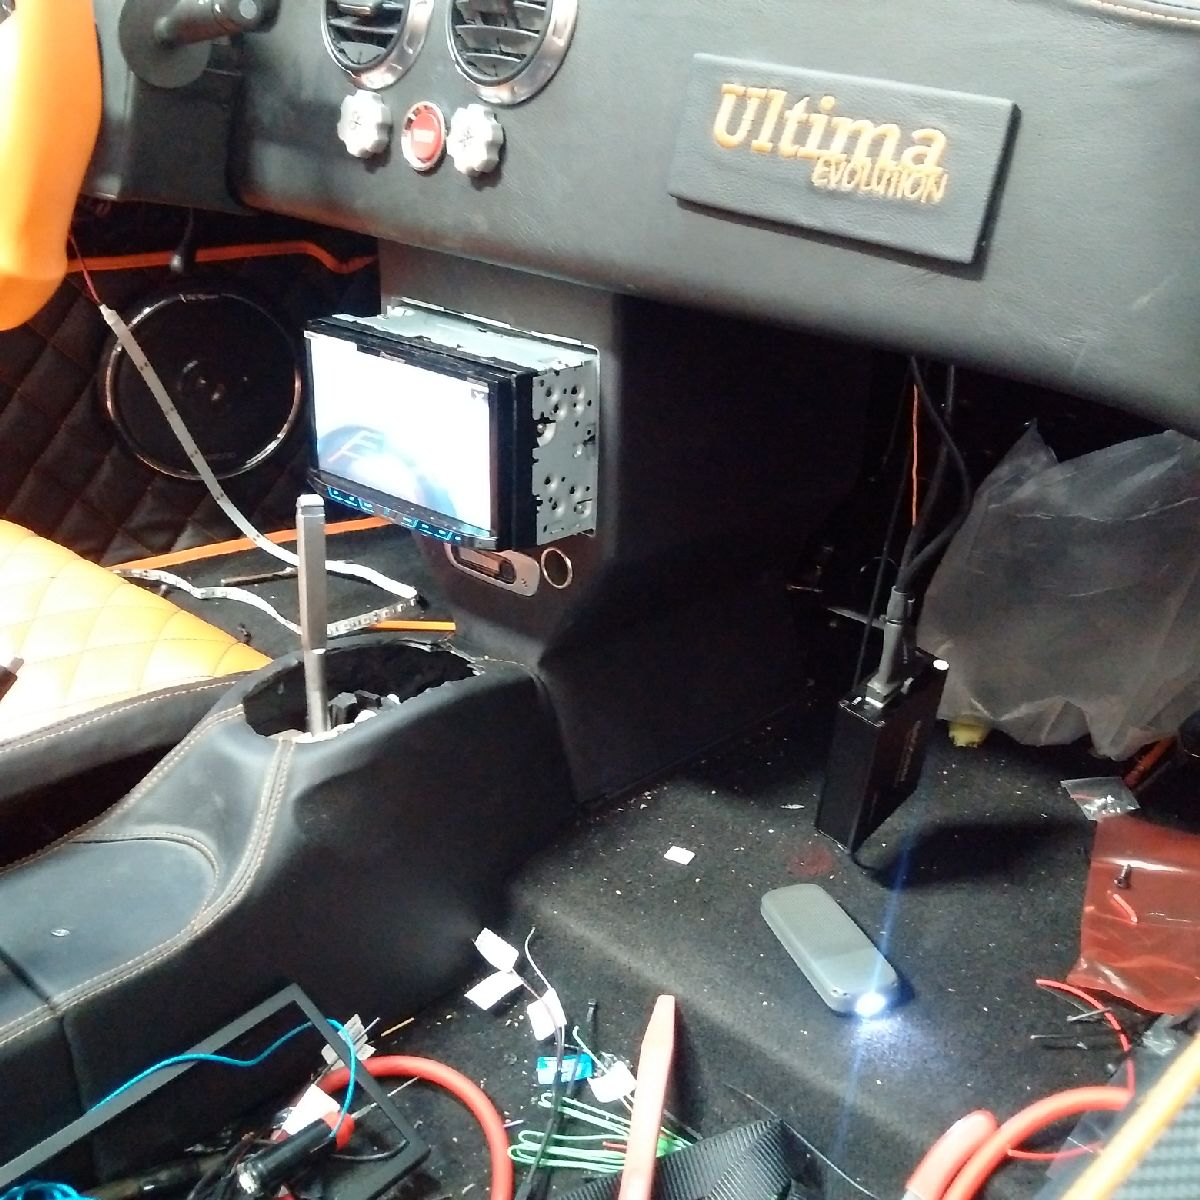

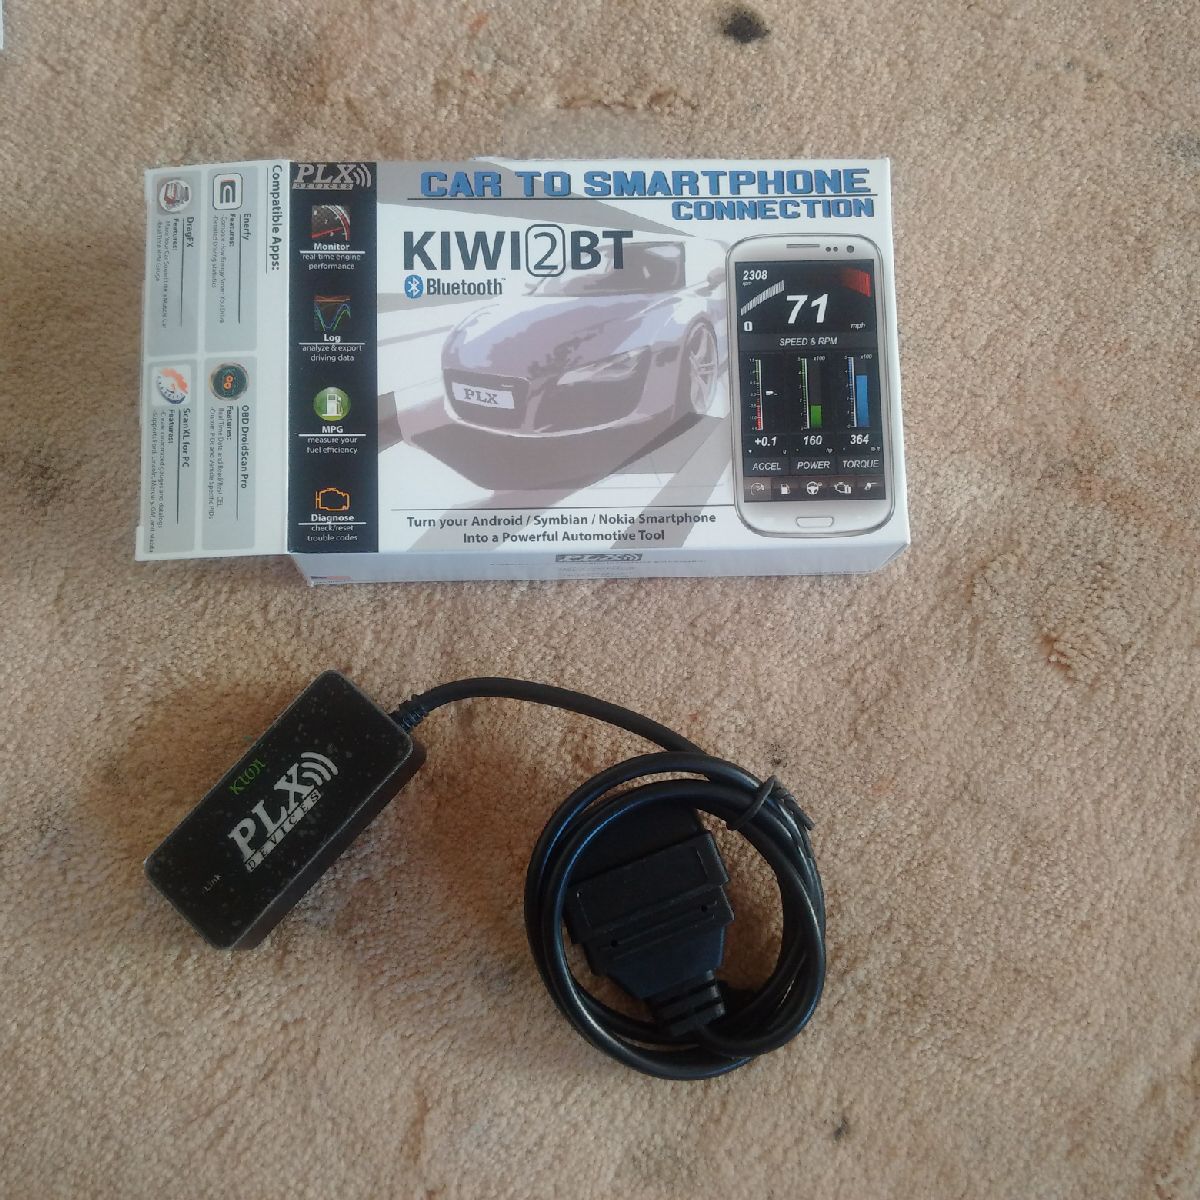
A Kiwi2BT unit was also installed on the LS ECU OBDII adapter so that I will now be able to read the ECU using an app on my phone, and that app will be mirrored to the radio unit using MirrorLink, so that way I will get (hopefully) all my ECU information to display on the screen while driving...
While the car was away at FOS, I was only able to finish up the prep work on the windsreen and front canopy - the front canopy was sprayed with plastidip around the rear of the headlight housings to make it waterproof. The front was marked with the glass primer so that no GRP will be visible from inside the light pods...
The front winscreen was cleaned off all the excess silicon adhesive - this process took a long time as the silicon was gradually removed using caulk remover, and then the windscreen was cleaned to a final finish...
The wind deflector was also final prepped with it being installed in its bracket...
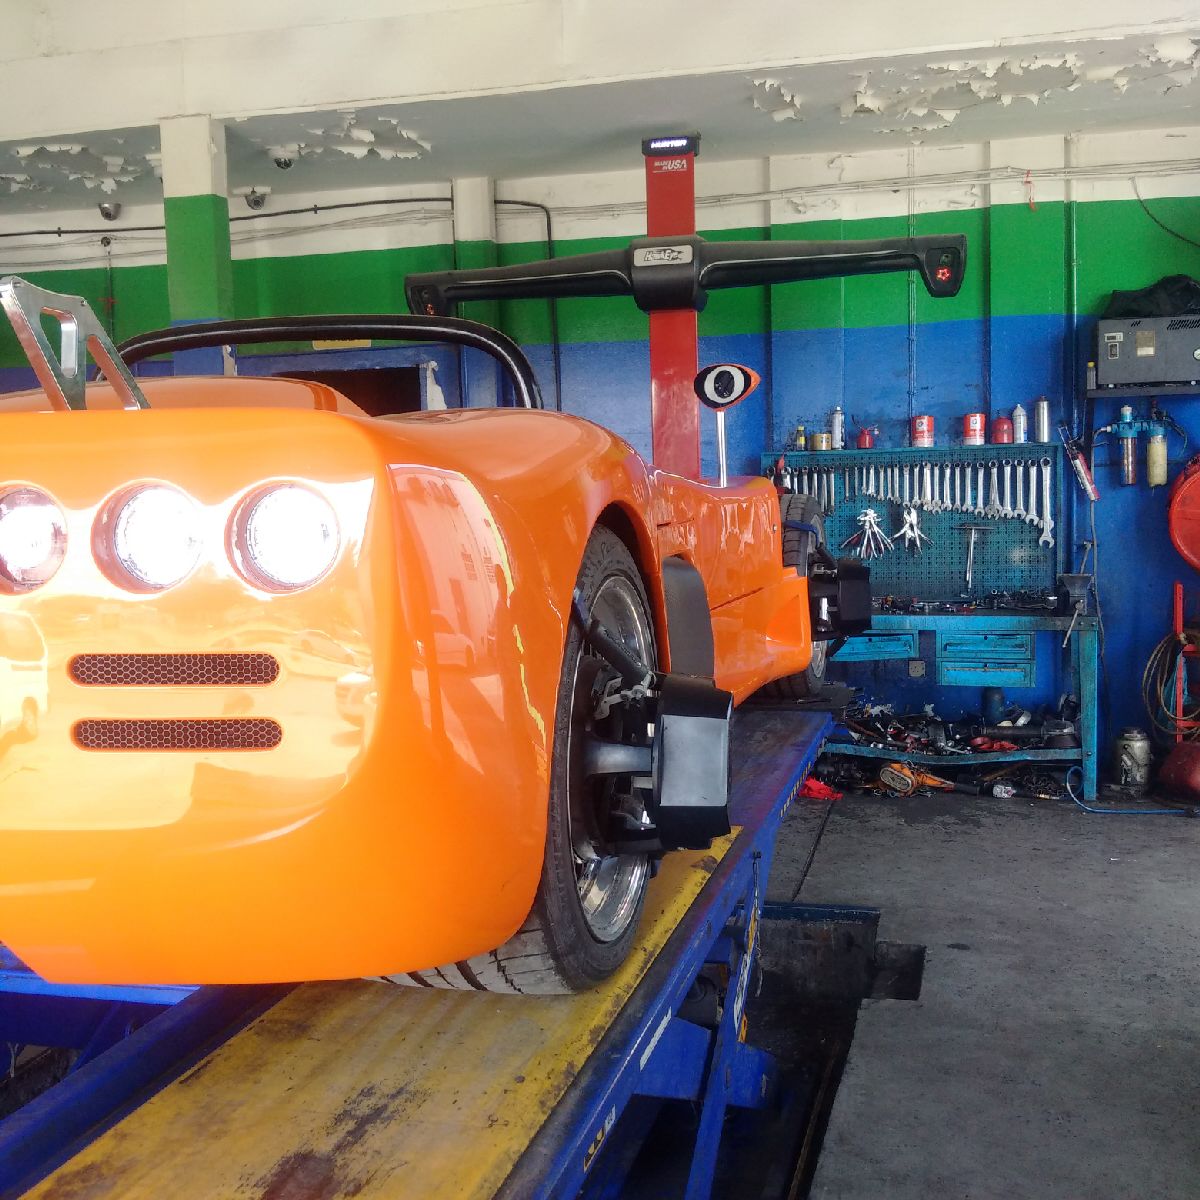
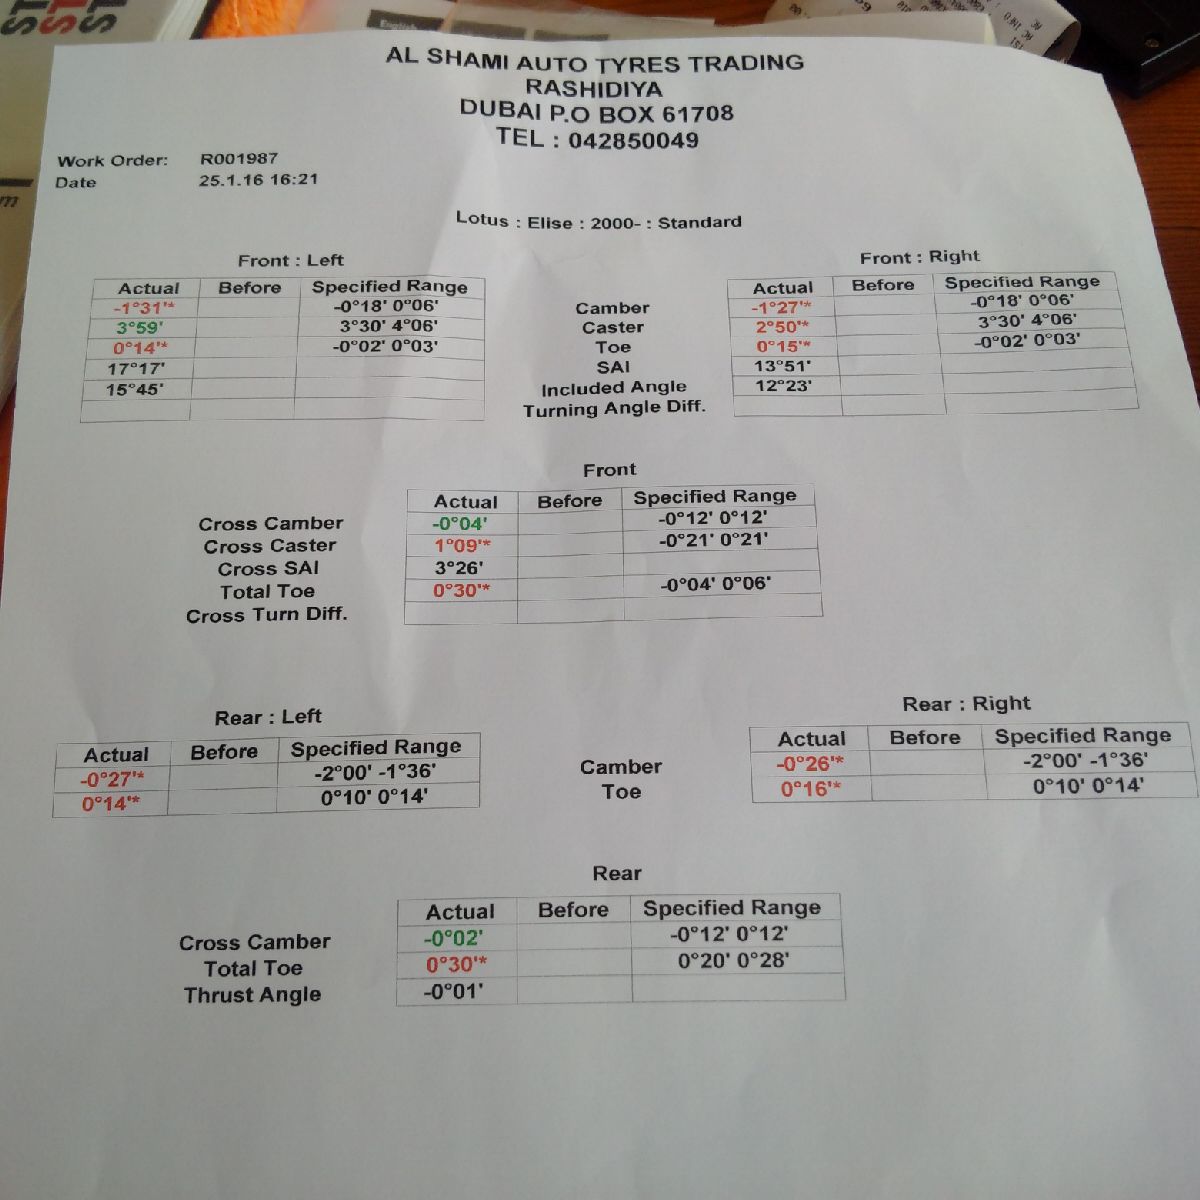
Finally, the car was returned to me today so I can now start on the final installation items - there was a detour on the way as the car was stopped to get a full precision laser alignment...
Jan 27-28, 2016
Build Time Today: 6 hours
Total Build Time: 459 hours
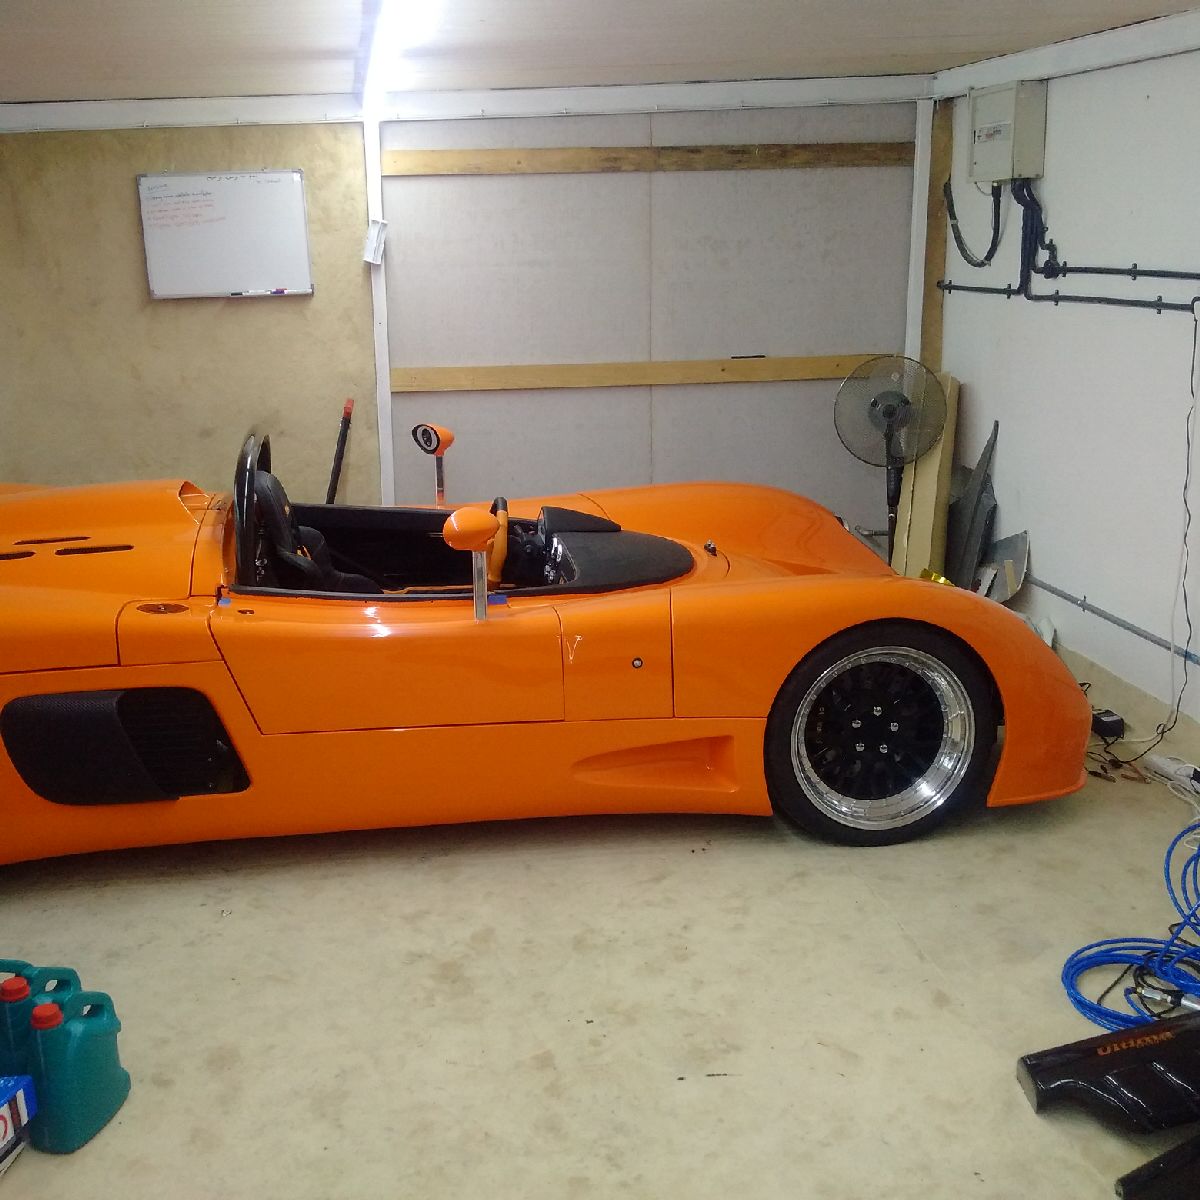
The build seems to be reaching its conclusion!
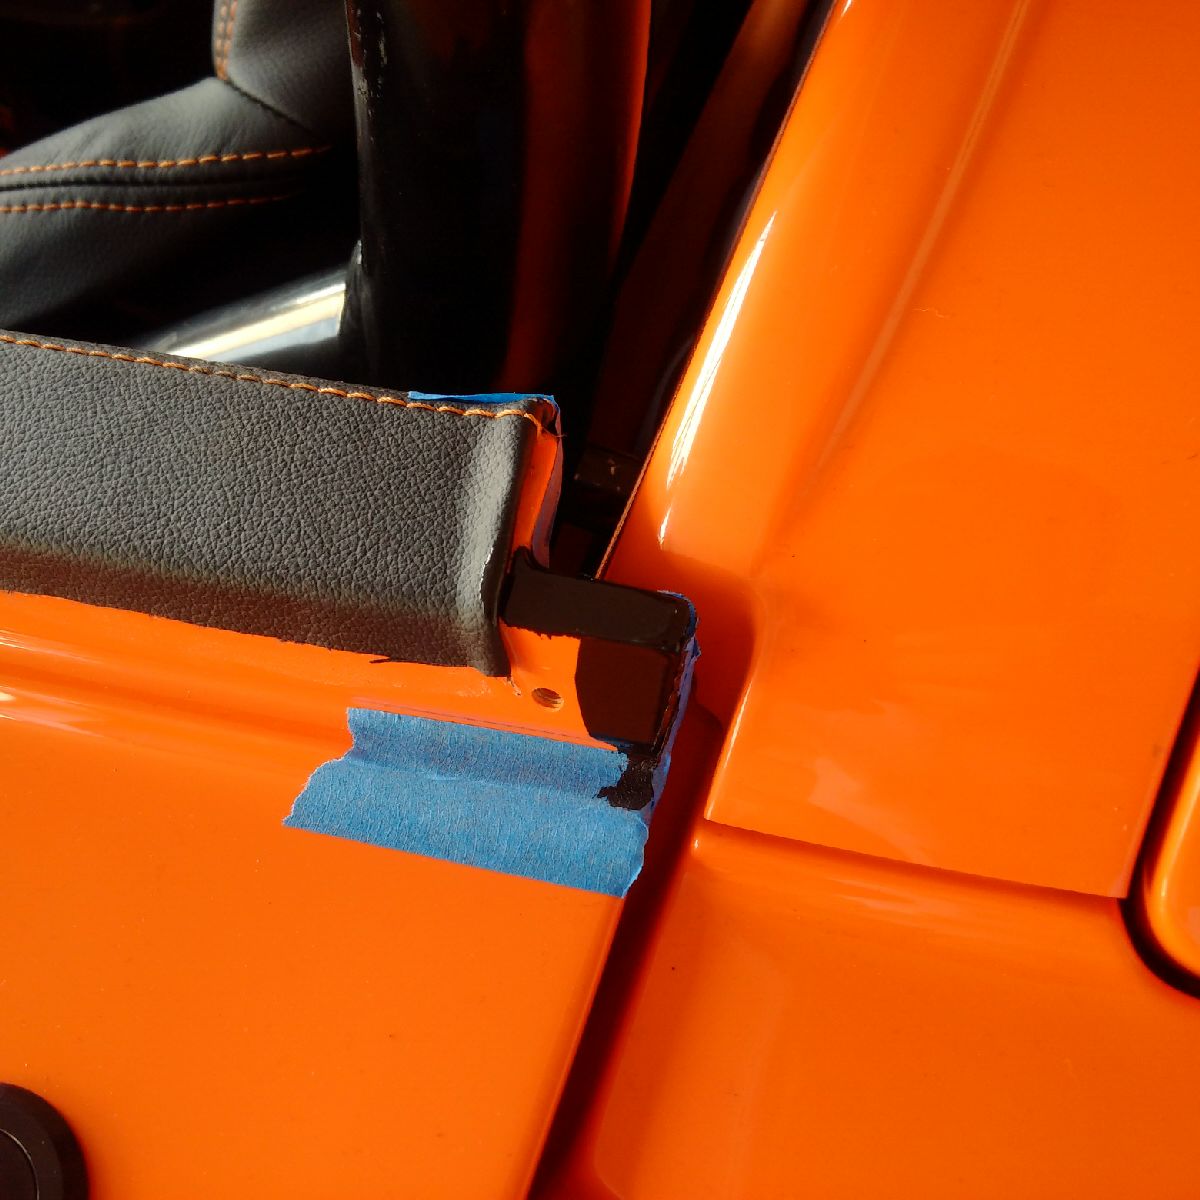
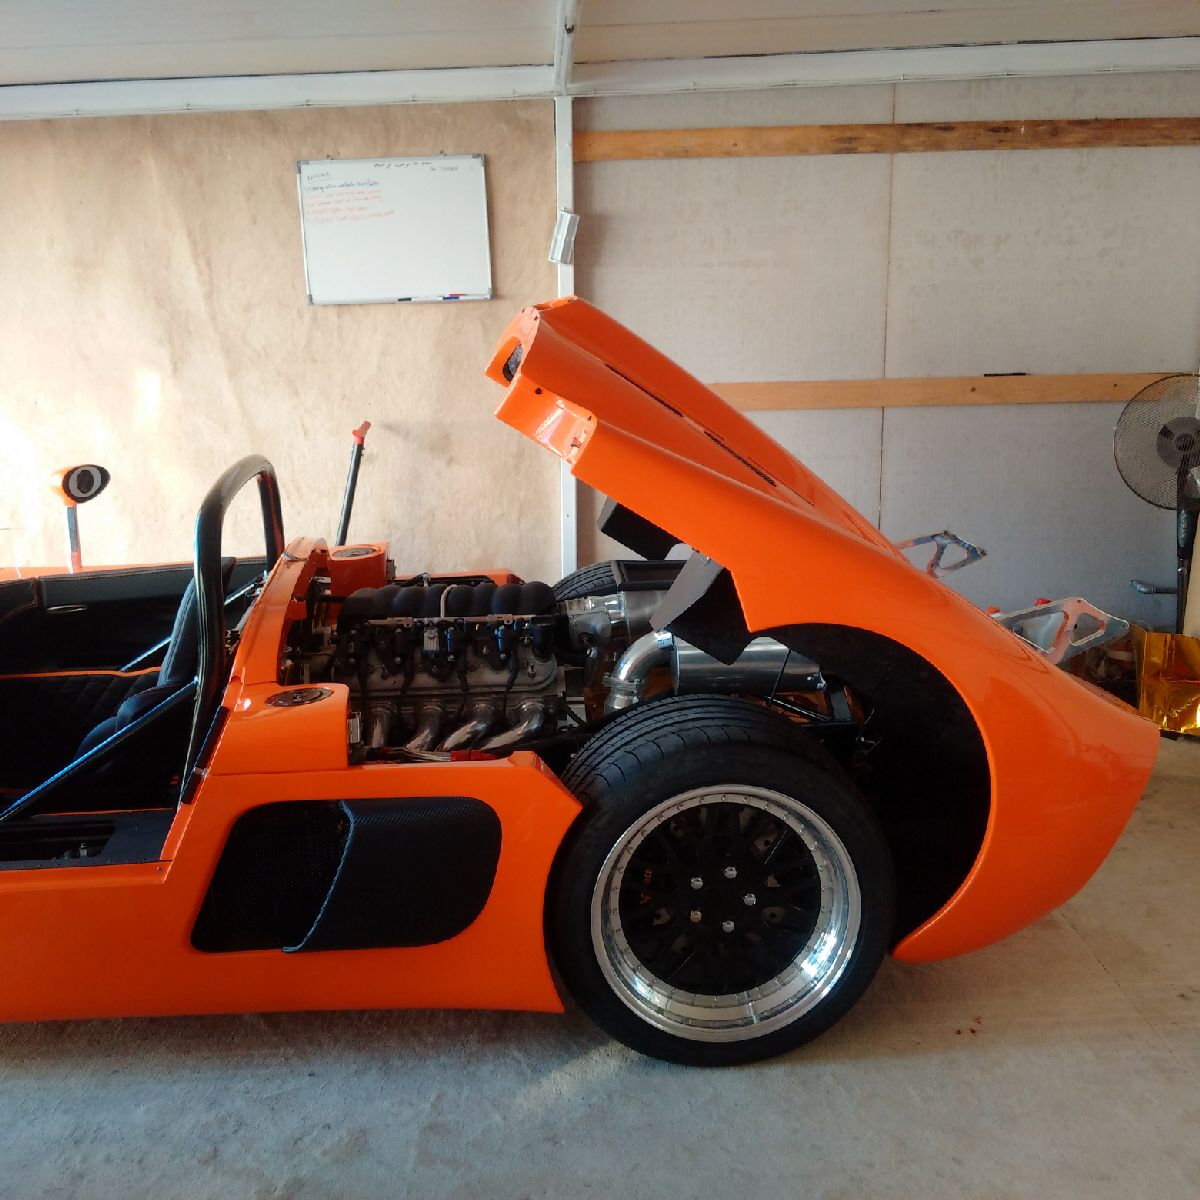
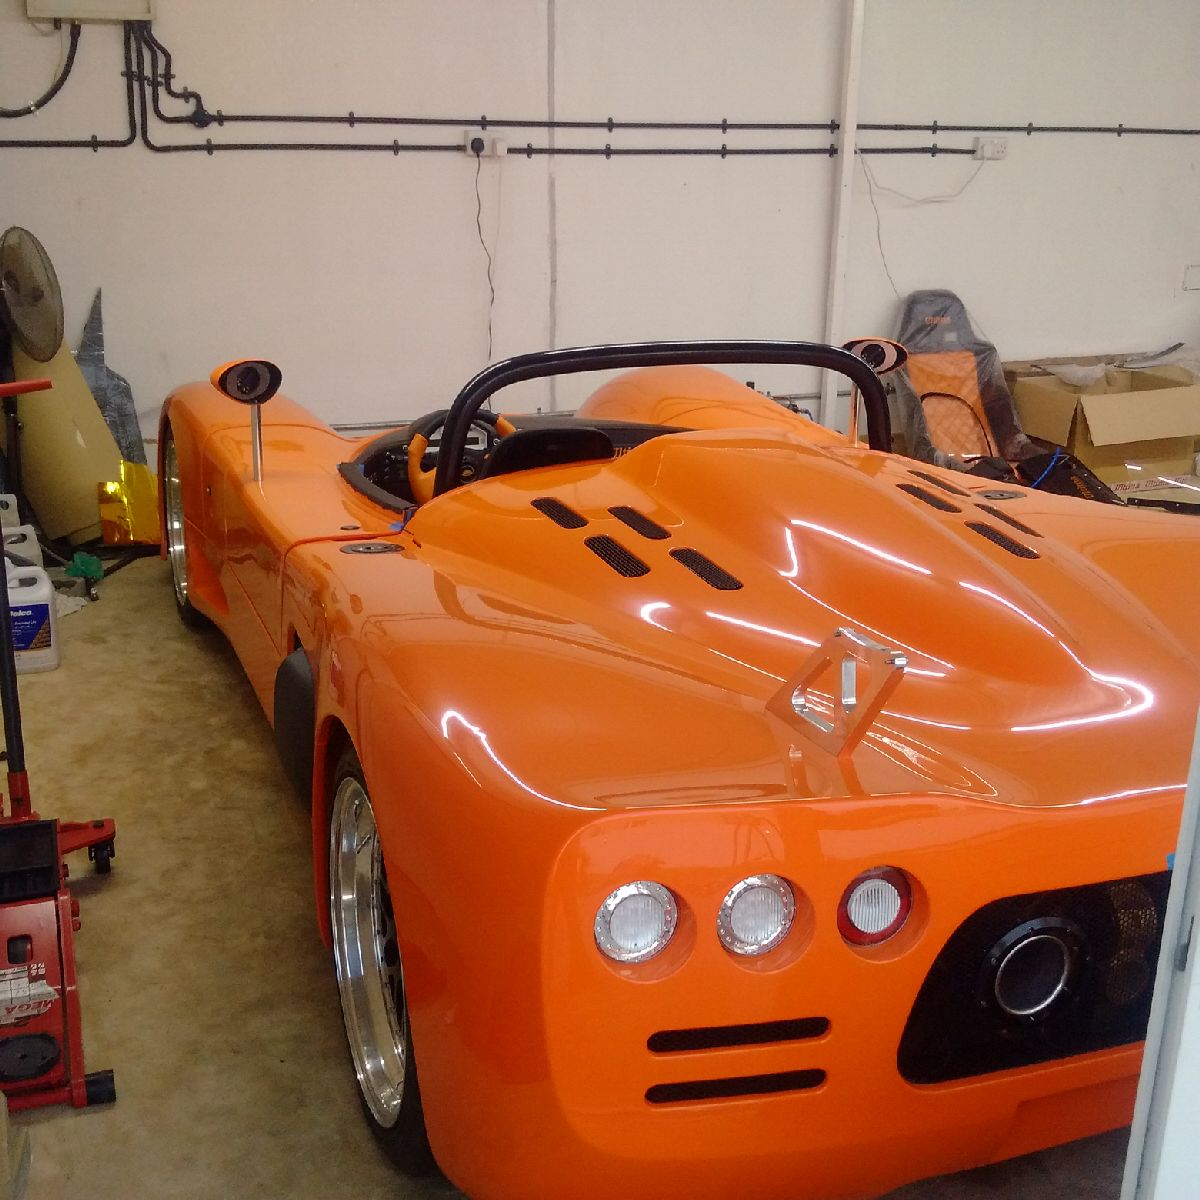
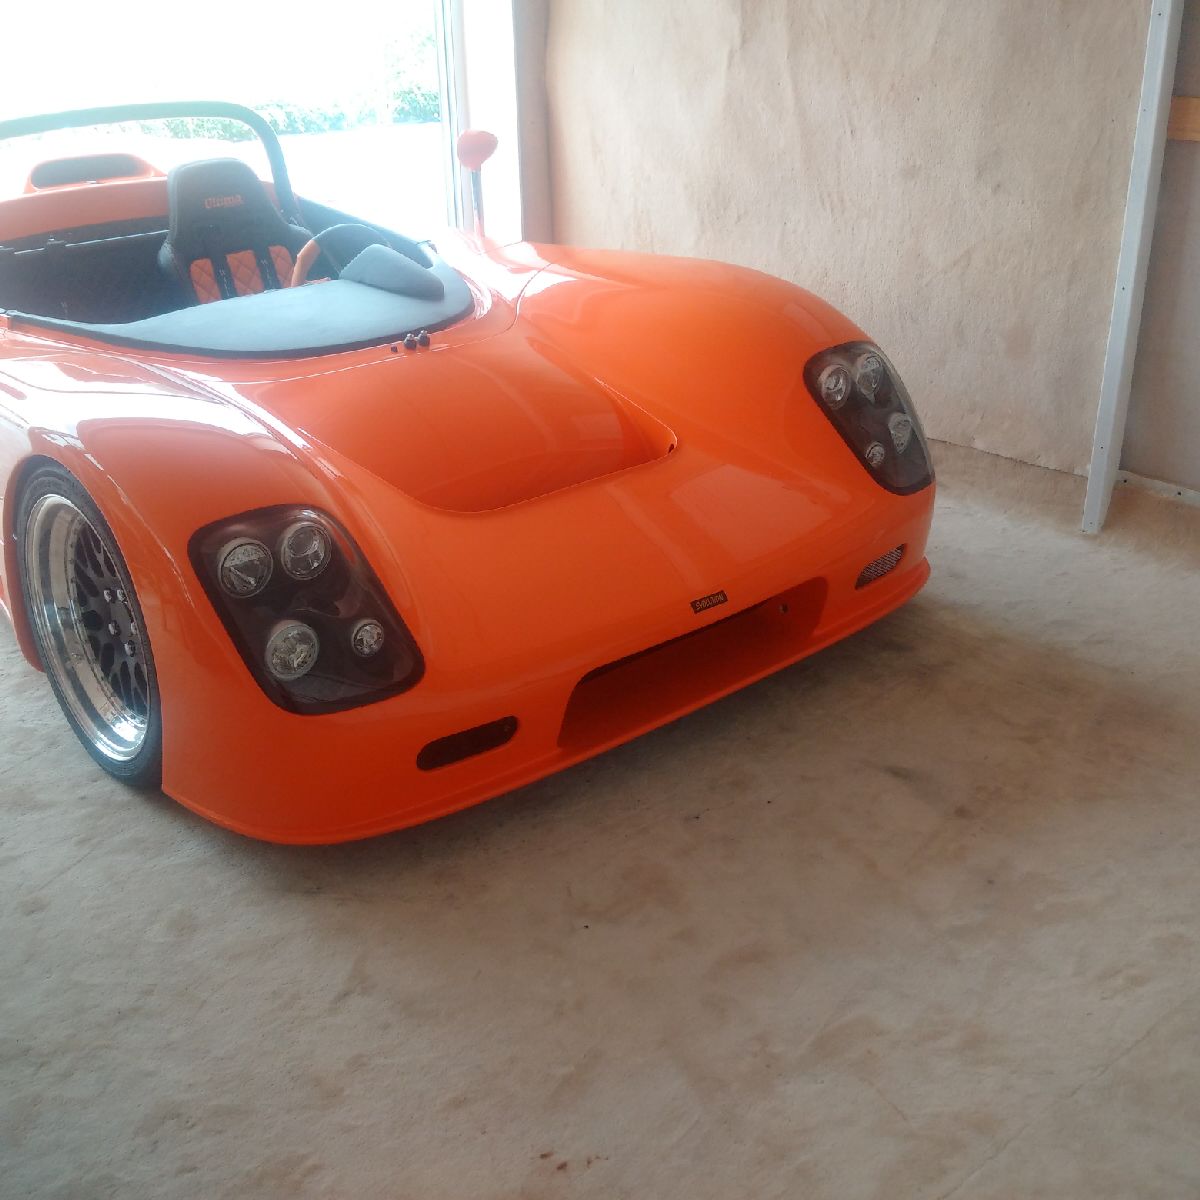
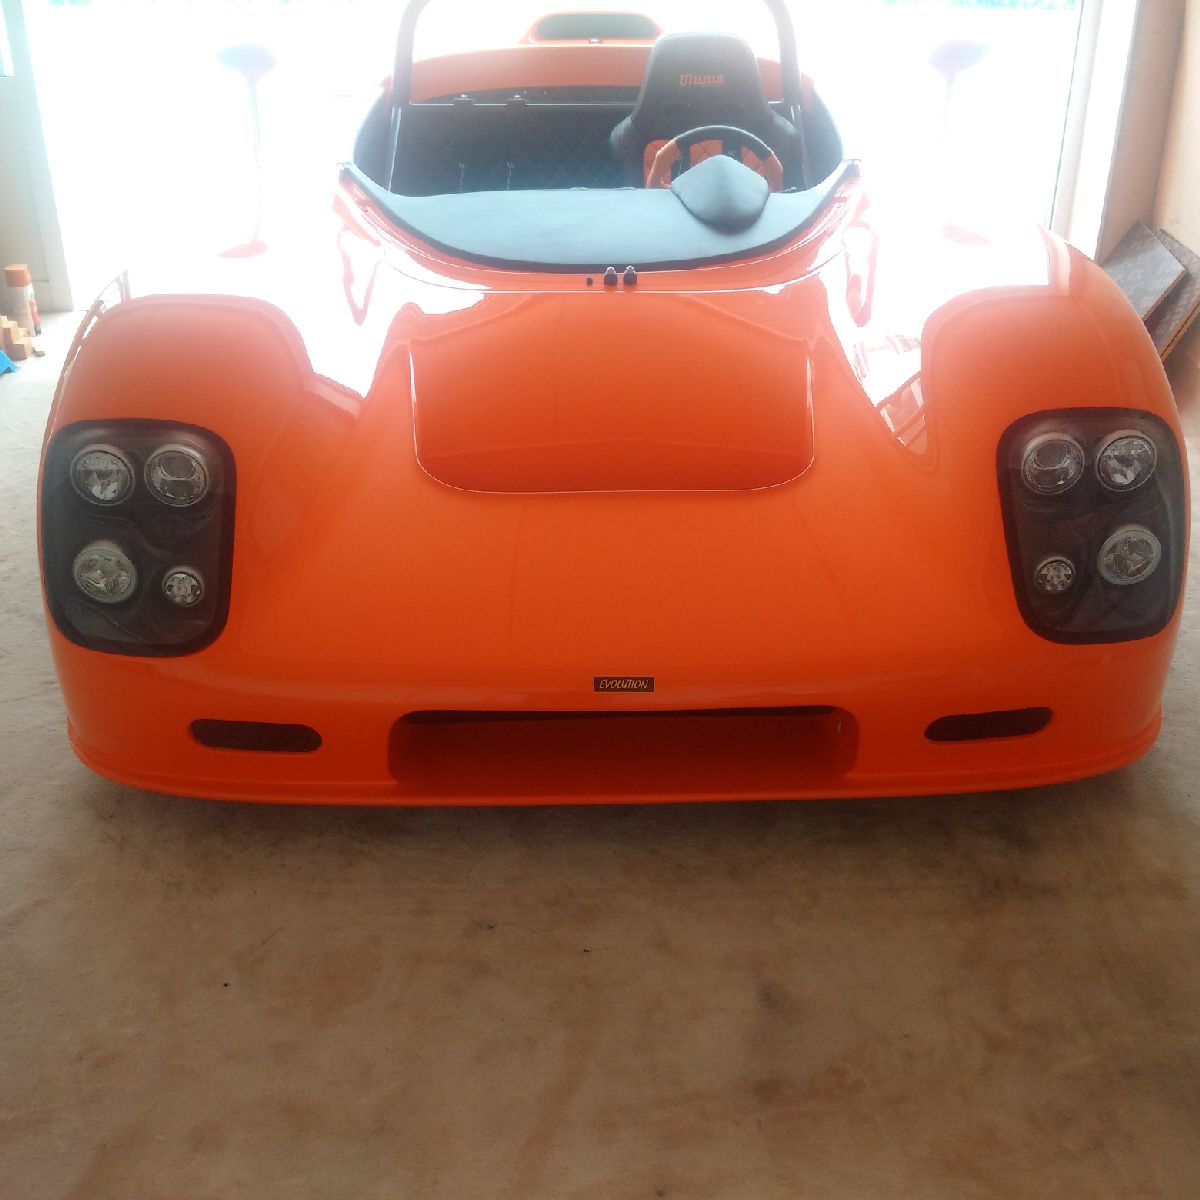
First item for today - getting the front clip installed. The clip was lined up, and bolted on to the rose joints. The latches would not fit correctly, probably because of slight movement from the pre-fit - so I had to slot the catcher (for the latch) on the canopy side to get it to move a little inward and down, and then the clip was able to lock into the latch. The front wiring harness was connected, and the lights were tested - and they work!! My experiment in converting the GTR/CanAM loom for the EVO style lights has worked perfectly!
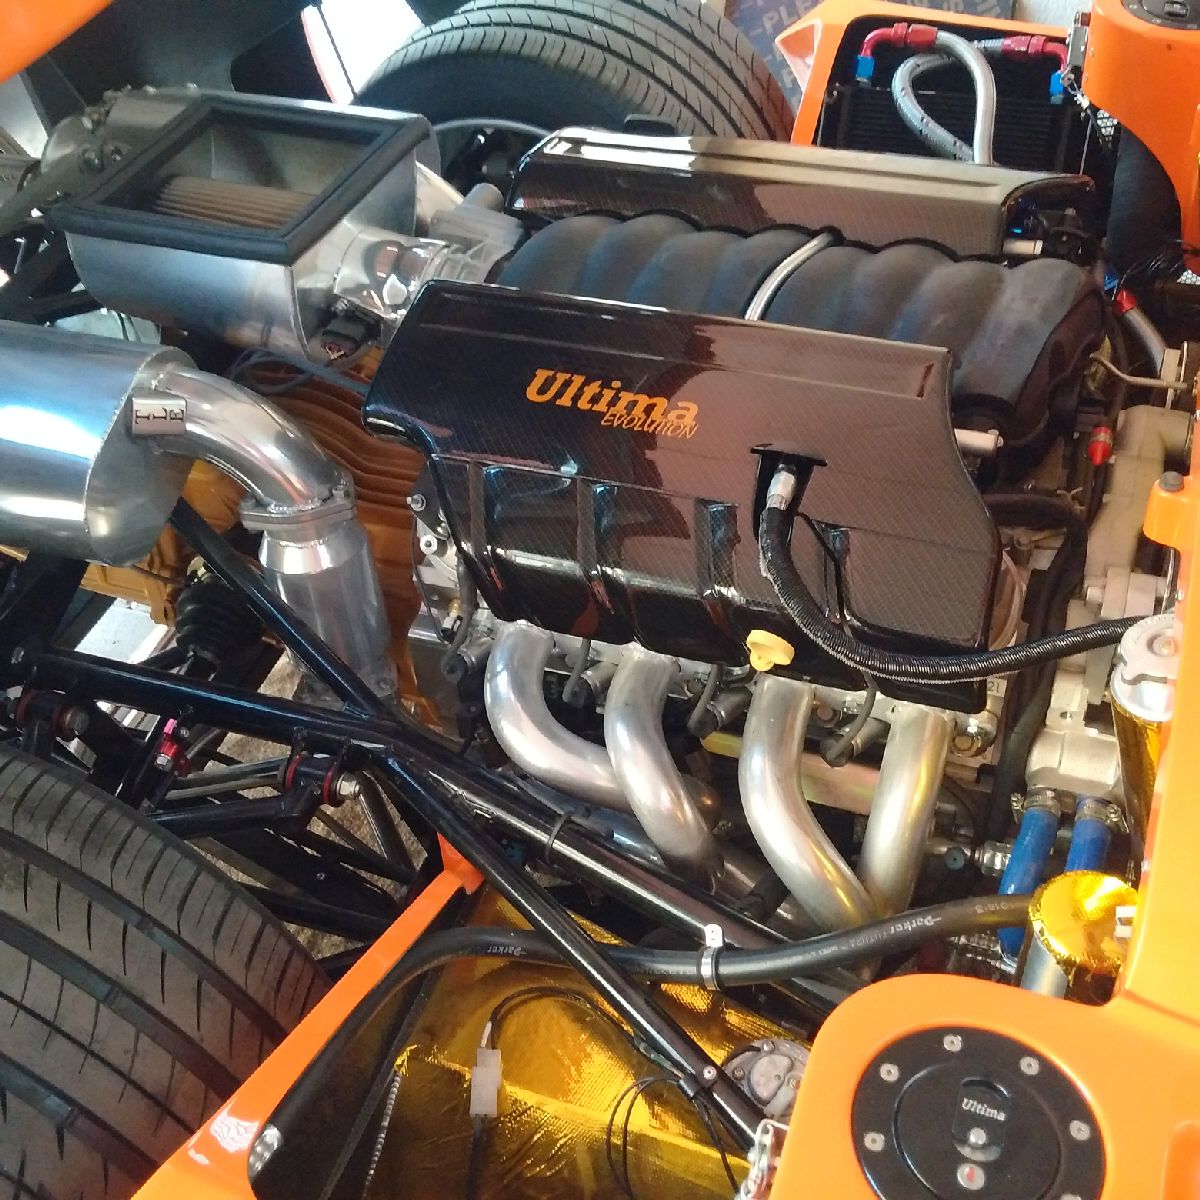
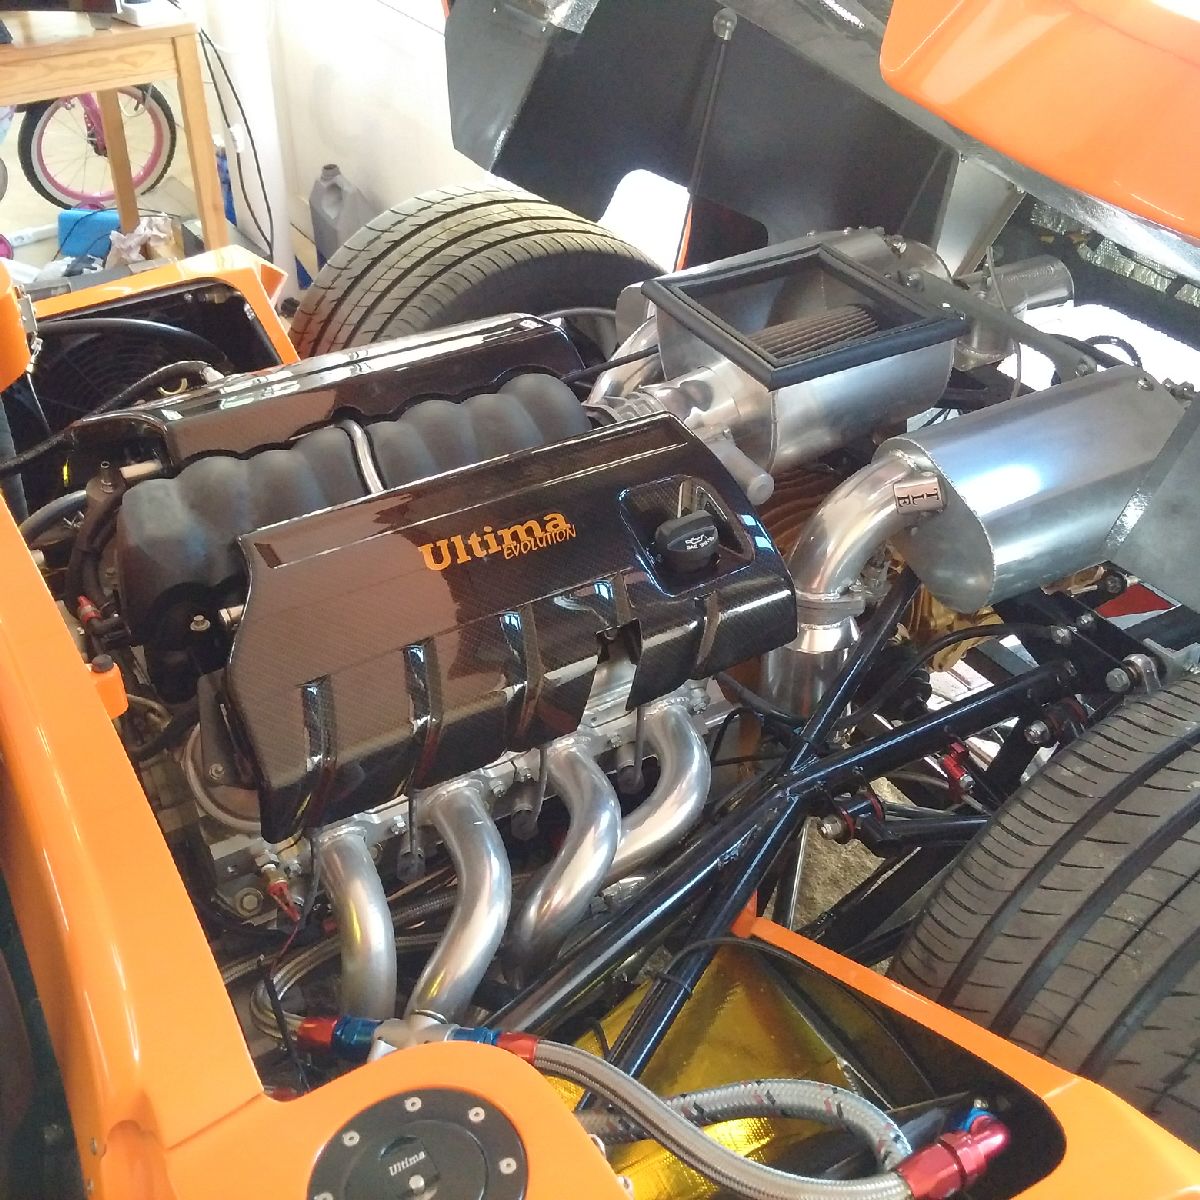
I spent some time tightening the silicon hoses and exhaust manifolds, as the former has shown leaks in several joints when the car got to temperature at the laser alignment shop... The exhaust manifolds were tightened due to the heat cycles being put through it... I also installed the CF engine covers, which look amazing on the engine!
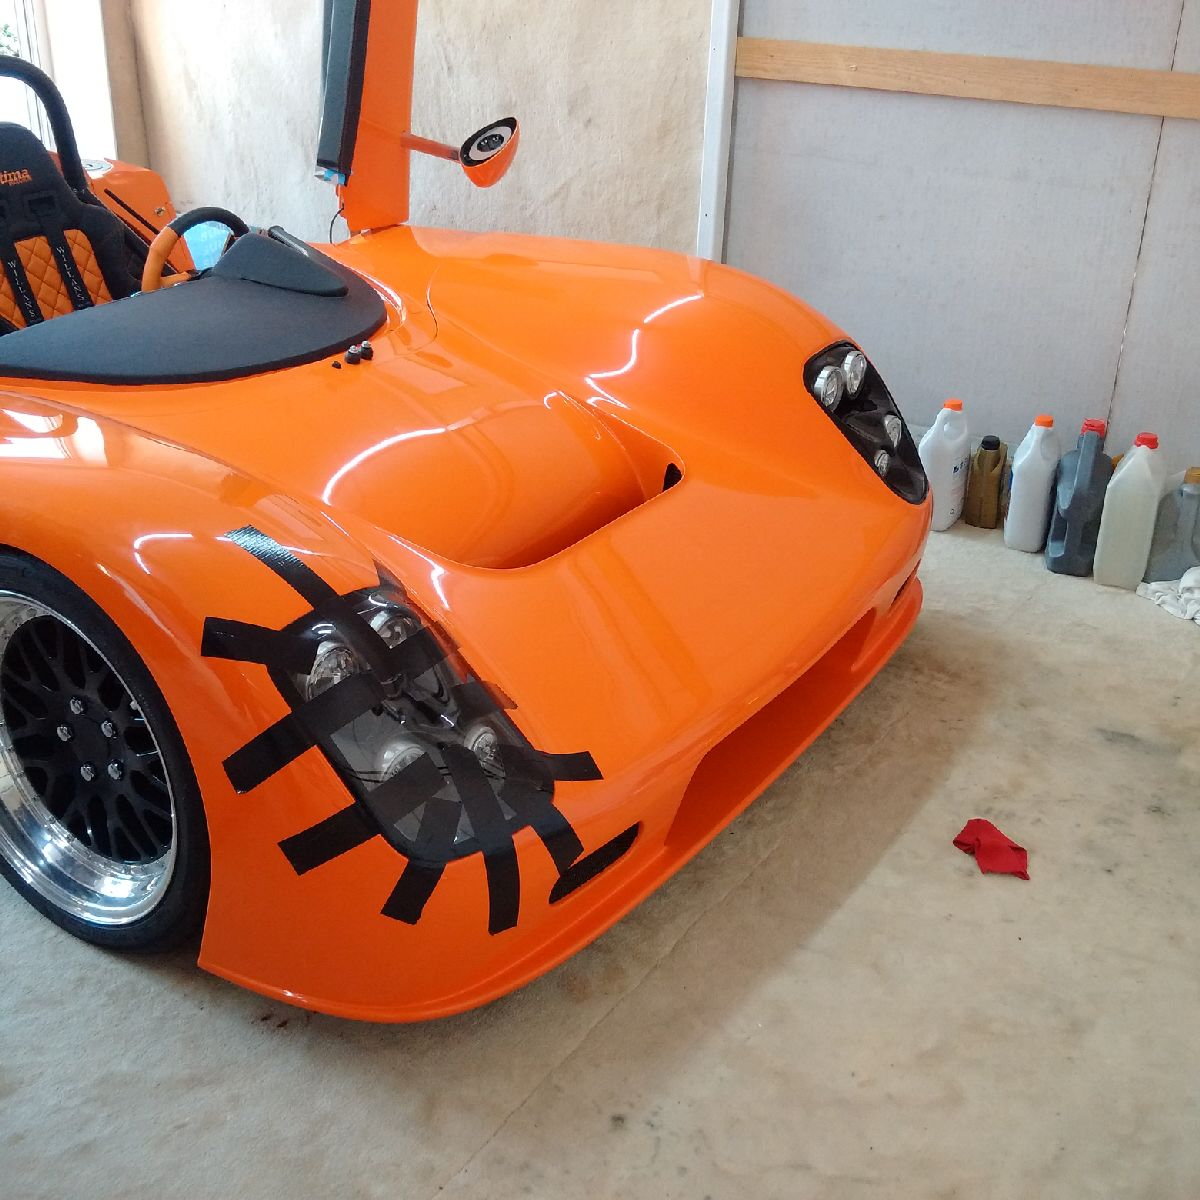
Final item installed are the front light perspex covers - the light pods were lined with sikaflex, and the covers placed on top and tied down with duct tape. Once the sikaflex had set, the duck tape was removed - I may still need to put a bead of sikaflex to get an even finish, but I will let it first dry completely before touching it again...


Jan 29, 2016
Build Time Today: 1 hours
Total Build Time: 460 hours
Just a quick stop in the garage today got a few more items ticked off:
The 'Ultima' badging was put on the car - the front, sides and rear now proudly display the Ultima name and the Union Jack!
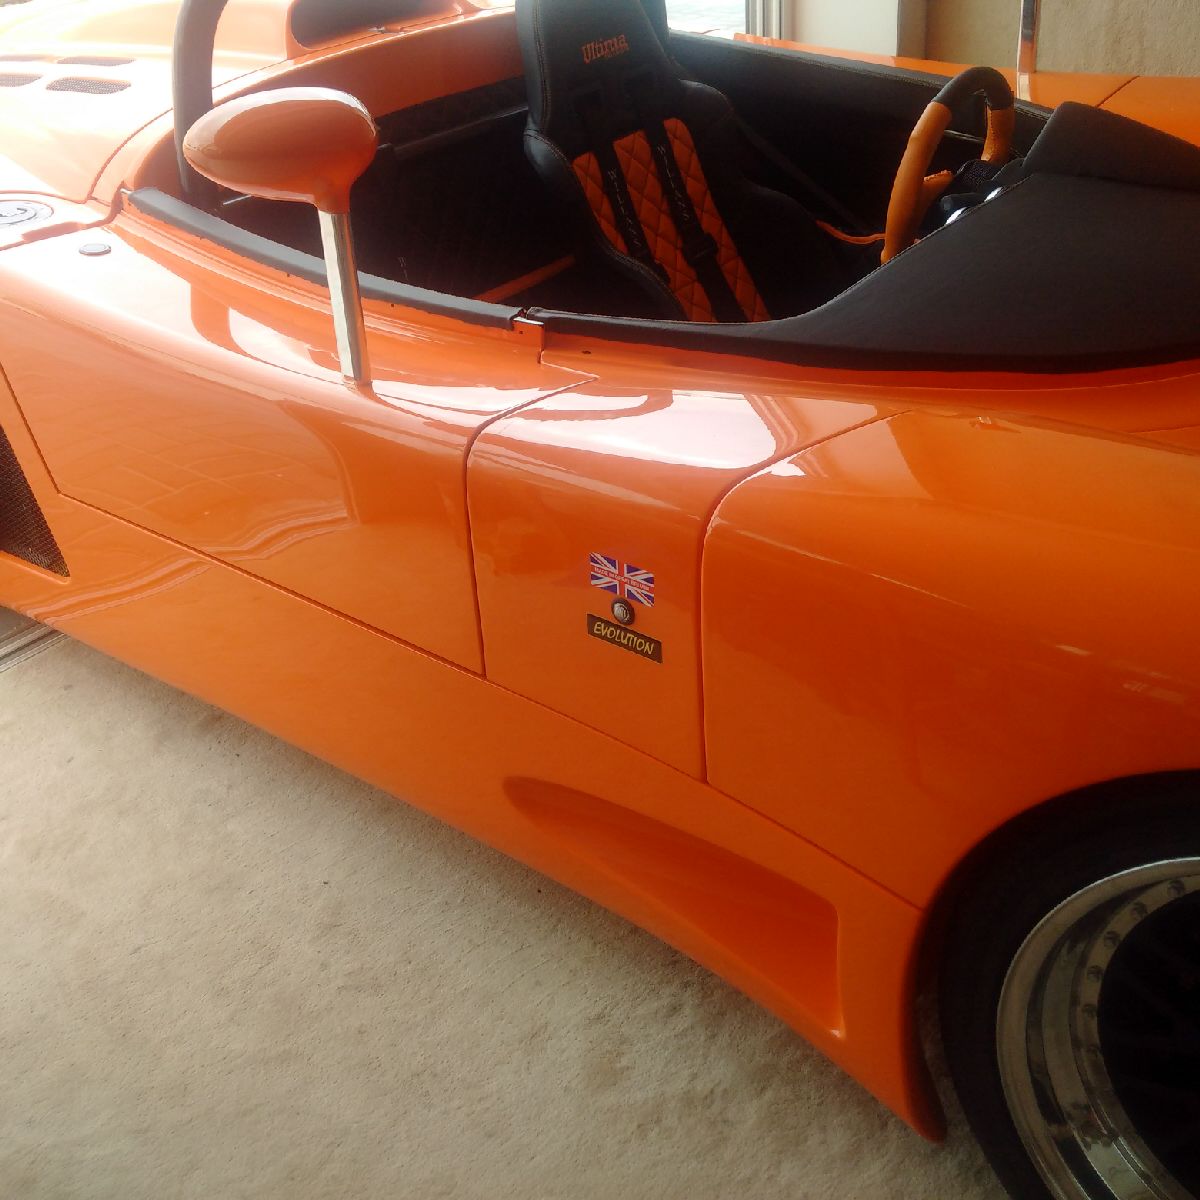
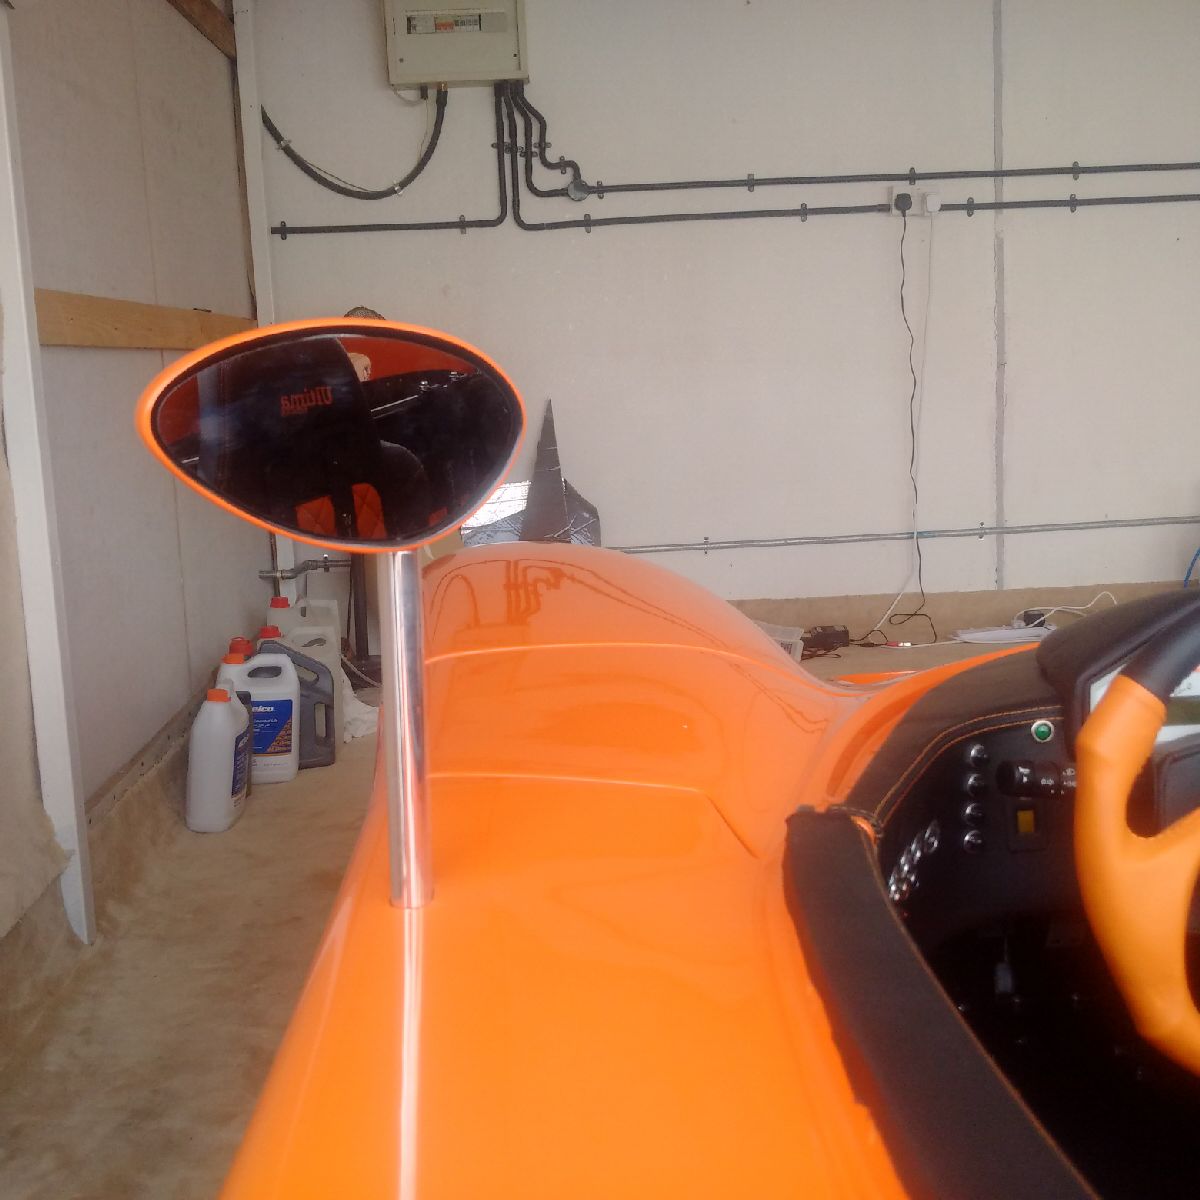
The side view mirrors were installed in the housing...
The foam for the front canopy edges was installed using sikaflex and left to cure...
Once again, I will be travelling the next few days and unable to finish the last few steps required to get the car ready... hopefully more next week