Nov 1, 2015
Build Time Today: 3 hours
Total Build Time: 320 hours
The brakes were final bled, and the clutch was given its first round of bleeding.
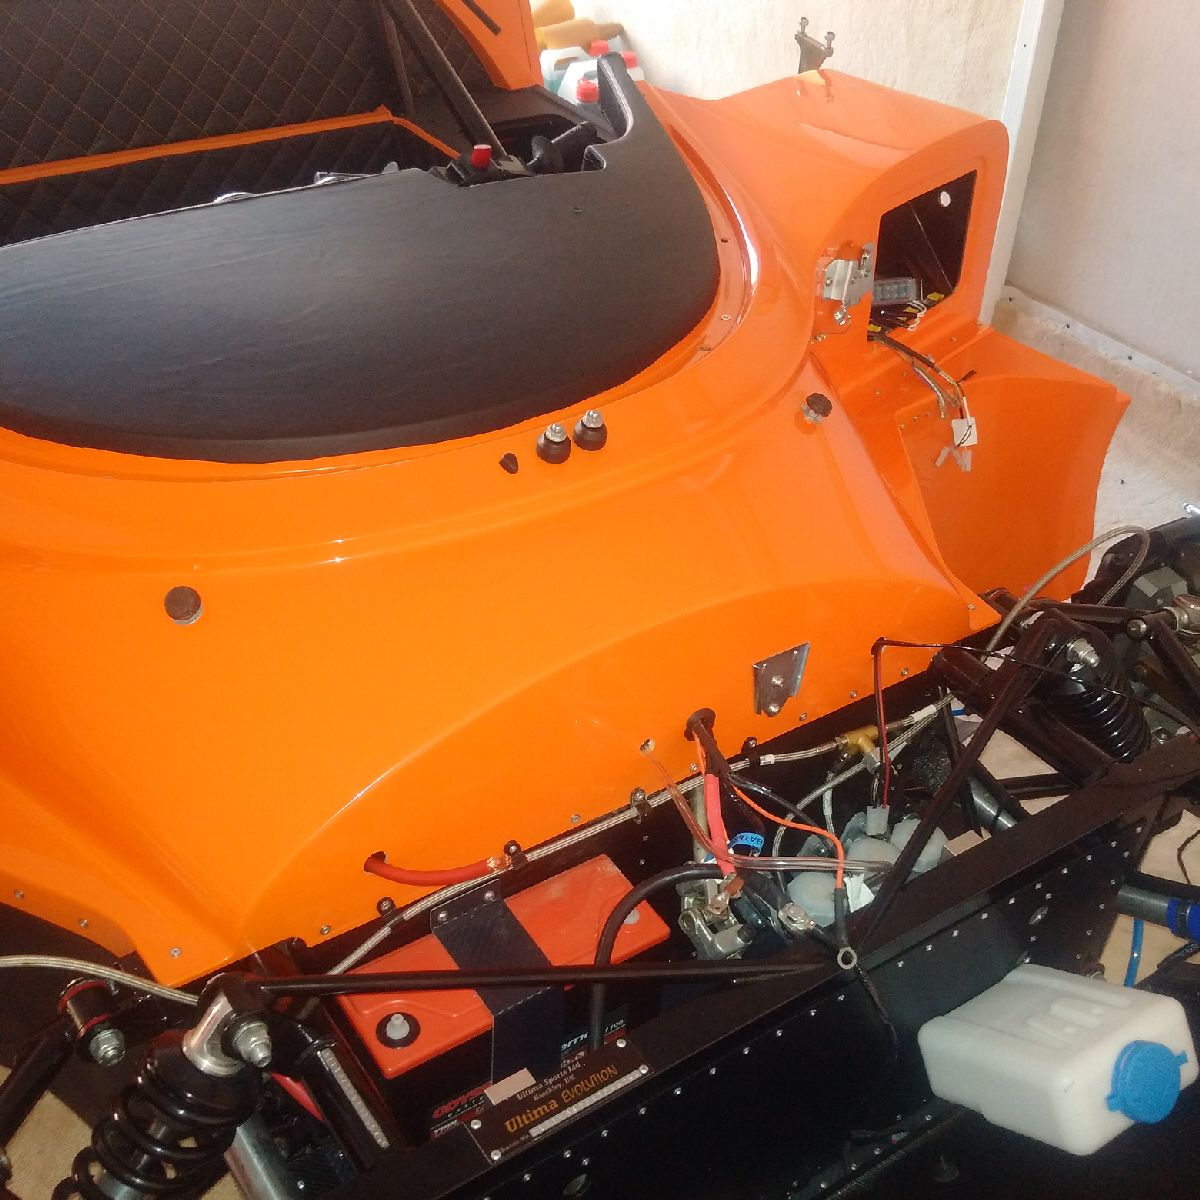
The engine loom was routed across the engine, and all connectors except the O2 sensors, speedo and brake connections were connected.
The passenger side radiator pipe was connected to the lower side of the engine.
Nov 2, 2015
Build Time Today: 4 hours
Total Build Time: 324 hours
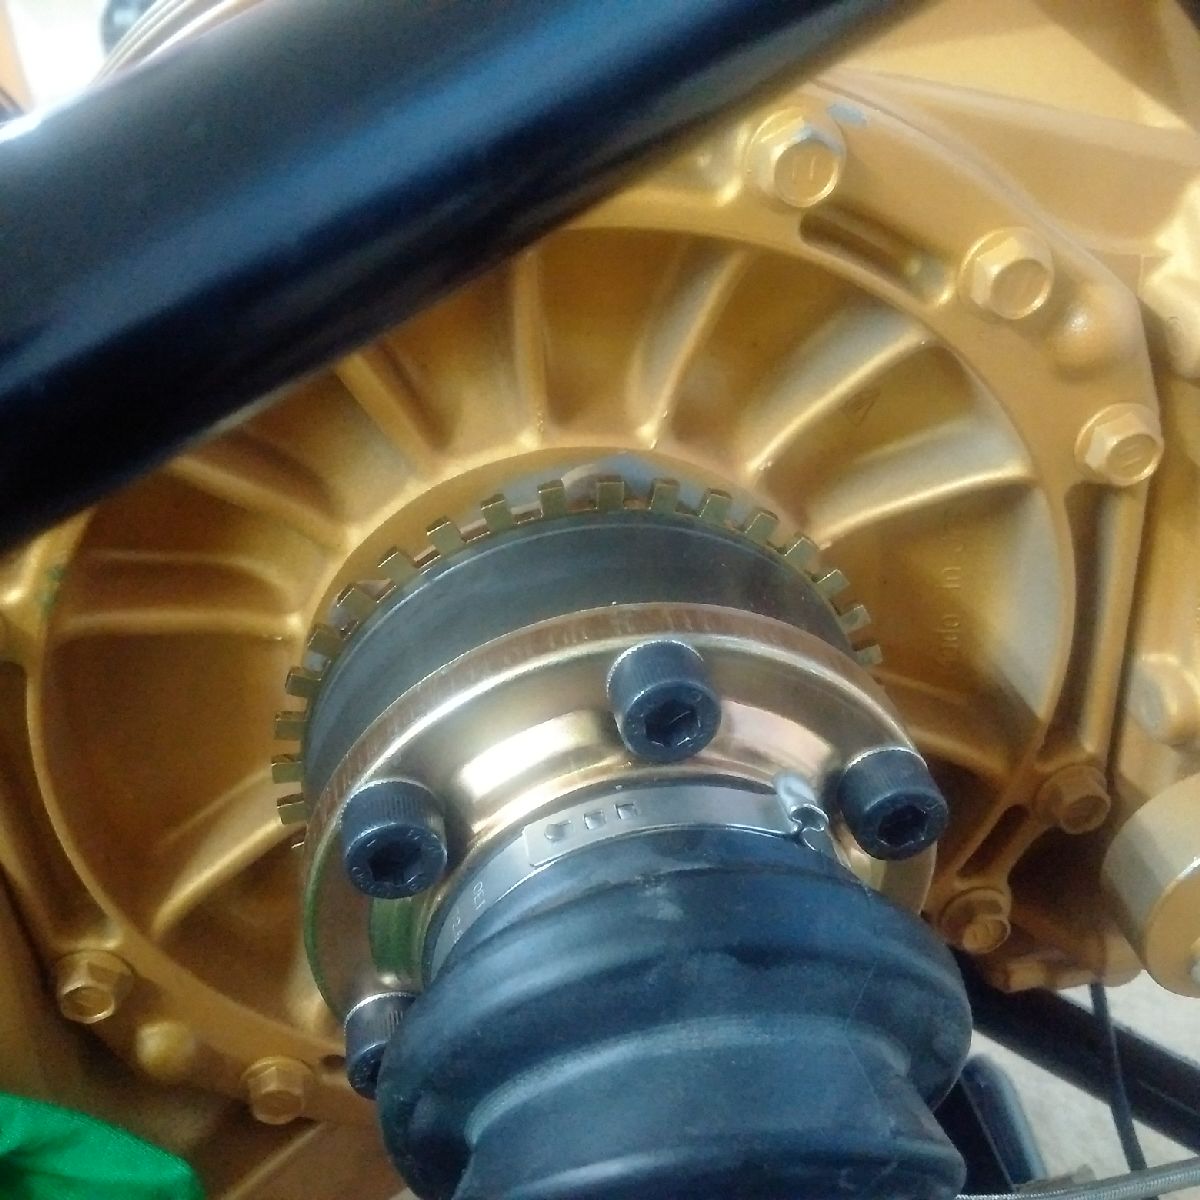
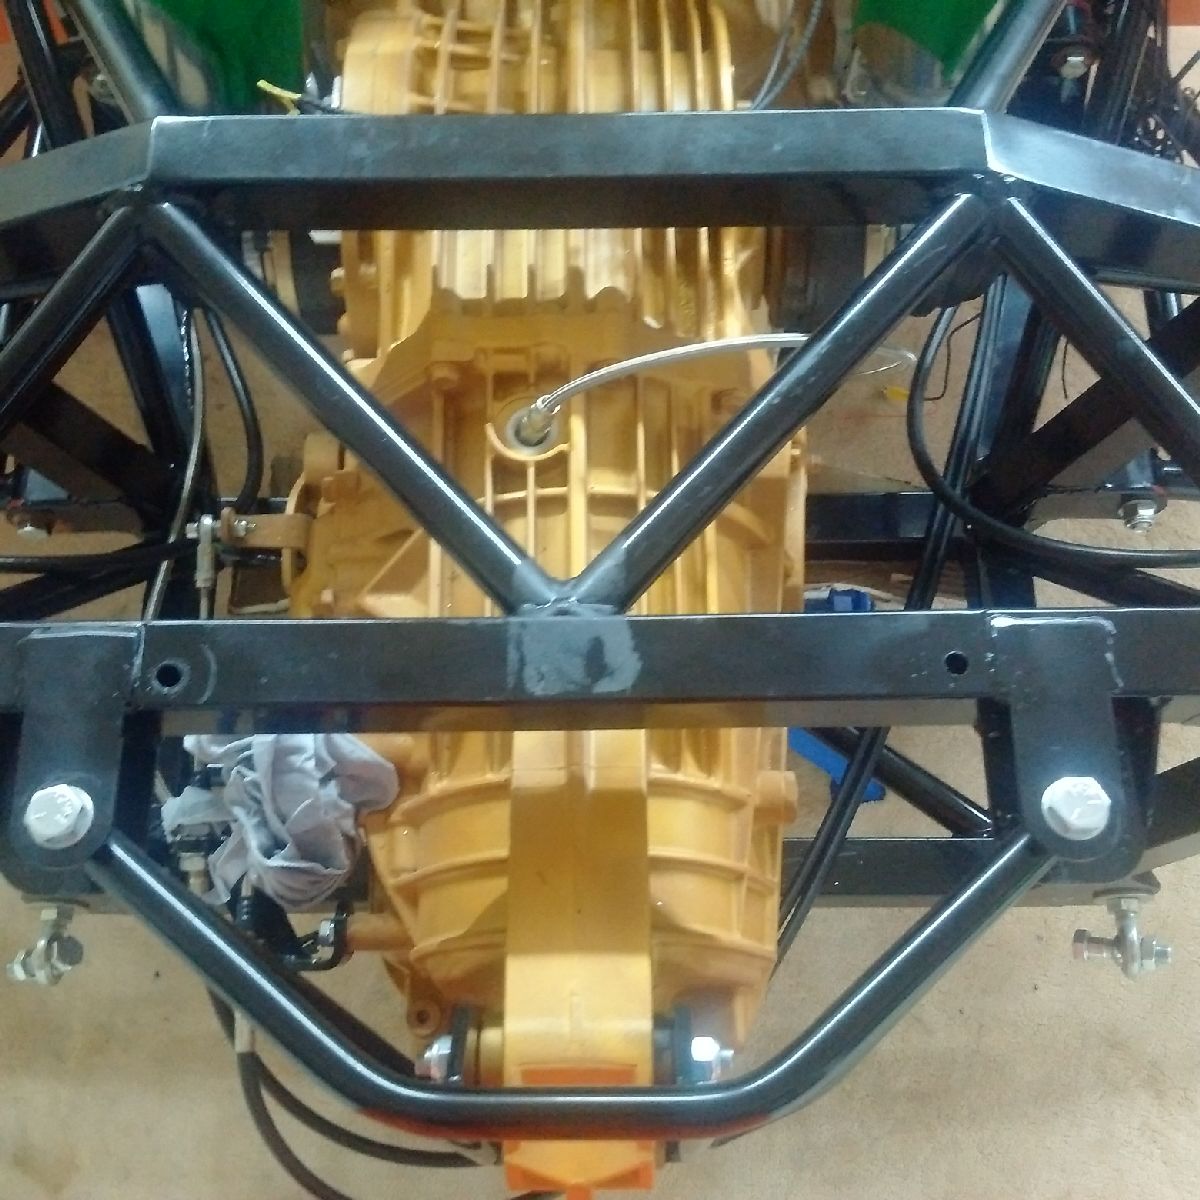
The clutch was final bled and is now (hopefully) ready for use. With the clutch ready, I proceeded to install the driveshafts. Each side was first given a small coating of blue loctite to act as a sealant (prevent grease from coming out of joint), and then each flange was attached to the gearbox/hub with bolts using red loctite. The bolts were torqued to specs, and the process repeated on the other side. The speedo-sensor wheel was also attached on the driver side driveshaft between the shaft and the gearbox flange.
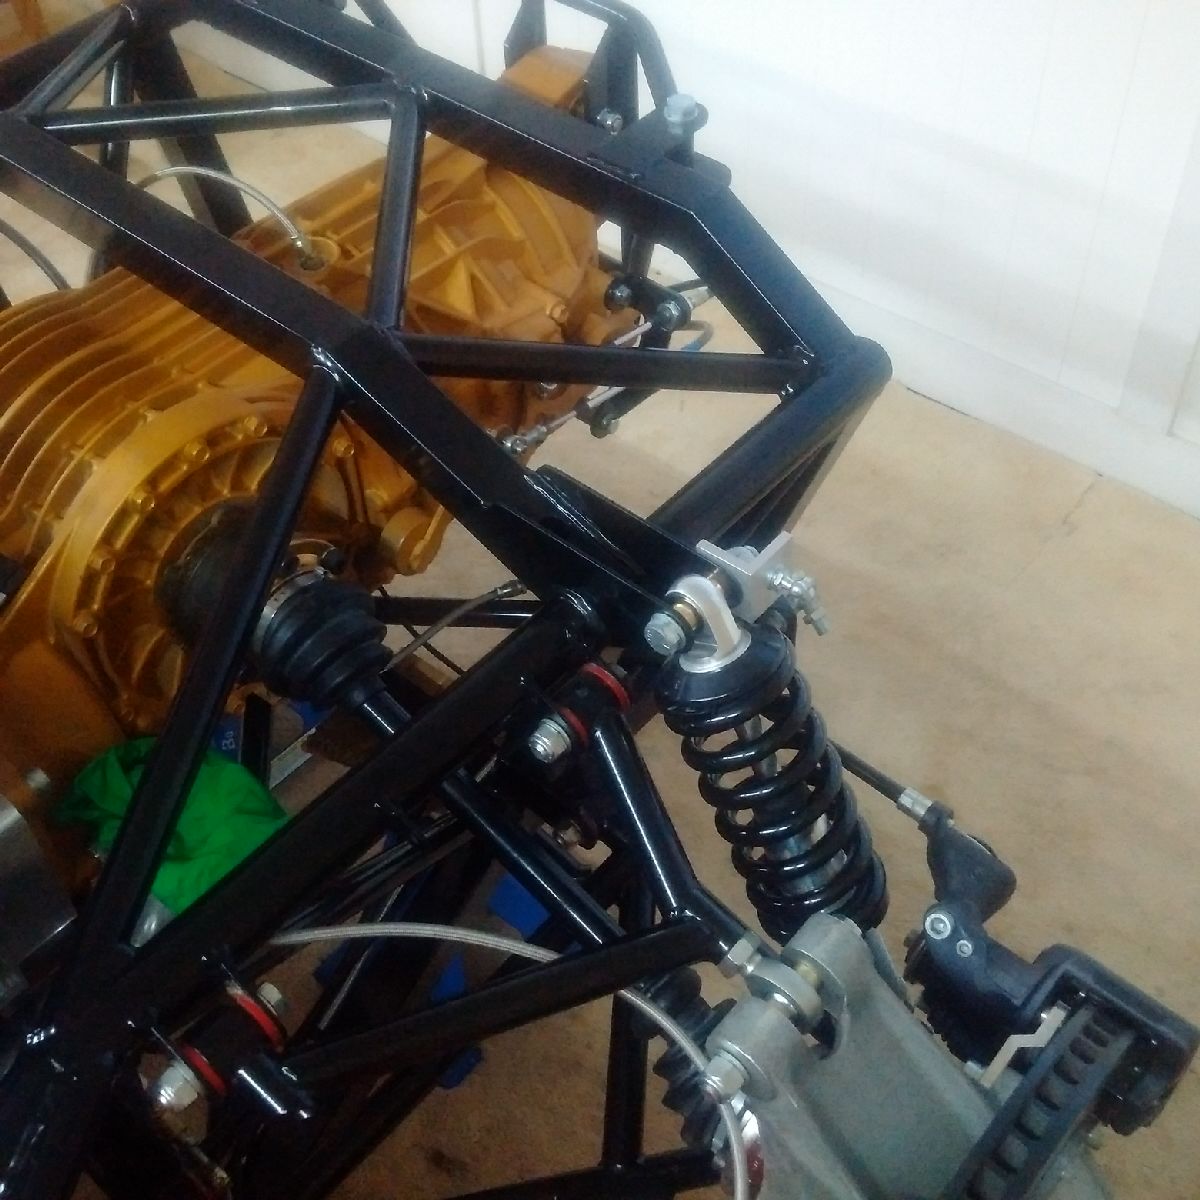
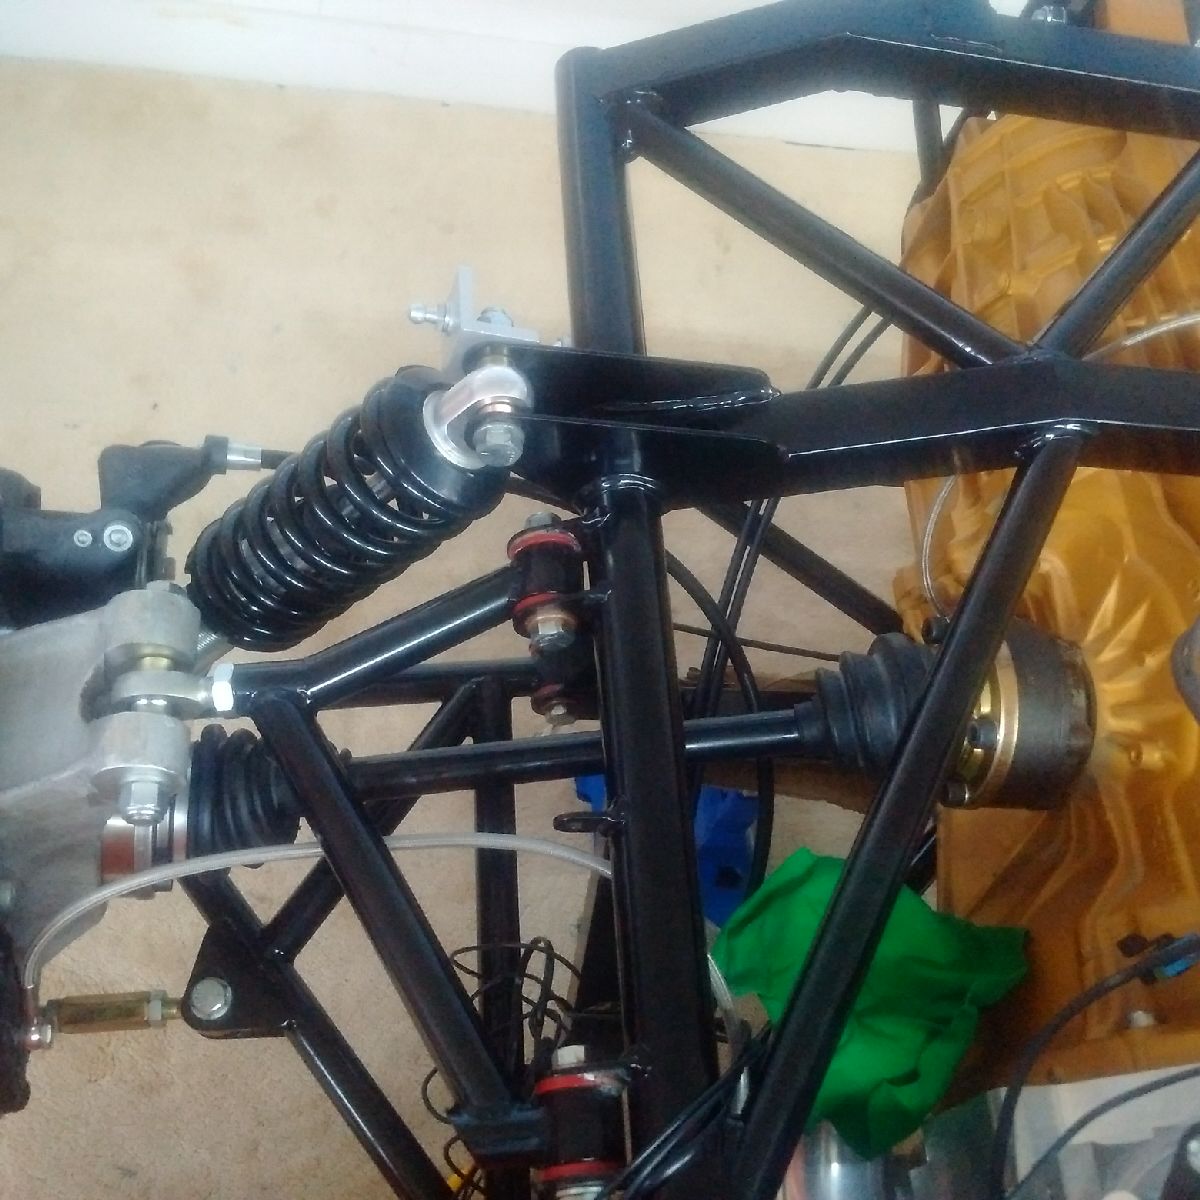
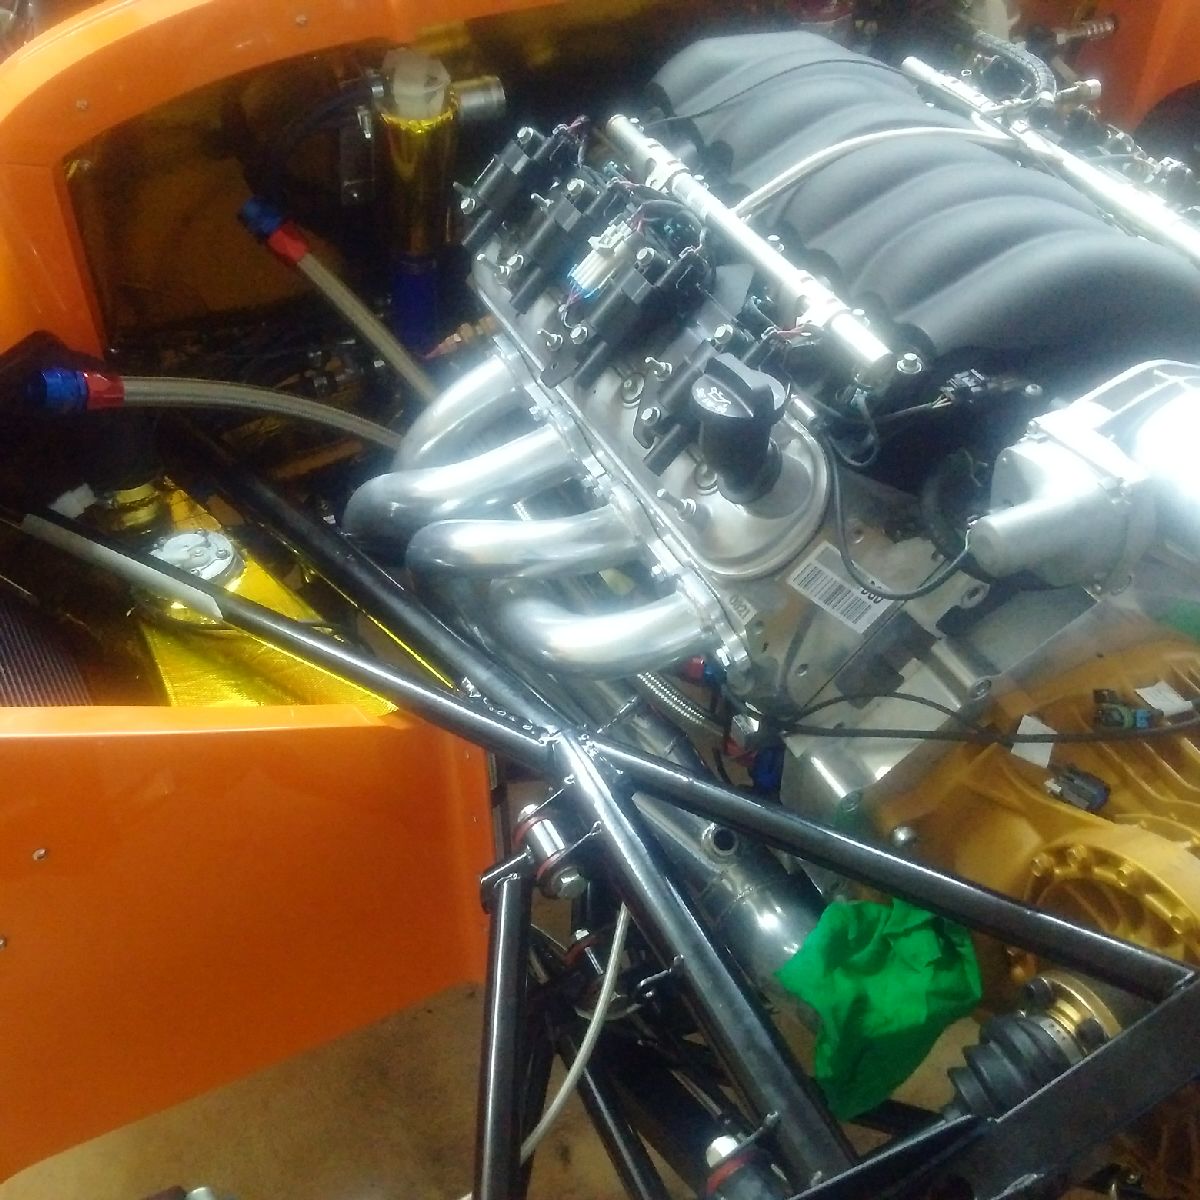
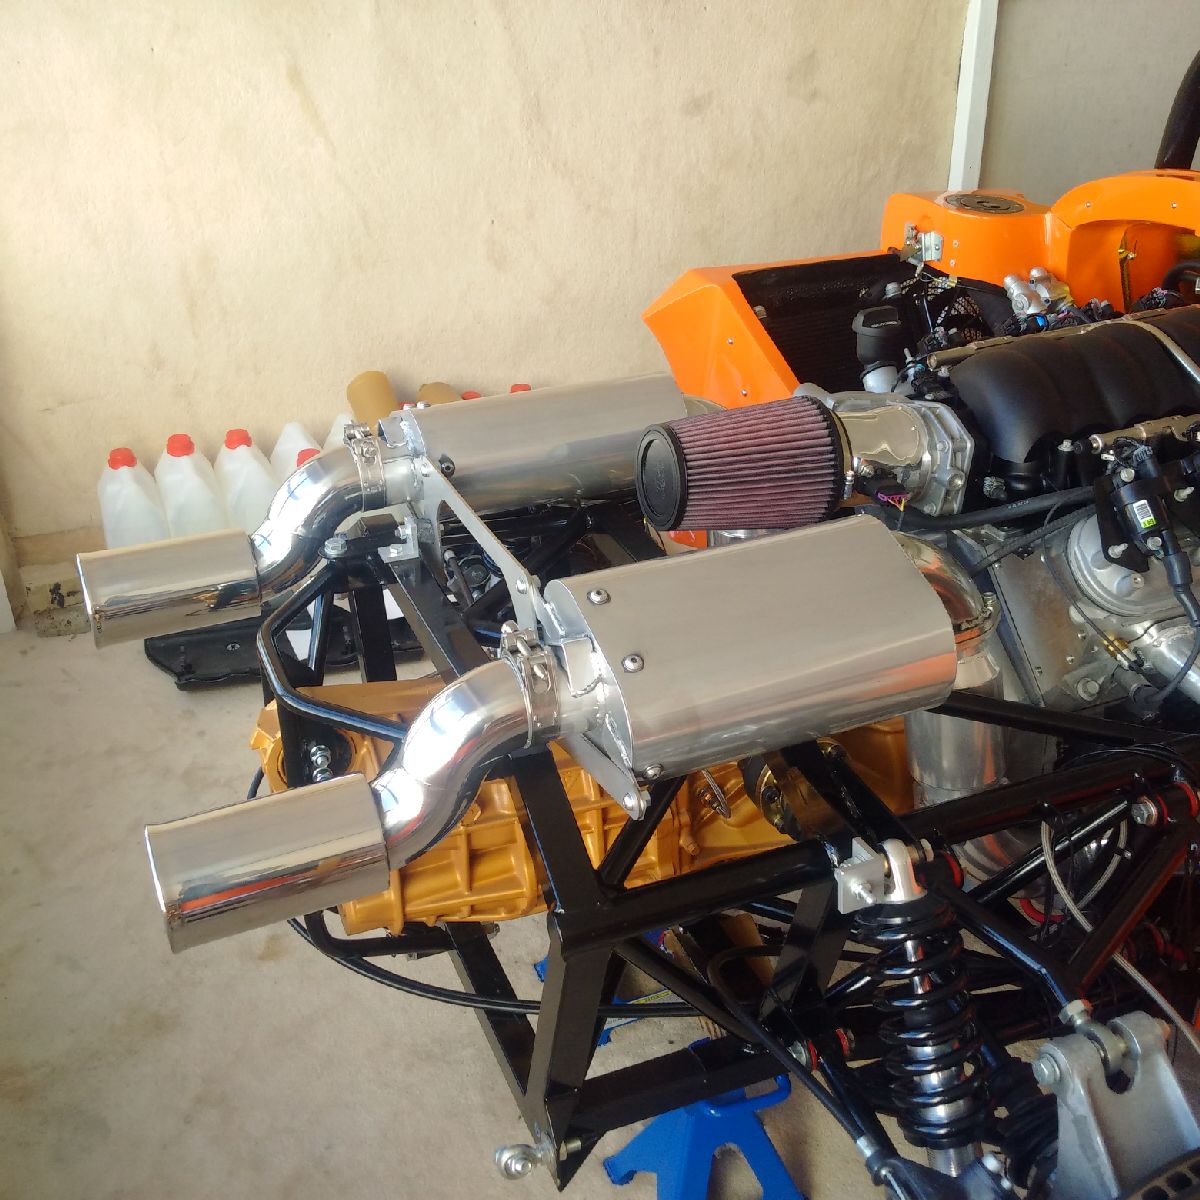
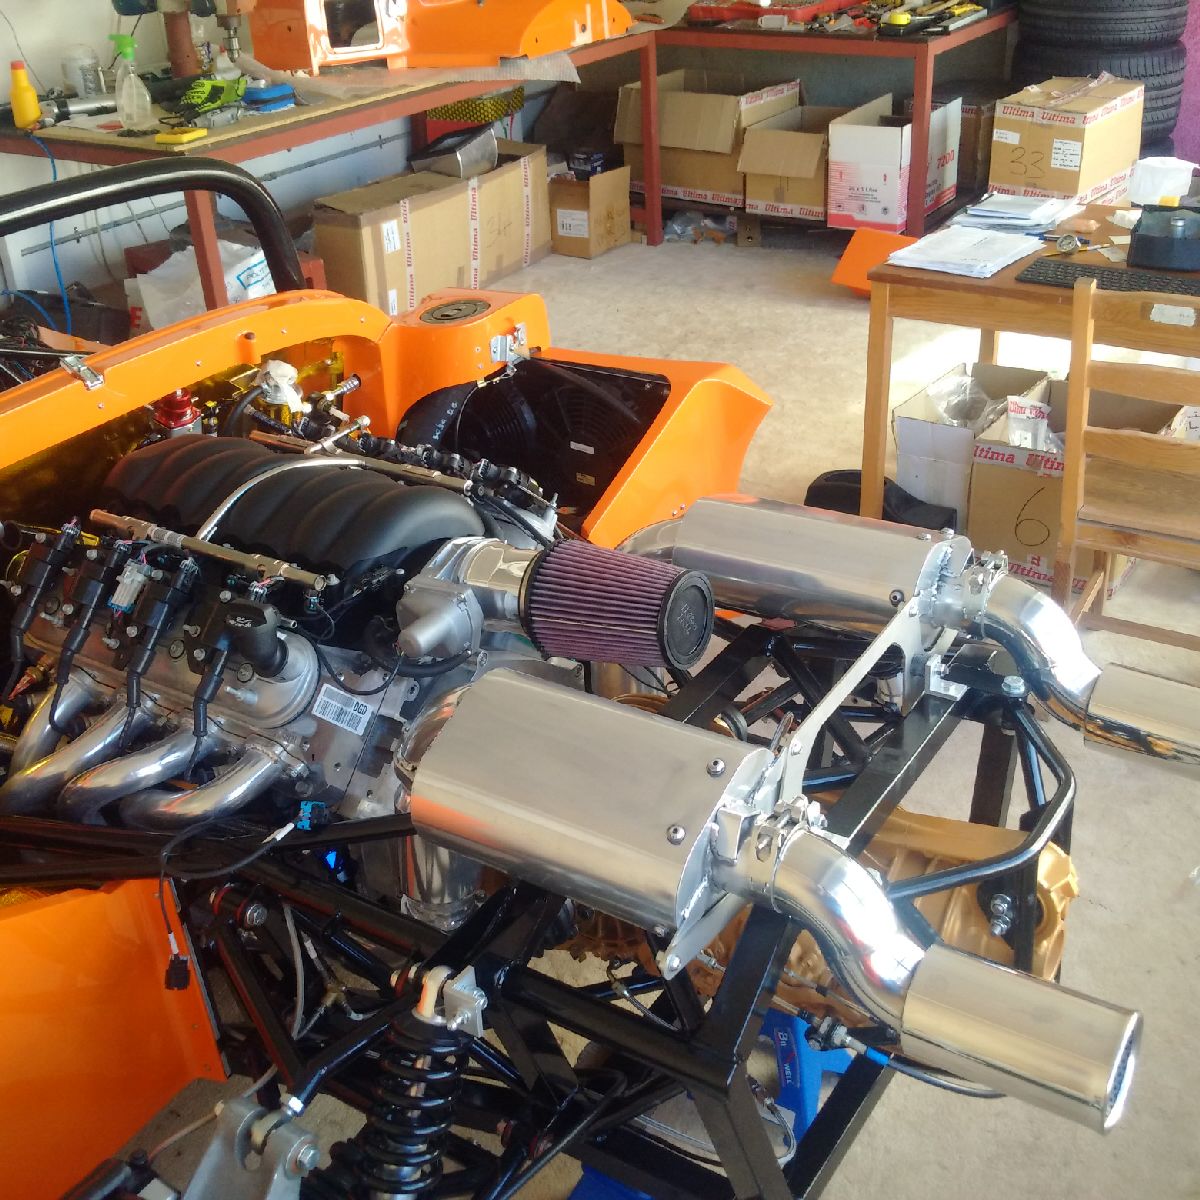
After the driveshaft, I turned my attention to the exhaust system. It took a while to install the driver side exhaust manifolds - my oil cooler piping is in the way, and it took a while to get it routed correctly so that the headers would not foul the oil pipes. However, once I was able to successfully place the headers in the chassis with the pipes routed behind the headers (closer to the engine), it didn't take long to tighten all the bolts holding the header pieces (3 piece headers), and then tighten all the bolts from the header to the engine (remember to use gasket in between).

Nov 3, 2015
Build Time Today: 3 hours
Total Build Time: 327 hours
I started the day with installing the right side exhaust manifolds - I had to re-run the AC hose as it was fouling the headers, so that took a while to re-route and secure. Once the headers were installed, I tried installing the cat but had to stops as the bolts are too short and won't tighten...
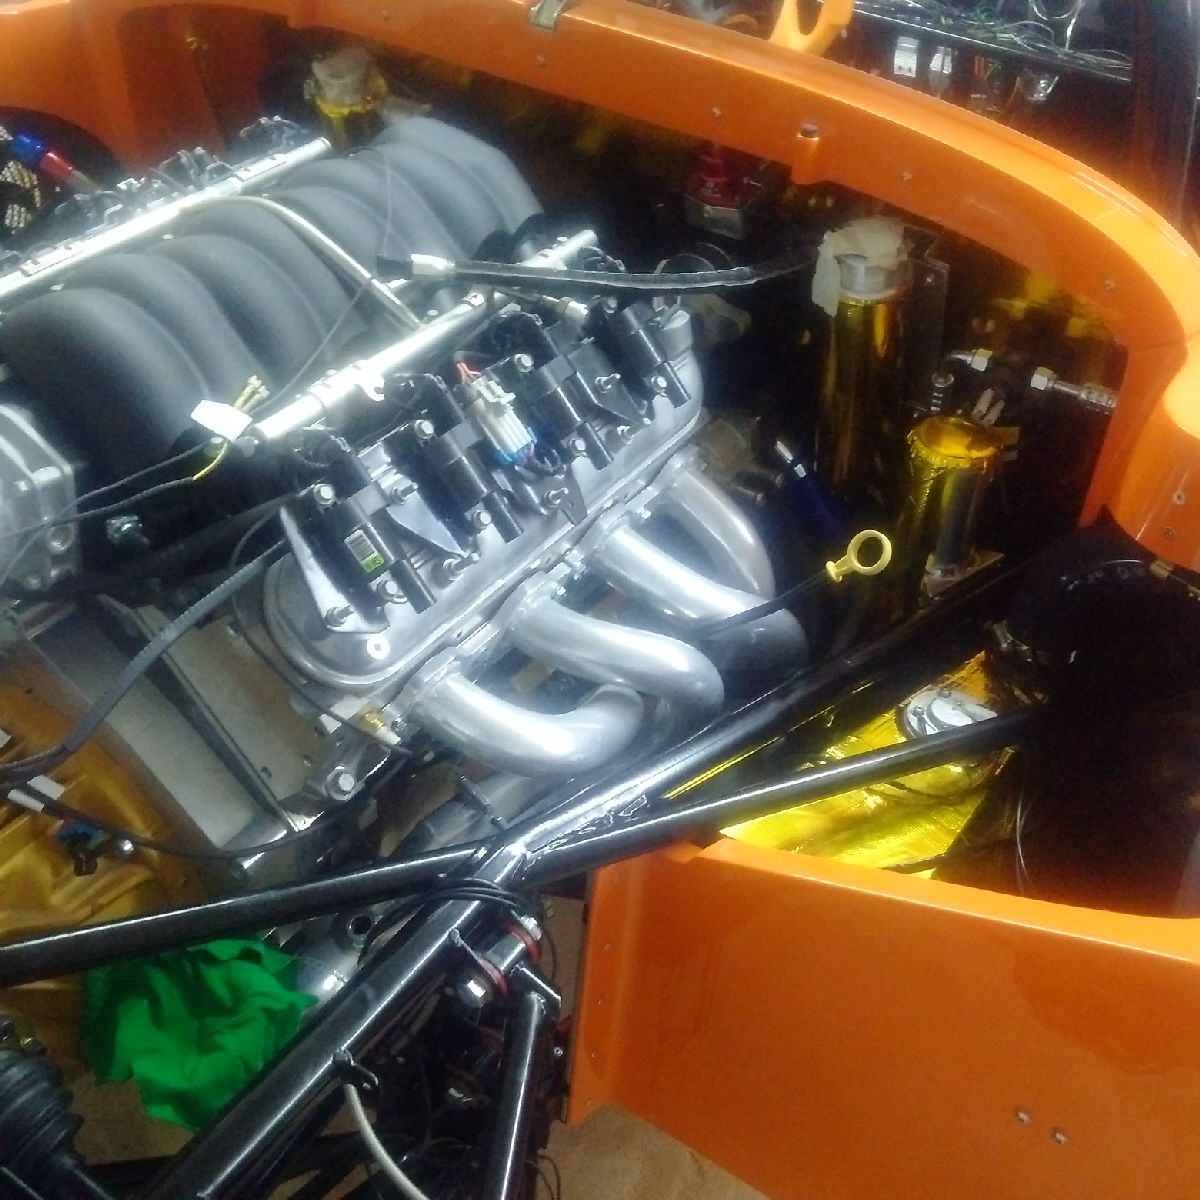
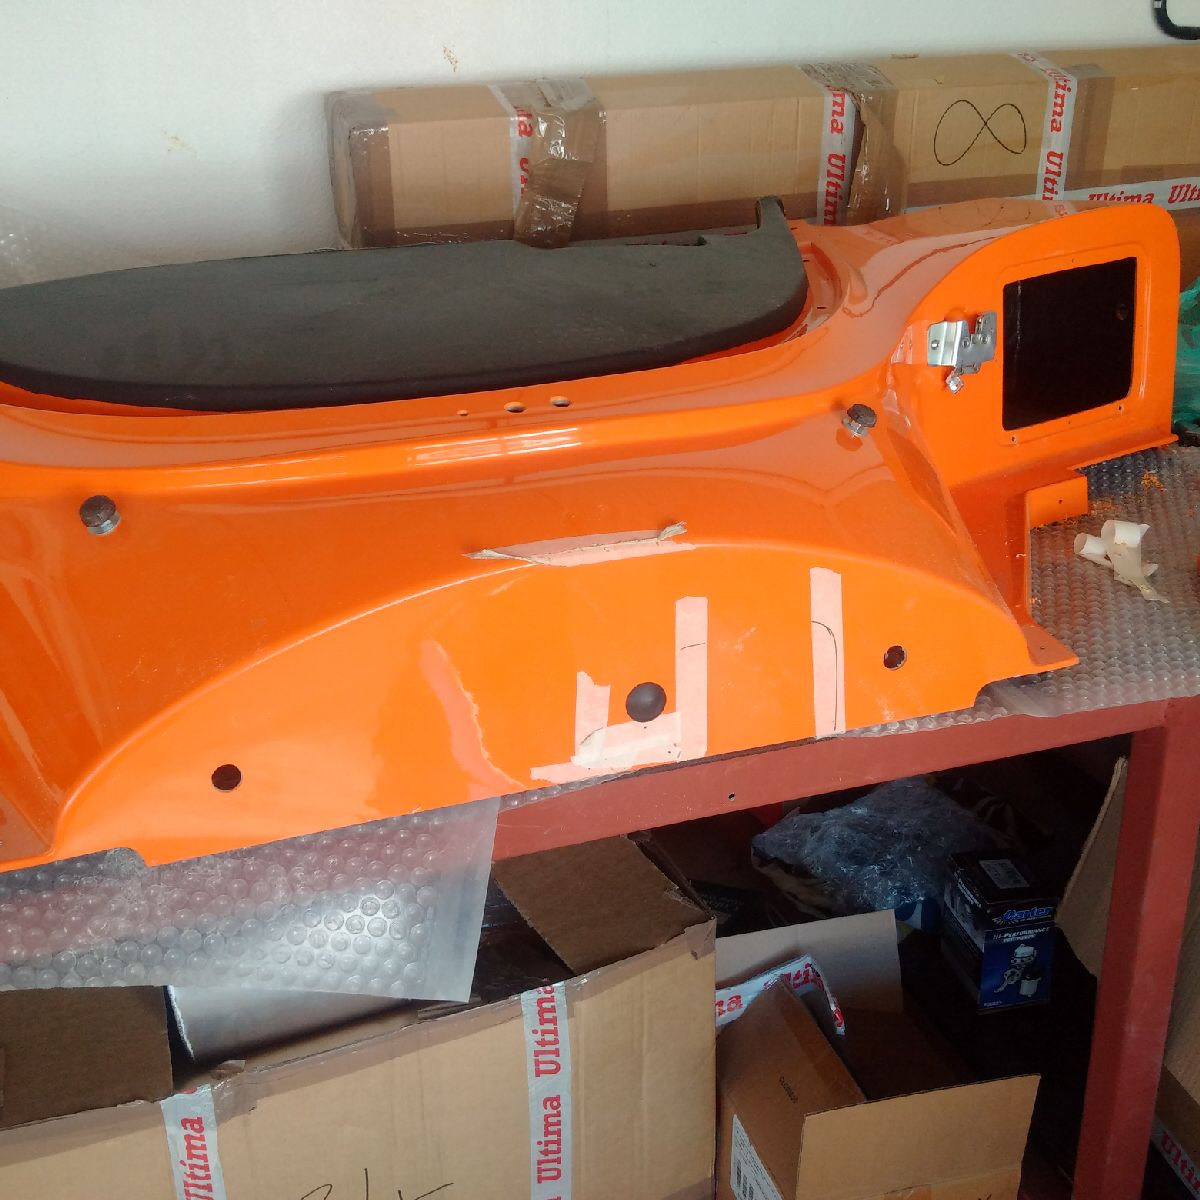
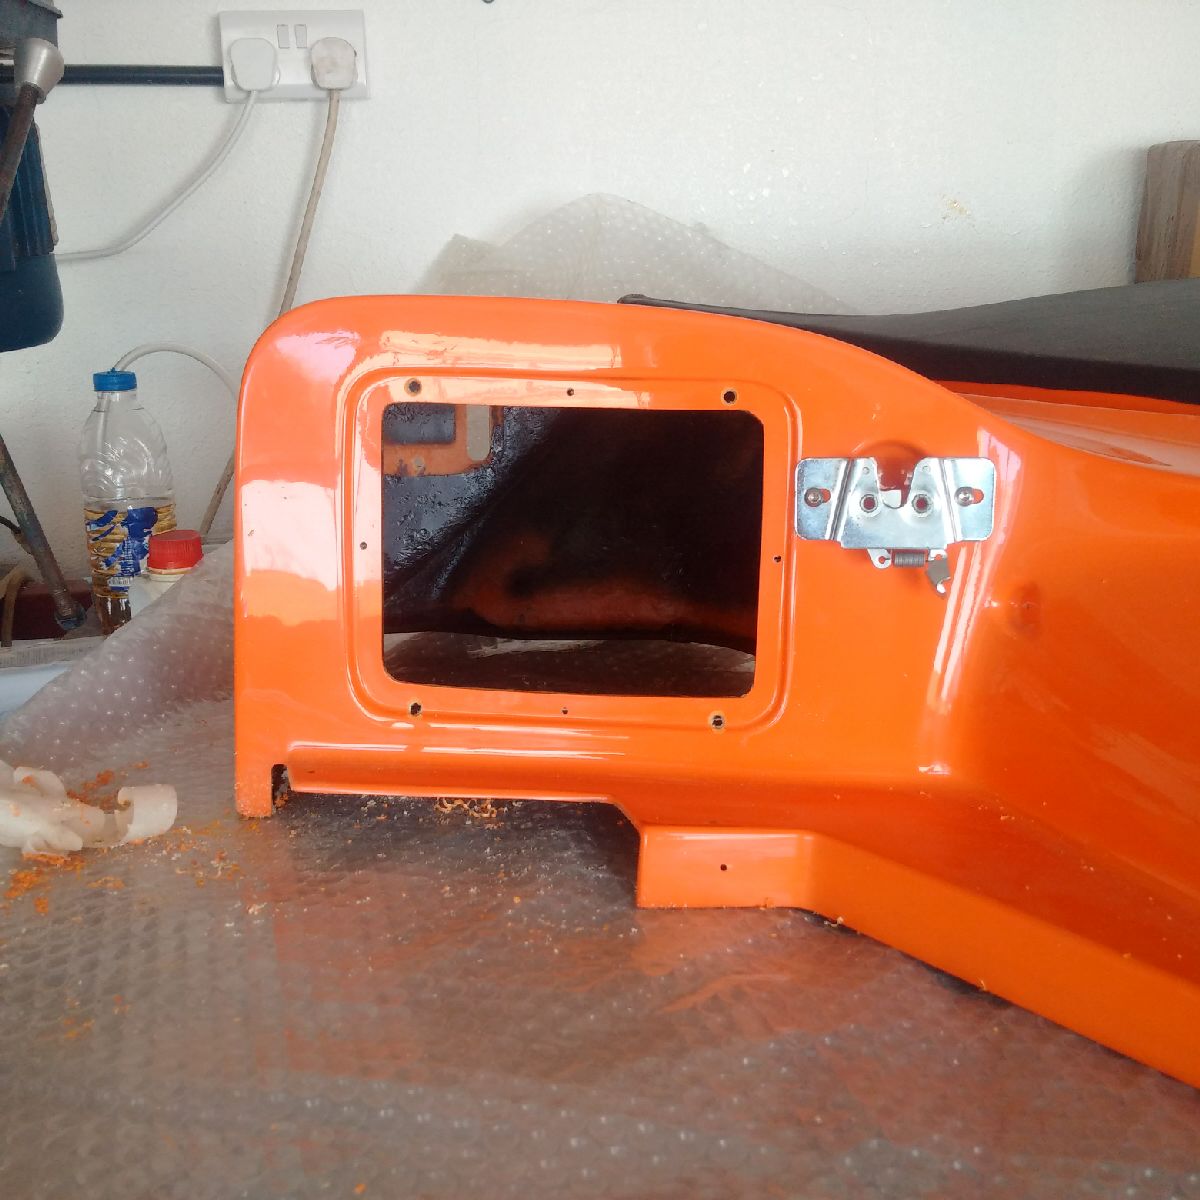
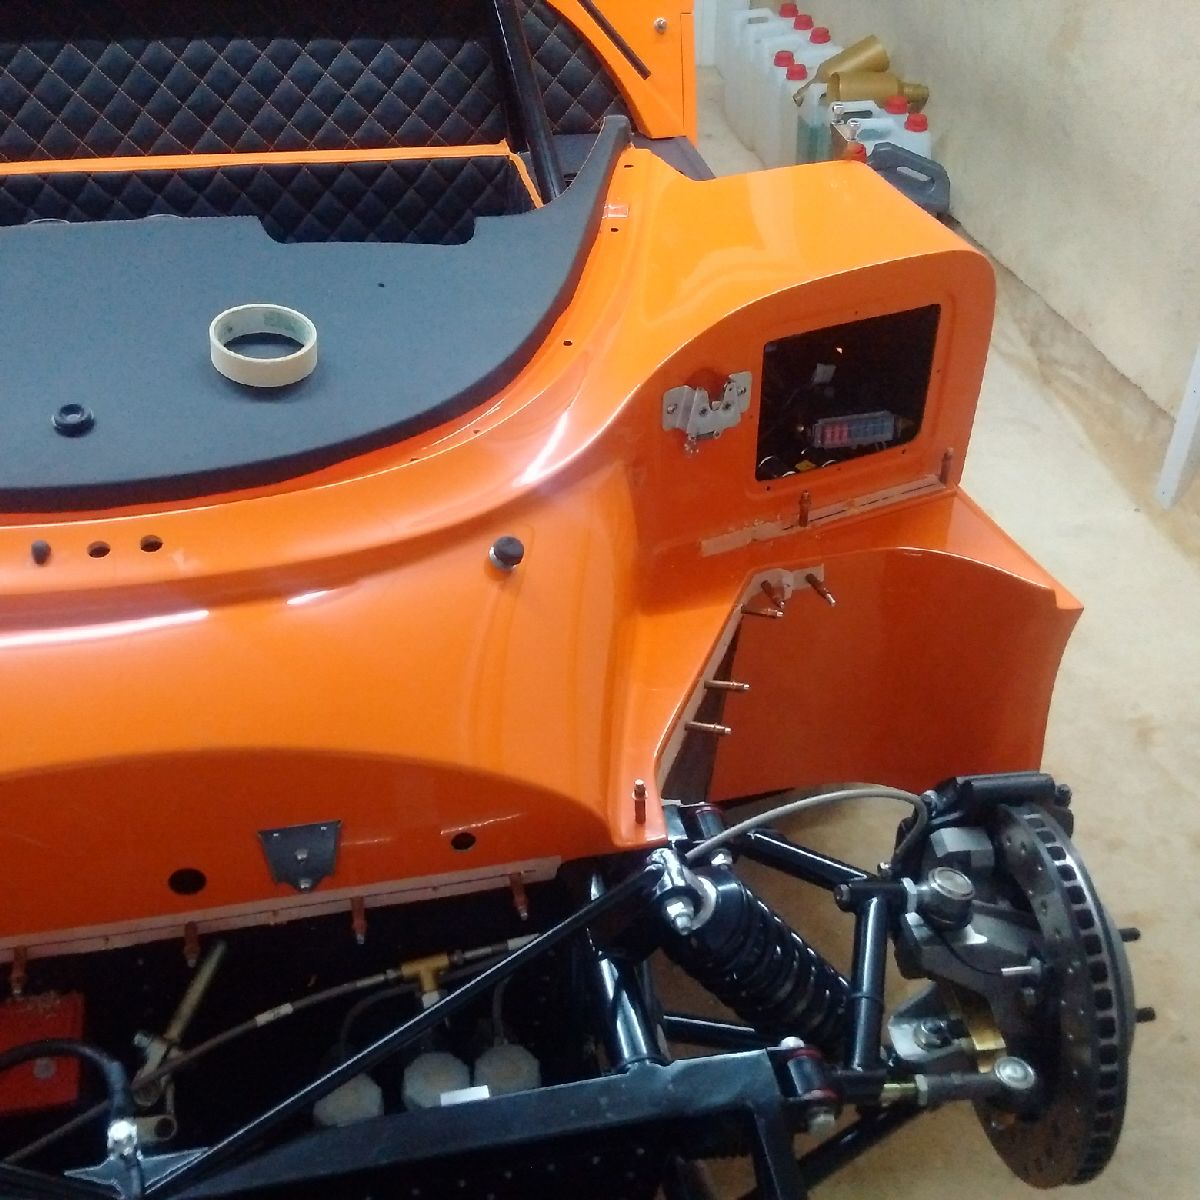
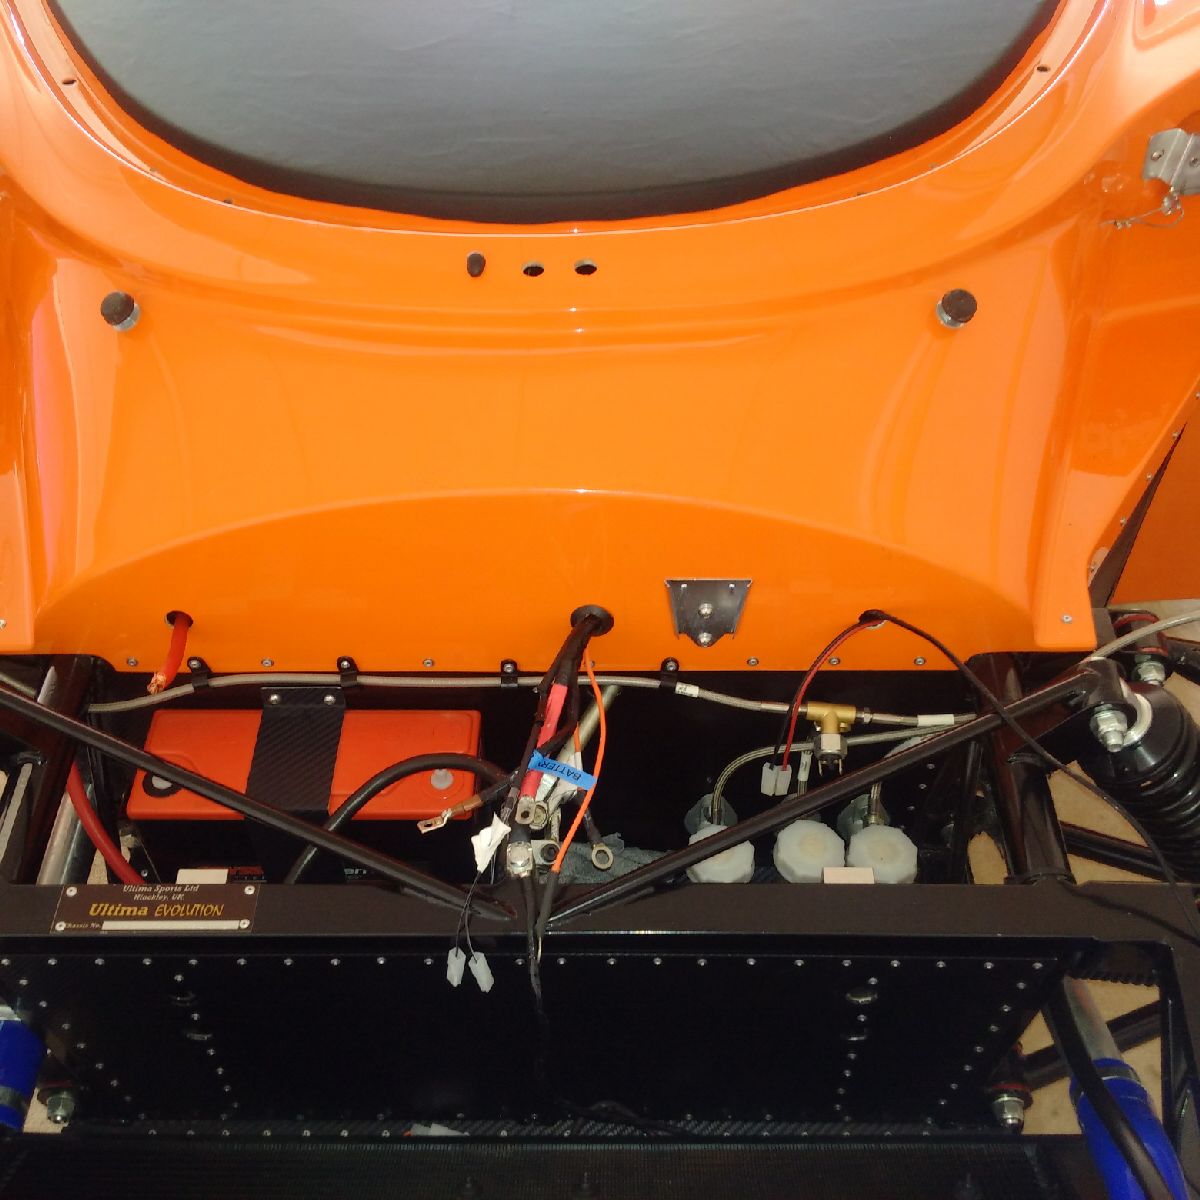
I then took a step back to see older pending work - the oil cooler! Since I had already installed the sidepod and the sidepod mesh, I could not use the factory bracket that secures the oil cooler to the chassis - there is just no room to drill/install the bracket. Thus I had to make my own bracket with spare ally. The ally was bent, cut, drilled, spray painted black, and then installed to the chassis. The oil cooler was slid in between, and secured to the bracket and the side pod. Oil cooler is now installed! Only the thermostat remains for the oil plumbing!

Nov 10, 2015
Build Time Today: 4 hours
Total Build Time: 331 hours
Another week of travel meant today is the first day back in the garage...
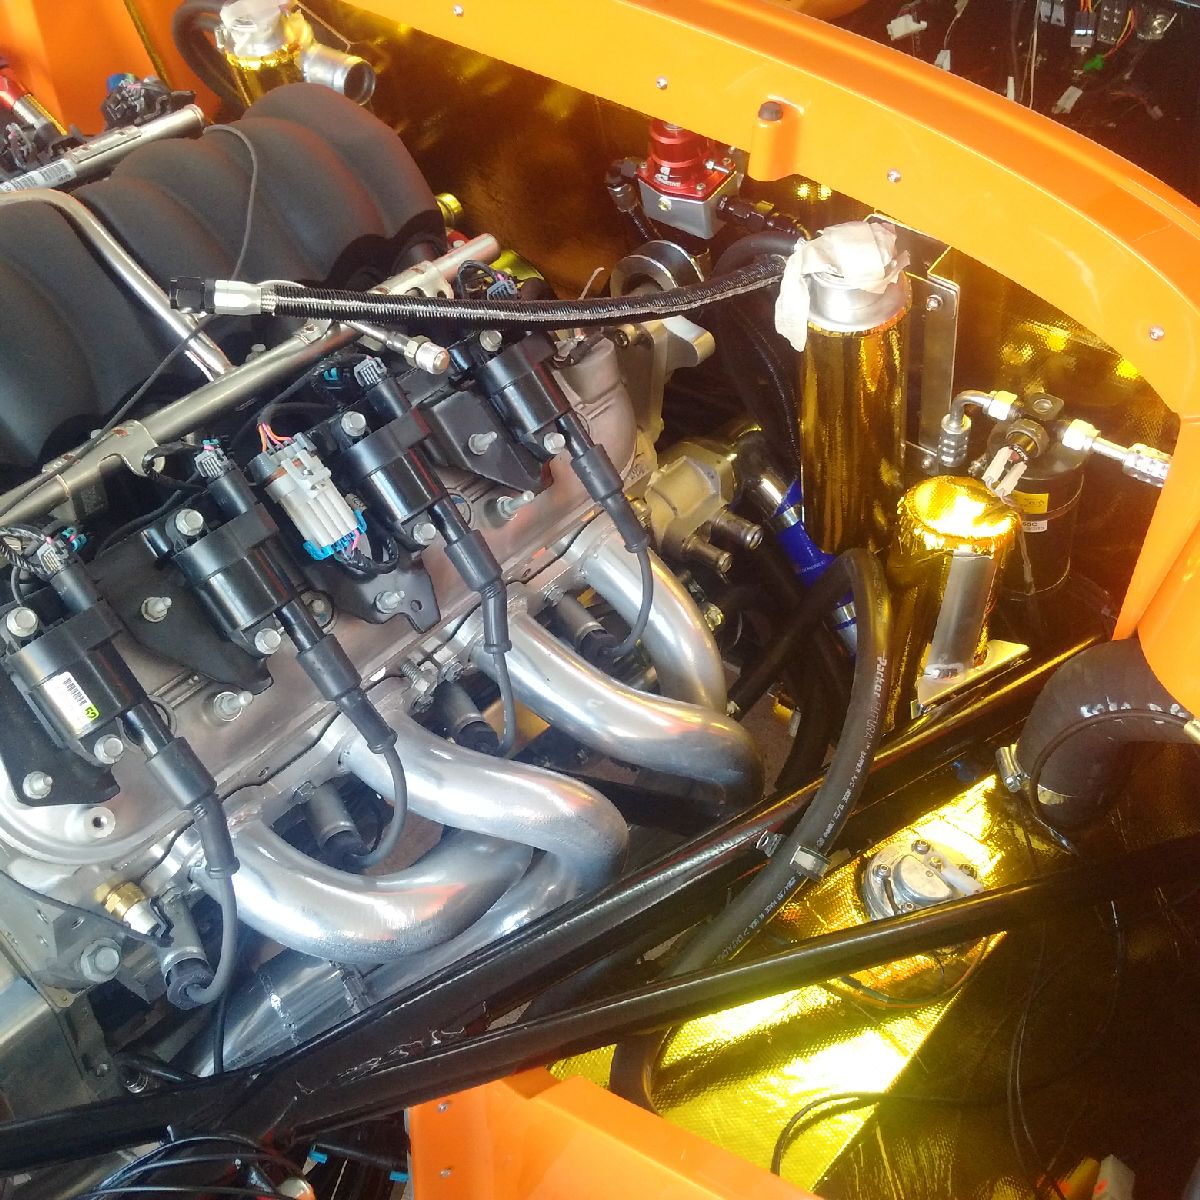
I started with the cat installation - both cats were installed using the 'short' bolts after getting rid of the flat washers.
After installing the cats, I tried to install the muffler boxes - however, there were a few issues that cropped up that took a while to solve. The muffler boxes are positioned between the cats and the tail pipes. They are spaced by using a laser cut bracket provided by Ultima that bolts to the chassis at the rear most chassis diagonal. My first problem was that the bracket supplied was for the old chassis - the new chassis has additional support beams that run across the top bars, and those additional beams prevented the bracket from sitting on the chassis correctly. A call to Ultima confirmed that the only solution would be to cut the bracket to the new style - so the bracket was reshaped so that it would fit correctly. Once able to fit over the chassis bars, I decided to check the spacing before drilling the support bracket to the chassis - and its a good thing I did... the right muffler box fit perfectly between the space between the cats and the bracket, but the left muffler box would not fit - it appears as if the cats are too far backward... some head scratching later, I figured out that the manifolds were probably not all the way in (3 piece manifolds, so lowest section that connects to cats also slides on the headers part of the manifold on 4 bolts)... I ended up re-fitting the manifolds again, this time squeezing the lowest piece as far in as possible... the additional 0.5 inch was all I needed to get the muffler box to fit in the end, so the manifolds were retighened, and I started to drill for the muffler support bracket - except that Ultima has provided two very small allen bolts with nuts, where-as the build CD shows the use of rivnuts!! Some experimenting later, I ended up drilling the chassis through BOTH sides, and will need to get extra bolts which will pass through BOTH the chassis sides so that I can bolt the bracket on tomorrow. Also, I had to clear quite a bit of the welding splatter from the top chassis rail so that the support bracket L-bracket will sit correctly. I ended up painting the revealed steel to prevent future rust...
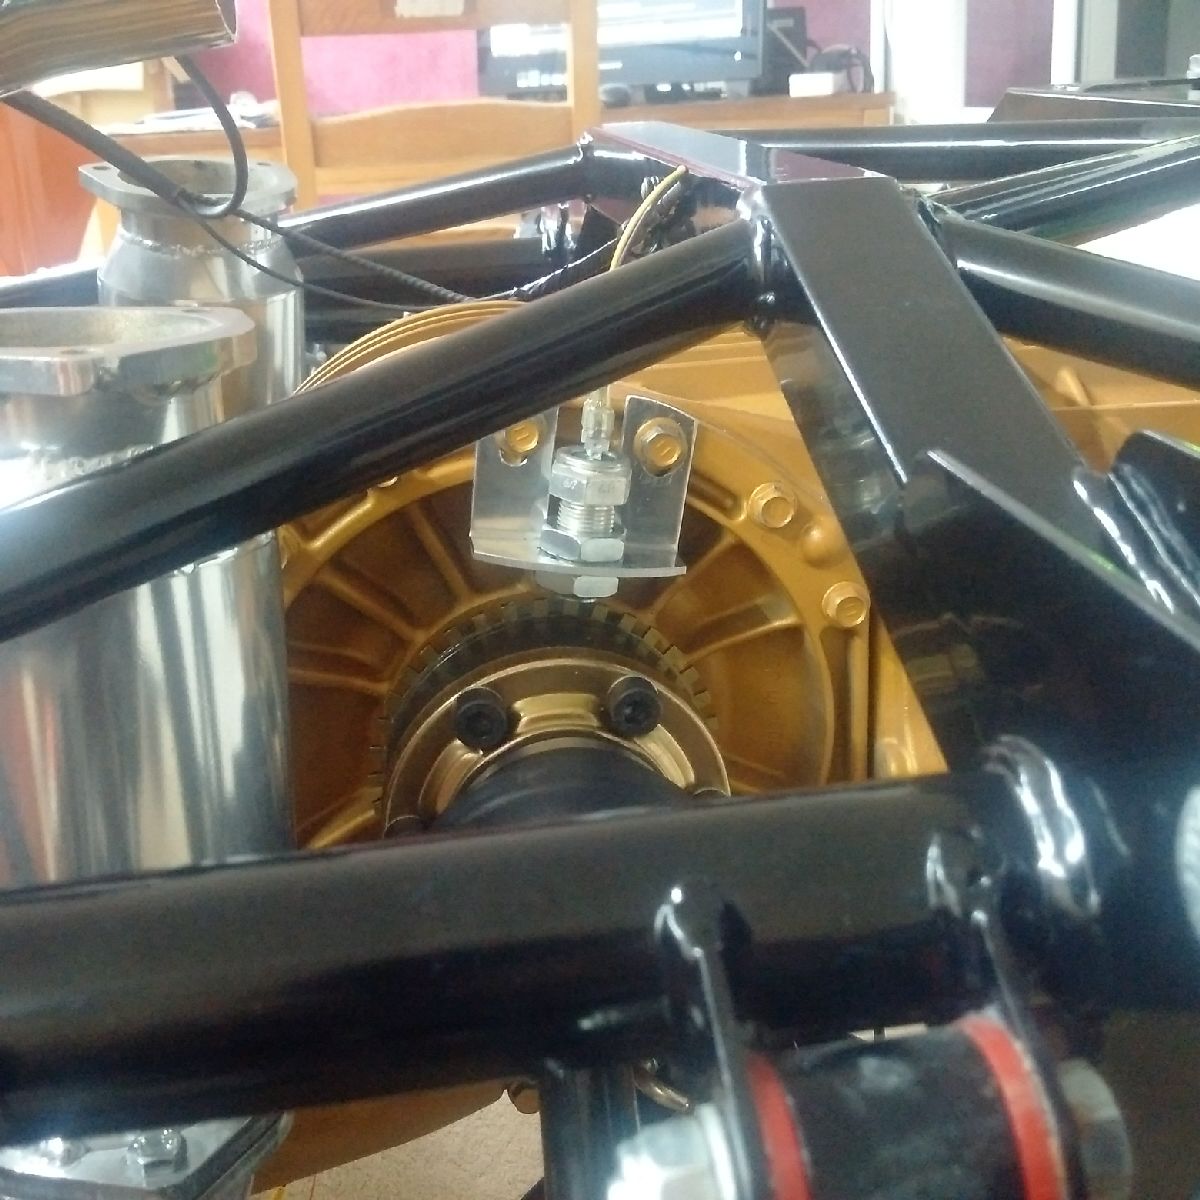
After working on the exhaust for a while, I decided to get back to the engine bay wiring - the Ultima loom connections were all hooked up (Alternator, etc) and all the LS Engine loom connections were also hooked up - after installing the speedo sensor on the rear differential for the ECU speed look up...
Nov 11-12, 2015
Build Time Today: 3 hours
Total Build Time: 334 hours
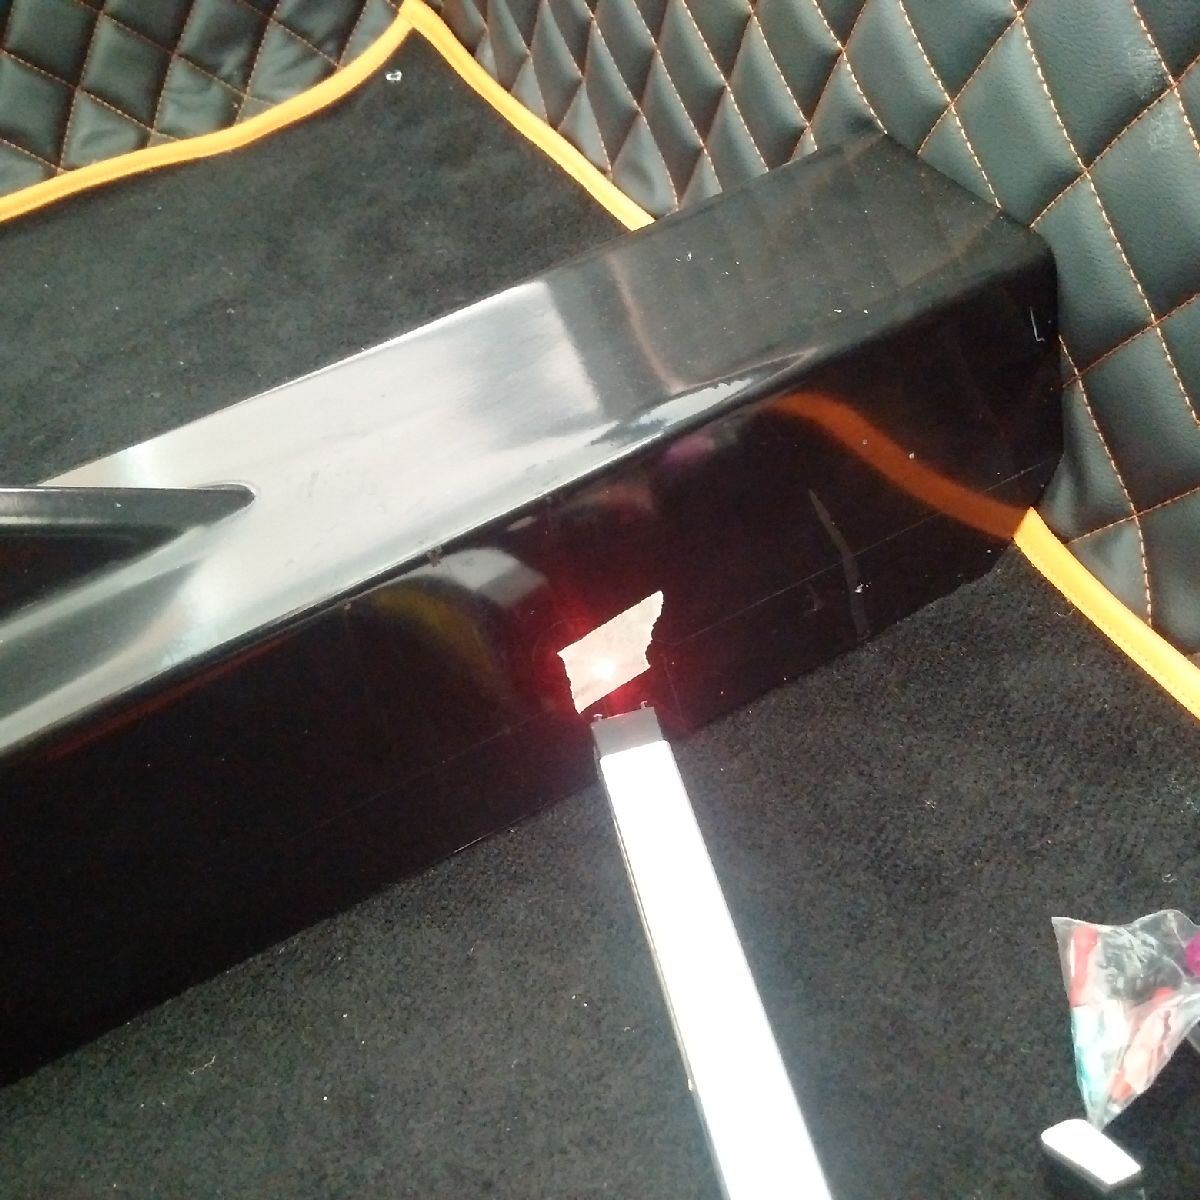
Today was completing the exhaust system - the muffler boxes were installed after the correct sized bolts were acquired. The muffler bracket was installed, and then the tail pipes were connected. The exhaust is on and is a thing of beauty! I also installed the air filter for the time being so that I can test the engine in a few weeks - the filter will later be removed and re-installed after the air-intake system is installed in the rear GRP canopy
I also spent a little bit of time installing some last minute dash items - a GPS antennae, the alarm horn, and the amp kit (power cable from battery for amp in ICE system)
Nov 13, 2015
Build Time Today: 3 hours
Total Build Time: 337 hours
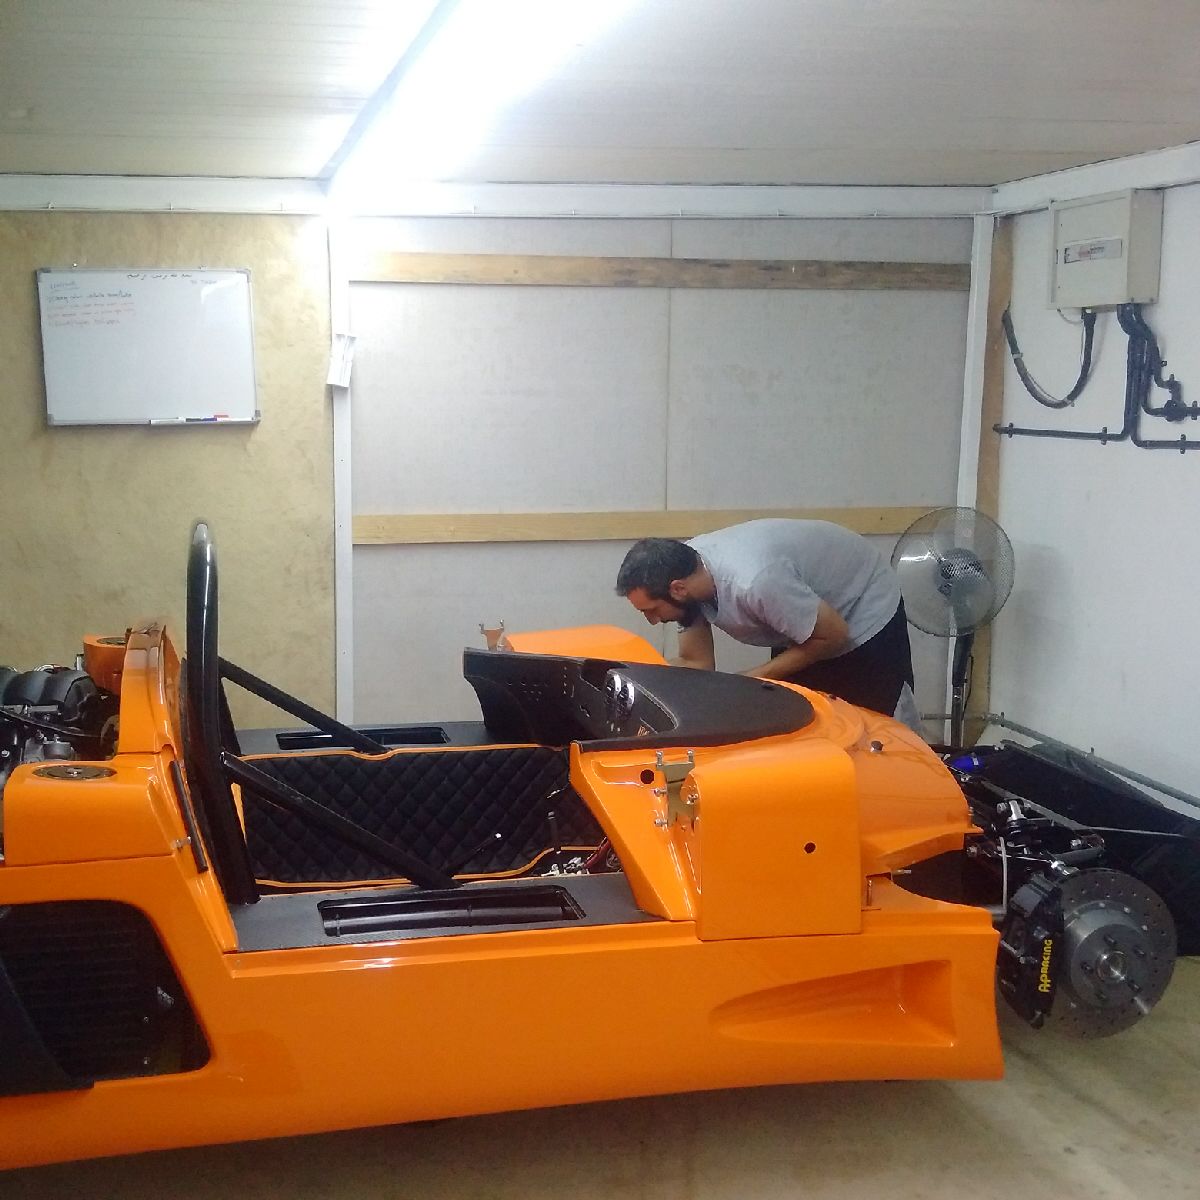
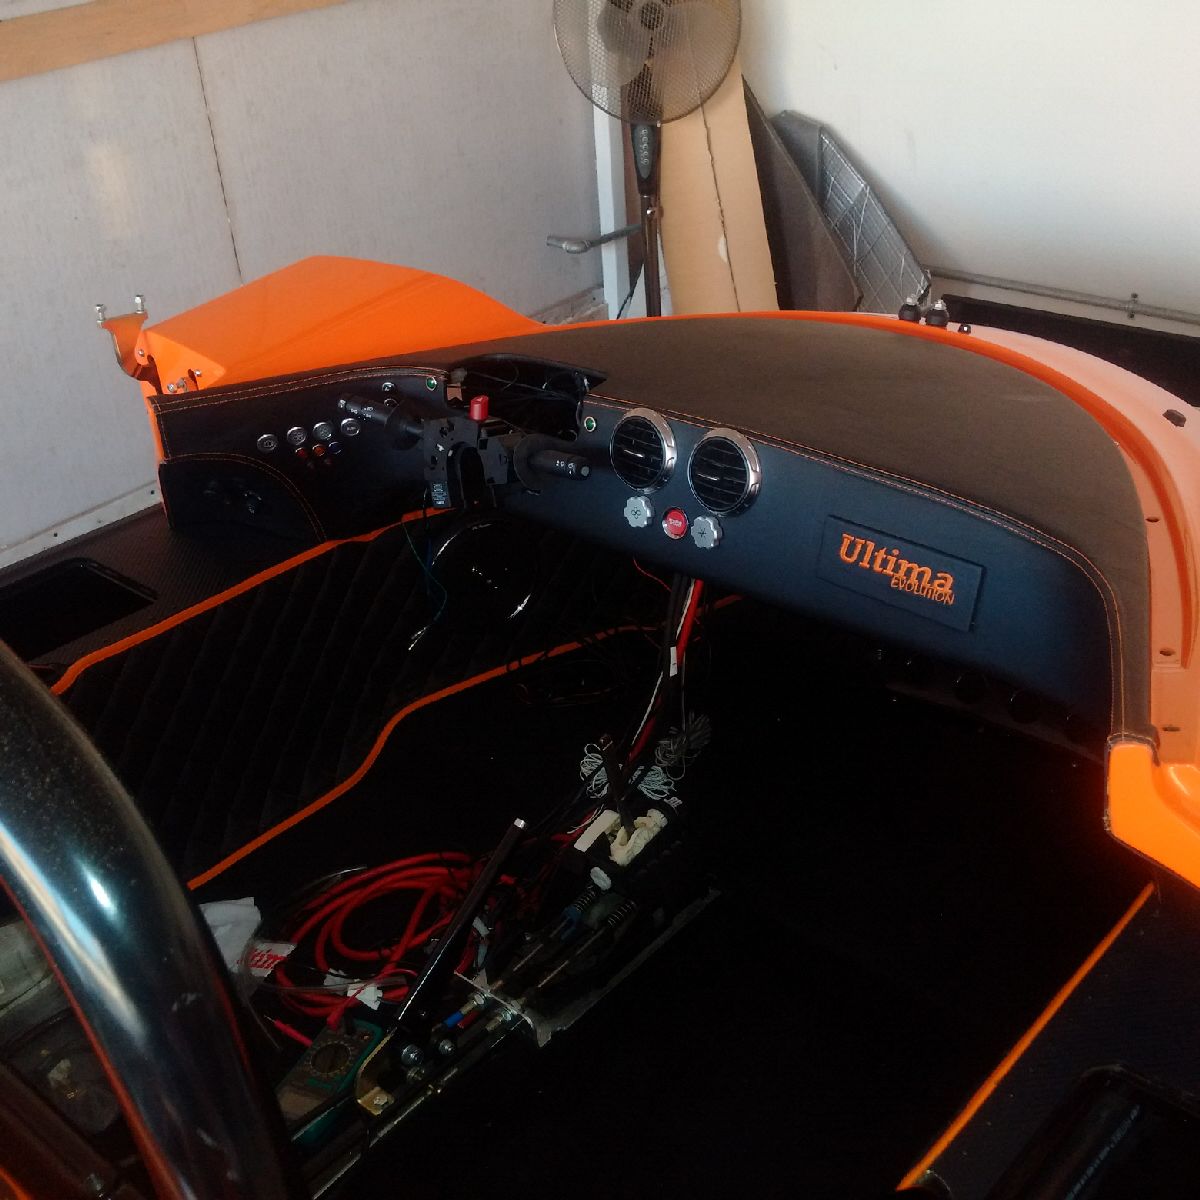
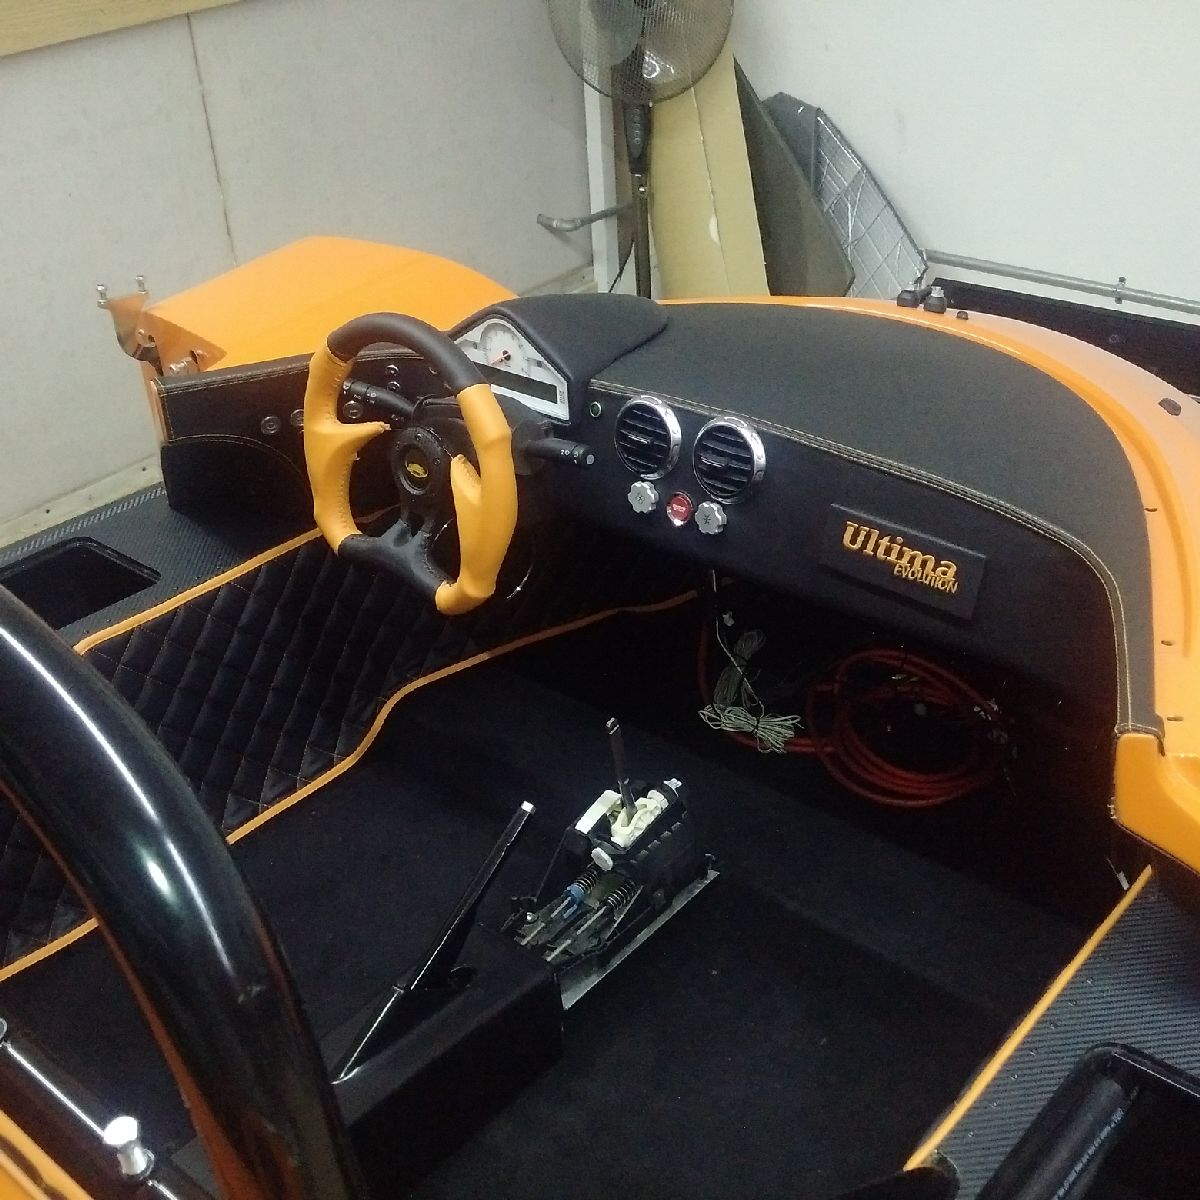
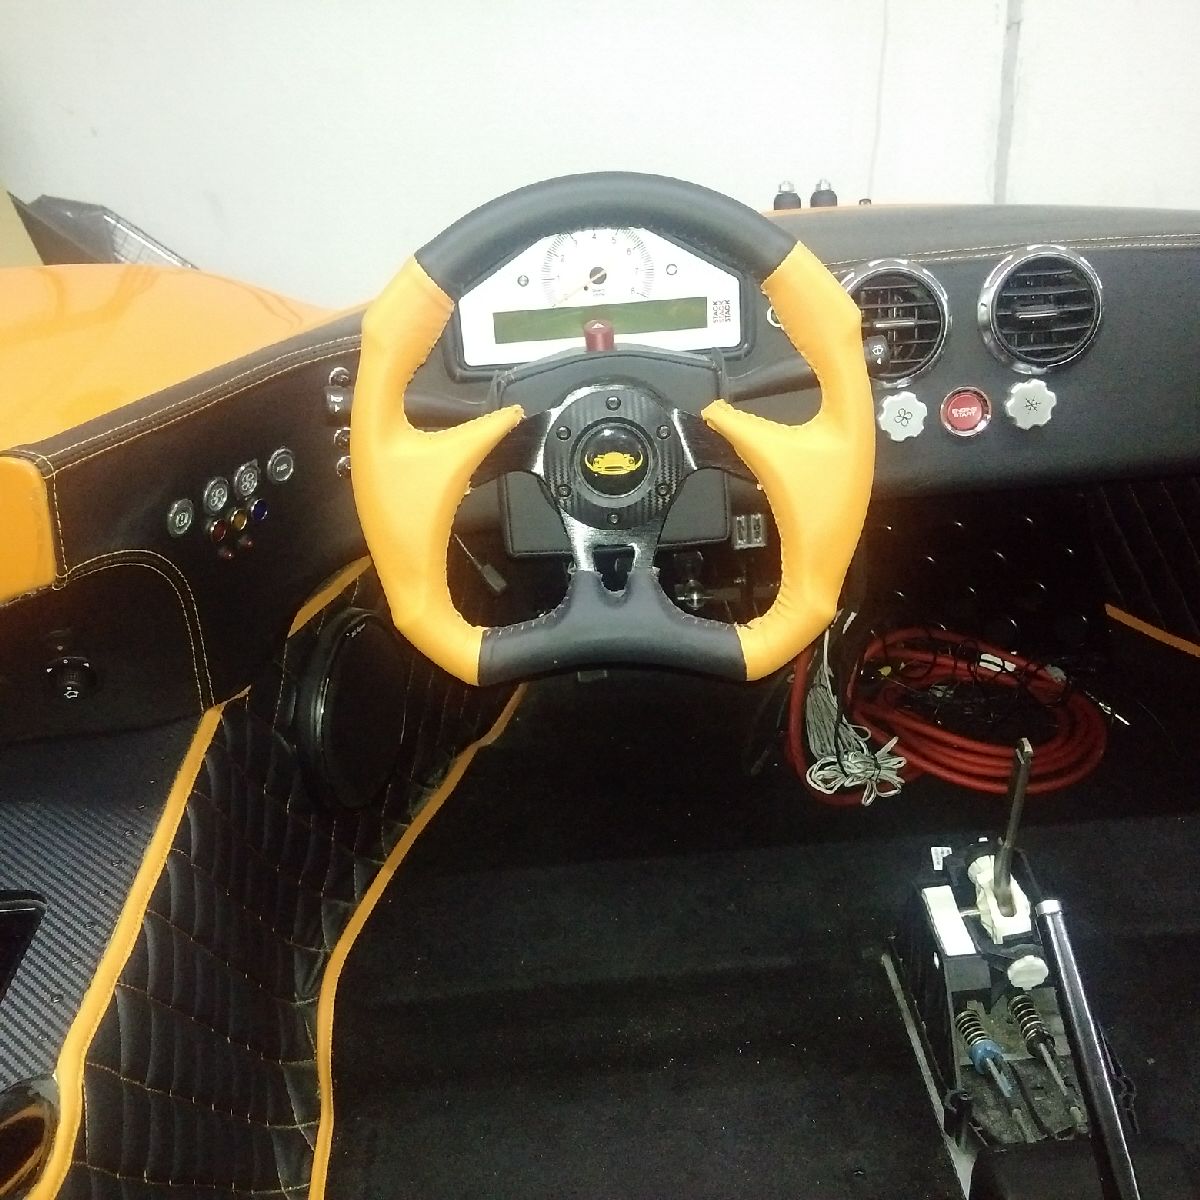
Today I return back to the dash! The dash is back from the trimmers and has been trimmed in the black leather I received from Ultima. My first order of business was to drill all the holes in the dash that will be required after install - holes in the front for battery and other cables that run from the inside of the cabin to the front clam, and also holes in the side archs where the ECU and Fuse/Relay brackets will be installed. I also took some time to install the AC vents in the dash as they will be hard to fit once the dash is on the car, so it is better to have it in from now. Finally, I also installed the door hinges and hydraulic pistons back into the original position (they had been removed for the trimmers)
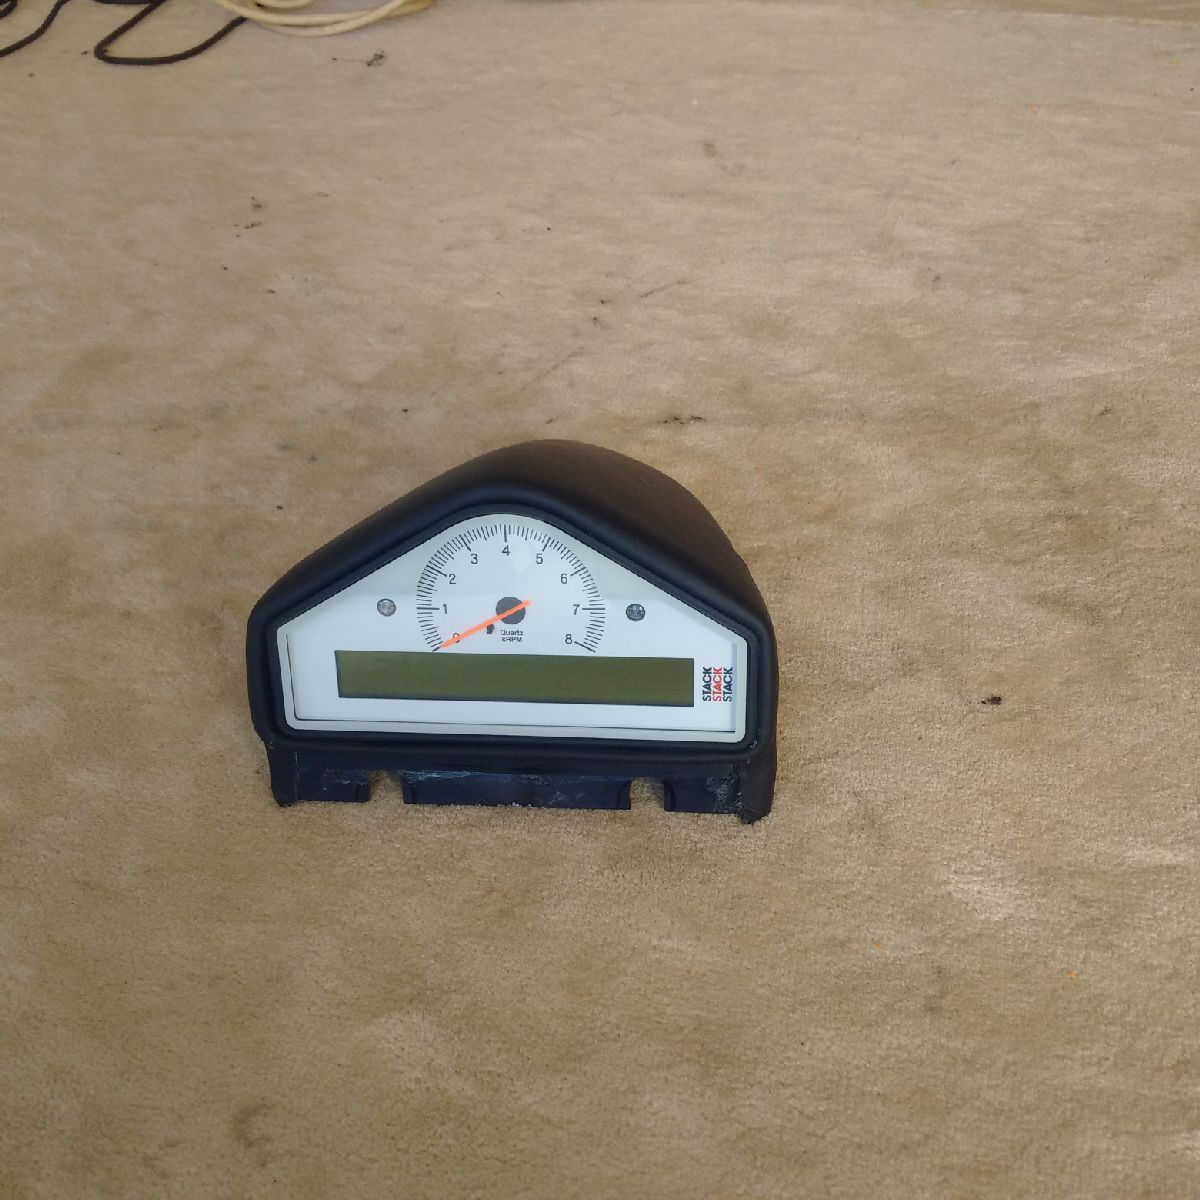
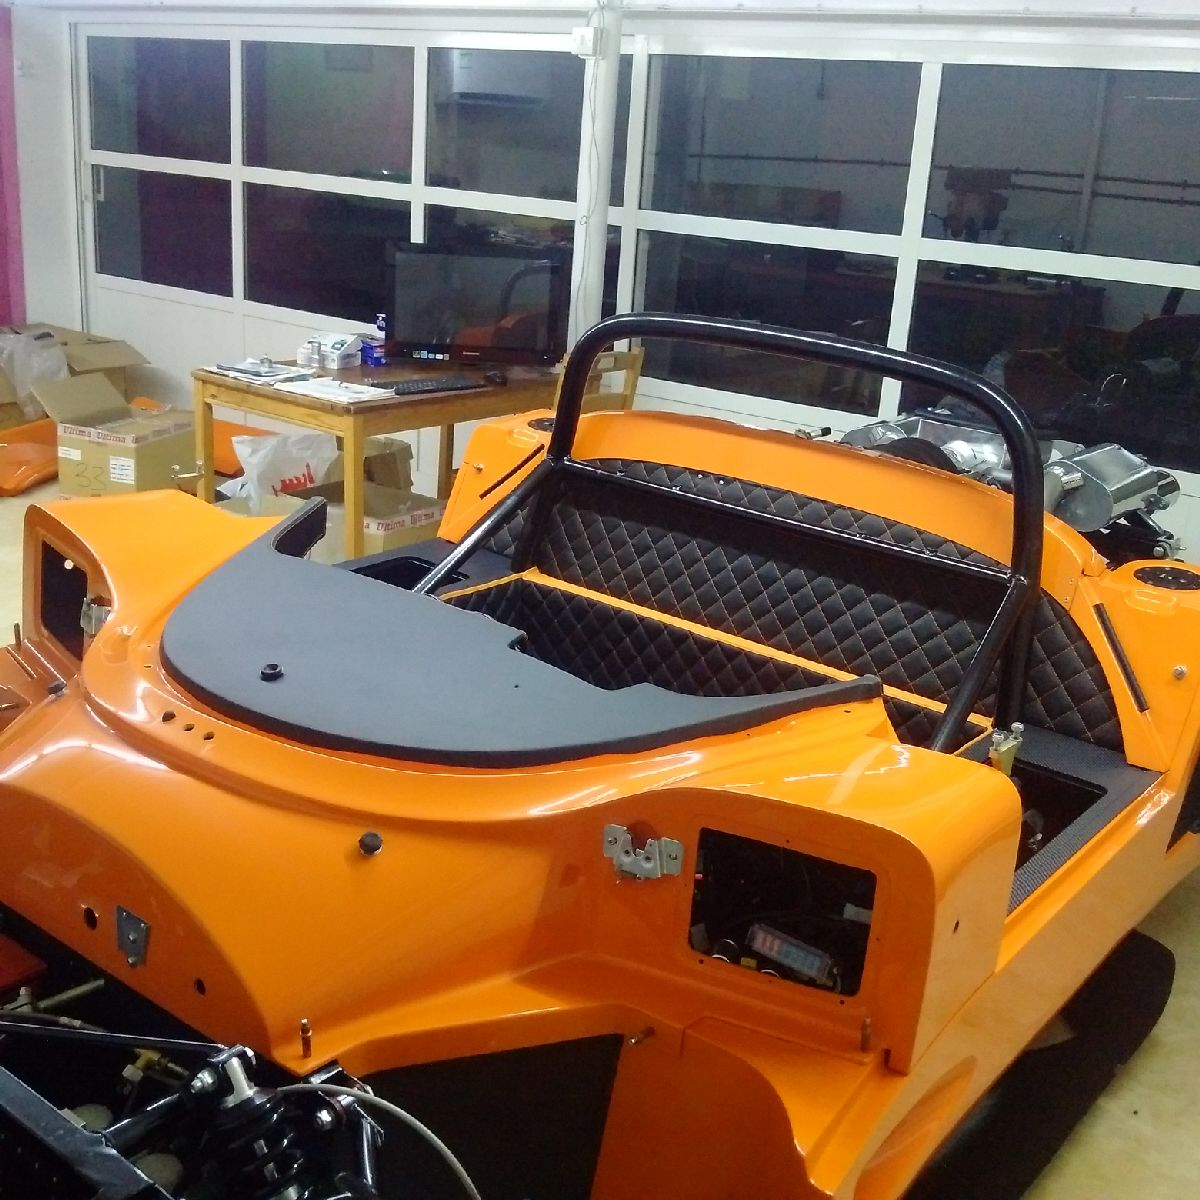
After working on the dash, I decided to install the Stack pod - the pod was trimmed in leather (by me, only leather I am installing myself), and then the stack display was installed into the pod - and it was a TIGHT fit - I had to pull and adjust the leather in the corners to allow the display pod to fit inside. However, it is looking awesome in its final resting place!
Nov 14, 2015
Build Time Today: 4 hours
Total Build Time: 341 hours
Today I finished up a couple pending jobs in the engine bay area:
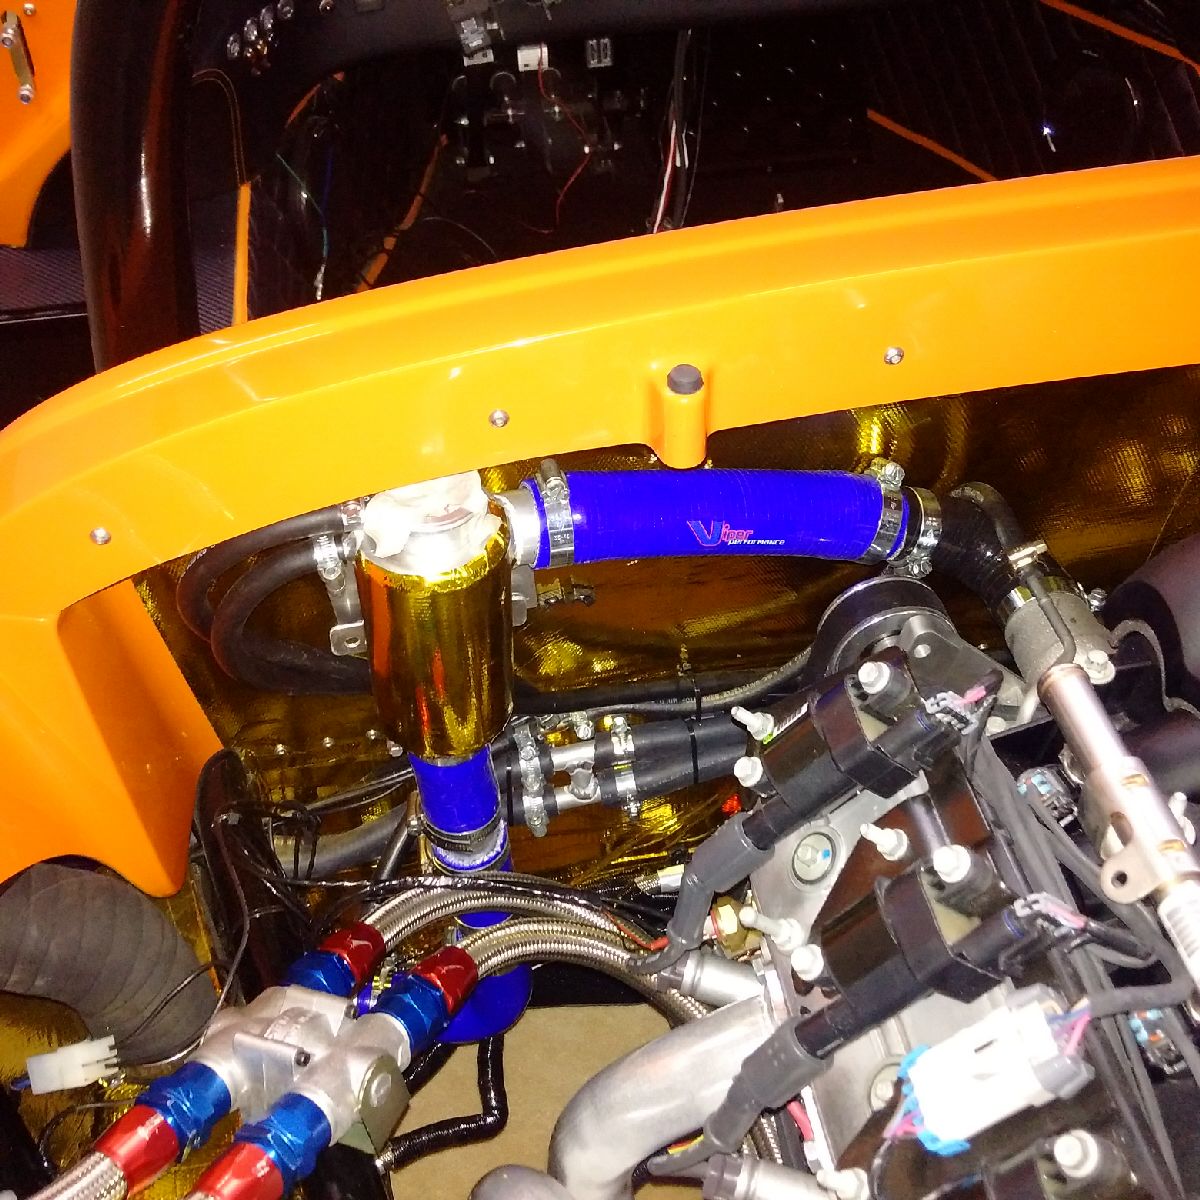
First off, I worked on the heater water connections to the engine block - the rubber hoses from the electrical heater valve were just a tad too short to bend and connect to the engine directly - they ended up kinking up and blocking water flow, so I had been looking for an alternative for a while. Finally I found suitable silicon elbows in the correct size, and they were used to connect the rubber hoses to the engine heater inlet/outlet...

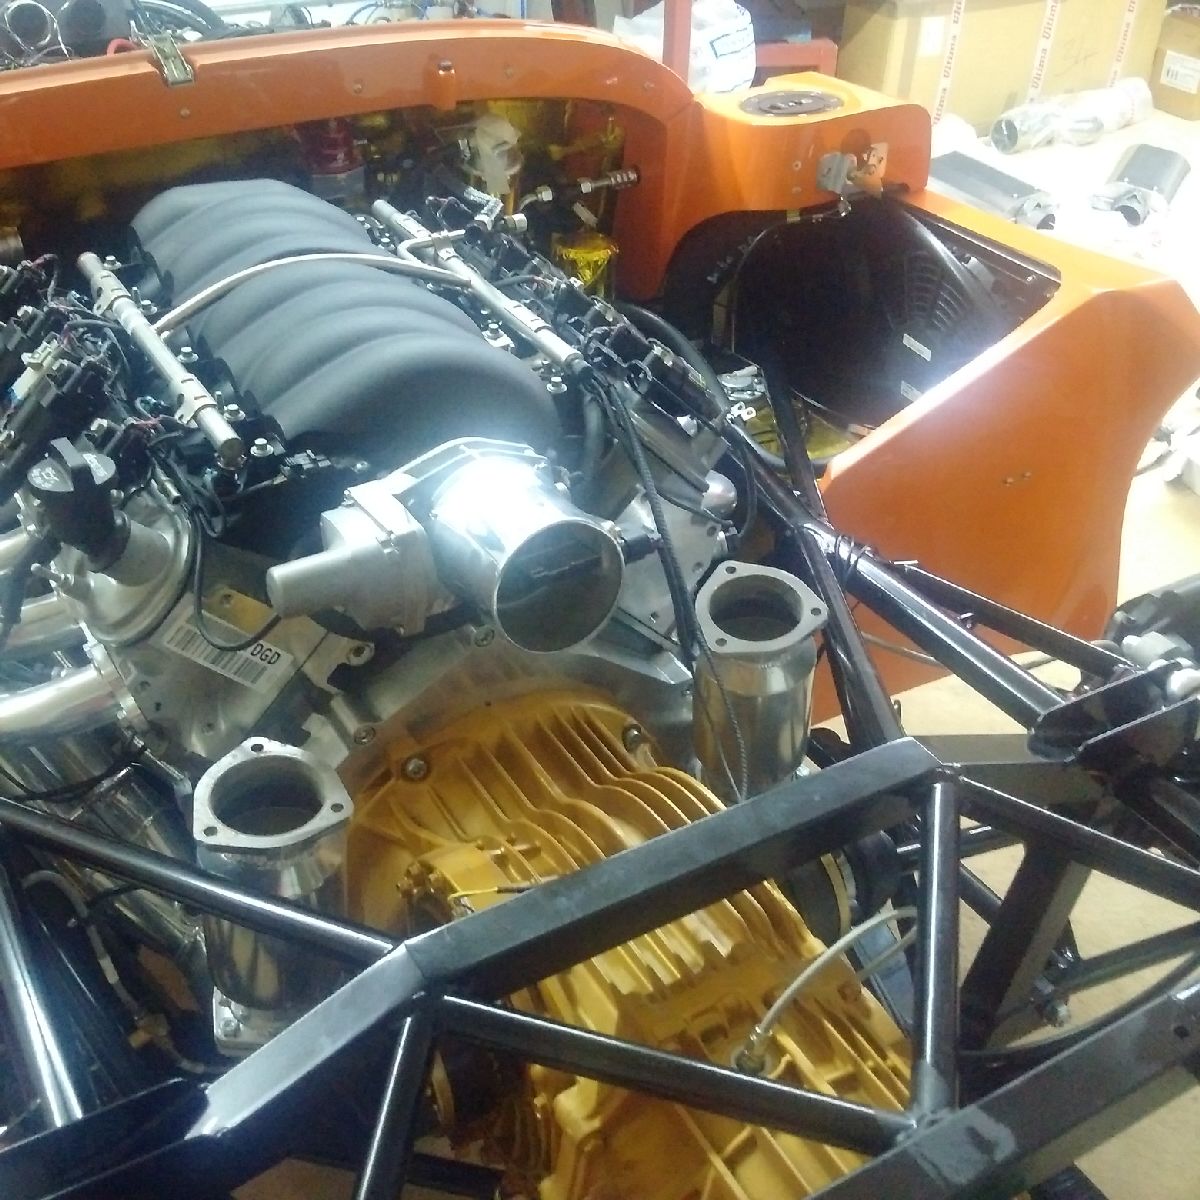
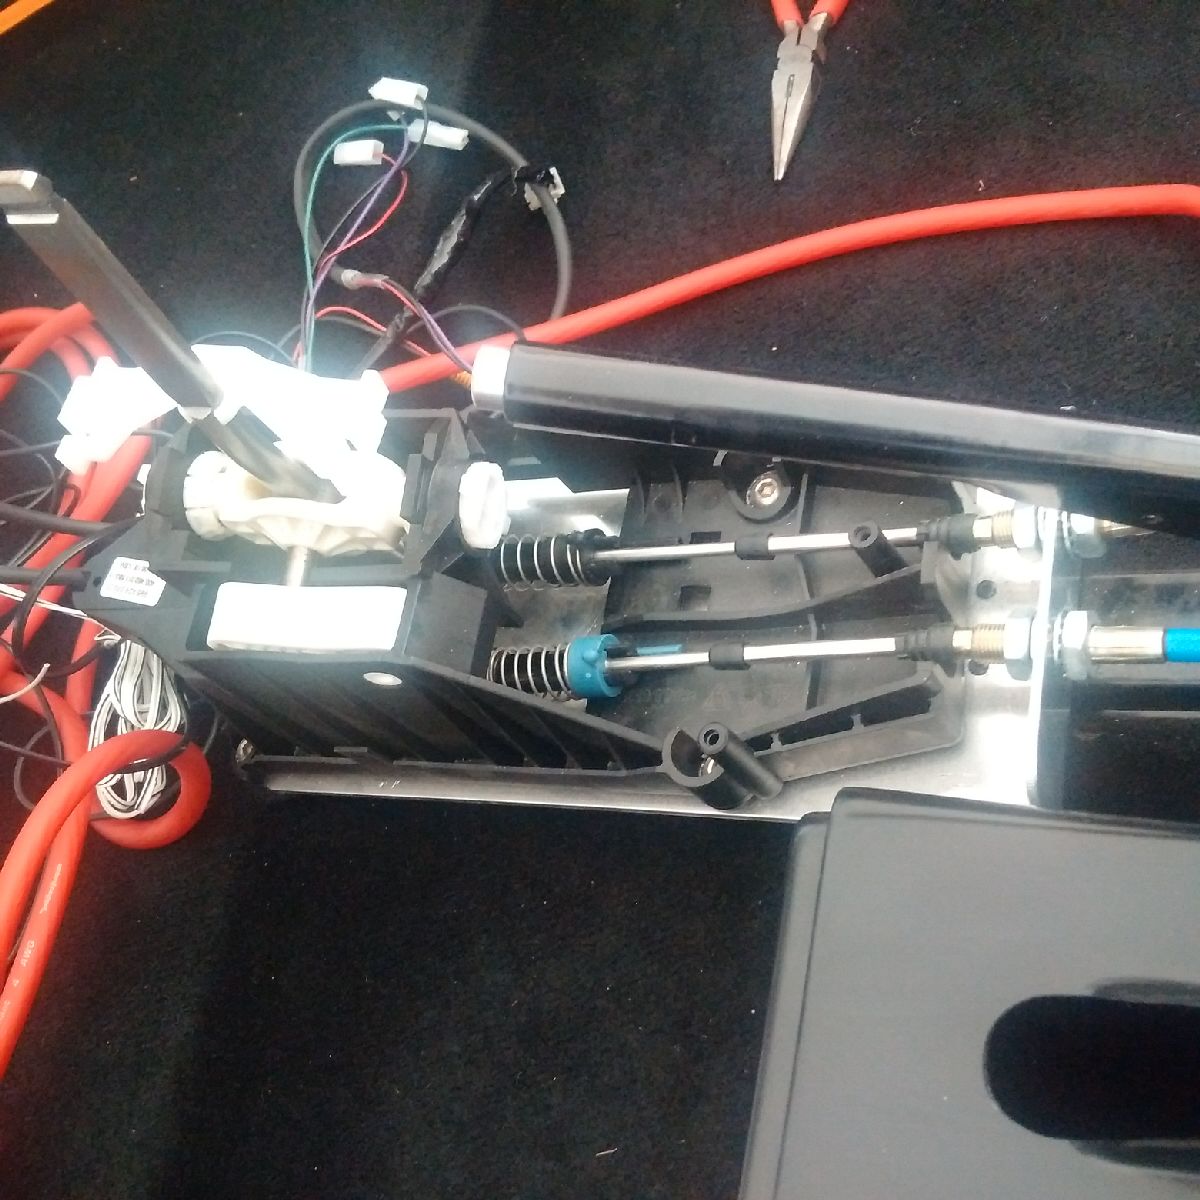
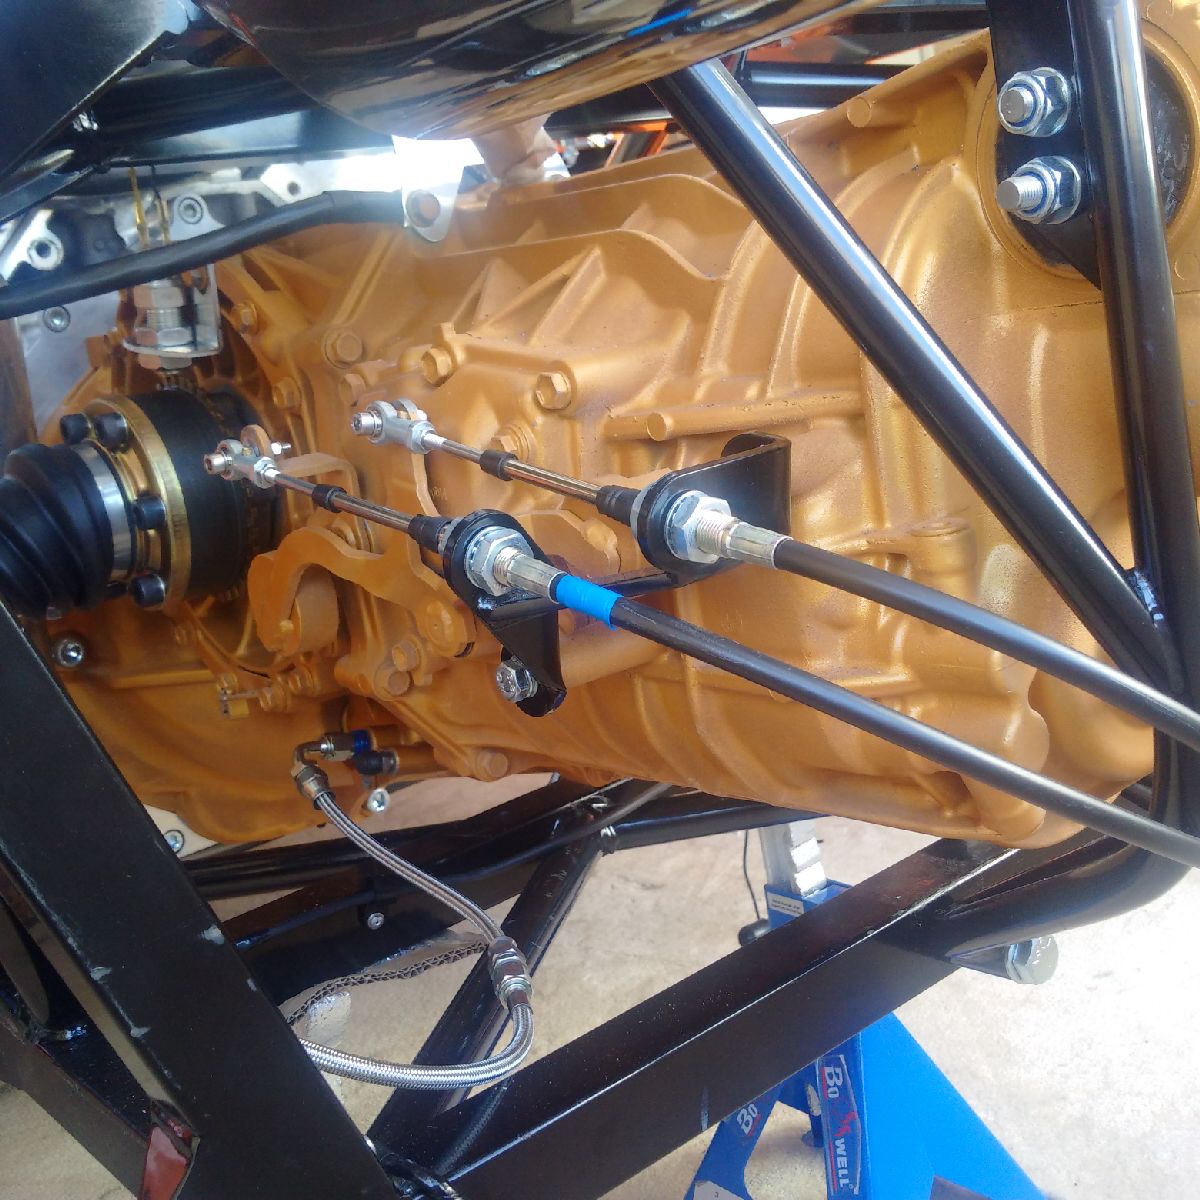
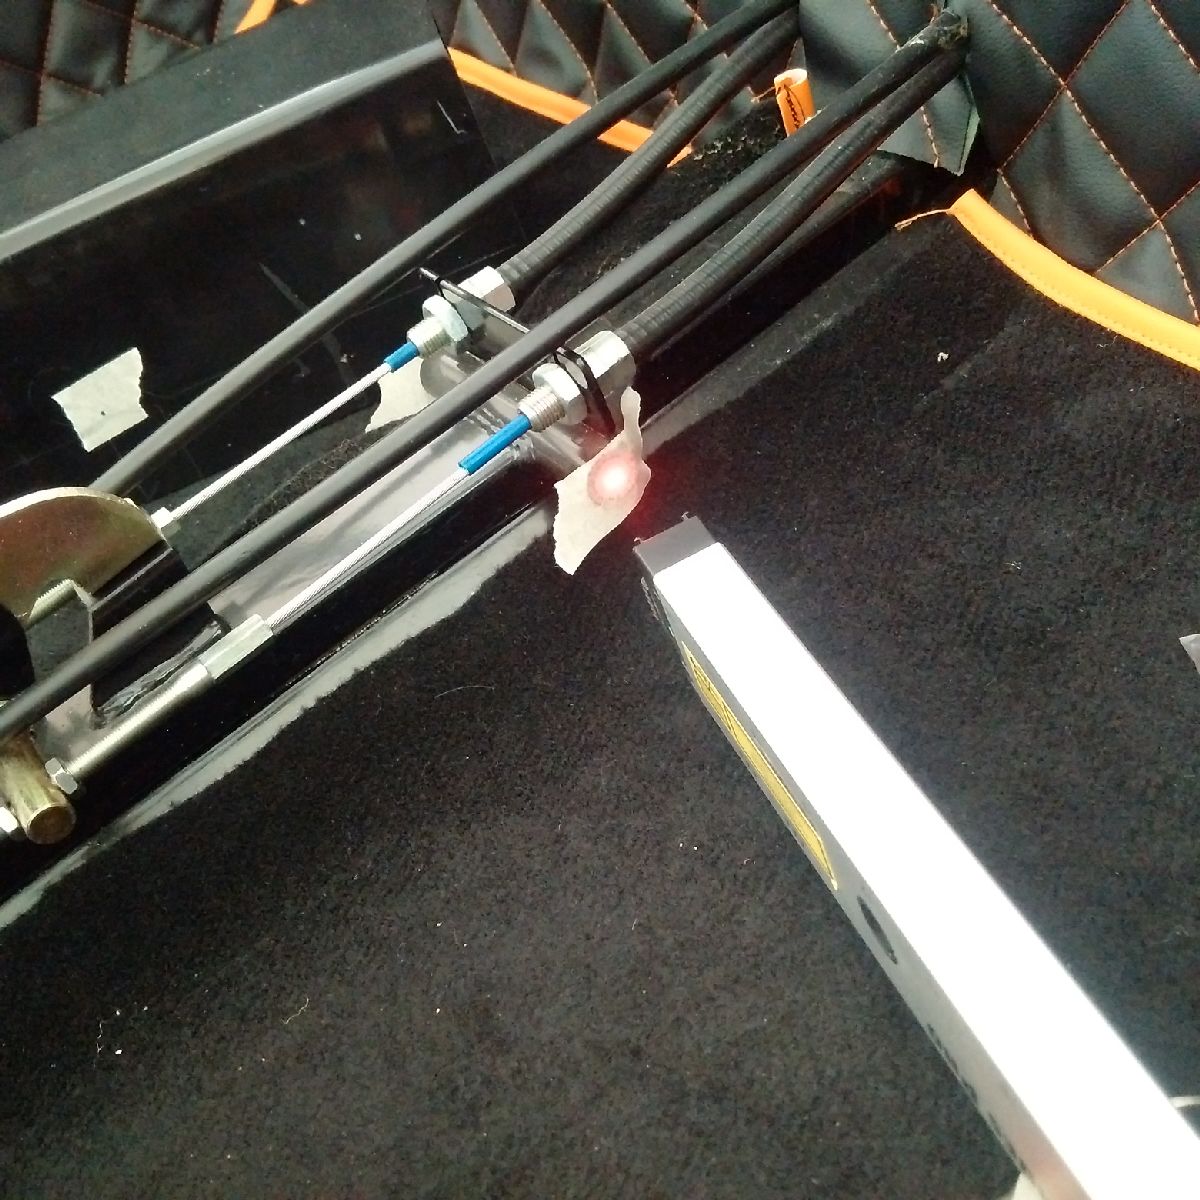
Next I worked on getting the gearbox connected to the cables and adjusted correctly. Both the factory Porsche studs had been cut off and tapped previously. I now worked on installing the rose joints to the cables, and then connecting the rose joints to the gearbox tapped holes (with a locknut on the back as an added locking feature). The cables were connected with the gearbox in Neutral. the cables were adjusted (using the locking nuts) so that the cabin end lay close to the locking pins on the shifter mechanism... The shifting mechanism was then connected to the cables, and the neutral locking plastic removed. The gearbox was then tested and all 6 forward gears and 1 reverse gear can be selected!! All gears are present and accounted for!! SUCCESS!
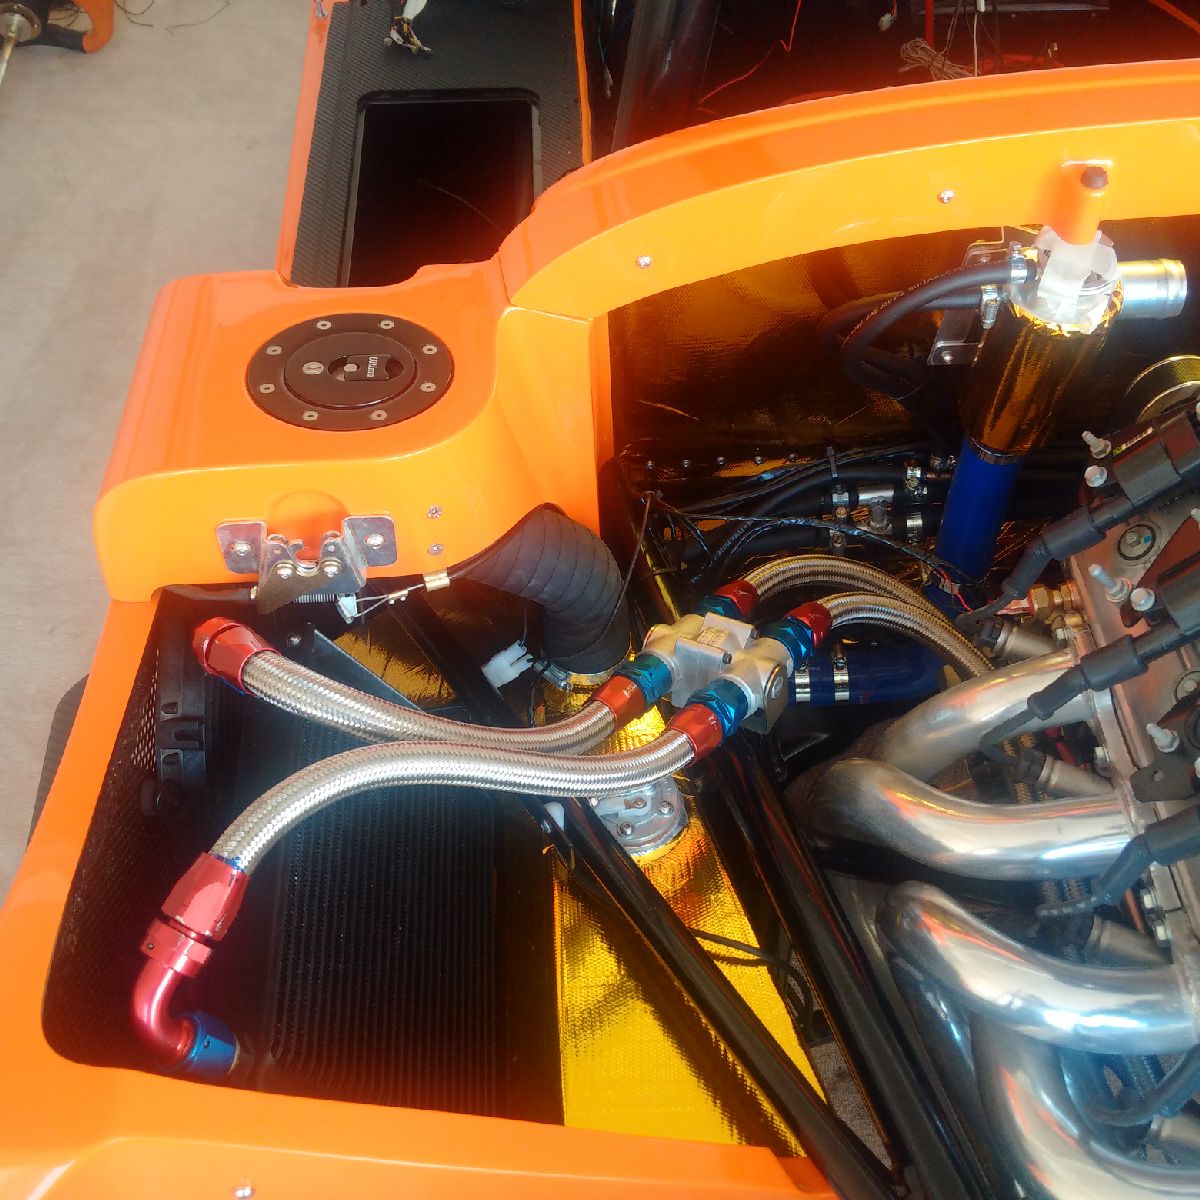
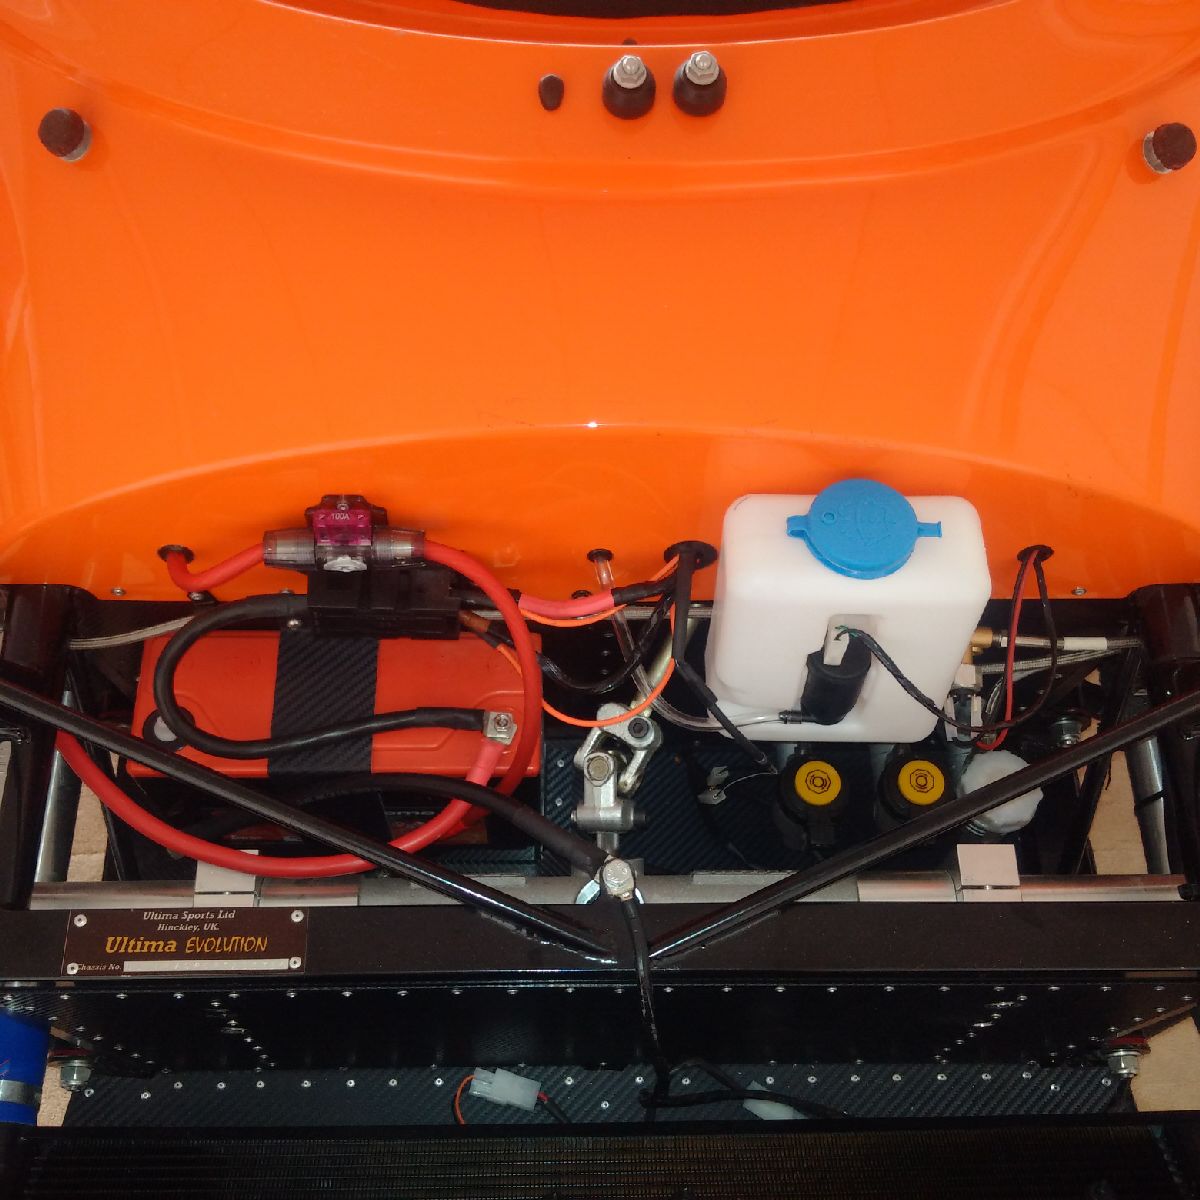
Next I worked on getting the oil connections to the engine finalized. The final oil pipes were cut and AN hose fittings fitted. The thermostat was installed and the hoses connected to the engine, oil cooler and thermostat
Nov 15, 2015
Build Time Today: 3 hours
Total Build Time: 344 hours
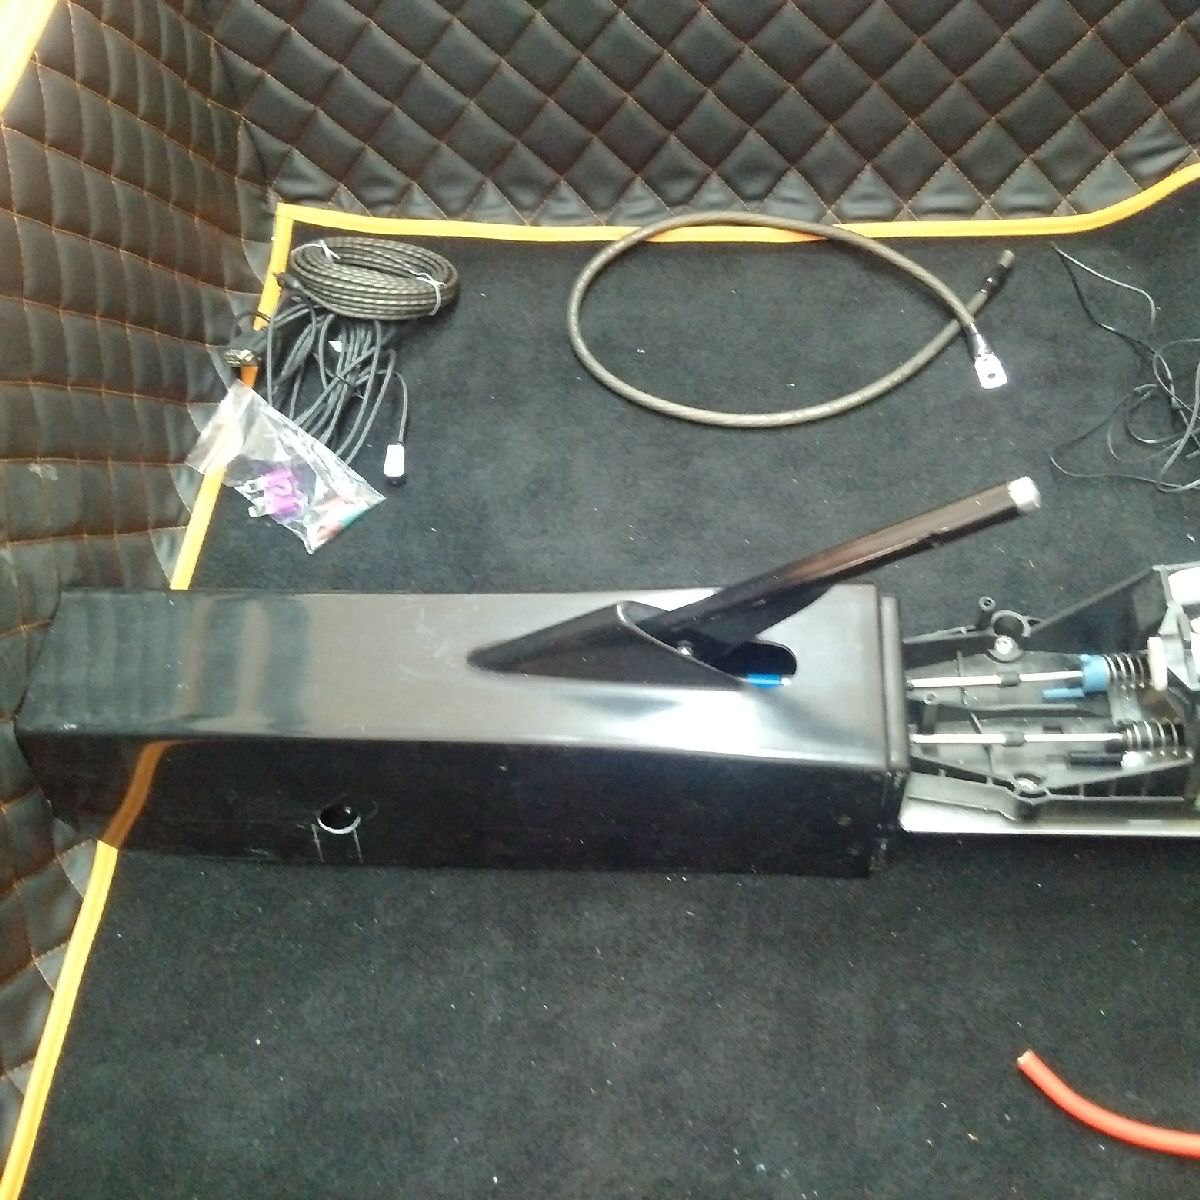
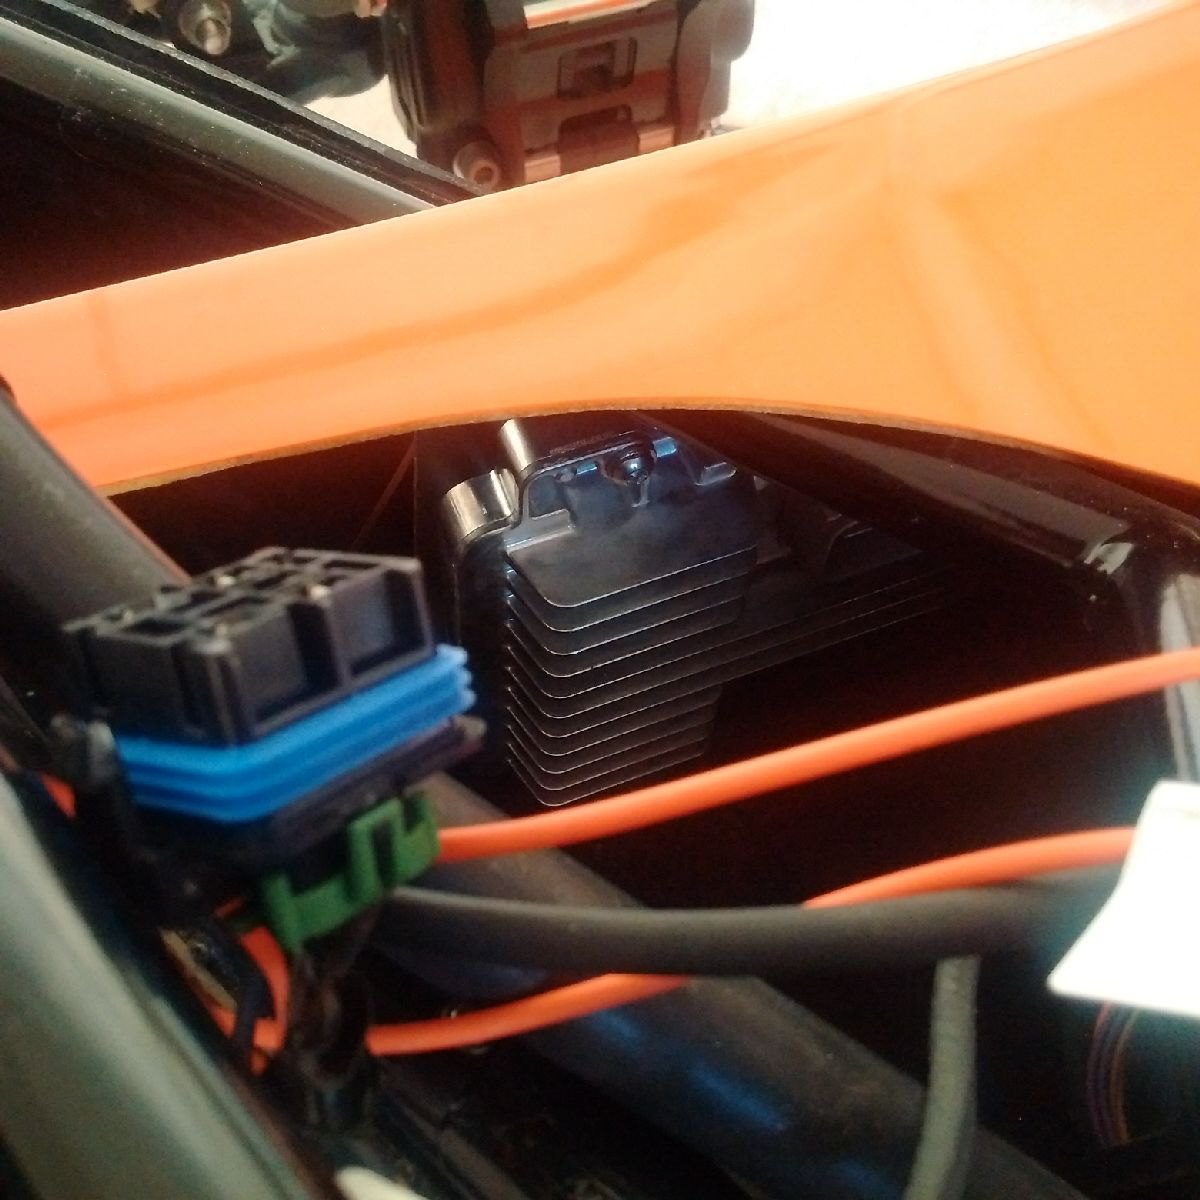
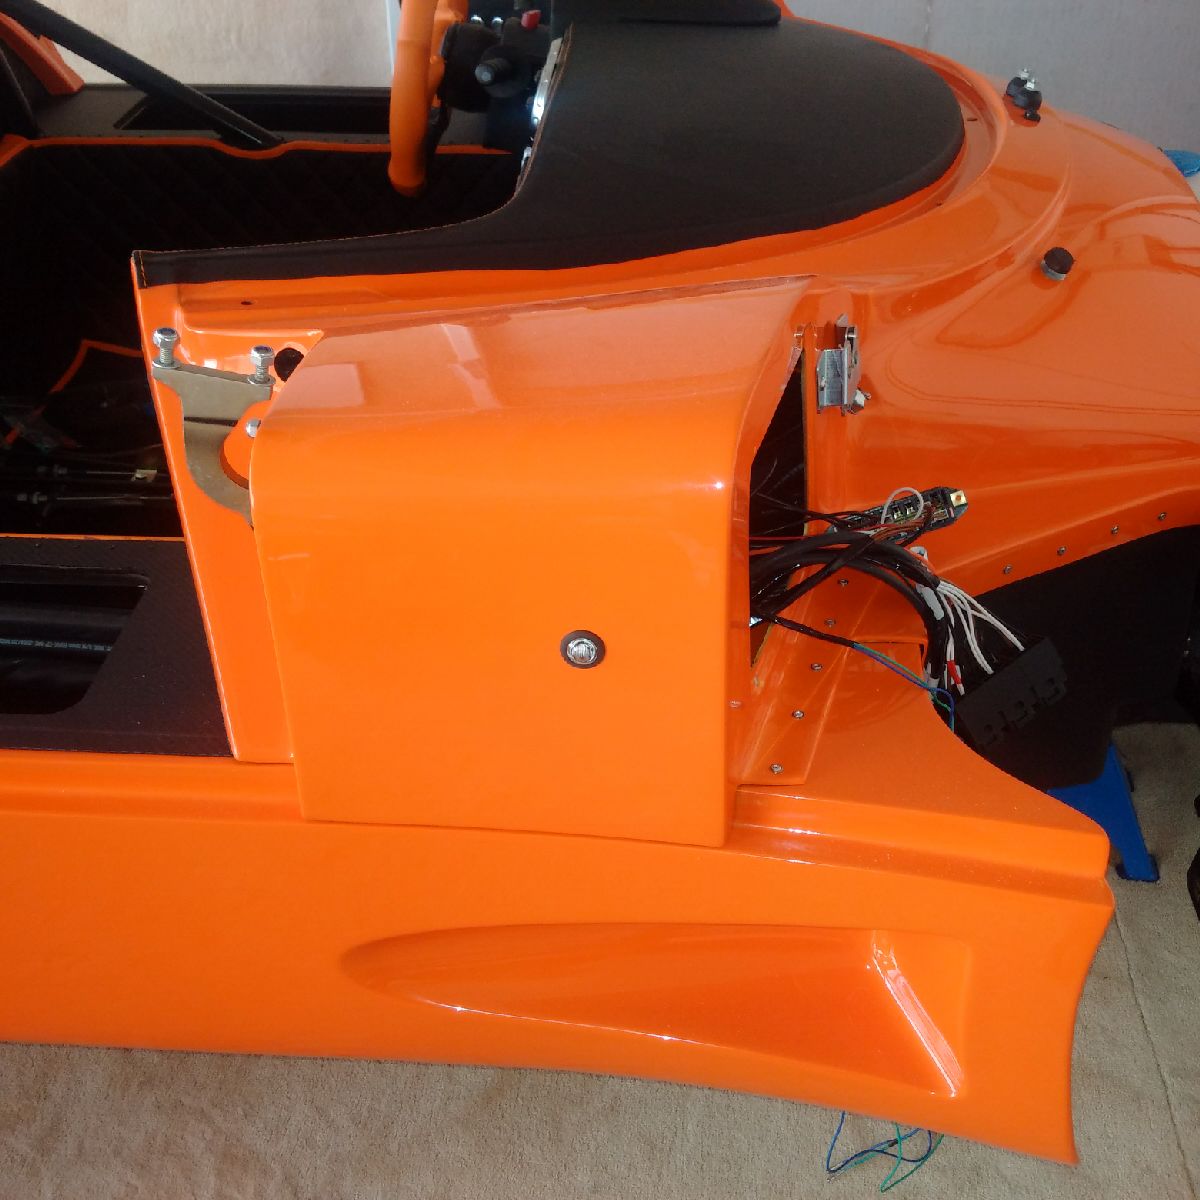
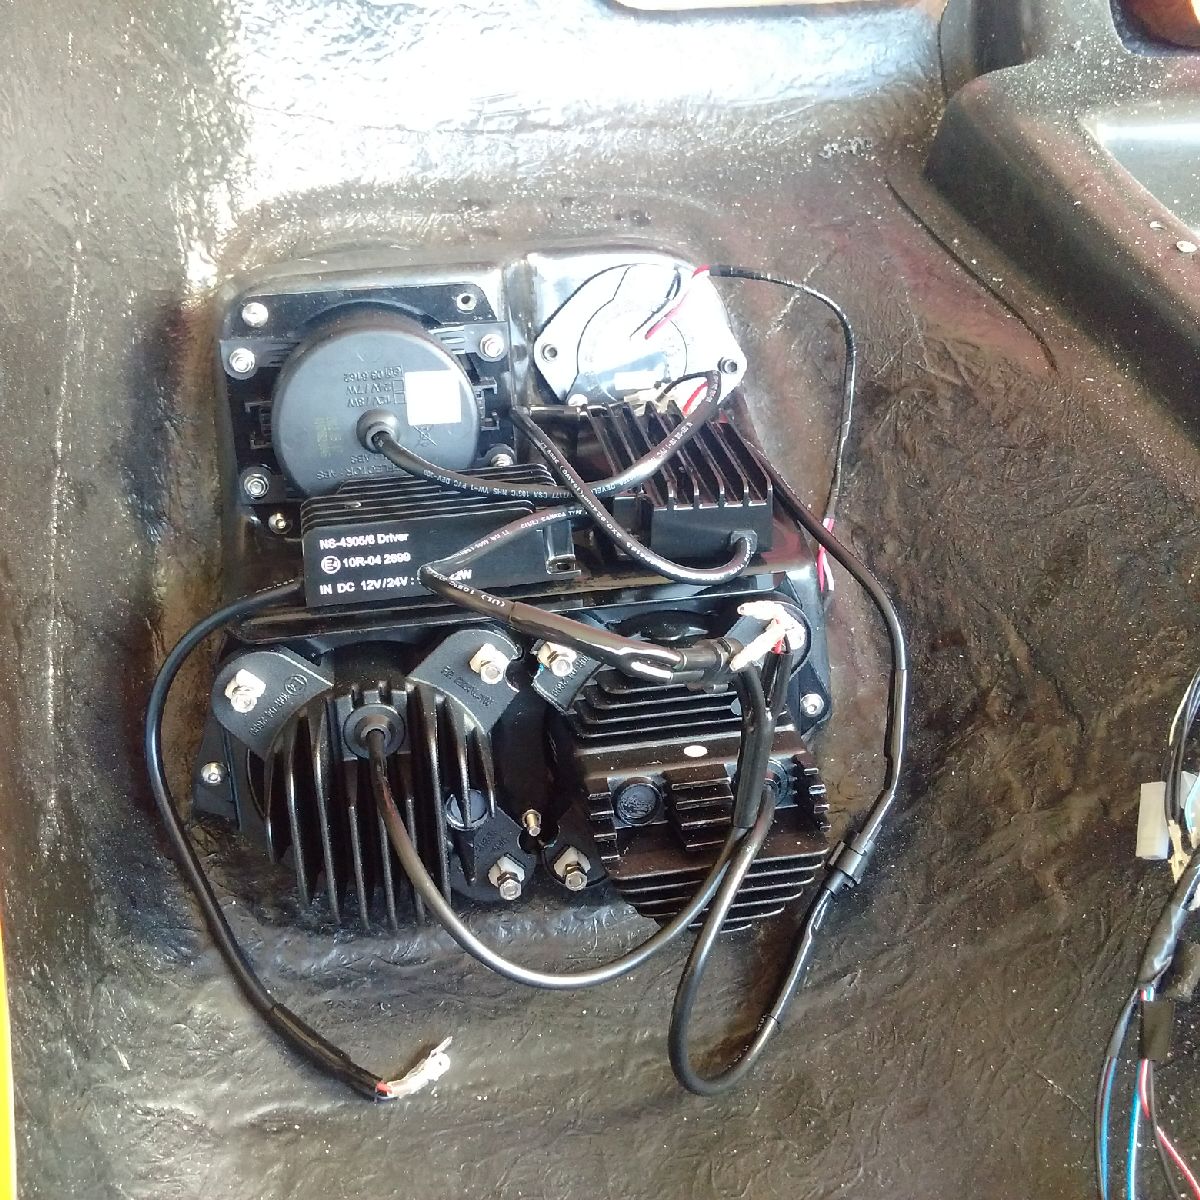
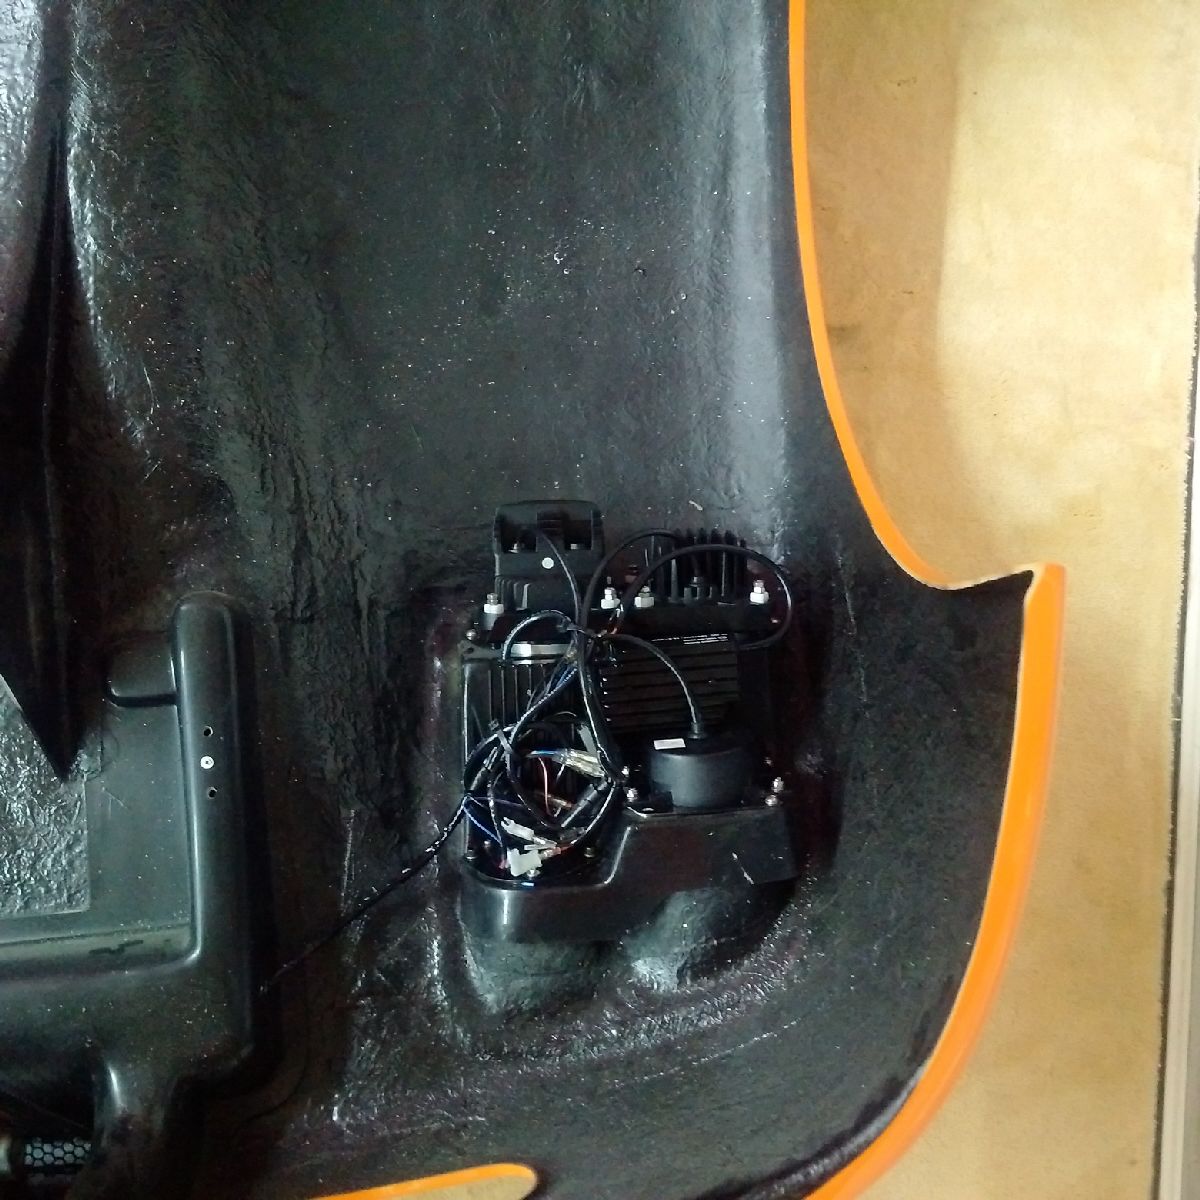
Today was another day getting small tasks out of the way in preparation for the dash install later this week. First, I spent some time planning on where and how to install the Engine ECU. Ultima normally provides a bracket to install the ECU in one of the front recesses, but I have an additional relay and fuse box(s) which will take up the recess space. Quite a bit or trial and error and holding up the ECU in various places led me to my location - the ECU is being placed in the front of the passenger sidepod, right behind the wheel well. Although it will inaccessible after the dash is installed, the only time I will ever need to remove the ECU is it it ever fries (and at that point I will have more bigger problems than the ECU) - it can be removed by cutting the sidepod from below and making a hatch.. A bracket for the ECU was made and tested, and then holes were cut into the bracket.. I was unable to install the bracket in the sidepod as I need some longer bolts to hold the bracket through the GRP and spacers..
I then installed the AM/FM antennae, and routed its power/ground and signal wire to the ICE 'area' of the dash...
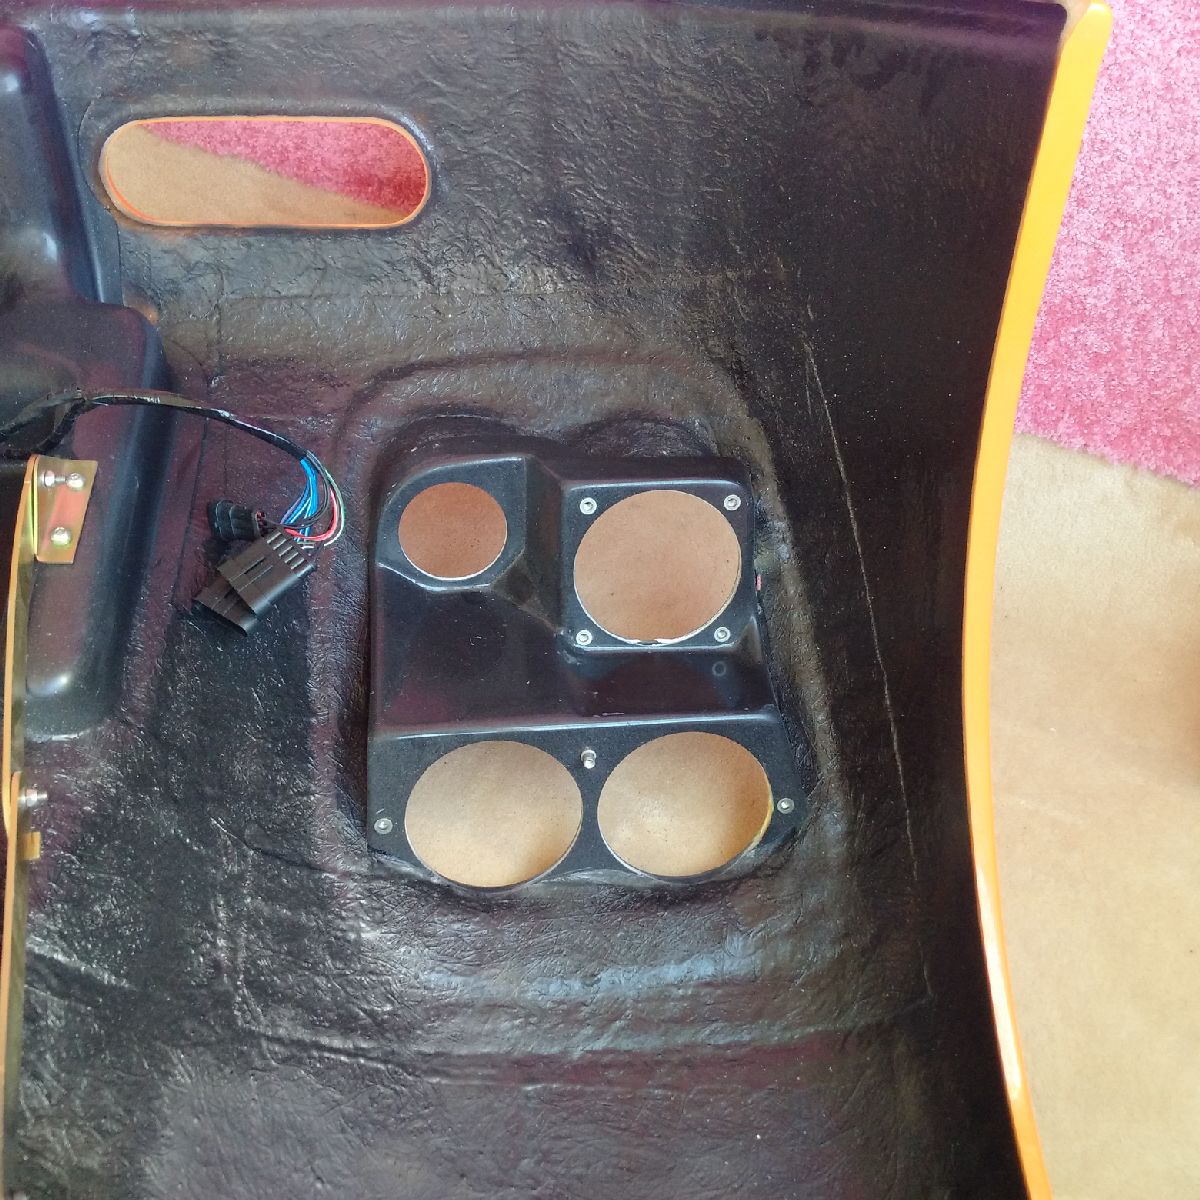
Then I worked on the central tunnel between the two seats - the rear section was trimmed to fit correctly, and then the two holes for the seat belt fixings were drilled. I marked the holes with the help of a laser, which was pointed at the hole, and then the GRP section was installed to see where the laser marked the hole behind it... The front section of the tunnel was also trimmed along the front edges as it did not fit between the chassis and the rear section... The locating hole at the top did not also align correctly, so the hole was filled with epoxy and a new hole will be drilled in the correct place...
Finally, I also trimmed the oil dip stick bracket so that it would refit over the headers to the engine block, and the dip stick was re-attached.
Lots of work done today!
Nov 16, 2015
Build Time Today: 2 hours
Total Build Time: 346 hours
A short day in the garage today... I started with final fixing the ECU bracket... the longer bolts had been arranged and I marked the two holes required on the bracket and on the sidepod wheel well... all four holes were drilled, and the ECU attached to the bracket... the bracket was threaded between the wires and harness to the sidepod front, and the two bolts were installed with a spacer - it took a while as it is almost impossible to reach inside and secure the bolt... I opted not to use rivnuts as they cannot tighten 100% and I did not want the ECU moving/vibrating...

Once done with the ECU, I took a little bit of time to add some more pending items to the dash while it was still out - namely the washer bottle bracket and the washer nozzle... holes were marked and drilled, and the washer bottle bracket and the washer nozzle were both bolted on...
Nov 17, 2015
Build Time Today: 3 hours
Total Build Time: 349 hours
I started the day with working on the seat belt holes - all 8 seat belt fixing pre-tapped holes were checked, and two of them do not appear to be tapped correctly as the bolt will not turn. I used a 7/16 tap and corrected those, so that way when the seat belts are fixed there will be no hold ups.
I also worked on the two other AC vents, which I had forgotten about till now - the AC has 4 vents, and I had previously installed two in the dash. The other two had been planned to be facing the legs - however, the Ultima supplied bracket cannot be used since I will be adding an ICE system under the dash area. I ended up making my own simple brackets, and then sikaflexed my chrome AC vents to them... the holes were drilled in the chassis, and then the bracket painted and left to dry... I will rivet the brackets on after installing the dash to make sure it does not interfere with anything, and also so that I can work under the dash connecting the wires before being blocked by these 2 AC vents...

Finally, I decided to start mounting the dash - the wife came out to help put the dash on the chassis - hopefully for the last time! All the factory pre-fit holes were checked and aligned, and then I started marking and drilling the remaining holes that will hold the dash to the chassis... the holes were drilled and clecoed, and I will start the bonding and riveting tomorrow as my back is killing me from bending over for the tap, AC vents and steel drilling...

Nov 18, 2015
Build Time Today: 2 hours
Total Build Time: 351 hours
A long day at work meant only a short time in the garage today. I permanently mounted the dash by releasing the clecoes, applying sikaflex, and riveting the dash to the sidepod and chassis. I also P-clipped the front brake line to the dash rivets to fix it in place.

After installing the dash, I began the under dash work by installing the door hinges - this procedure requires you to be contortionist to get your hands under and inside the sidepod to bolt on the nut that holds the metal bracket that the door piston is attached to. Between both door pistons and piston brackets, my hands were scrapped and bleeding, and I decided to call it a day...

Nov 19-20, 2015
Build Time Today: 8 hours
Total Build Time: 359 hours
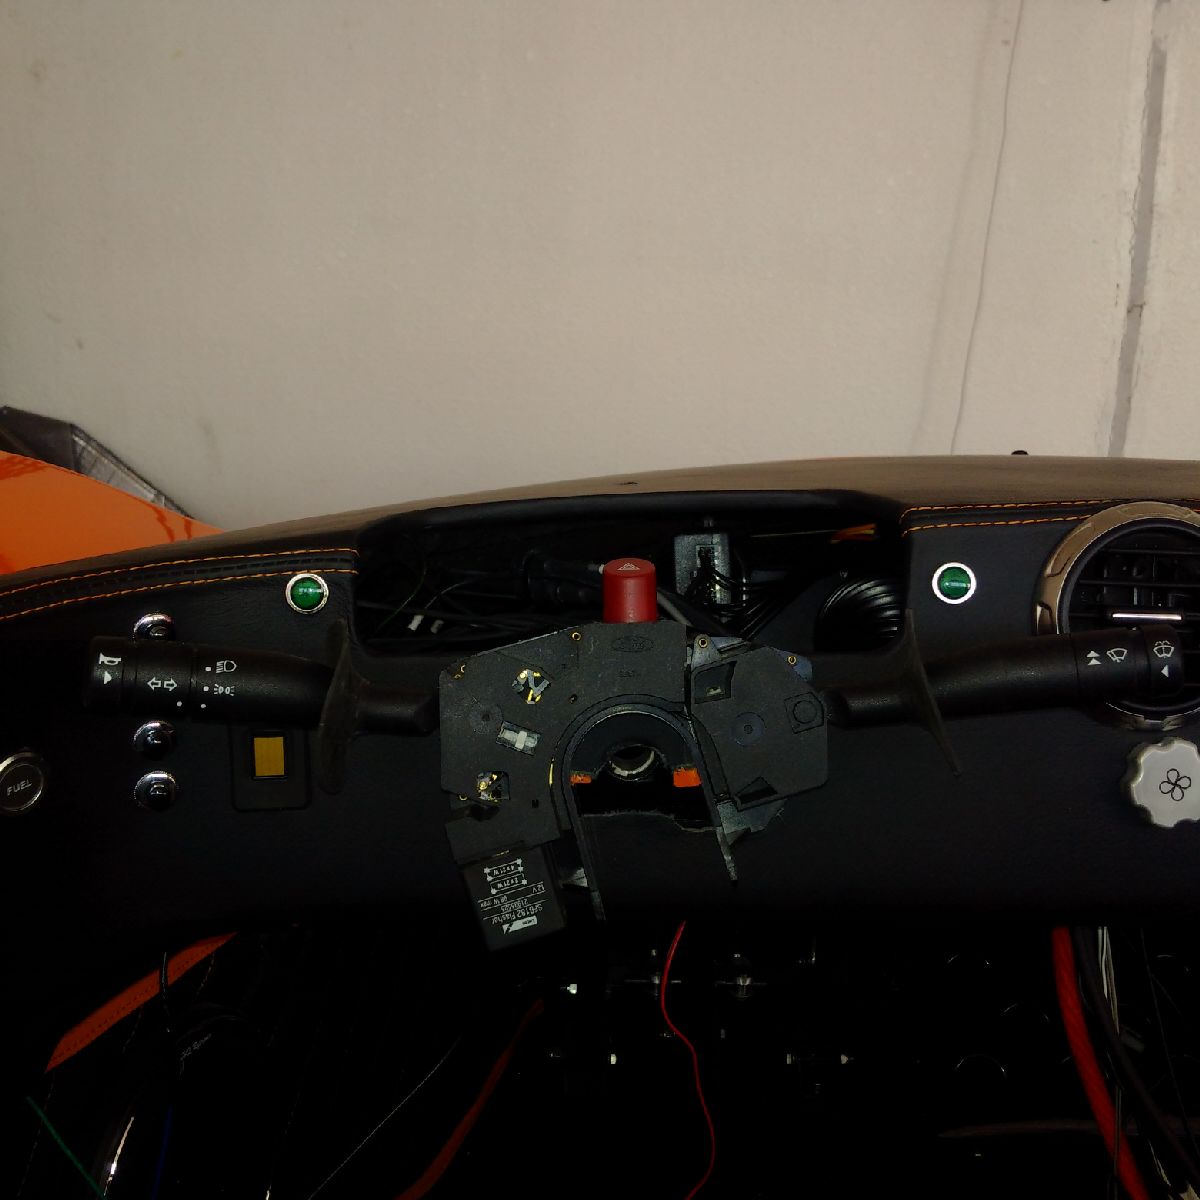
A couple good days of getting work done - I was able to install most of the dash switchgear, instruments and ancillaries - All the under dash wires for the dash face were connected except the Stack pod - that will installed after all under dash work is complete as the pod hole lets a little light inside the dash, otherwise it is impossible to see anything underneath. The only real challenge came during the stalk installation as the wire harness would not fit between the dash and the stalks, and I had to cut leather, drill and file the GRP to make enough place for the harness - needless to say, but it was not fun watching the GRP dust settle on the finished dash switches, vents and leather... however, a good deep clean later on should get rid of most of this dust...


I also installed the wiper motor and connected its wiring, and also passed all the wiring from inside the dash to the front area through the dash holes previously drilled. I also connected the drain pipe to the rivnuts installed in the windscreen gulley, which should help prevent water from entering the cabin...
Finally, I got back to the engine area and connected the water pipe from
the engine outlet to the swirl pot - I ended up moving the swirl pot
further to the left to give the silicon pipe enough place to be able to
bend a little... This relocation of the swirl pot ended up having issues
due to breather pipe lenghts, but some pulling and re routing resulted
in all the pipes fitting the swirl pot... With this last connection
done, the engine is now ready to accept coolant and oil, and also a
first start as soon as the dash area is ready...
Nov 21, 2015
No build time today as I take part in the Dubai Grand Parade... hopefully next year I will be able to do so with the Evo!
Nov 22-23, 2015
Build Time Today: 7 hours
Total Build Time: 366 hours
Another couple days getting the dash/front area ready - I finished up all the underdash work with the installation of the Stack Pod - this again required more cutting into the GRP because the Stack connector in the back would not fit! I hated cutting the leather and removing the GRP (getting dust everywhere) but it had to be done... once satisfied with the fit, I bolted the lower half of the stack pod... All other wires under the dash were clipped and zip tied, and everything is ready except the bolts for the steering wheel...
I also took time to install the stalk cover and the steering wheel - this was challenging as the stalk turn cancel ring needs to be installed on the steering column between the cover and the stalks! Since there is no access to this area, I started with threading the stalk cover onto the steering column and then installing the turn cancel ring... the whole assembly was later installed to the dash area with some fettling of the ring and the cover to get the correct fit - it was finally on, but it will need to come off to install the seats, and also because the steering column does not reach all the way to the UJ (short by about 2-3mm).. a solution for this is pending as I think of possible way outs...
I also installed rubber grommets in all the forward holes that pass wires between the under dash to the front clam area - the grommets were fixed with clear silicon and left to dry... all the wires in the front area were connected - the brake switch, the washer motor and water pipe, and EVO style brake fluid switch... I also installed a 100A fuse for the AMP and 100A Megafuse for all the car electronics... this megafuse was then connected to the battery and shold provide a good safety net from short circuits...
Finally, I also got hte side markers installed - this was done by removing the rubber holders from the lights, installing the rubber holders, and then threading the lights through it.. the wires were connected, and another small job ticked off the list...
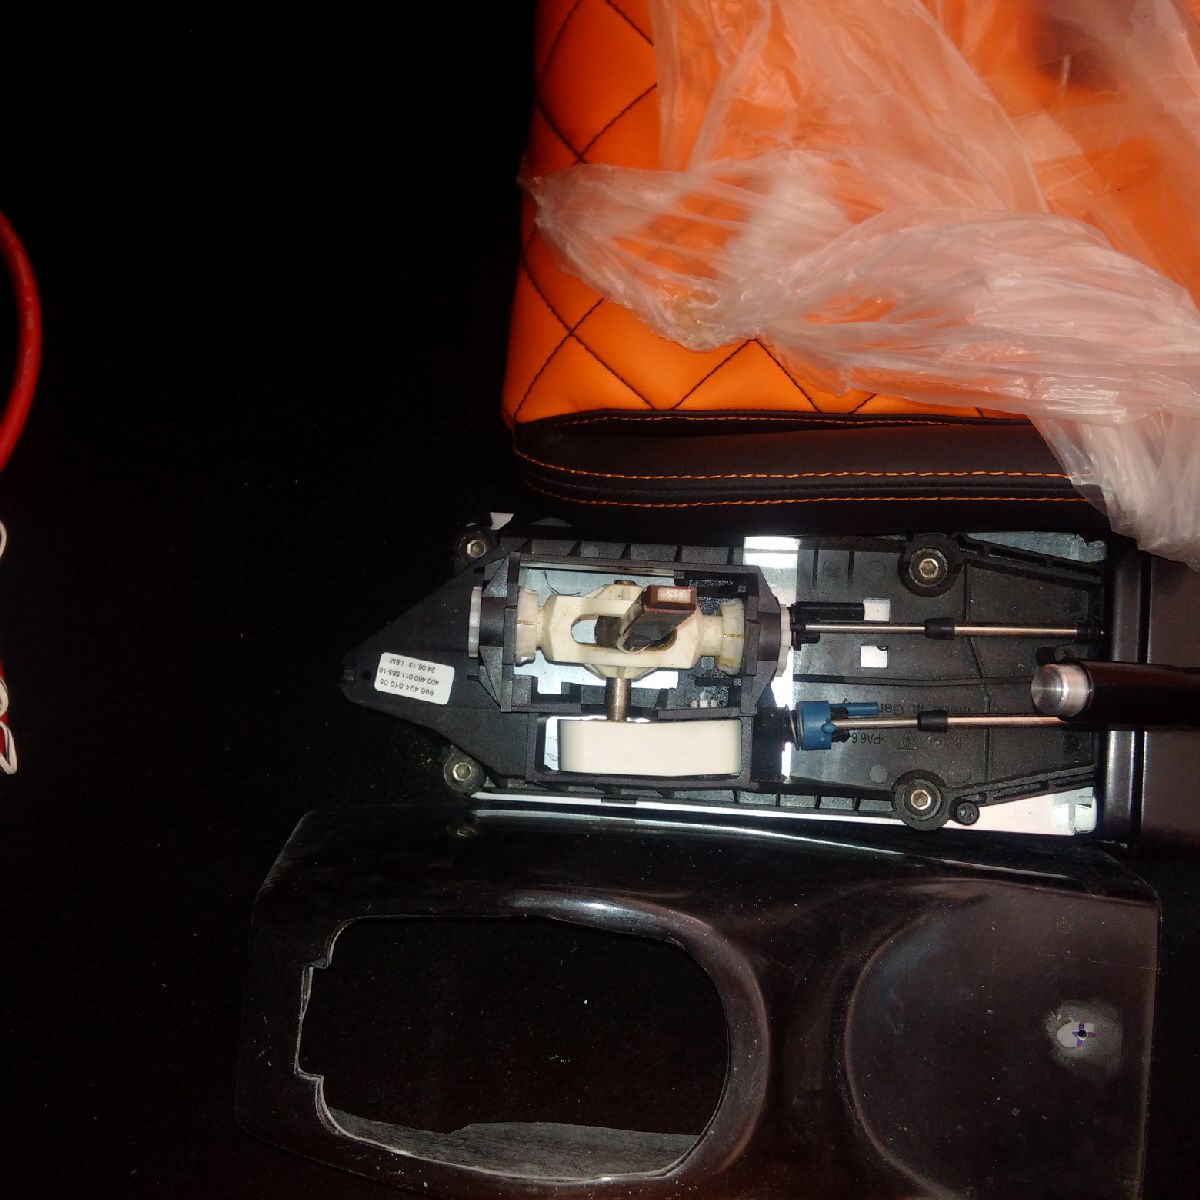
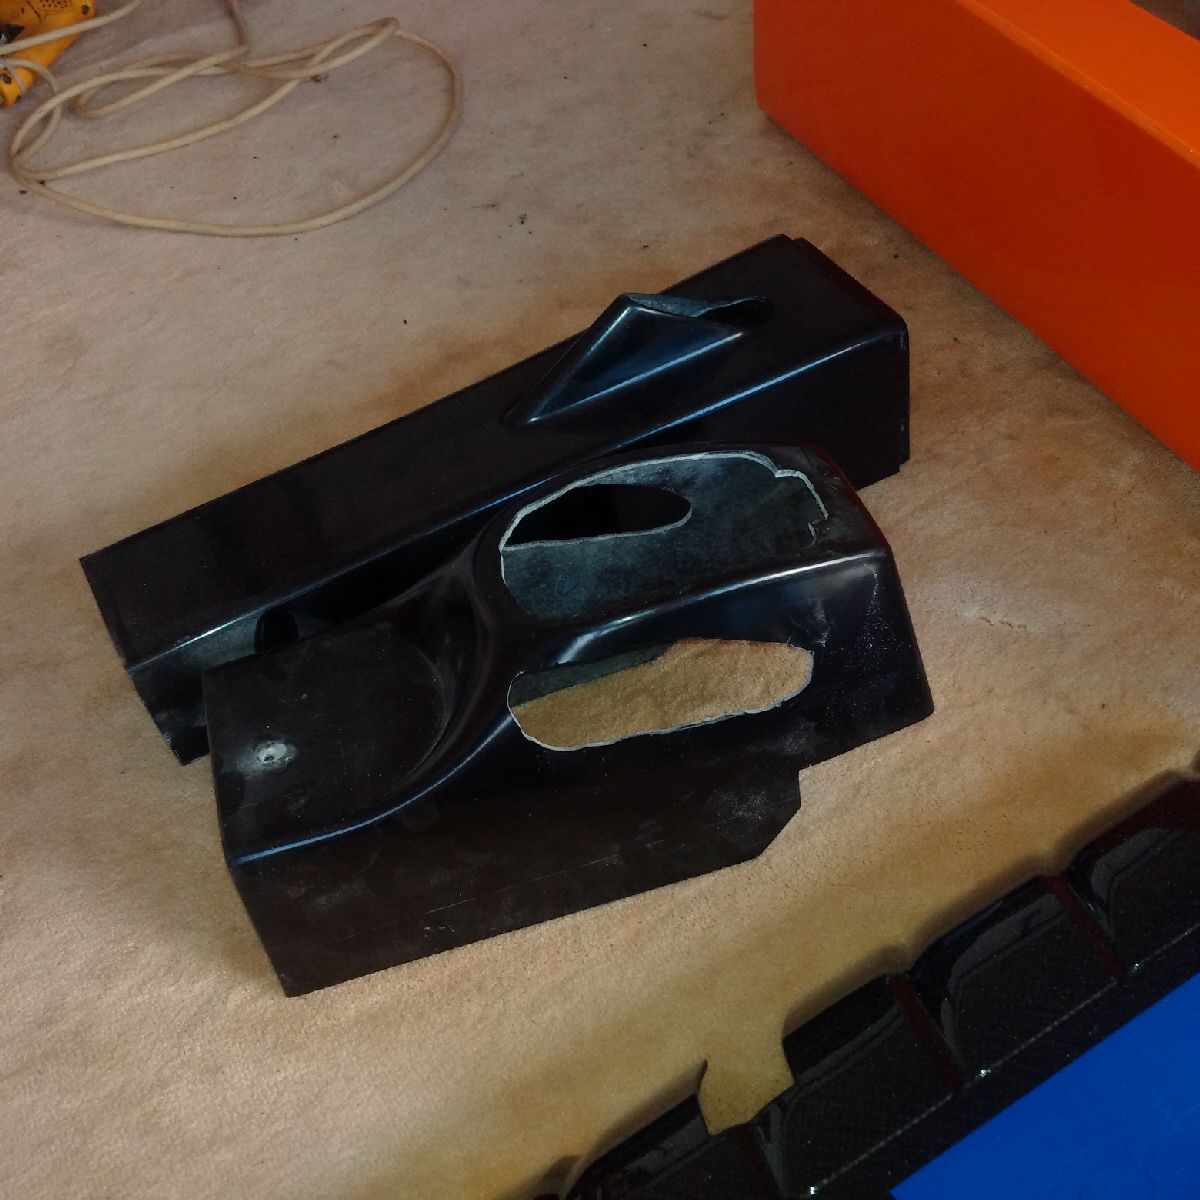
The last major task accomplished was the trimming of the center consoles - this was a nightmare!! Both the seats when fitted in their seat runners and bolted to the floor, leave almost no room for the center console to be installed... Big cuts had to be made in the center console along with trimming to allow for seat movement... a repetitive procedure of checking the hole with the seat lead to a long arching hole on both sides of the console that should allow the seats to be installed and also allow some movement...
Nov 24-25, 2015
Build Time Today: 3 hours
Total Build Time: 369 hours
Just a couple short days in the garage:
First priority was to get the steering system finalized - the column is short by about 3mm, and at this point I cannot get a new column - instead, I thought about cutting into the stalk cover and letting the steering wheel boss slide a little into the cover... the leather was carefully cut out, and the inner cover ally cut to the required shape... the stalk cover was then re-installed and the steering wheel installed after - and it works! The UJ lines up, and all steering column bolts are torqued to complete the steering system!

Next, I decided to finalize the hub/wheel area so that the tires can be installed - the brake lines were still loose so billet ally clips were used to secure them to the chassis. The brake line was then covered in spiral wrap to provide protection against road grit.
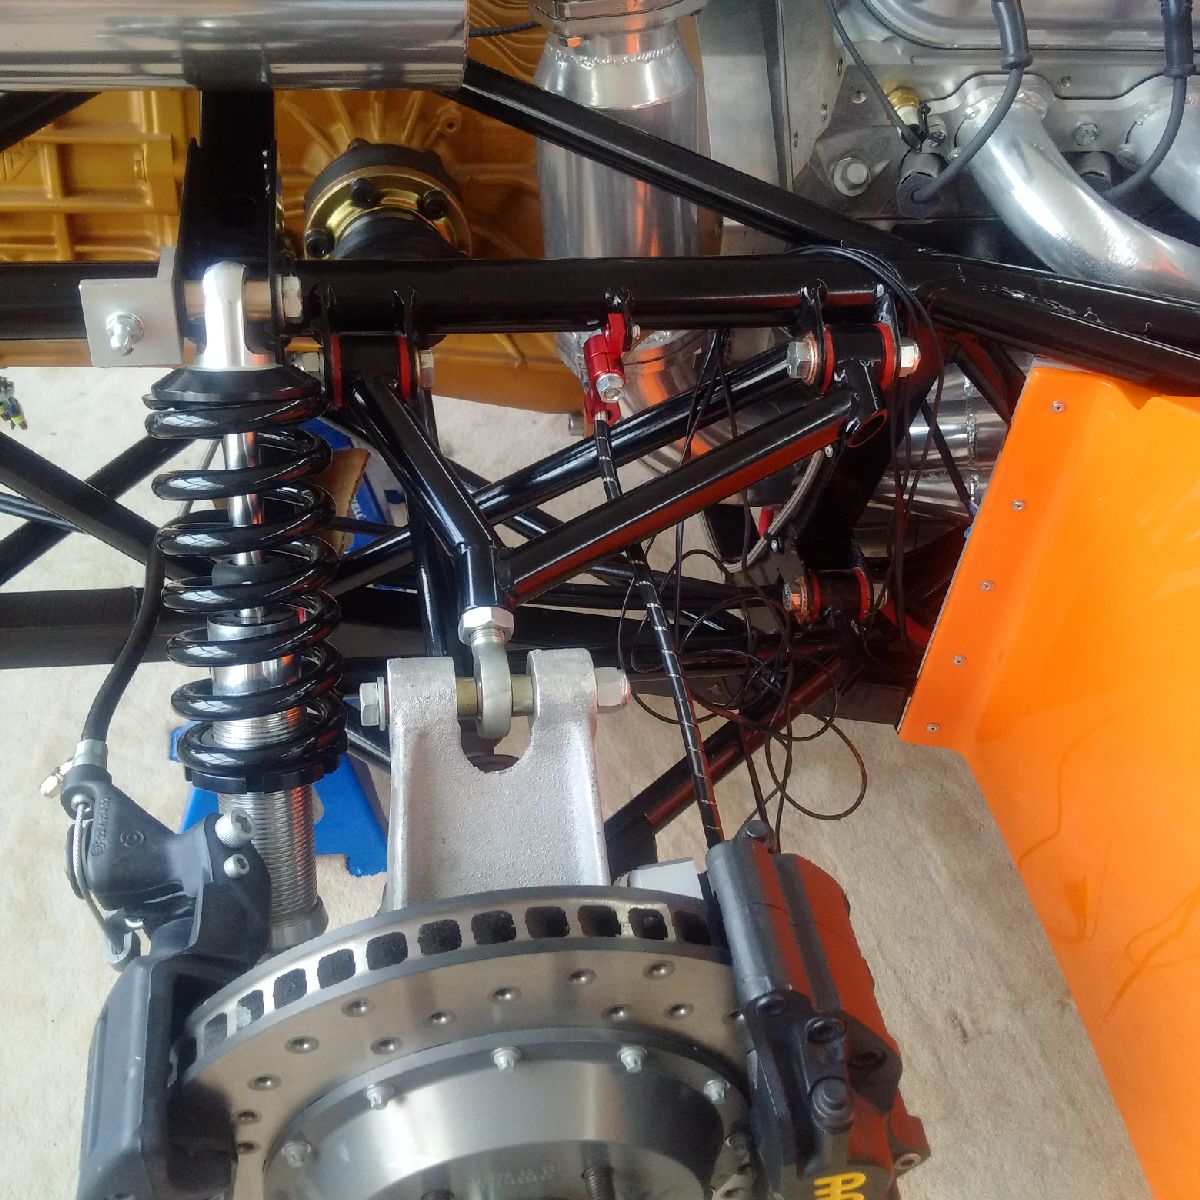
Finally, the wheels and tires were installed!
Not much other work can be done now because:
1) I need coolant, engine oil and transmission oil to start testing the
engine/gearbox operations
2) I need the front or rear clam back in the garage so I can start
working on them... Since they are both in storage, I will wait till
tomorrow for help to bring it out to the garage...
Nov 26, 2015
Build Time Today: 4 hours
Total Build Time: 373 hours
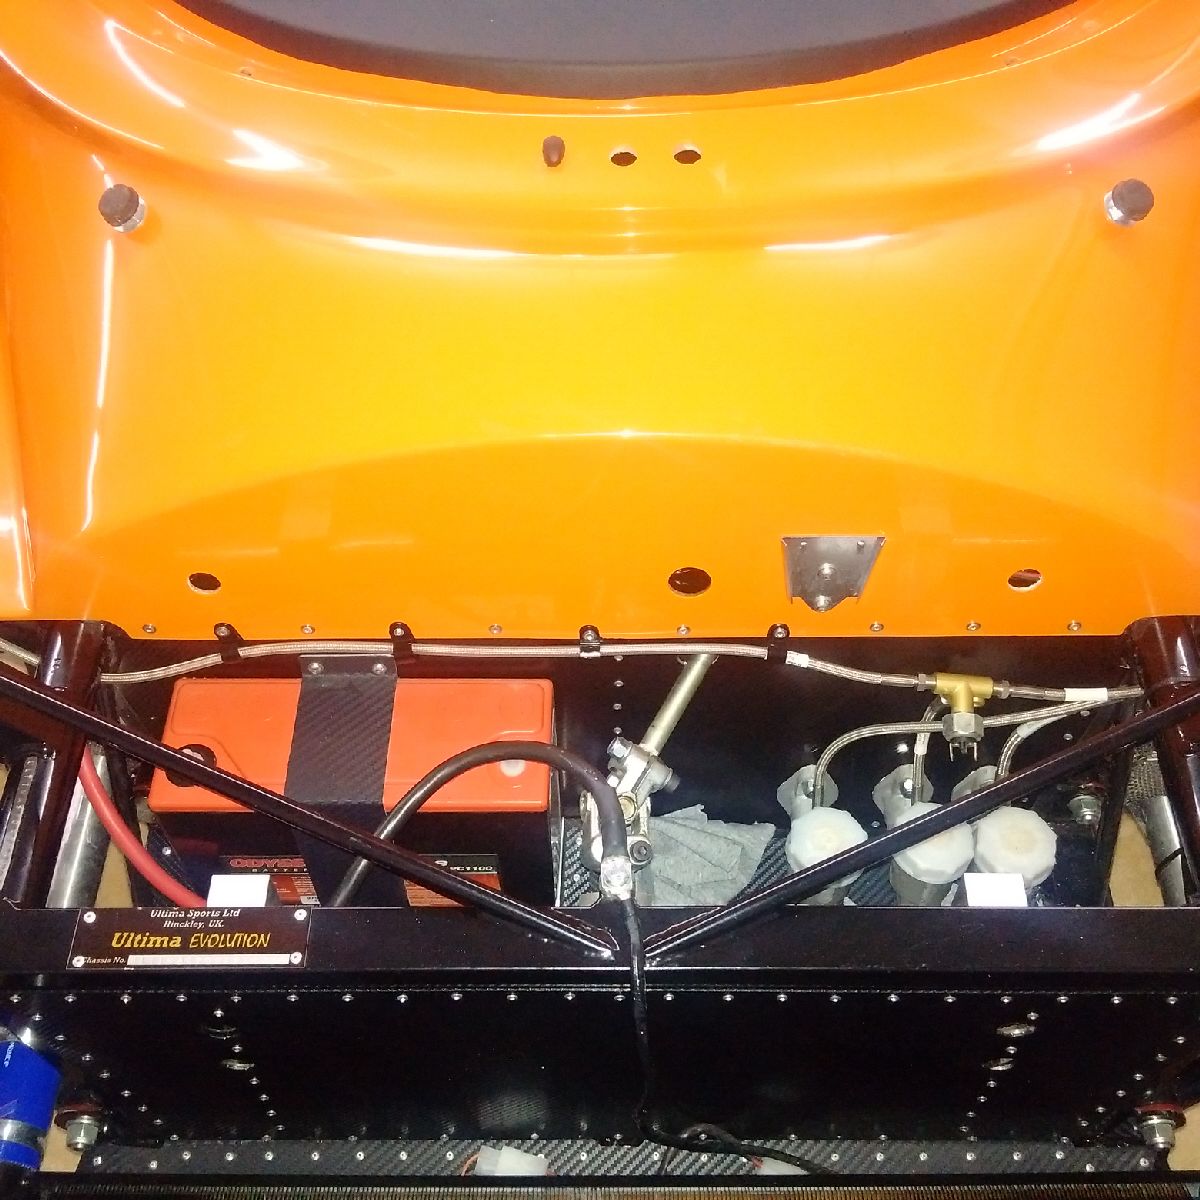
First task of the day was filling up the liquids: Mobil 1 0W40 was used to fill up the oil cooler and then the engine (0.75L in cooler and 5.75L in engine). 50-50 coolant (red) was filled in the expansion and swirl pots (16L). 5L of petrol was added to the driver side tank - the engine is now ready for its first run after a last round of checks and priming the engine - this will be done tomorrow!
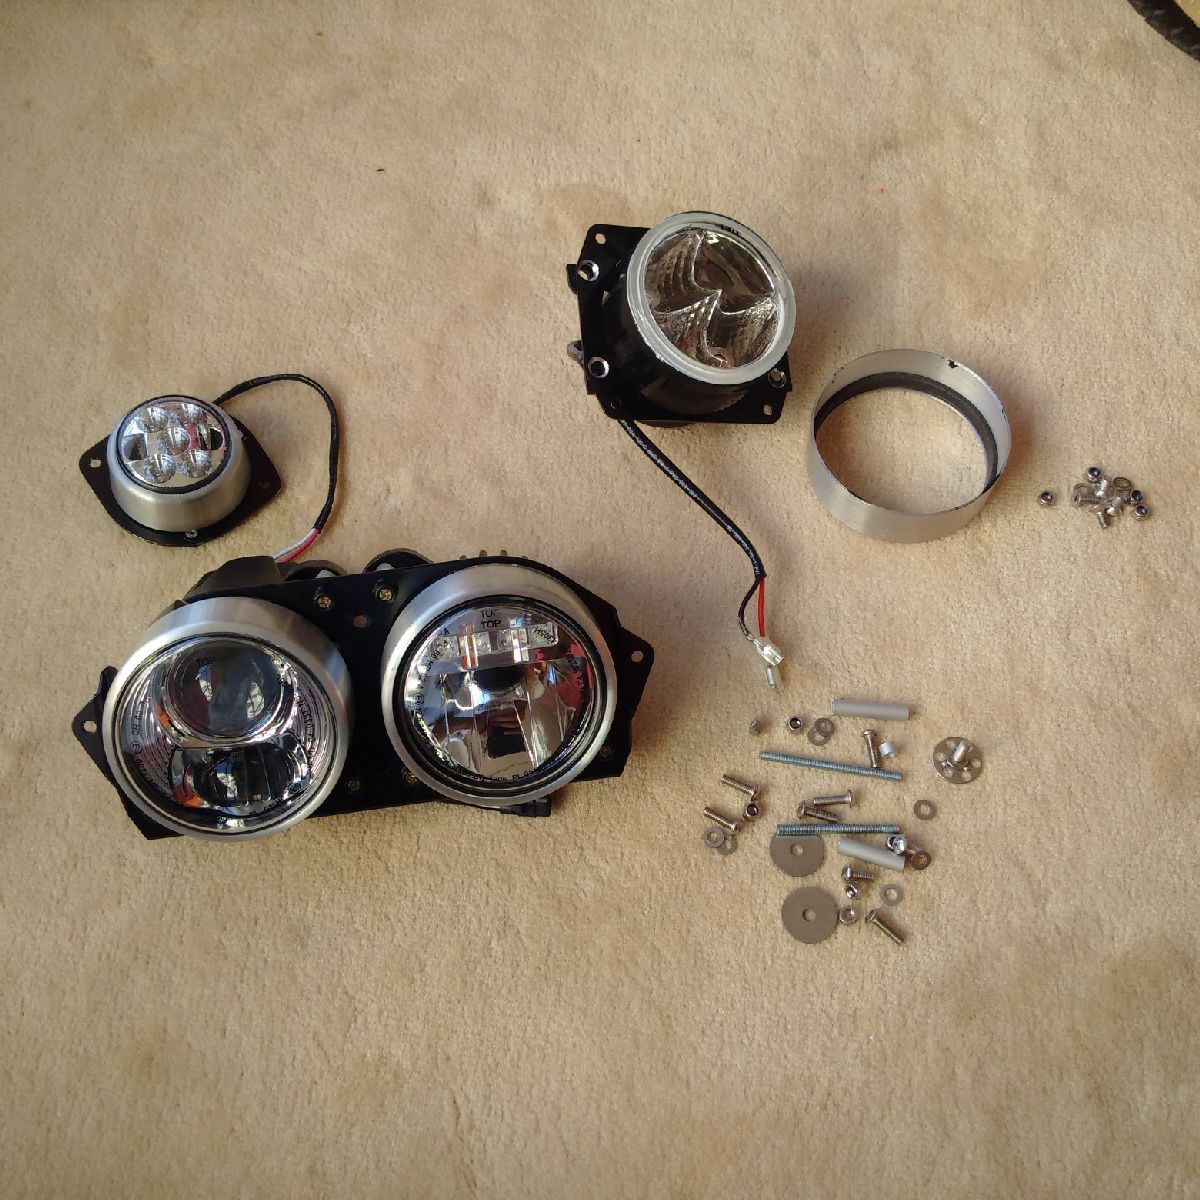
Next, I was able to move the front clip to the garage so I started work on that - the lights!! The front lights consist of 4 bulbs in each pod - Ultima supplies the lights in brackets which need to be attached to the pod - however, the holes in the brackets do not line up with the pre-drilled rivnuts, so I set about filing the brackets to get the required fit - it took a long time to file and level one set of lights - filing the hole and aligning the bulb in the hole, and then checking for the level from the front... once all 4 were correct, the lights were attached to the body with allen headed bolts. The two LED converters were also velcroed to the pod so that the light connections can be made later...
Nov 27-29, 2015
Build Time Today: 8 hours
Total Build Time: 381 hours
This entry is a cumulative entry for the last 3 days - which have been quite a challenge!
I started off with priming the engine for oil - using the starter with the plugs removed... once there was oil flowing, I re-checked all the connections and pipes, and said a little prayer before starting the engine for the first time - and she started with a few chugs!! However, the start was short lived and I killed the engine within 5 seconds as there was a major oil leak - the oil cooler thermostat fittings and the oil cooler take off adapter were both leaking oil - heavily! Within those few seconds I had almost a litre of oil on the ground... ARGH!!
I spent the next day redo-ing the oil connections... the exhaust was removed, so that I could access the oil pipes and the take off adapter... the fittings were re-tightened and the oil adapter O-rings re-checked - one had apparently moved during the install and was not sealing well... the oil connections were then reconnected, and then the entire exhaust system re-attached!
Also found was a minor coolant leak at the temp sensor and at the radiator temp sensor - both were tightened down...
The fluid levels were rechecked (oil added) and then a second attempt to start the car was made! Once again, she kicked off into life right away... this time with no apparent leaks! I could not see any oil, coolant or fuel leaks, so at least there are no major leaks. Minor leaks will be checked after the first couple drives... However, with this second start, another major problem became apparent - there is very loud noise coming from the engine! No, not the grunt of the V8, but more like something bouncing around or something grinding internally! ARGH!! I also noticed some small sparks coming from inside the adapter plate near to the starter motor housing - this will need to checked in detail before the next start...
I also worked on the front clip - the second headlight cluster was trimmed and the bulbs installed similar to the first cluster... A hole was then drilled on both sides of the plastic hinge support to allow the wiring harness to pass through, and the front headlight wiring harness was passed through the holes with the use of rubber grommets. The front lights were all connected to their respective connections. Now, I will test the front lights before installing the rear covers or the front Perspex covers...

Continuation of the front clip work and engine issues will proceed after my trip - I head off tomorrow for a much needed break during the National Day holidays... so next update around the 10th of December...