Feb 1-5, 2017
Build Time Today: 8 hours
Total Build Time: 118 hours
A cumulative update for the past few days:
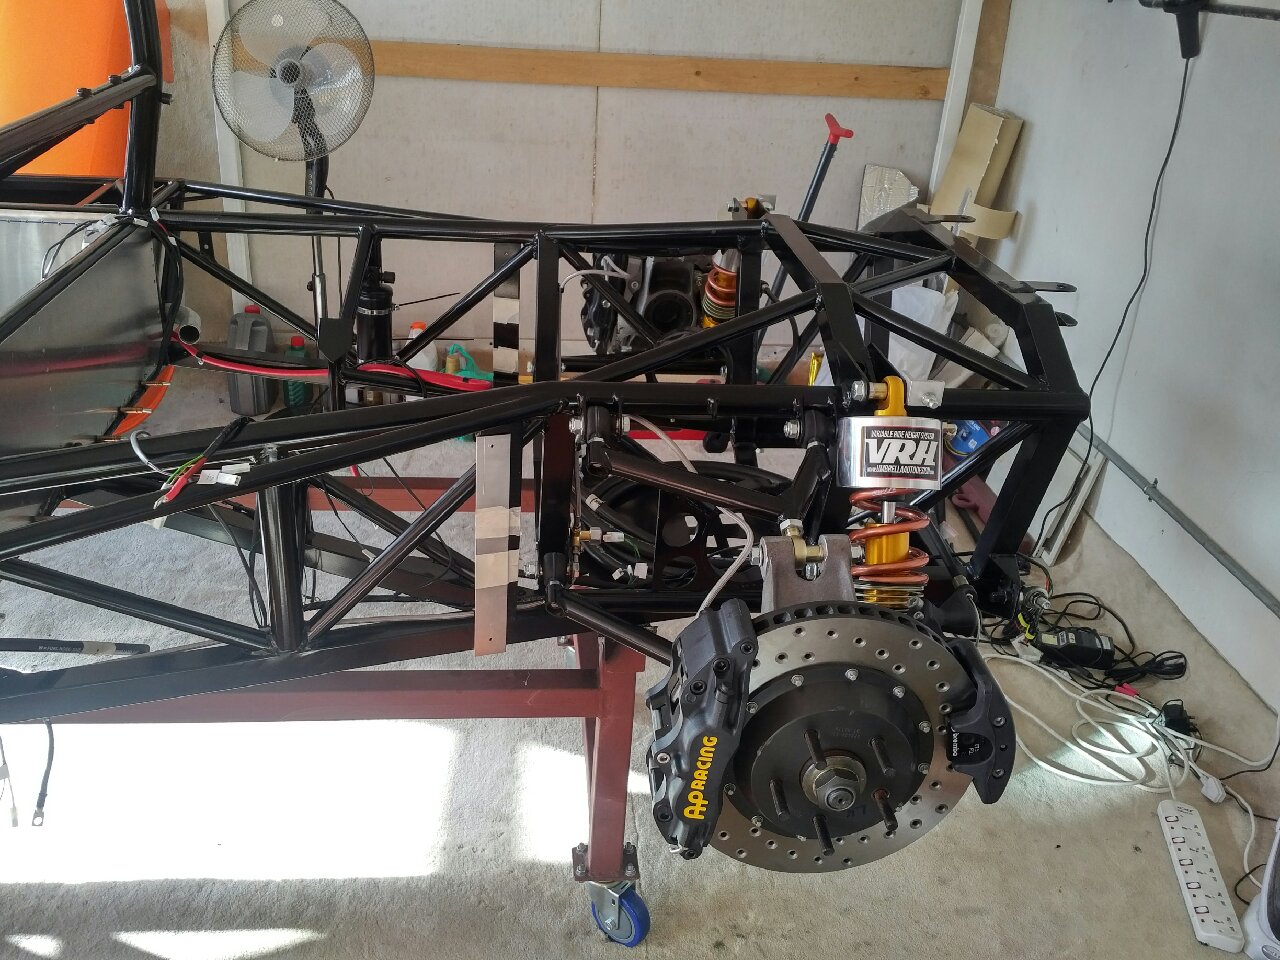
First, I got the other rear end installed - rotor, AP brake caliper and hand brake caliper.. The handbrake cables have not been installed as they are incorrect and the factory will be sending new ones soon...
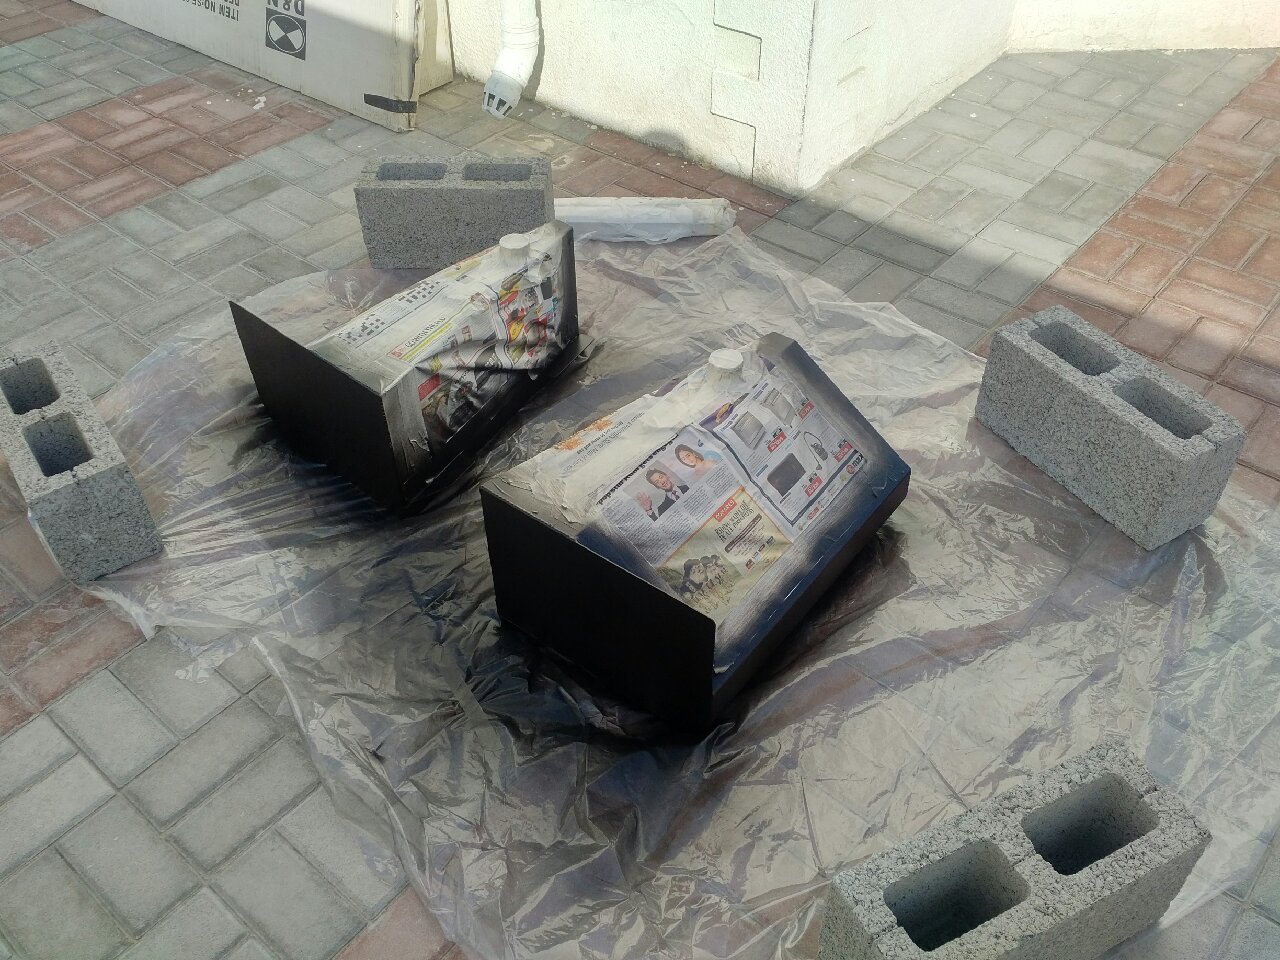
Then, I finished painting the fuel tank with 'tough black' paint - it will help prevent corrosion on the tanks, and also prevent scuff marks should anything rub against it in the future...
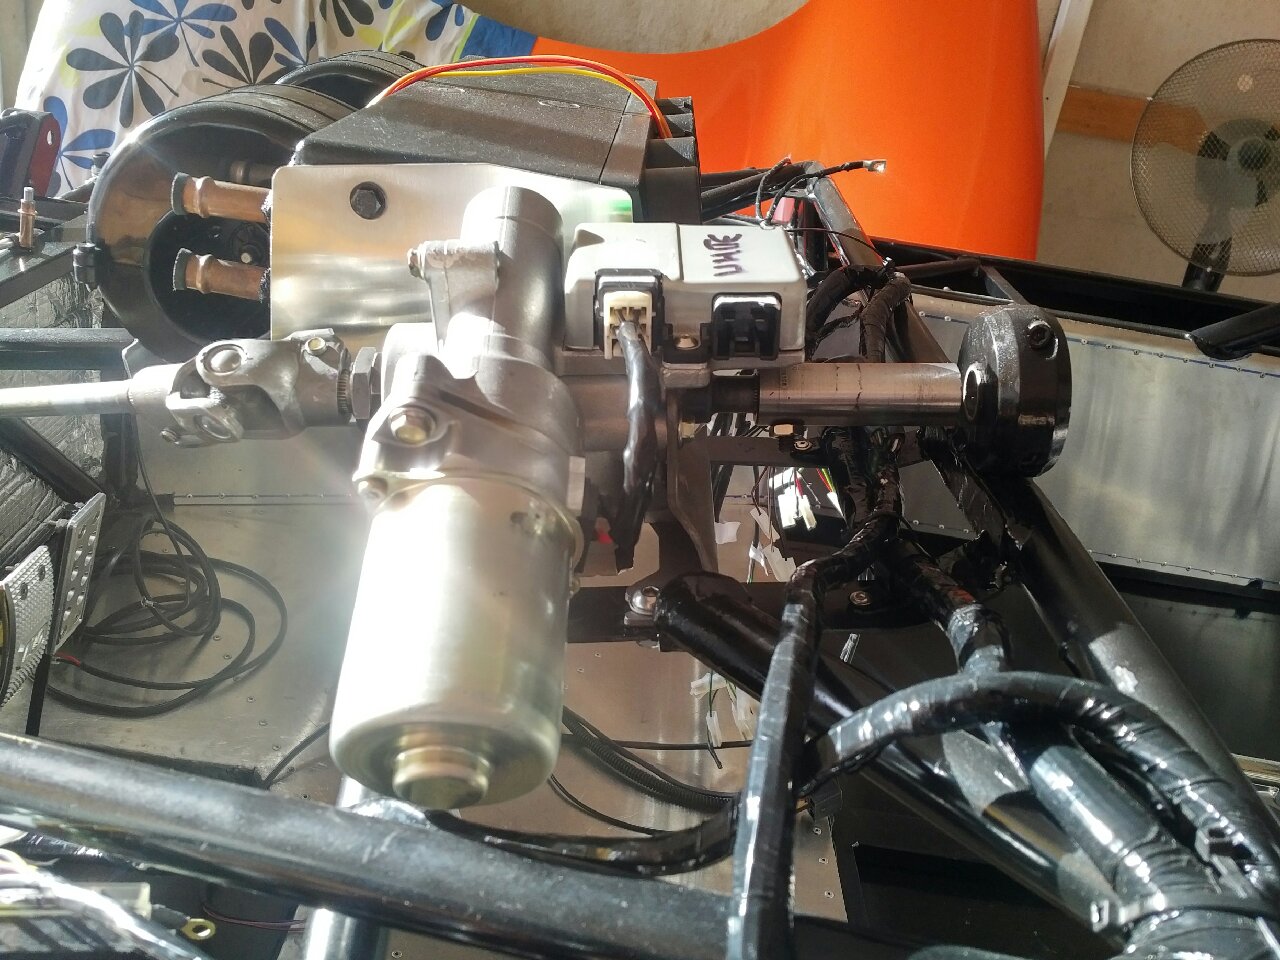
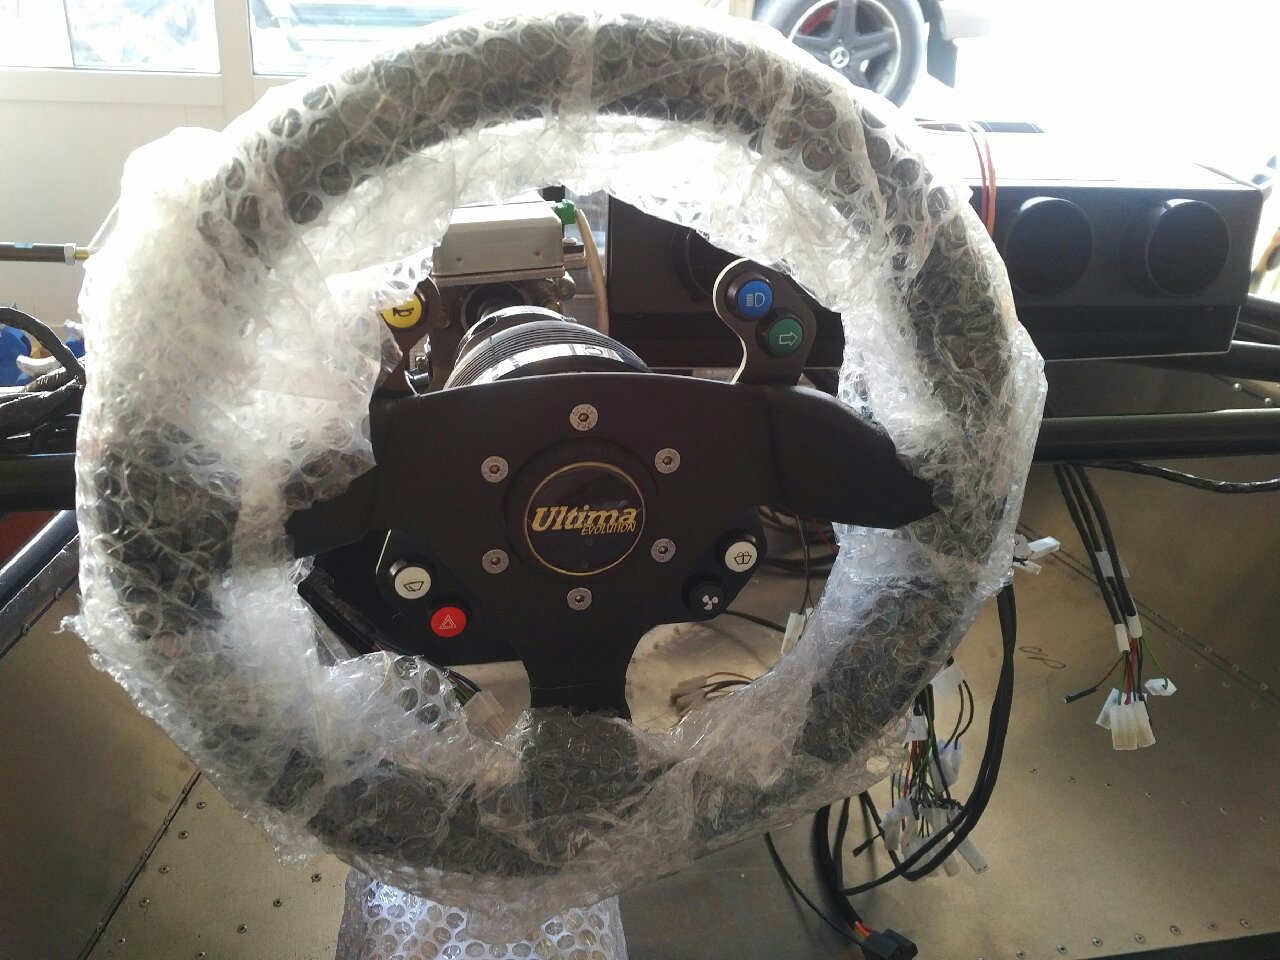
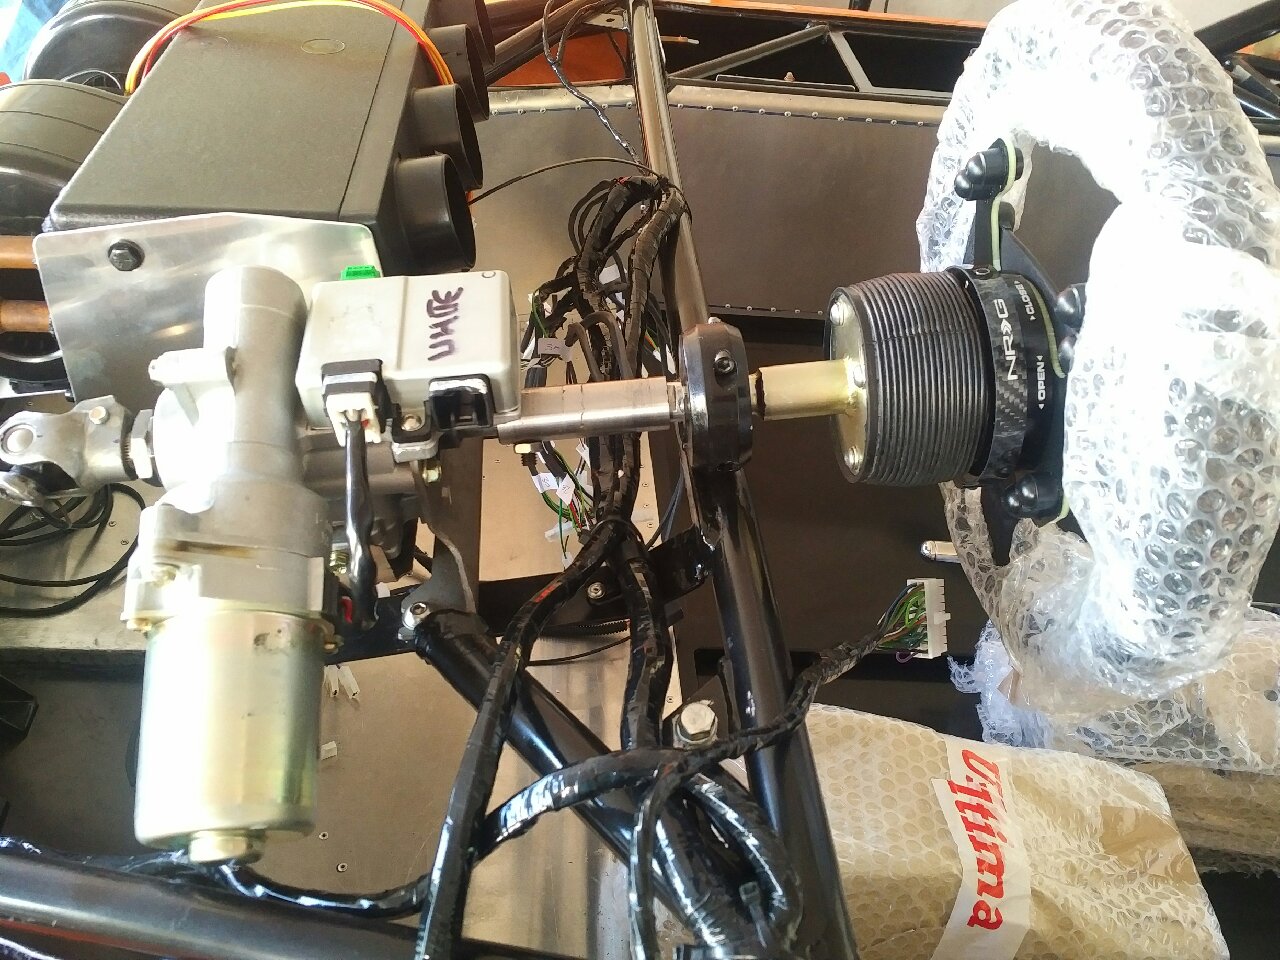
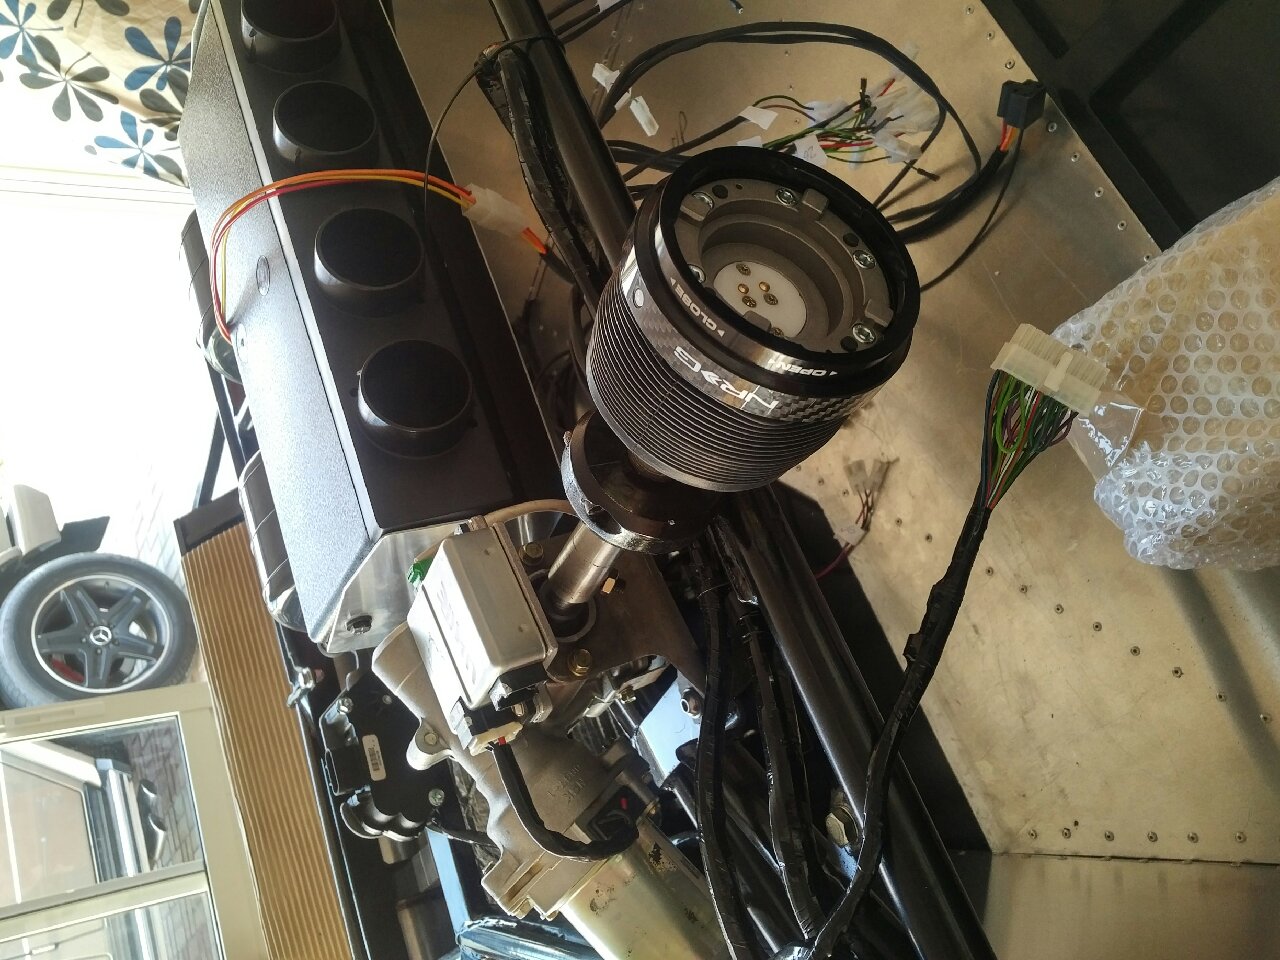
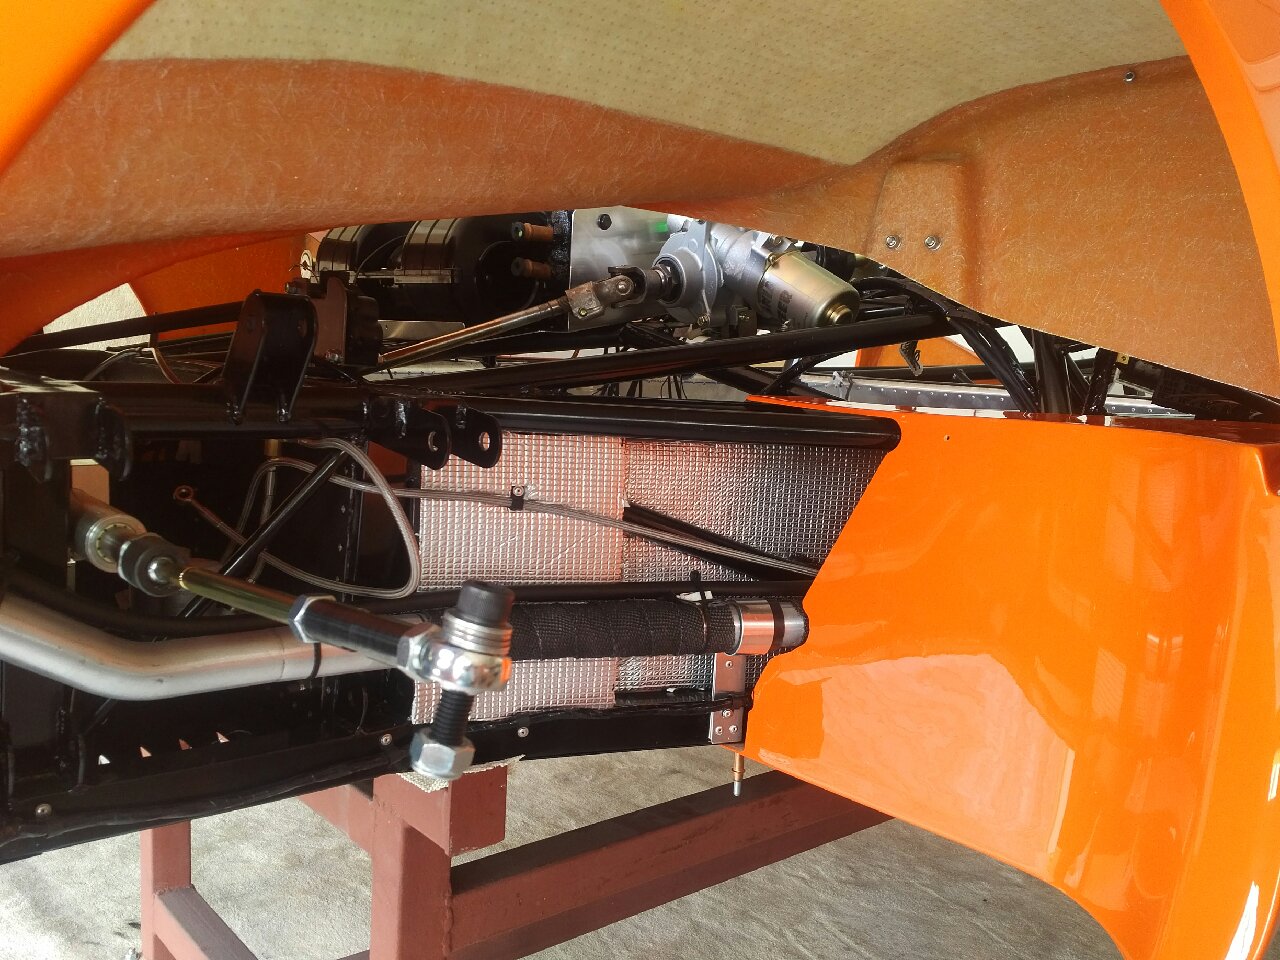
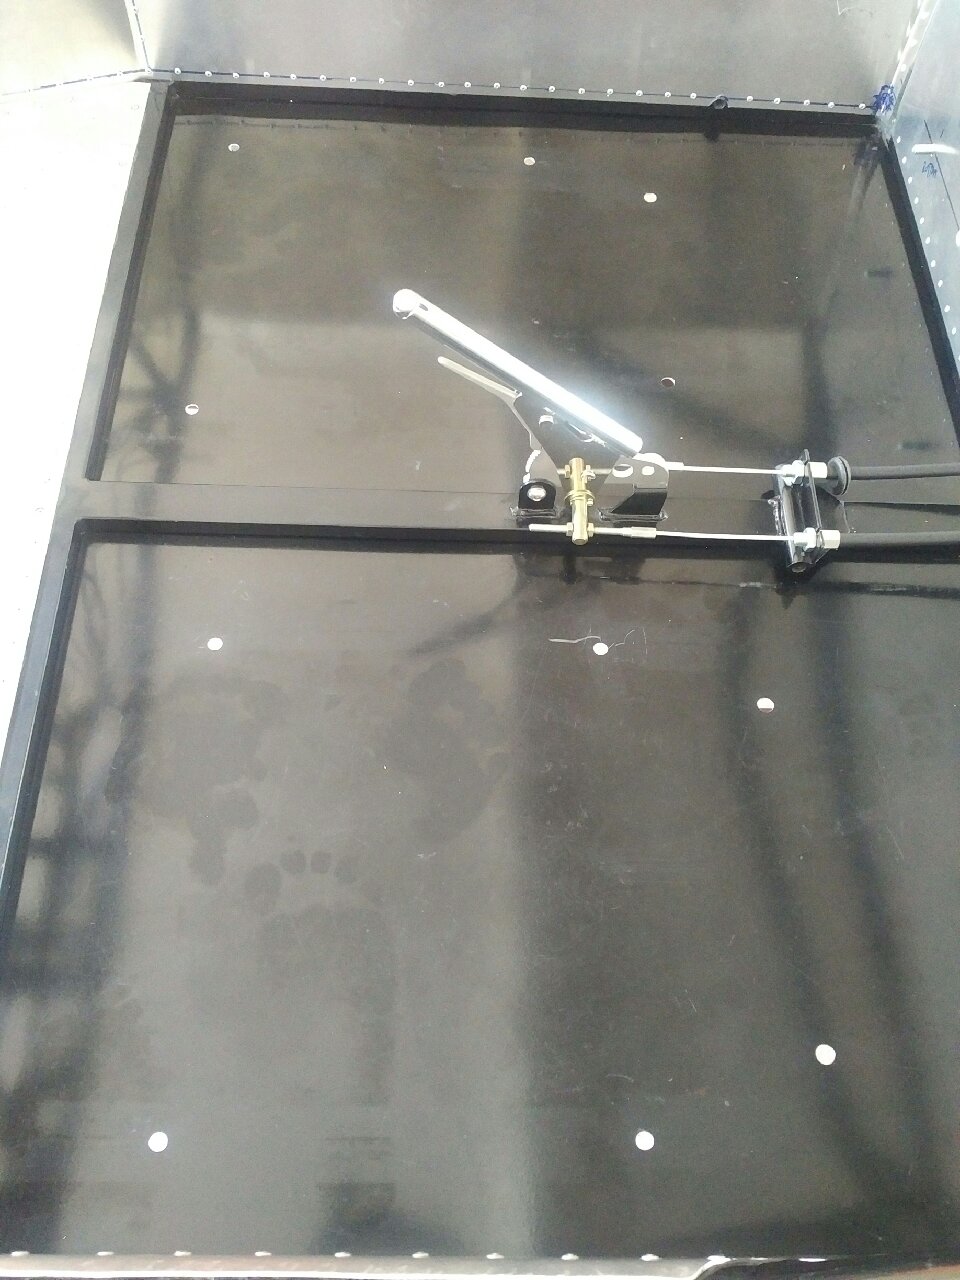
I also finished work on my custom steering system - my final custom coupler was installed, and the steering wheel can now be installed and aligned with the rack in center... Prior to installing the steering wheel, I also installed my new NRG slim quick release!

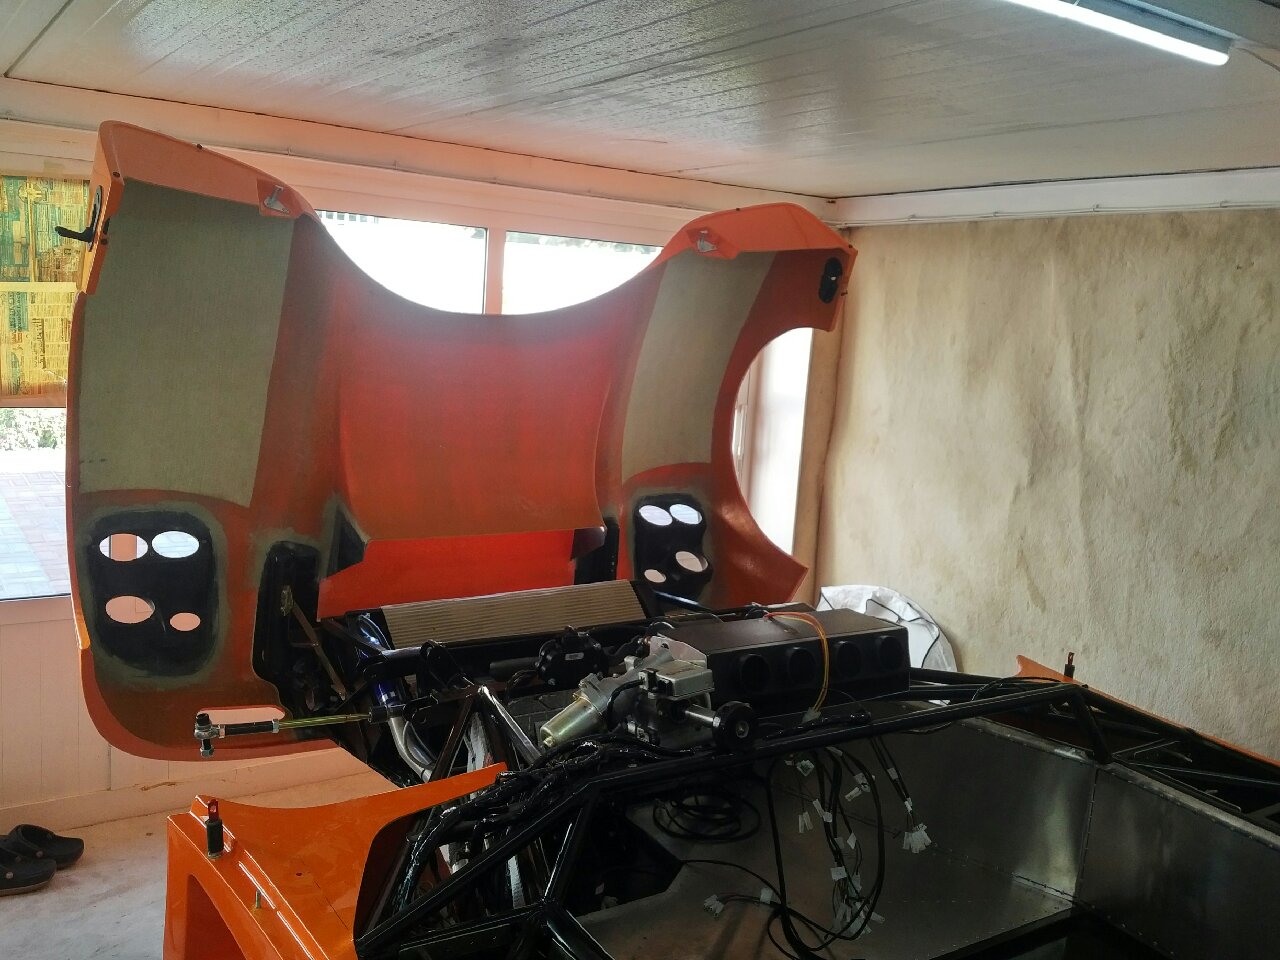
Now I had to start finding things to do, while I wait for parts.. the front wishbones are still on backorder, so I cannot install the front end, and cannot start the alignment process... Instead, I decided to pre-fit the containers and side pods - body work!!
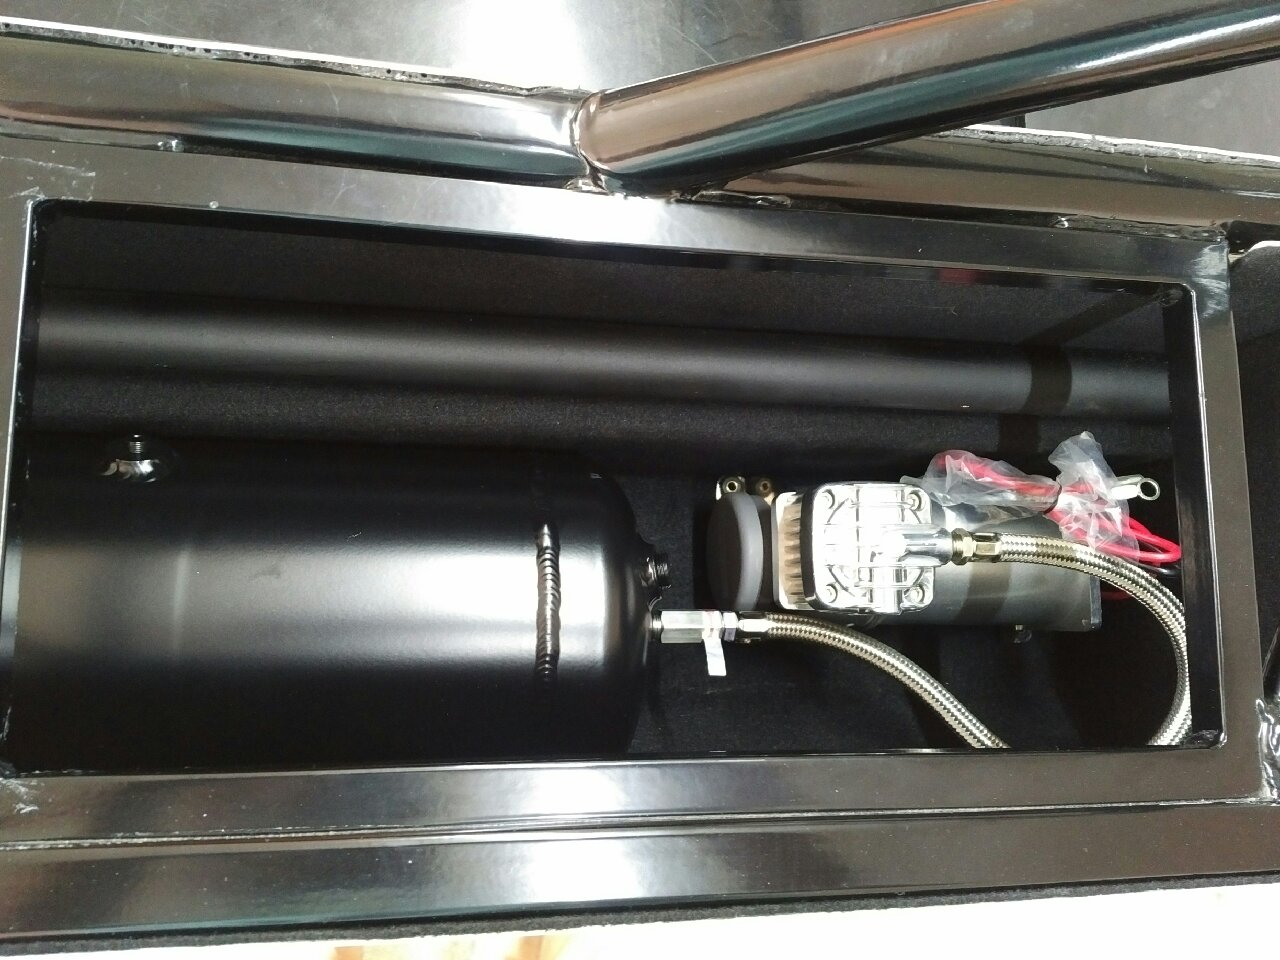
First, I decided to see where my air compressor and tank will be installed for the VRH system - I decided on the passenger luggage container as the location, but after trial fitting them in the pod, I have a decision to make: installing the tank in this location will make it 'permanent' - I will not be able to remove it for servicing in the future.. it is just too big to fit through the hole in the top of the luggage pod! There is no other place I can fit it (3 gallon air tank)... I will also get in touch with the VRH builder to see if I can get multiple smaller air tanks instead...

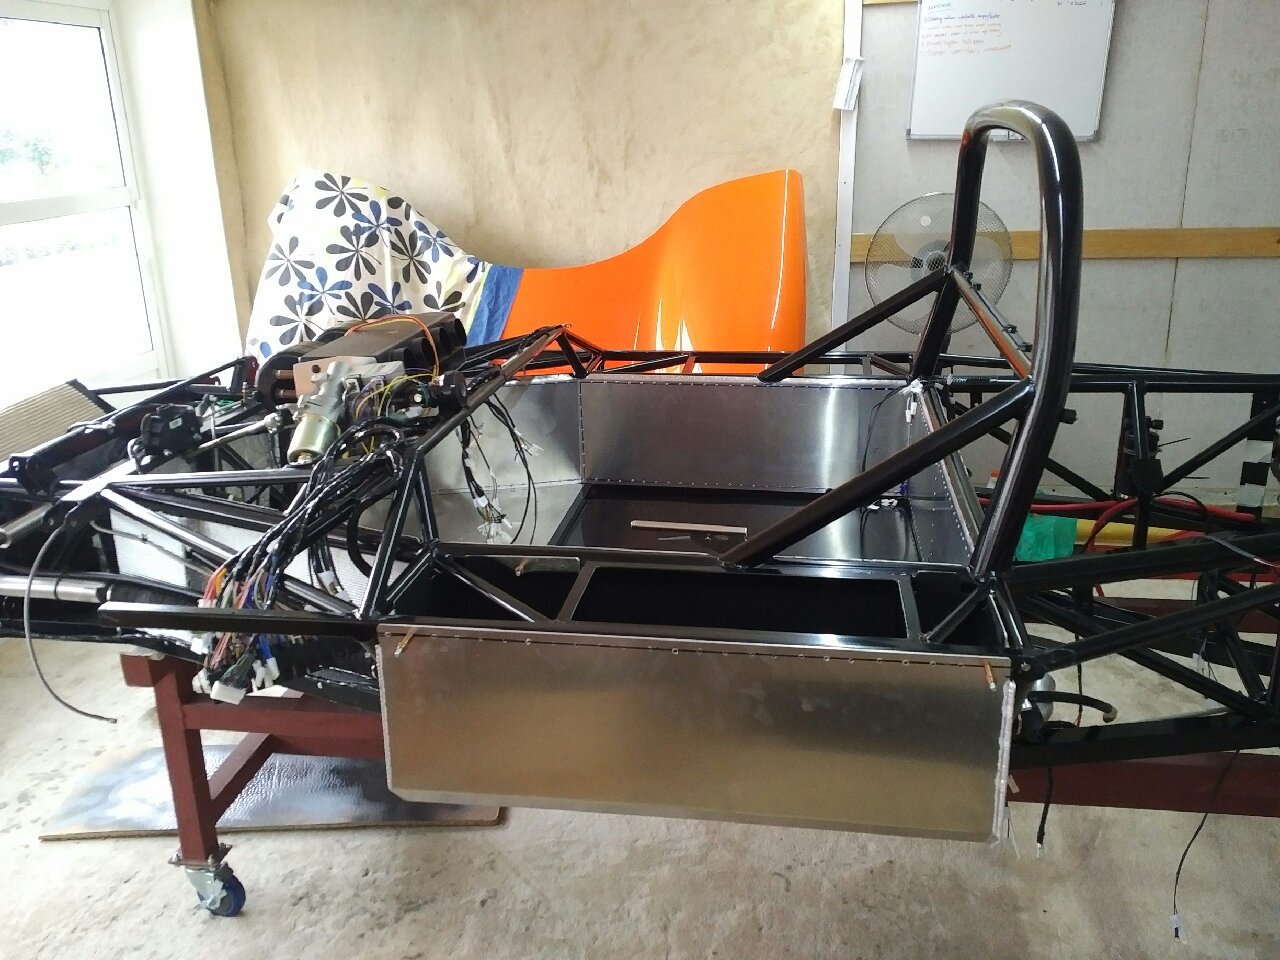
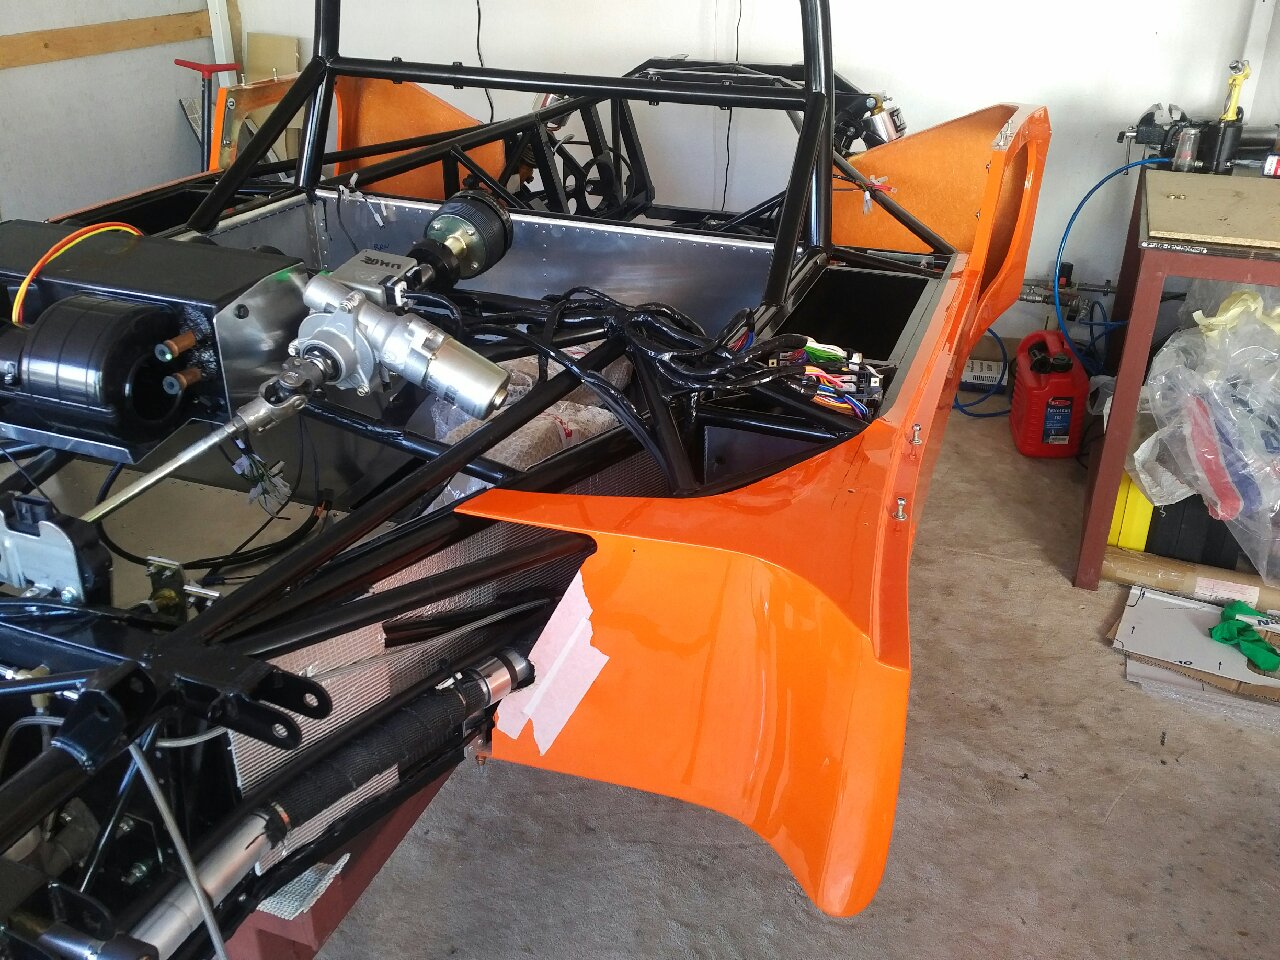
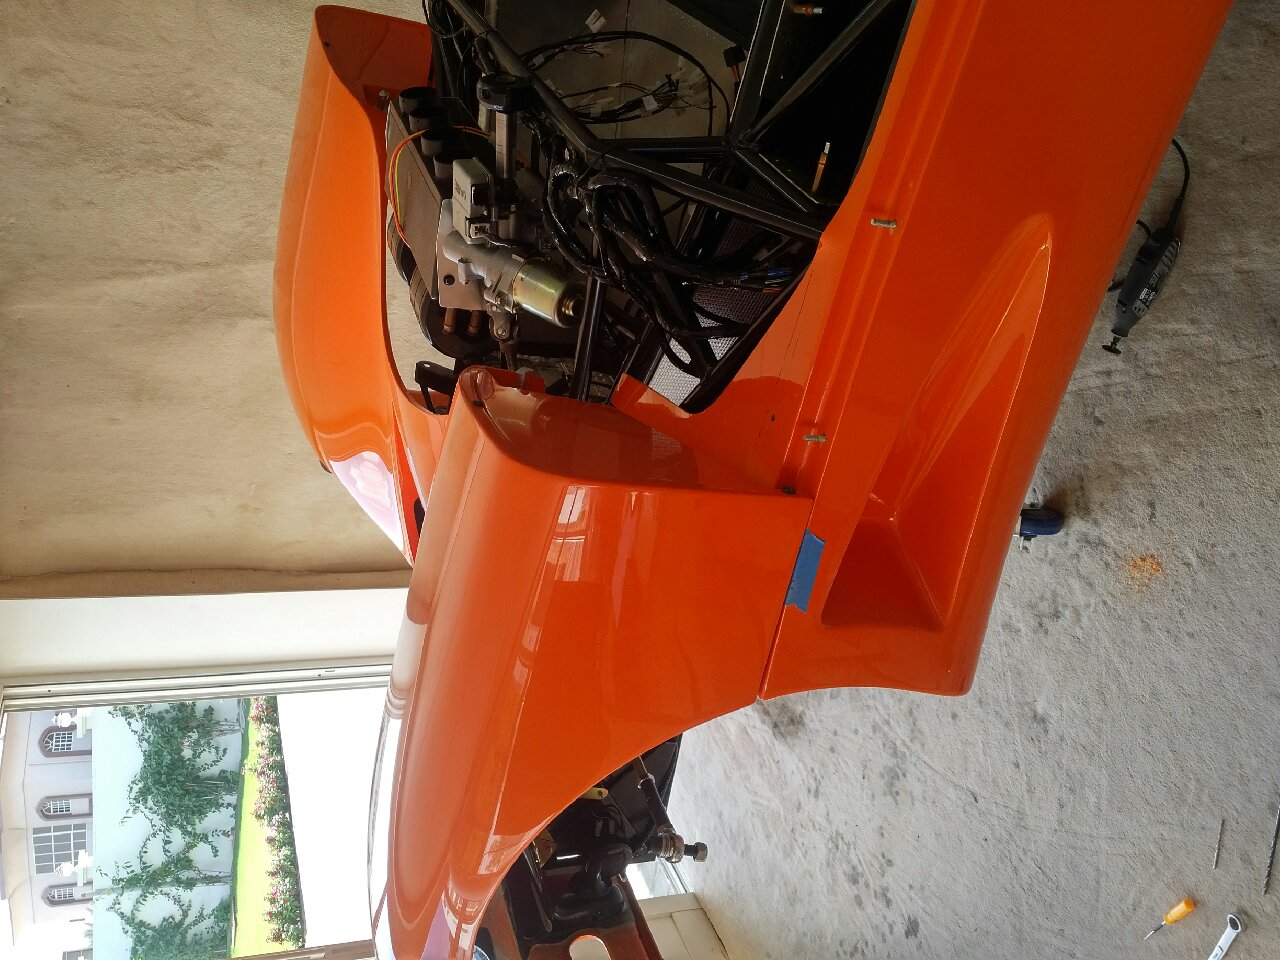
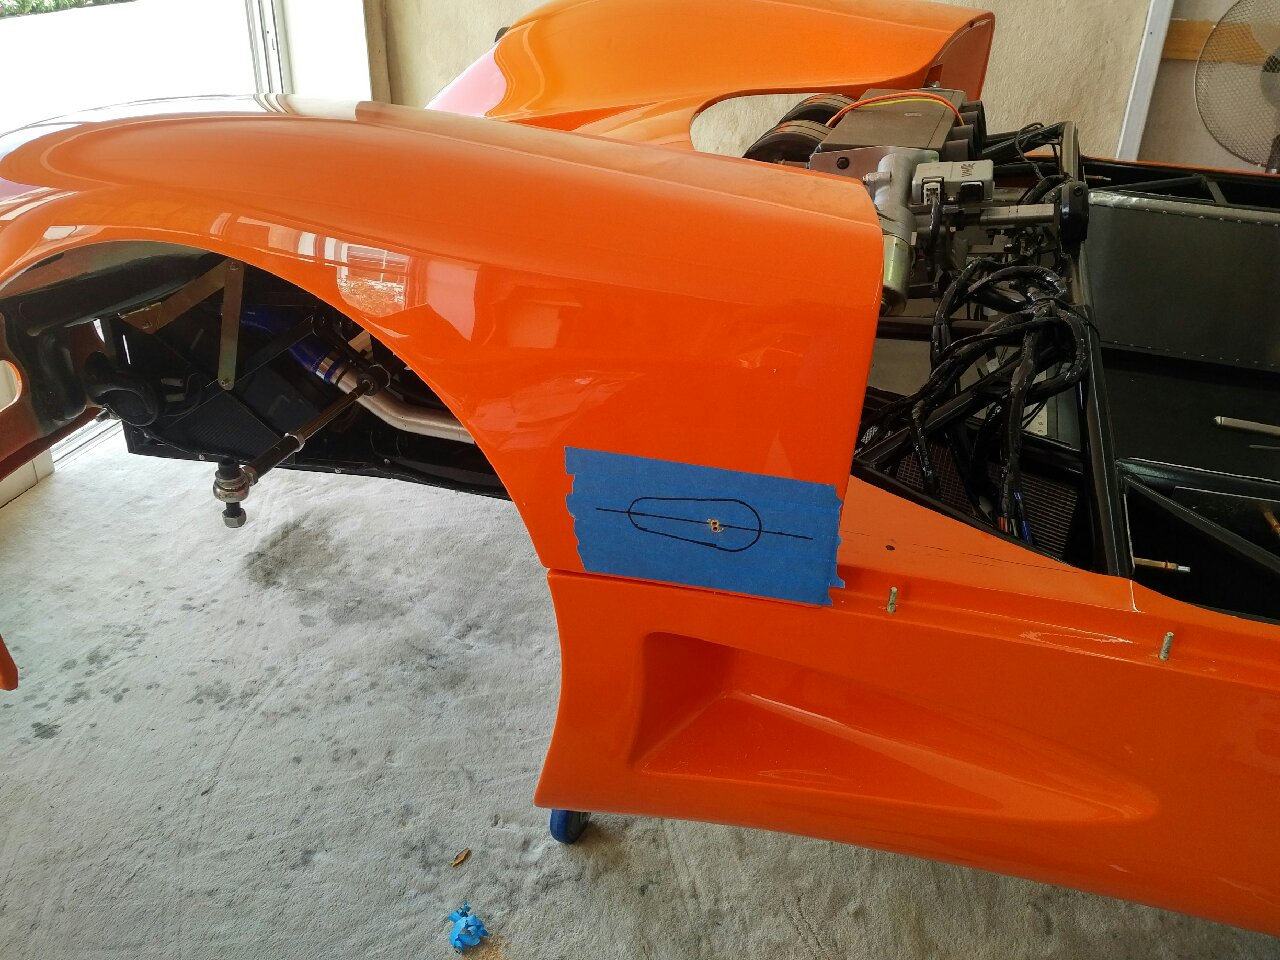
The luggage pods were then temp-fitted to the chassis using a few rivets, and the side pods work was started... The side pods need to be trimmed for the ally coolant pipes, and also for the loom (to prevent scruffing) - once the pods were fitting nicely, I had to mark the chassis lines, rivet lines, and mark and drill for rivet holes making sure not to hit the old rivets from the panel installation... The side pods were temp installed with clecoes, and I can know move onto the next modification - front clam latches!

Feb 6-7, 2017
Build Time Today: 6 hours
Total Build Time: 124 hours
Modifications - soo much fun! ;)
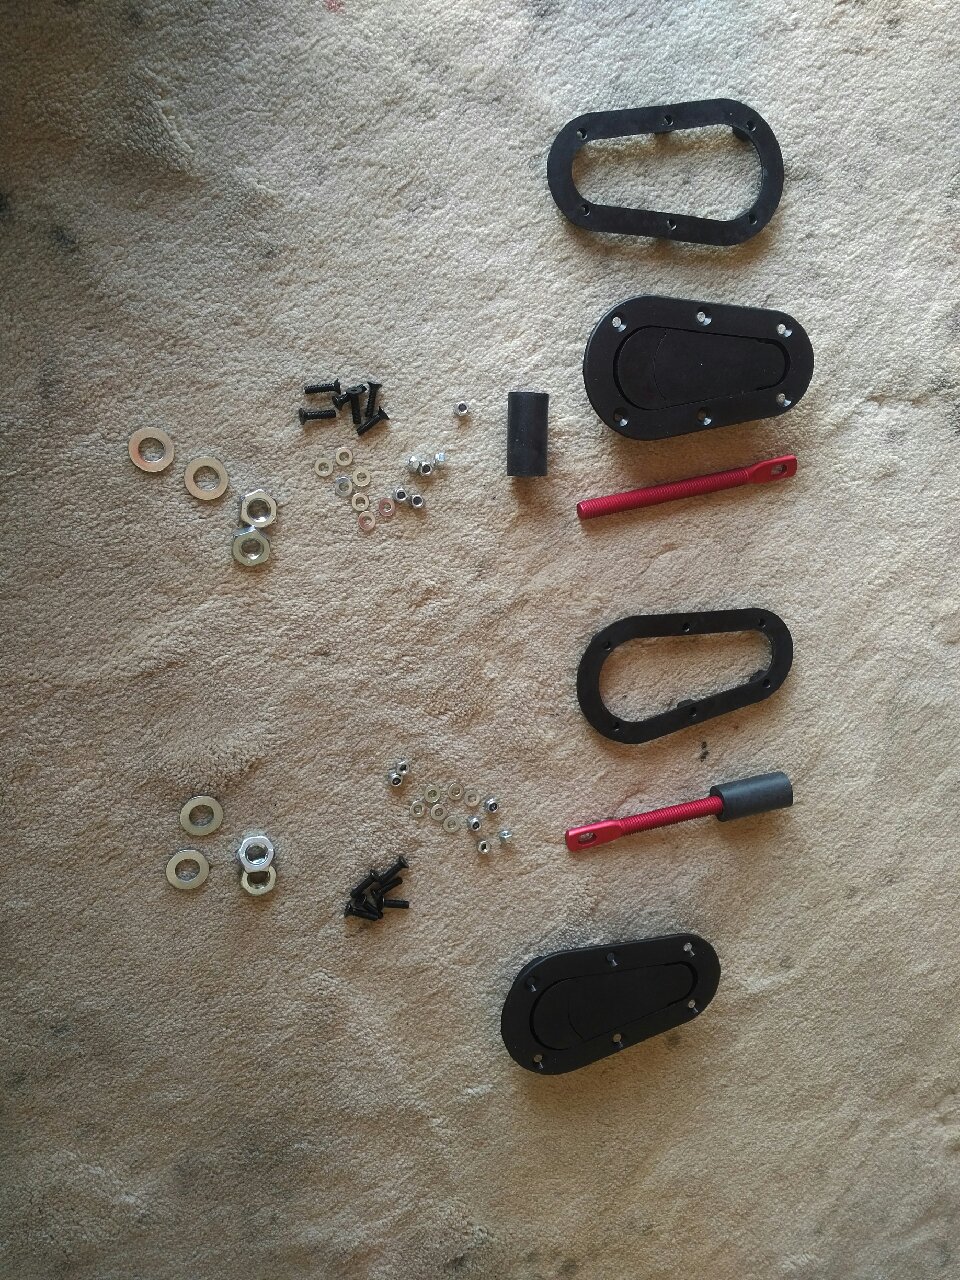
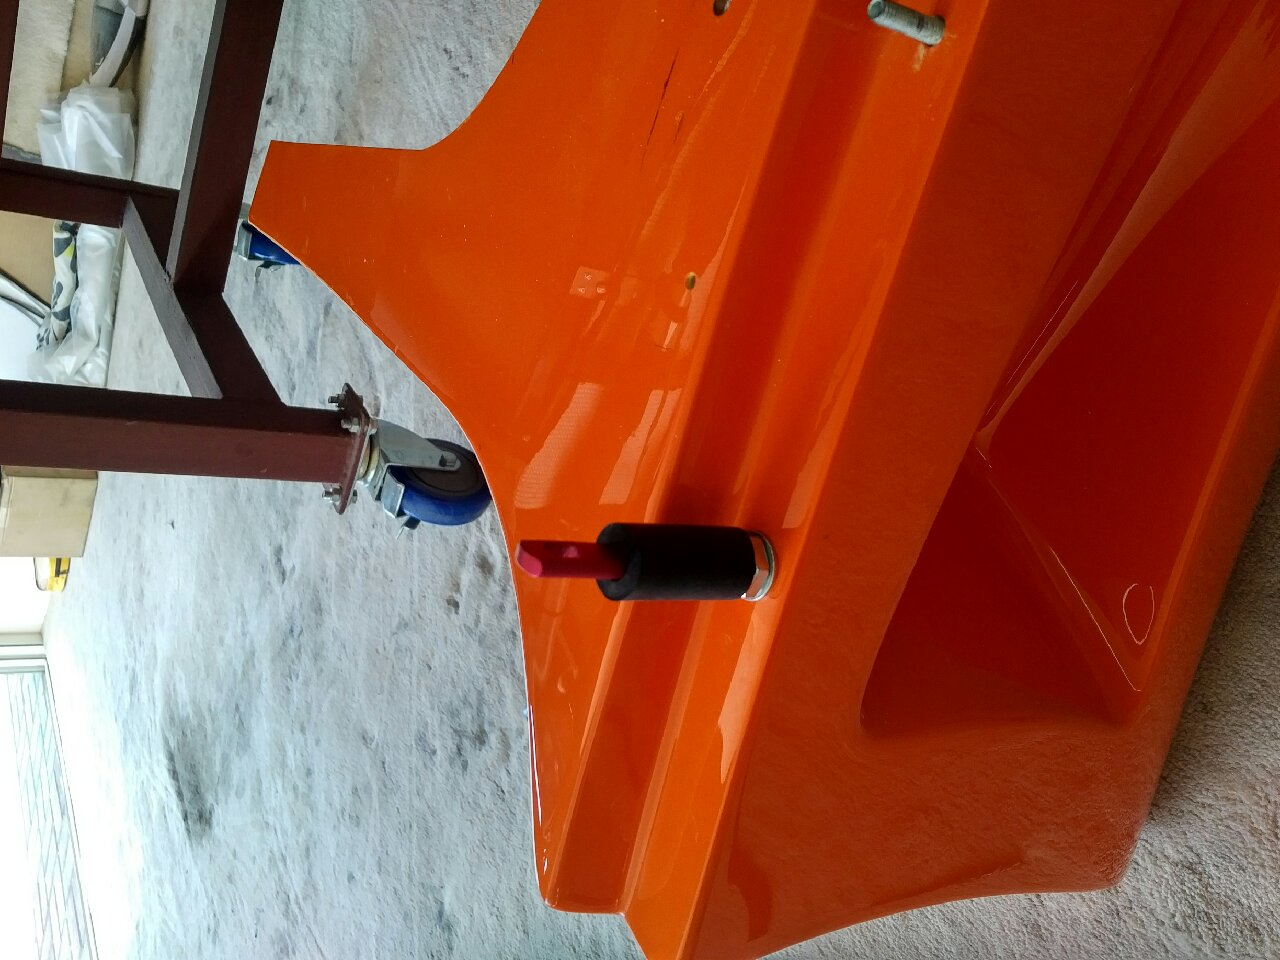
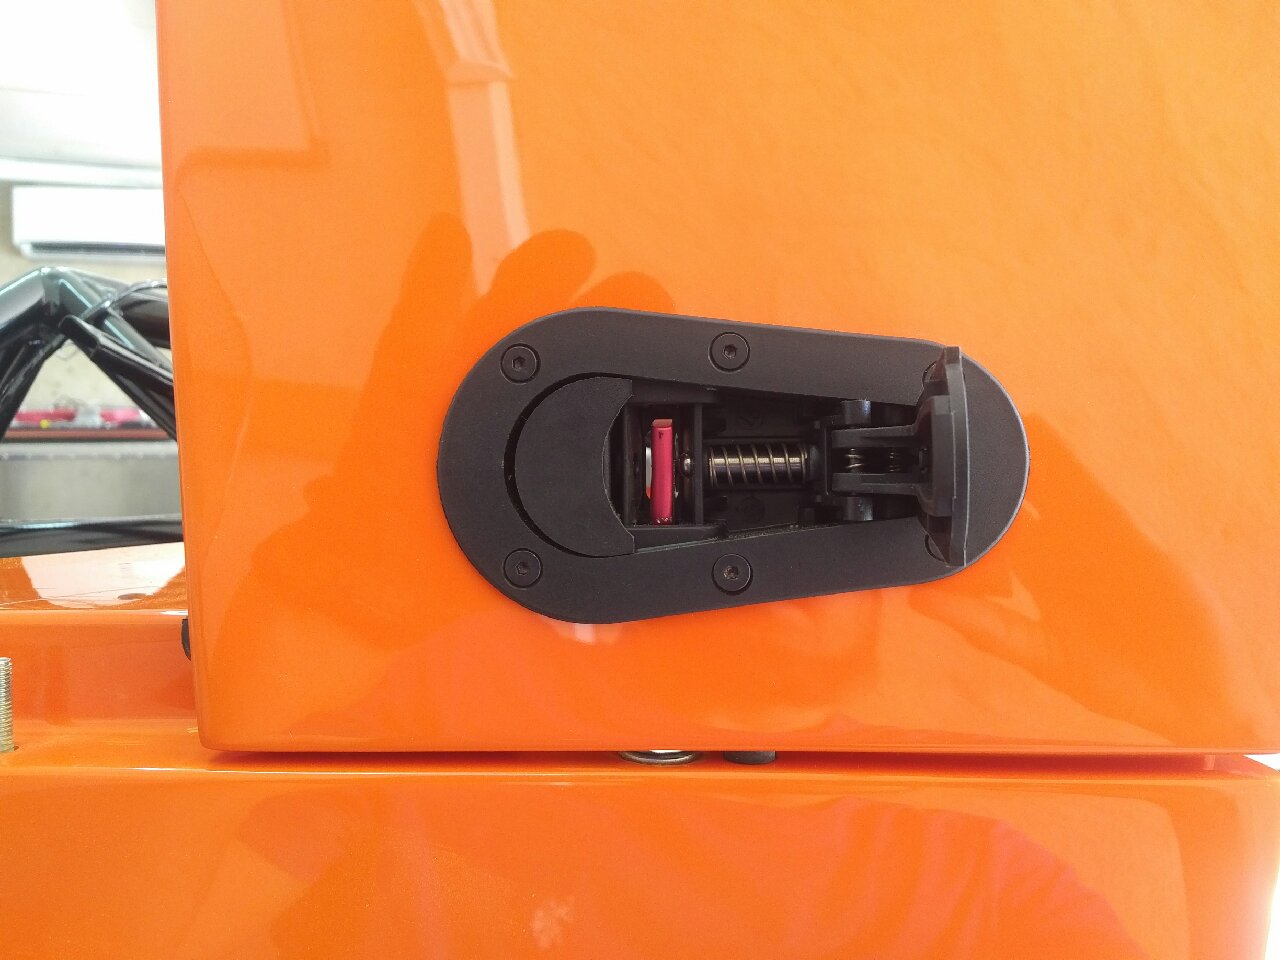
Spent the last 2 days installing the front clam latches - normally a 15 min job if using the factory pull cables, I decided to do something different - the pull cables were not easy to use last time, as they kept getting tight, and closing the clam was also not 'pretty'... So this time I have decided to use the Aerocatch pin latches that are used on many race cars - basically a hood pin with an enclosed latch...
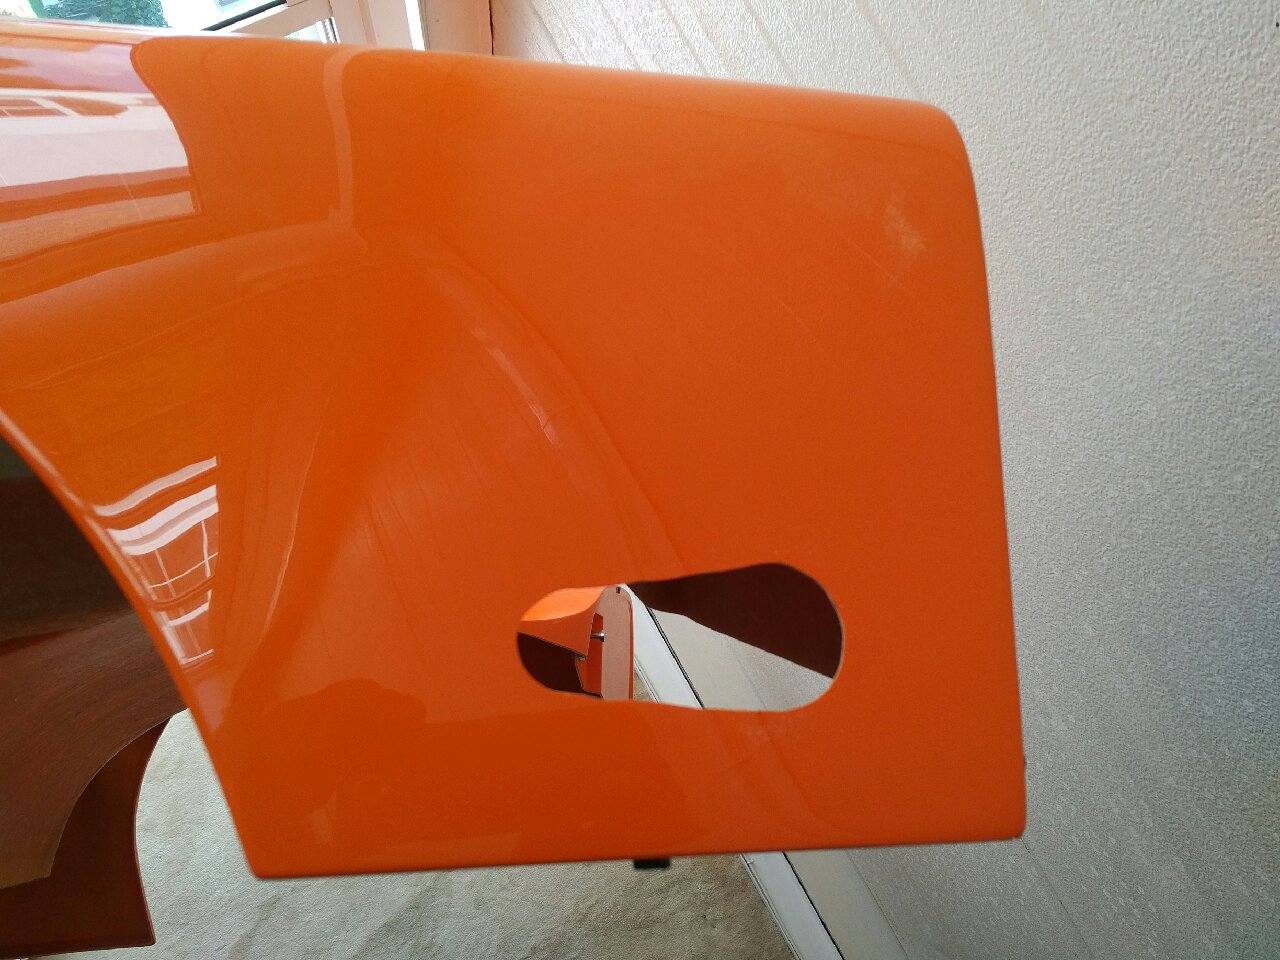
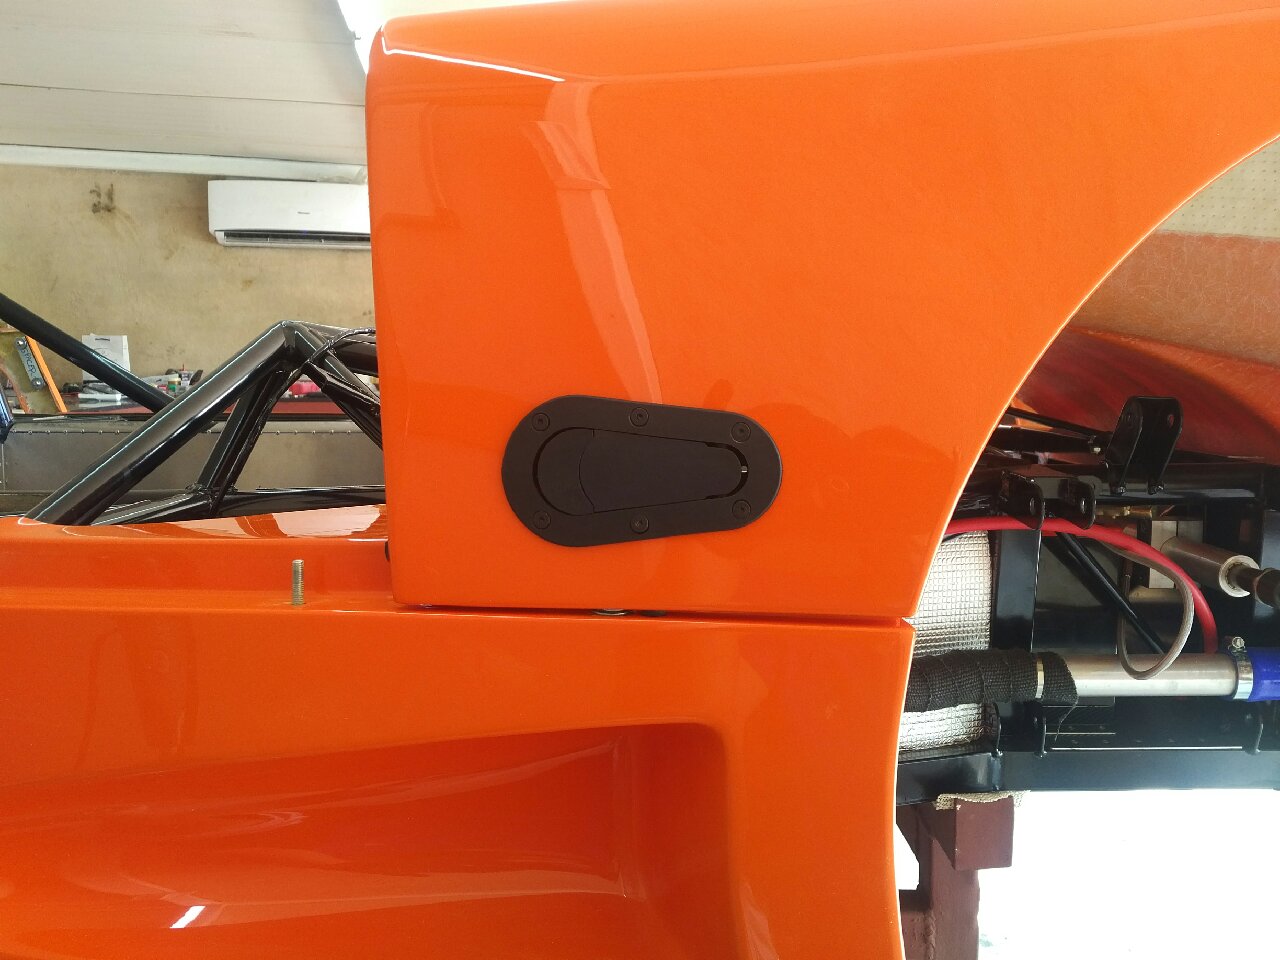
The first job was to install the 'hood' pin - this is normally done on a hole in the chassis under the hood... but for the Ultima, I had to install the pin on the upper edge of the side pod... I had to take multiple measurement of the hood clam GRP thickness, distance the hood pin/latch will travel, and figure out how far 'in' the pin needs to be on the side pod... Once I knew where to drill (13mm 'in' from edge of side pod), I drilled a 11mm hole for the pin.. The sidepod had to be removed for installing the pin, and the pin itself had to be cut down in lenght to fit in the side pod... the pin was installed (finger tight) and side pod re-installed... The clam was lowered, and then marked for cutting on the lower GRP edge to allow the pin to clear and the clam to close... Once the clam was closed, the hole in the pin was used as a template to drill a 3mm hole in the GRP (the cross hairs of the hole)... The clam was then marked for the latch using the supplied template, and GRP cut and filed for a perfectly fitting latch mechanism... The latch was the bolted on with the supplied hardware, and the clam closed again on the hood pin... The hood pin (both sides) needed to then be adjusted to get a 'clean' fit, and allow the latch mechanism to open and close without any undue stress... This involved pulling the sidepod off, adjusting the pin was required (forward/aft, side to side, or height adjsutments - all adjustments less than 1mm in any direction) and reinstalling to check for proper clearance and action...
Once satisfied with one side, I did the other...
A couple tips: This is much easier at this part of the build, when there is nothign in the wheel well (no wishbone, uprights, etc) as access to see behind the clam is very helpfull... also, the sidepod needs to be removed to install the pin, so better to do this before final fitting the pods...
The end result - a very proper looking hood with Aerocatch latches installed!


Feb 9, 2017
Build Time Today: 3 hours
Total Build Time: 127 hours
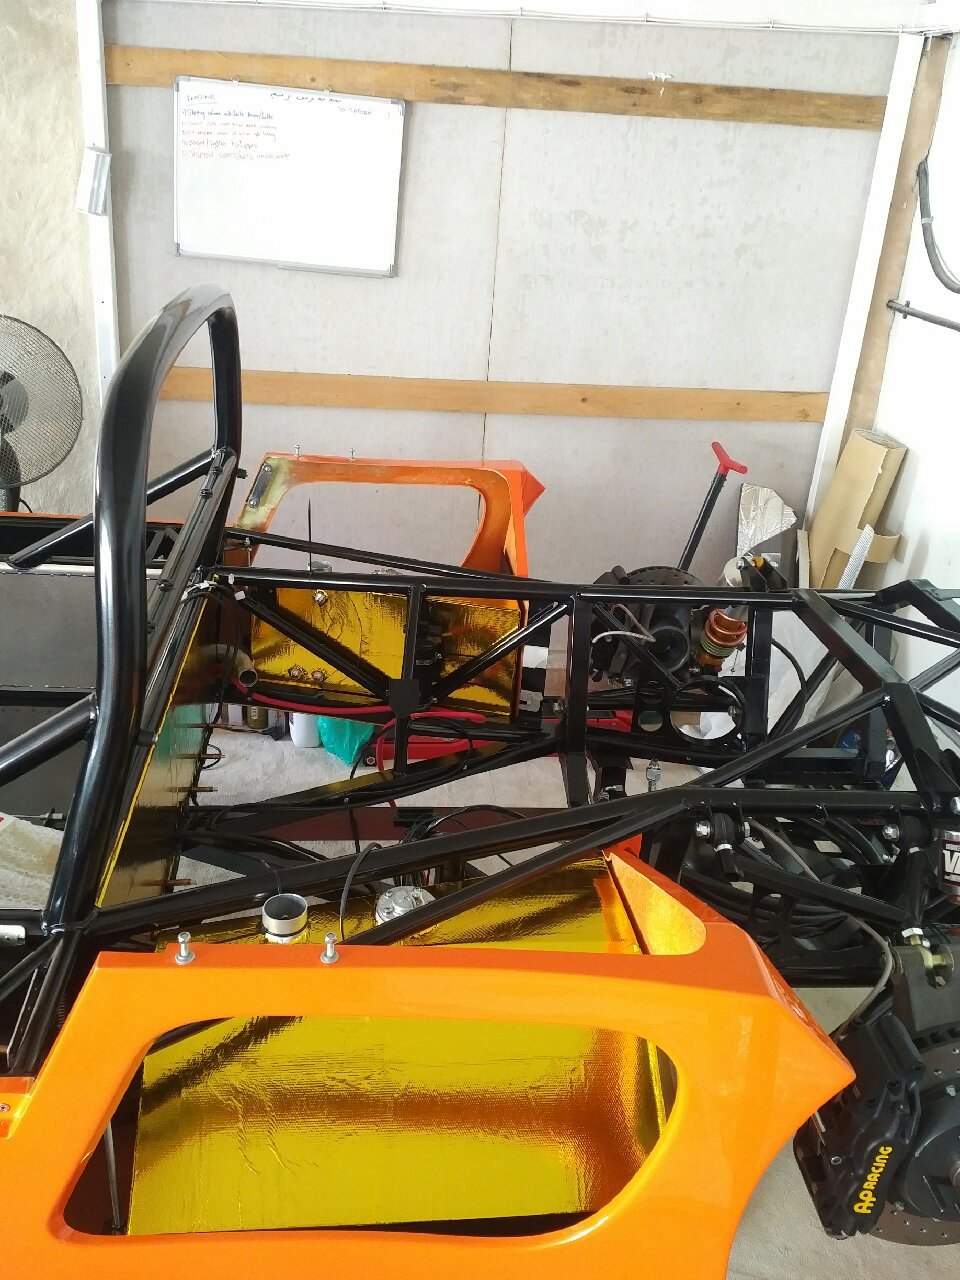
Today I spent some time getting ready to work on the engine bay area... I still have not received the front wishbones so cannot continue that part of the build right now.. so instead, I decided to work on the fuel system... Again, it will be a customized fuel system based on the work of previous builders... To start the fuel system, first job was preparing and pre-fitting the fuel tanks... They had already been painted black, so the paper/tape was removed, and DEI gold heat insulation applied to the top/engine facing surfaces... Also, last time I had problems with the AN6 fittings on the tank, so the the bosses were checked and a dye was used to clean the threads before fixing the tanks in...
The VDO fuel senders were installed, and then the tanks were placed in the chassis using zip ties... The side pods were reinstalled (with clecoes), and more DEI gold heat insulation was applied to the engine bay bulkhead ally panel...
Now I can start working on my fuel system this weekend...
Feb 10-18, 2017
Build Time Today: 15 hours
Total Build Time: 142 hours
Guess I spoke too soon in my last update! I have been unable to progress or update the build over the last 10 days - because Dubai has had some serious rainfall over the last 10 days, and some of that rain got inside my workshop! Well actually, the leak in my roof was ONLY over my computer! Everything else was fine, but my computer got fried! While I was able to move a little forward of the build (details below), I was unable to update anything... However, finally back online today with a new system, and a patch on the roof :)
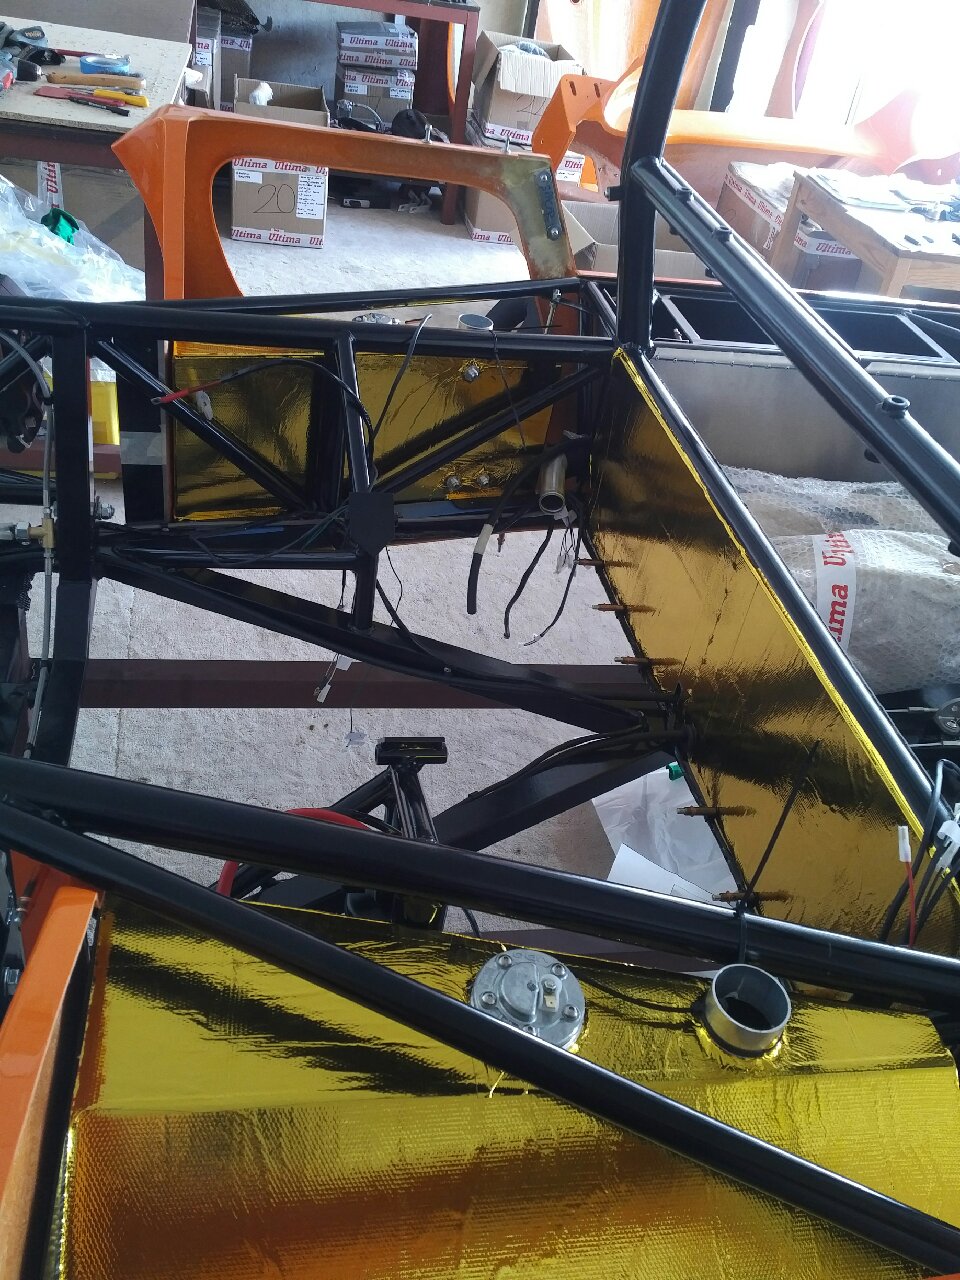
So during the past 10 days, I have only been able to work on the fuel system - once again going with my 'own' system is proving to be a challenge... My fuel system is basically a very simple setup - both tanks are linked at the bottom and top. A LP pump draws from the link at the bottom to supply a surge tank. A HP pump is located in the surge tank that feeds the rails... Sounds simple enough!

First job was preparing the surge tank - the HP pump was fitted inside the surge tank, and the surge tank assembled for the fittings... Then the center GRP was placed on the chassis, and surge tank location marked - since I am placing it higher up on the GRP, I decided to re-inforce the GRP with an ally sheet riveted to the back side...
Next, I had to make all the fuel pipes myself - AN hose was cut to desired lenght, and AN fittings installed on both ends. The pipe was then pressure tested, and finally wrapped in Cool Tube heat shield... it took about 30-45 min a pipe, and I had to make a total of 18 pipes! Getting the AN fittings on is NOT an easy task, and pressure testing/heat shielding the pipes was not much fun... however, the custom pipes meant that I have a fuel system that should hopefully not suffer from vapor lock, as the HP pump is submerged in the surge tank, and the lines are shielded... Also, a pump controller will be installed later to regulate the flow/load of the HP pump...
The LP pump was installed on the chassis, as were the filters (100micron / 10micron) to get the requisite pipe lenghts... I also threaded in 2 1/8" NPT ports for fuel pressure sensors... Once happy with everything, I took the fuel system off the chassis (except LP pump) as the center GRP has to now be sent for trimming before further install...
I did not take any pictures of the fuel system setup, but will post some once I reinstall them in a few weeks time...
Feb 19-23, 2017
Build Time Today: 11 hours
Total Build Time: 153 hours
Another cumulative update...
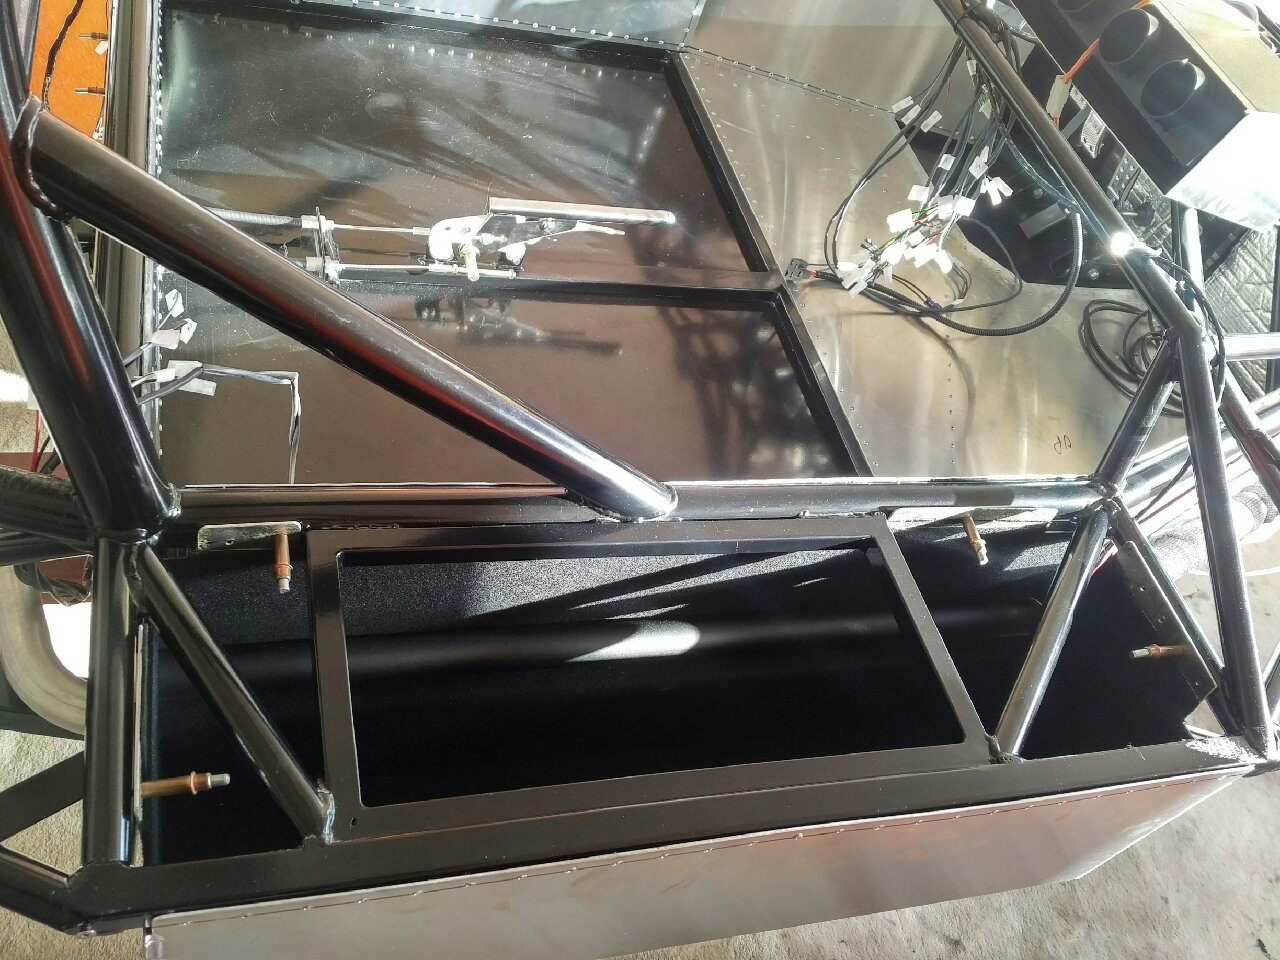
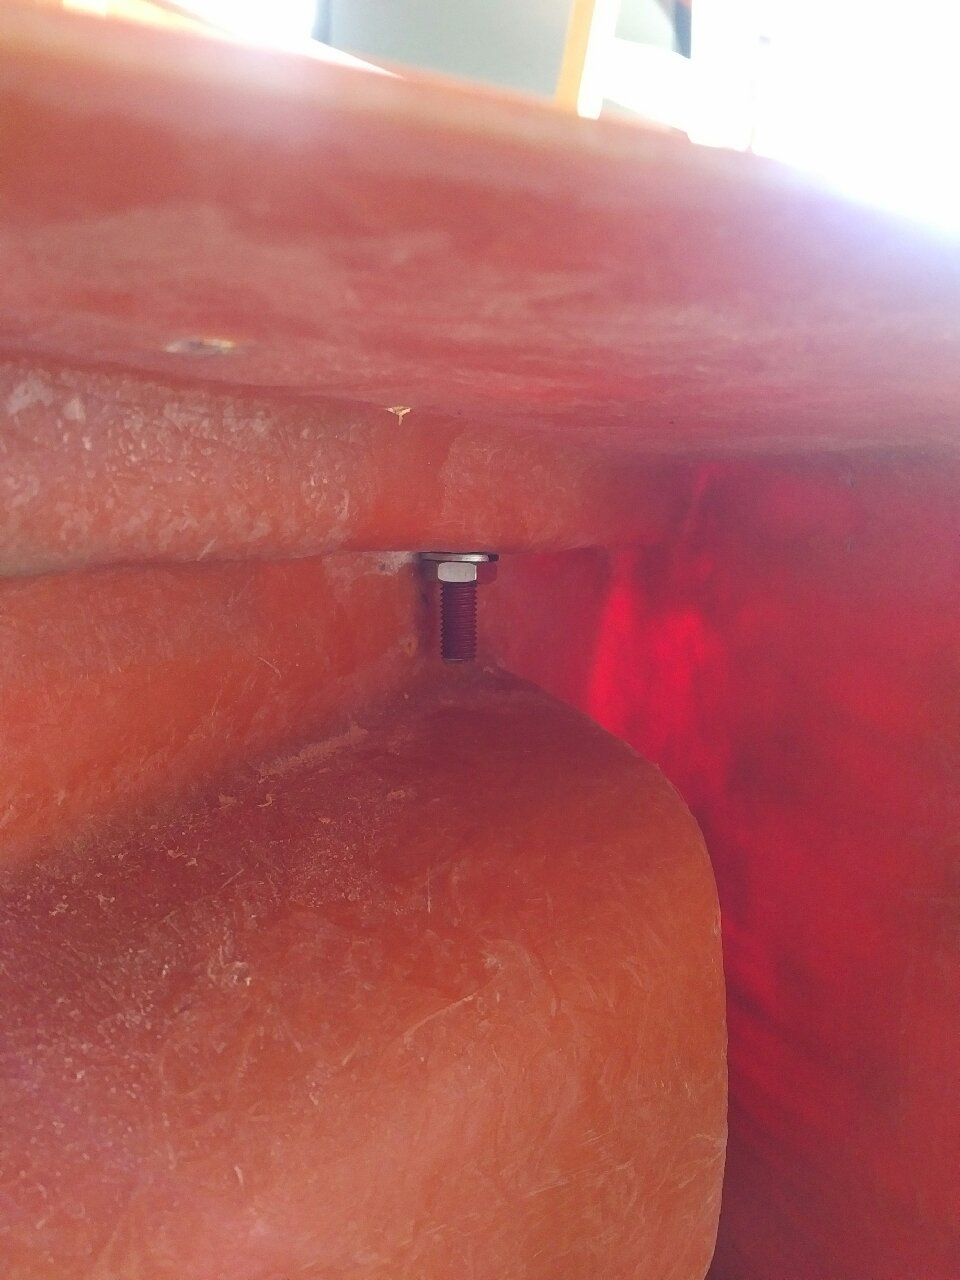
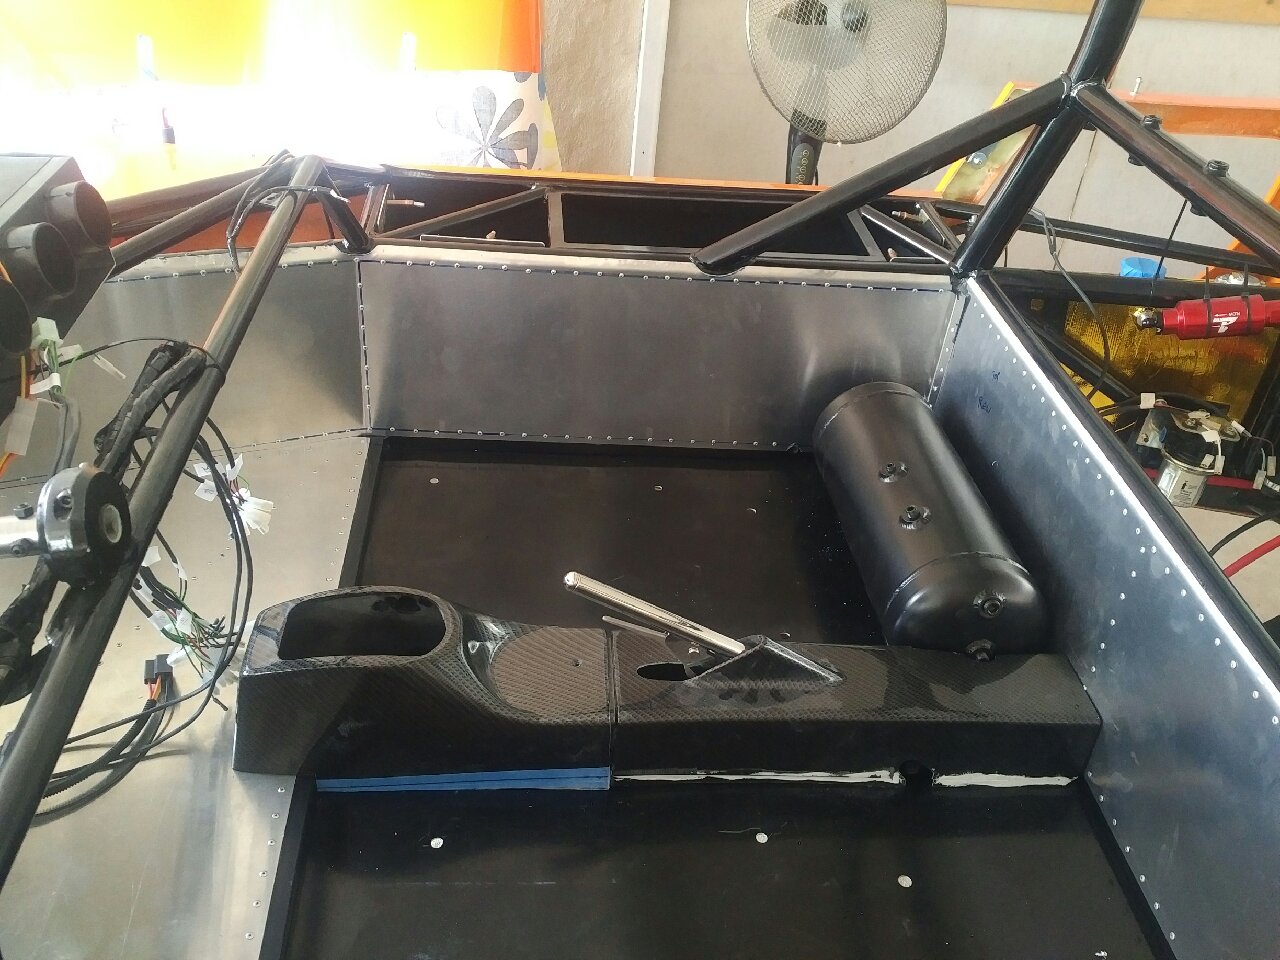
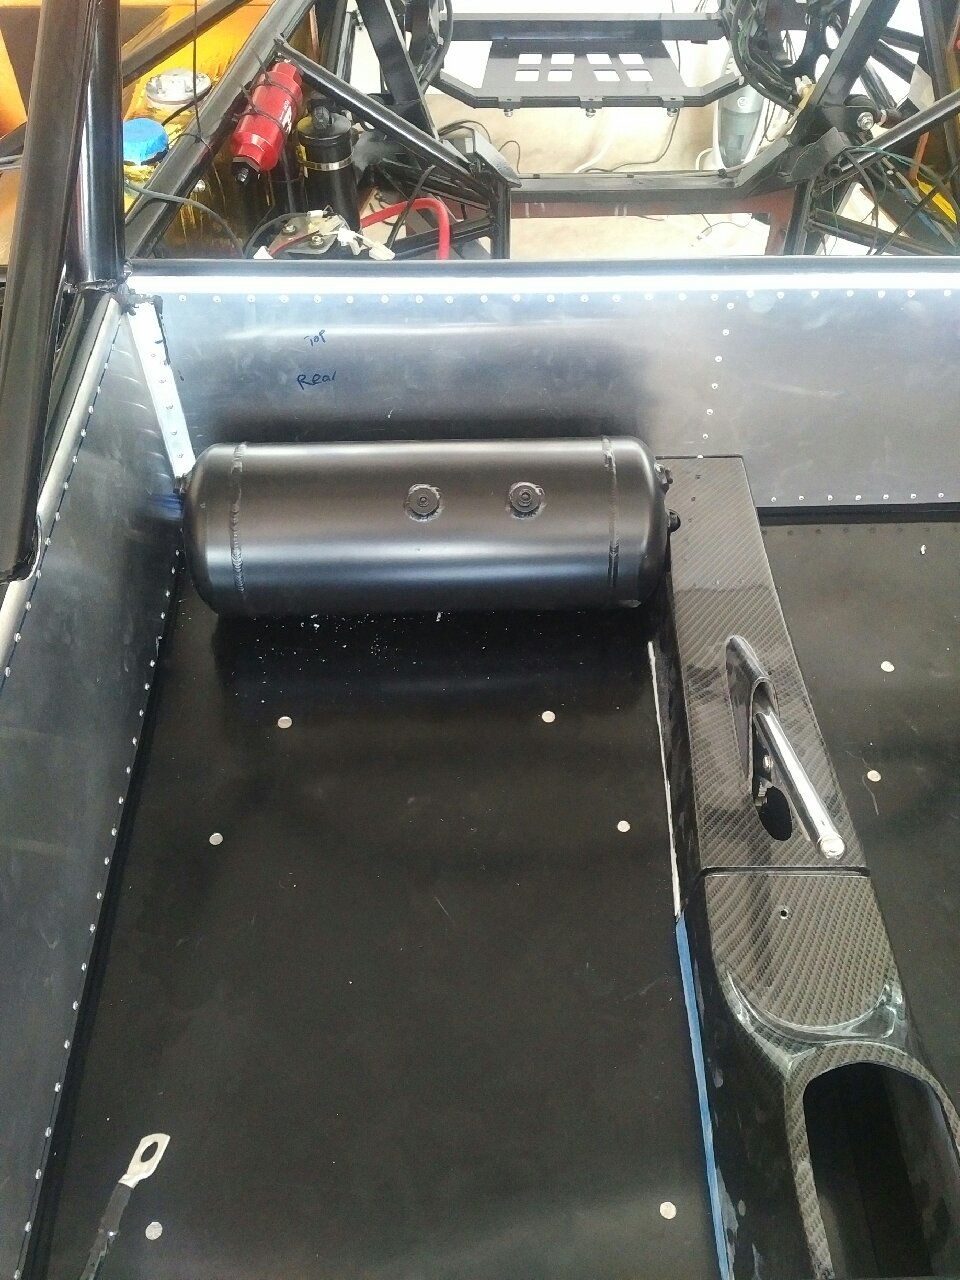
I got the air tank installed for the VRH system - it was placed in the rear of the passenger compartment, behind the pax seat. I had to place the seat in the chassis to make sure there was enough room behind the seat, and the tank fits in perfectly even with the seat all the way back (limited by chassis roll bar member)... Installing the tank took some time as I had to figure out the best way to secure it - I ended up drilling two large holes from the engine bay side, and using large washers to get the placement of the holes and tank correct...
Next, I worked on the seat and seat belt holes in the bottom chassis panel.. The holes were drilled to the factory specifications, and seats trial fitted!
I also got the center console trimmed to size and placed it in the chassis - the center console is made for a lowered chassis floor, so I had to remove quite a bit of material from the bottom edges to make it fit a flat floor chassis.. I also had to widen the handbrake lever hole, and finally remove material to allow the air tank to fit correctly...
Finally, I got started on my dash work - I made a list of all the holes I need for various switches, buttons, dash gear, vents, etc... I also started work on the display surround - I am using a Dash2 Pro (instead of Stack from last time). I will not have the unit until the end of the build, so I didn't want to wait till the end to trim the dash and get the display to fit... So instead, I googled the dash specifications, and built a mock-up display out of 18mm plywood - the unit is actually 15mm thick so this should work great... I also spent a couple hours designing my own display housing using 3D software, and sent the design off for 3D printing - hopefully it turns out well!


Feb 25-27, 2017
Build Time- Today: 7 hours
Total Build Time: 160 hours
I started work on the cill covers - templates were made and used to trim the cill covers to fit over the chassis tubes... It took quite a few iterations on each side to get them to fit perfectly... I marked the rivet lines and marked the drill holes... I also marked the diagonal chassis rails from below as I need to make a hole in the driver side cill cover for a cup/coin holder... The hole in the cill cover was drilled and my cup holder fits perfectly in it.. Now i just need to build a trim piece on a lathe to get the finished look!
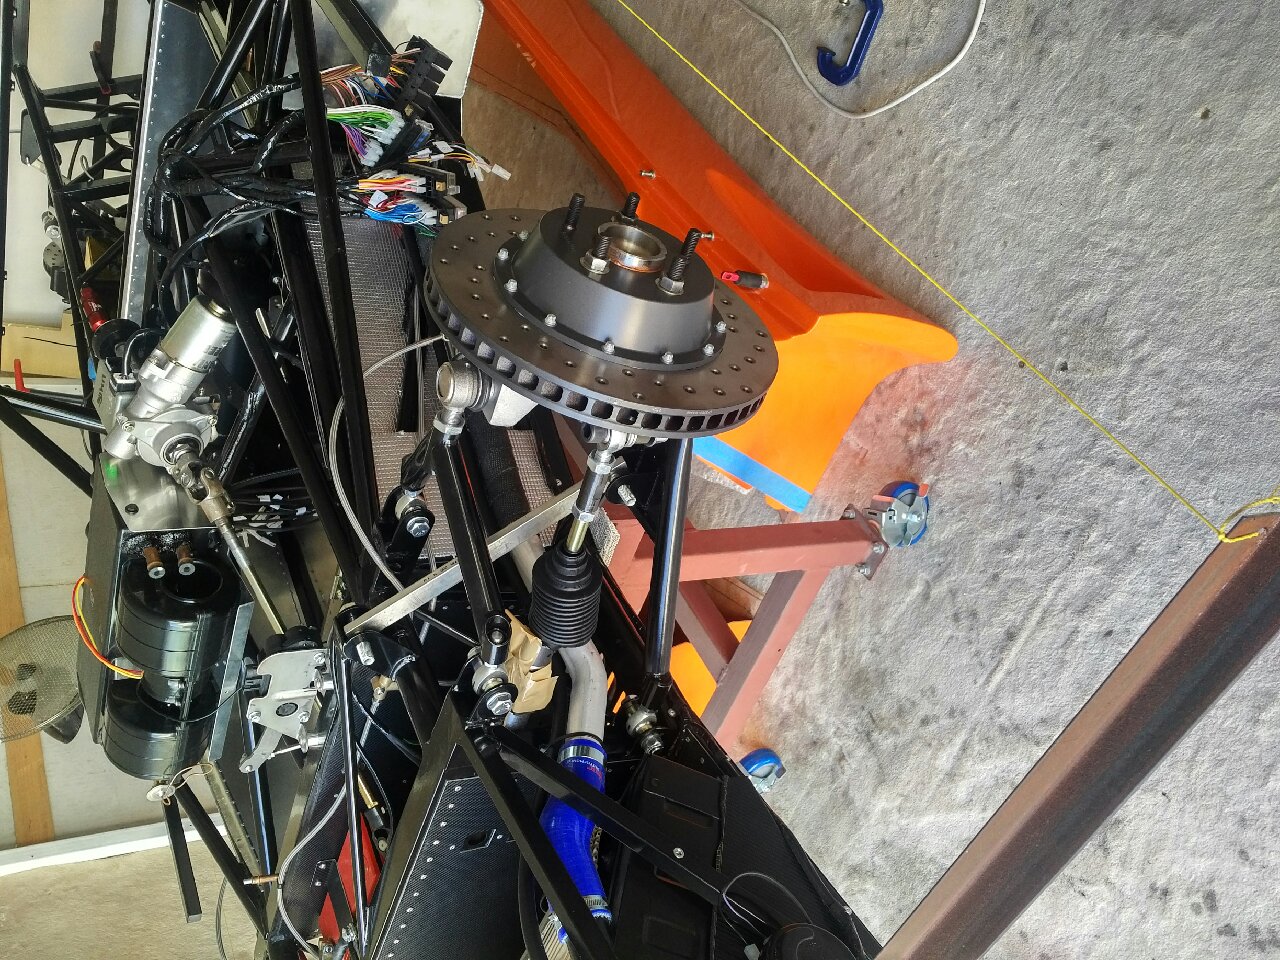
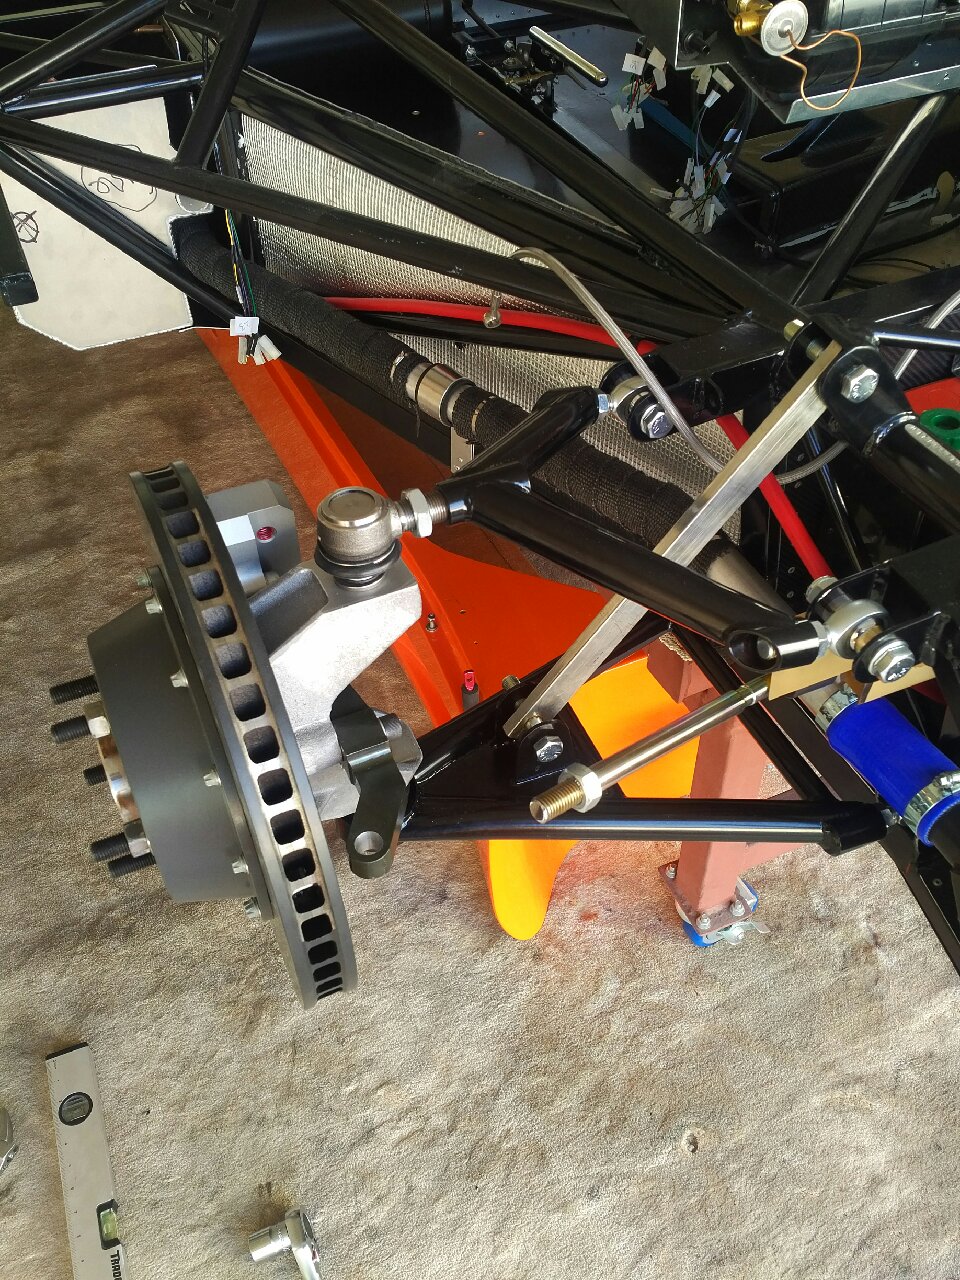
I finally received my front wishbones, so next item on the agenda was building up the front corners - I have the rose jointed longer front wishbones, so they were installed pretty quickly. The uprights were then installed, and finally rotors were put on... I had to modify the steering arms since I am using the bump steer kit, so the arms were drilled for the M14 bolts and the installed...
I am finally ready for the preliminary alignment now!
Feb 28, 2017
Build Time- Today: 4 hours
Total Build Time: 164 hours
Today's task was getting the alignment done:
First task was installing ride height bars (custom made) to get an accurate alignment. The dampers were replaced with the ride height bars. A box was then constructed around the chassis using rope and angle bars... I then aligned each corner to be perfectly vertical and straight... Once aligned, all the ride bars were replaced with the dampers... The bolts still have to be torqued to specifications, but the chassis is now aligned and ready for the next step!