Oct 1-2, 2015
Build Time Today: 2 hours
Total Build Time: 279 hours
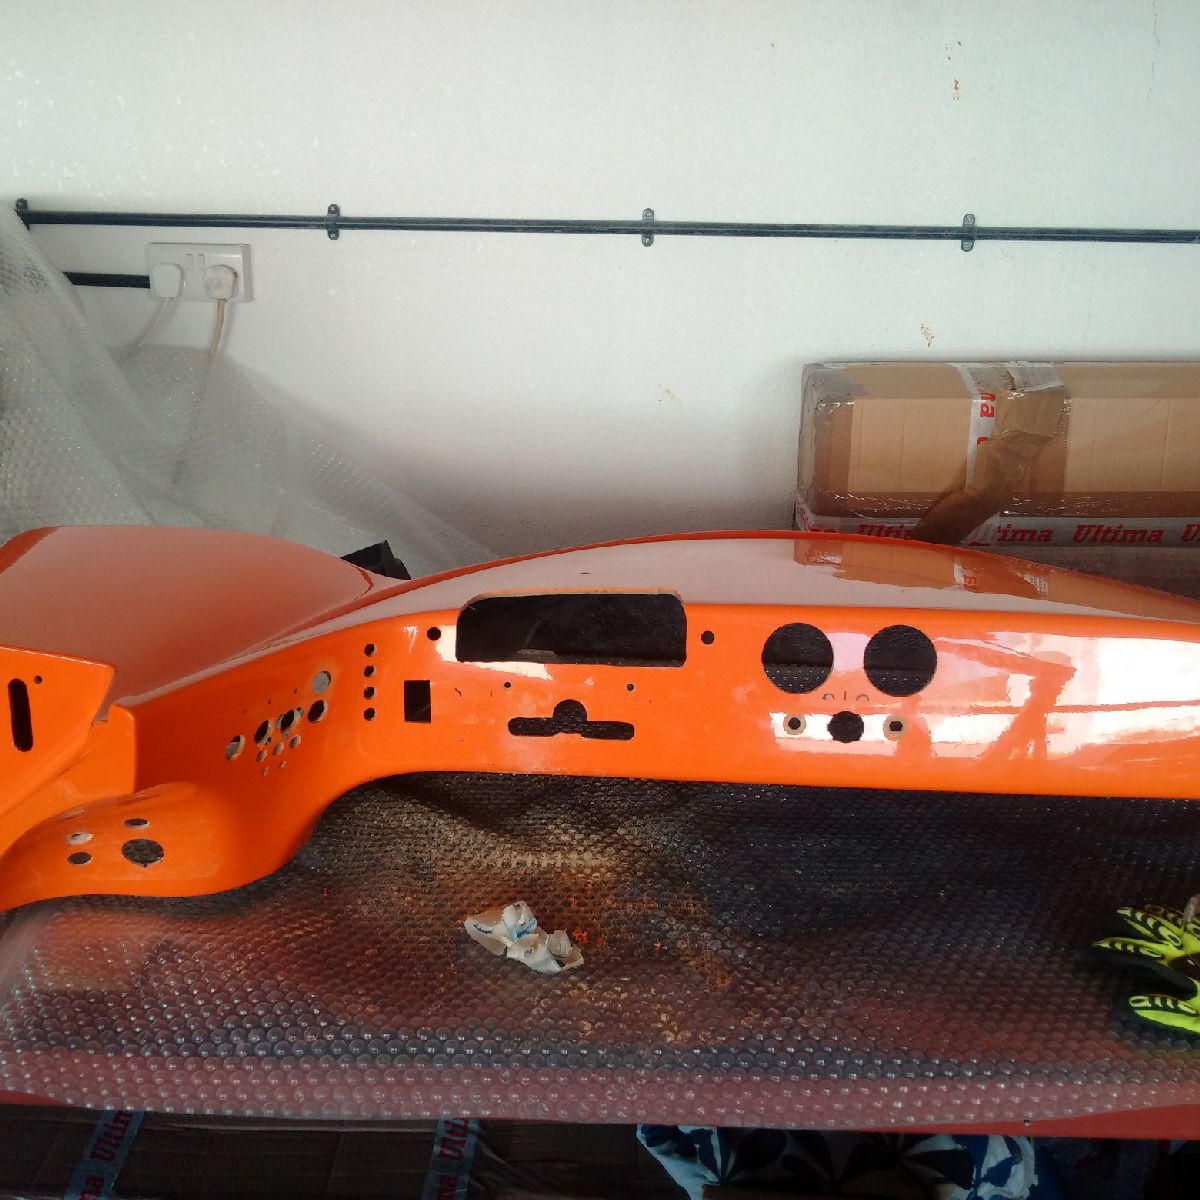
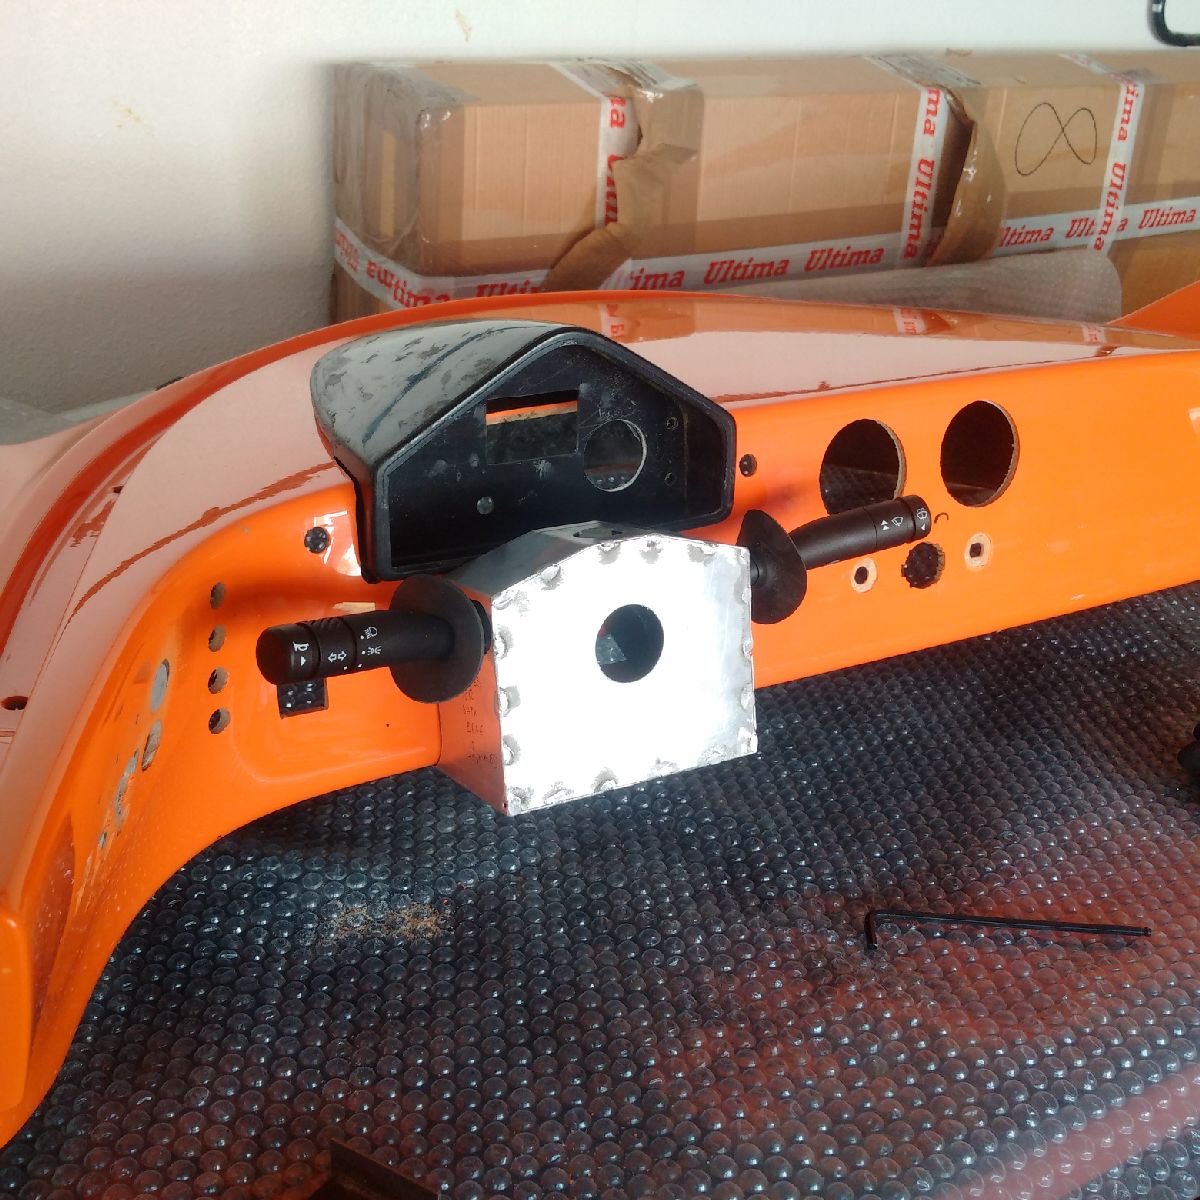
Not much time going on the build as I wait for the parts to get in from the factory. I spent some time finishing up the dash holes for mounting the stalks column and also making slots so that the stalk wiring connectors can come out of the dash.
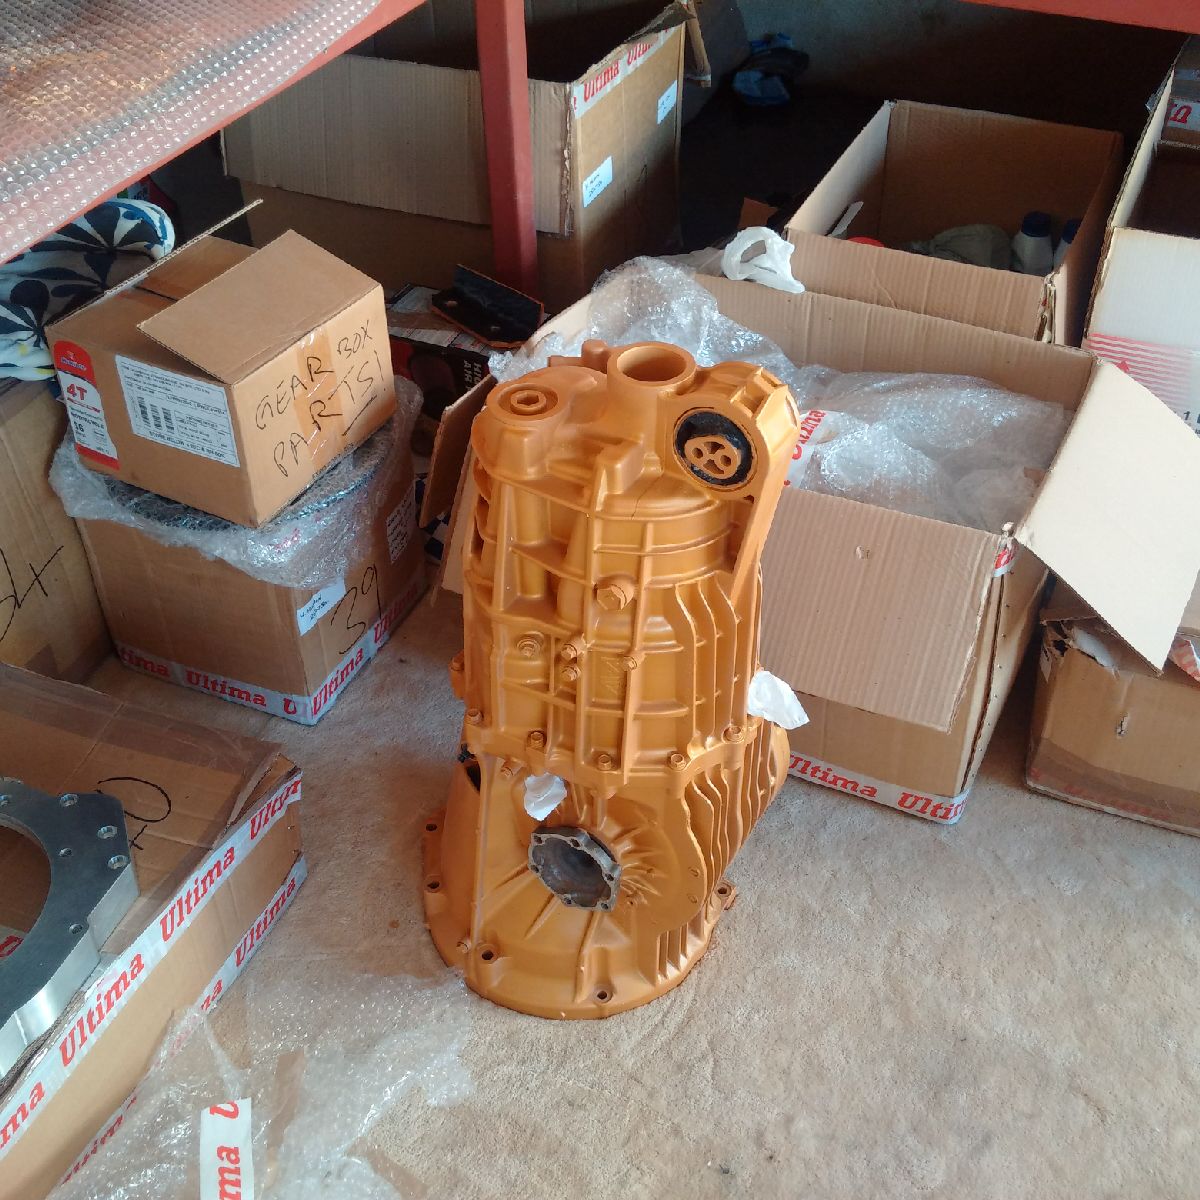
I also opened up the gearbox to get an idea of what all needed to be worked on - from the onset, I am looking at modifying the bolts to install the breather pipes.
Oct 3, 2015
Build Time Today: 3 hours
Total Build Time: 282 hours
First job was tapping the gearbox bolts for the breather connections - didn't take long to tap them, and they were put aside for attaching to the gearbox later.
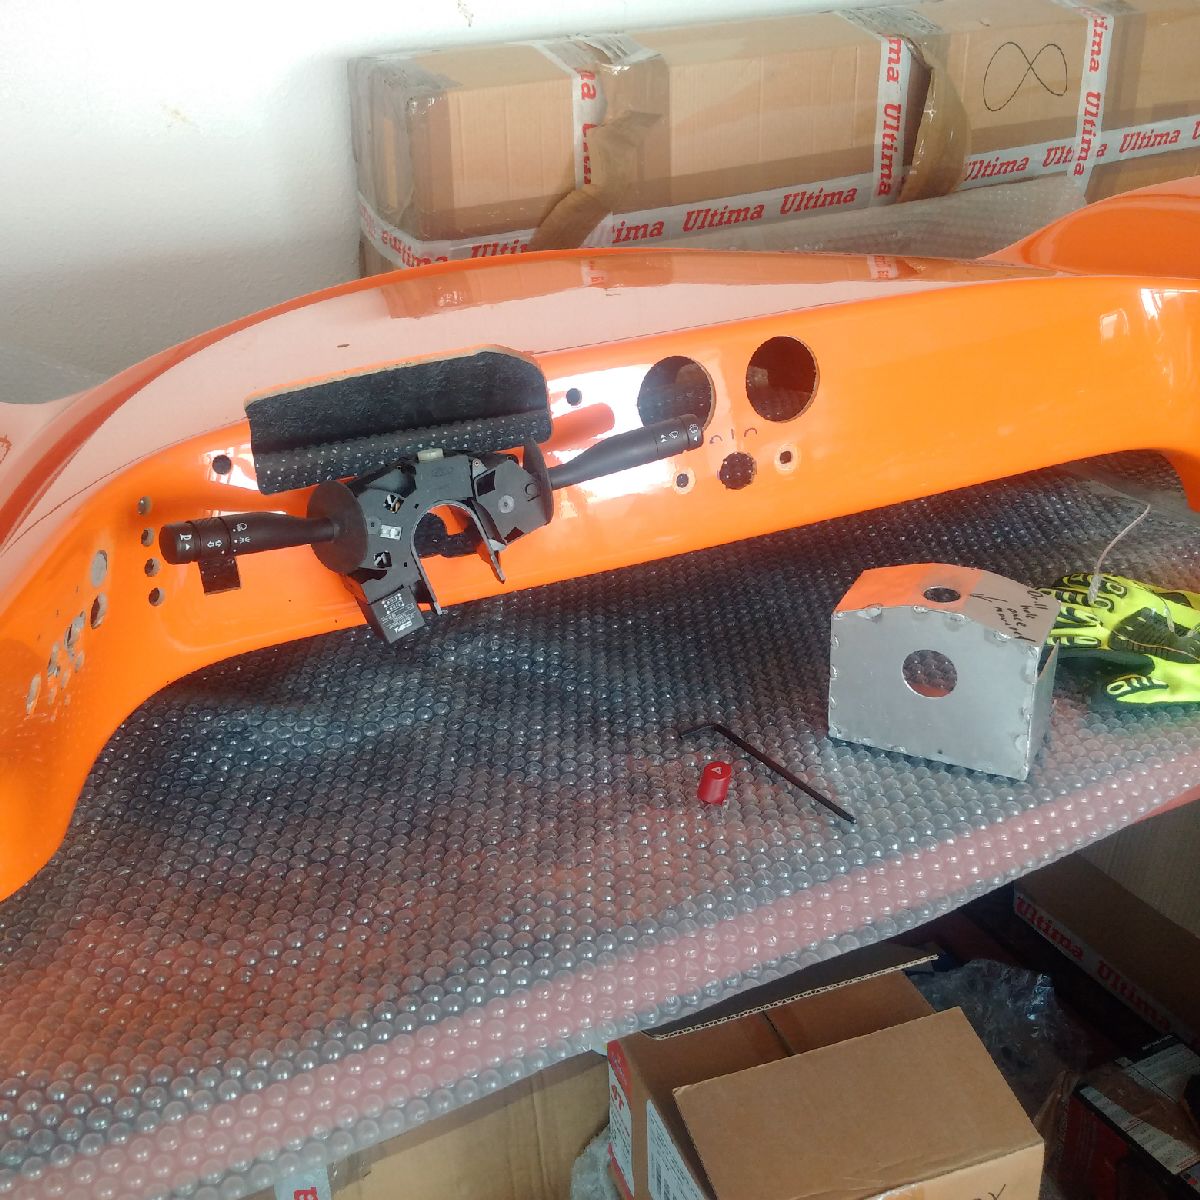
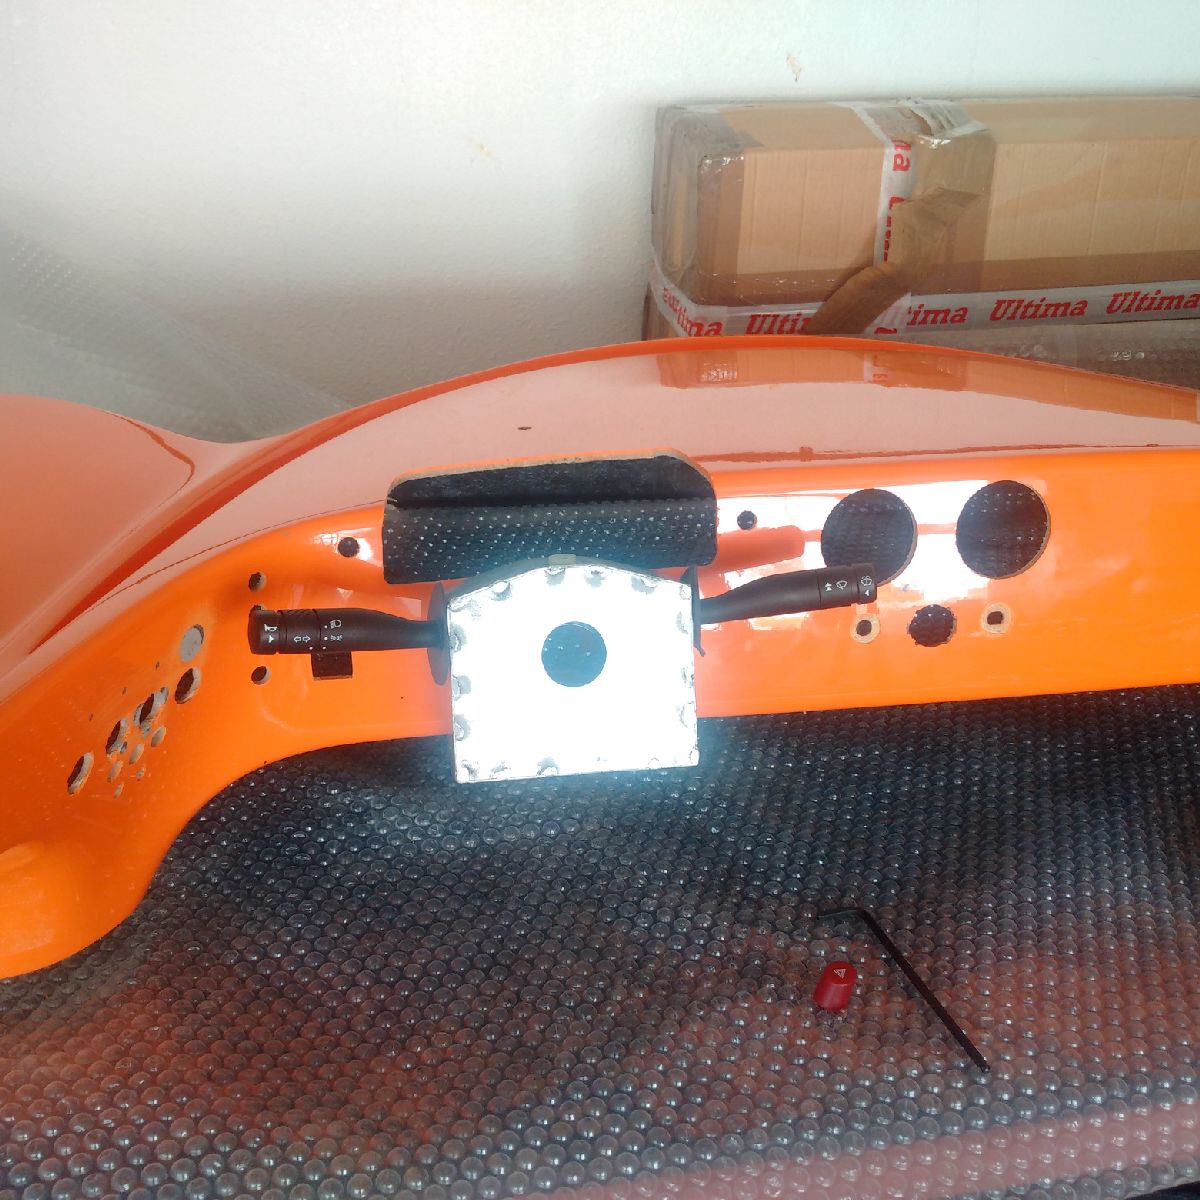
I then went back to the dash and worked on installing the stalk and the stalk trim piece... The stalks were mounted with 2 bolts from behind, and the trim piece was placed on the stalks to get an idea of how much trimming would be needed. Slow use of the dremel and file resulted in a great fitting trim piece. The Stack pod was then placed to verify the look, and it turned out the stalk trim piece would need some more trimming to sit correctly with the stack pod... trimming and filing done, the stalk and stalk trim piece are also now ready for leather trimming... However, I have now noticed that the stack pod still needs some internal trimming to let the stack unit sit correctly...
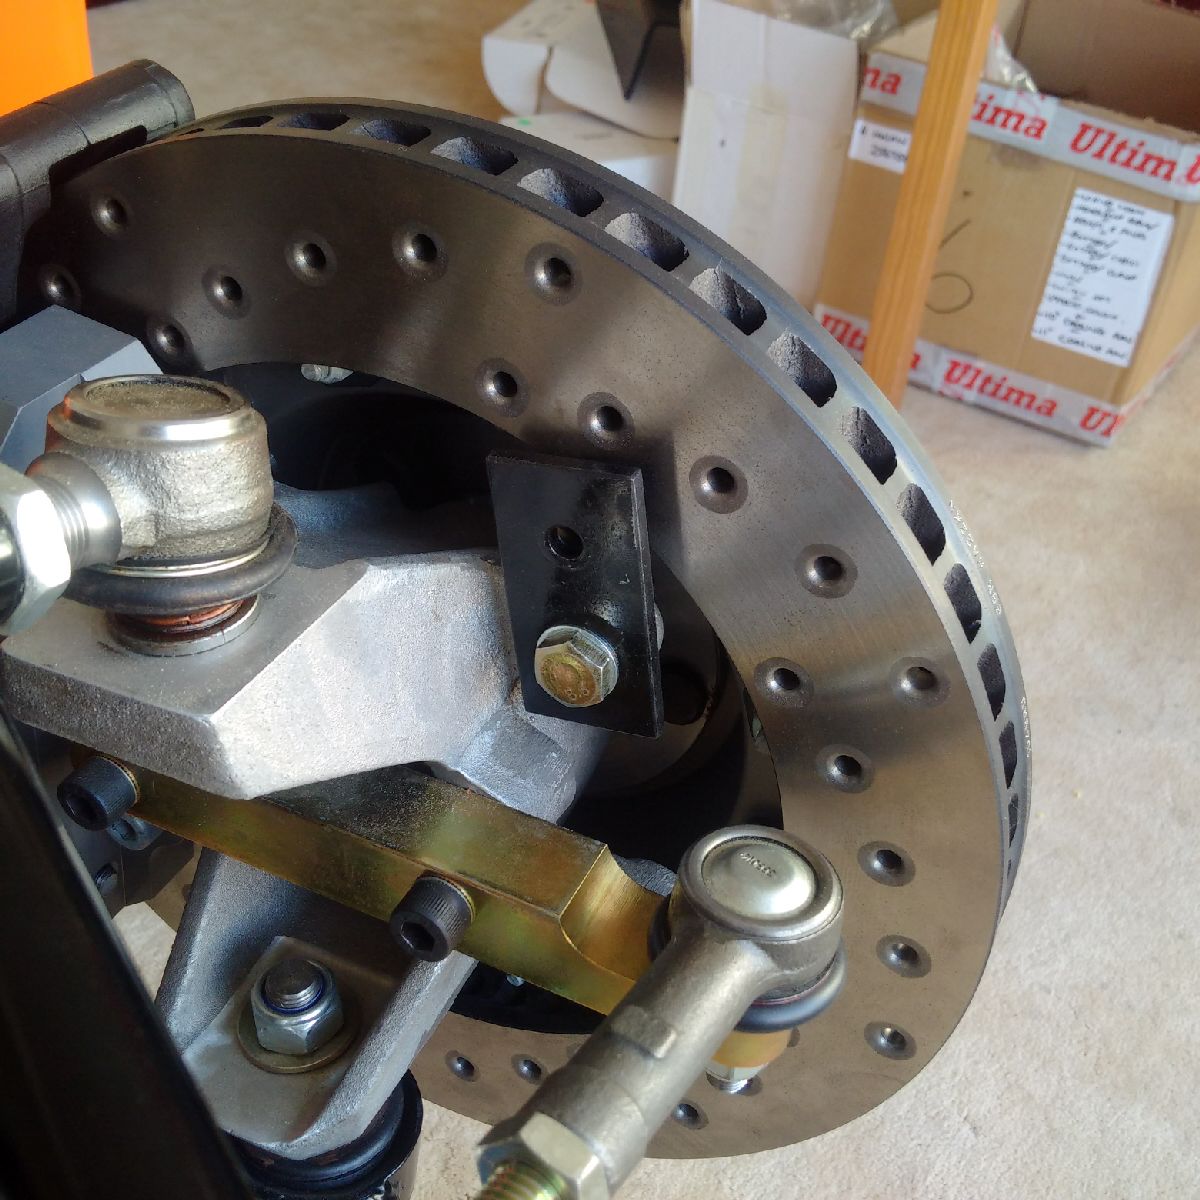
Finally, I also made the speedo-sensor bracket today - using some spare MS steel, the bracket was cut and drilled for 2 holes - one to hold onto the upright, and one for the sensor. The bracket was then bolted to the upright and positioned correctly with the help of a 8mm thick rod mimicking the sender.
Oct 4-5, 2015
Build Time Today: 6 hours
Total Build Time: 288 hours
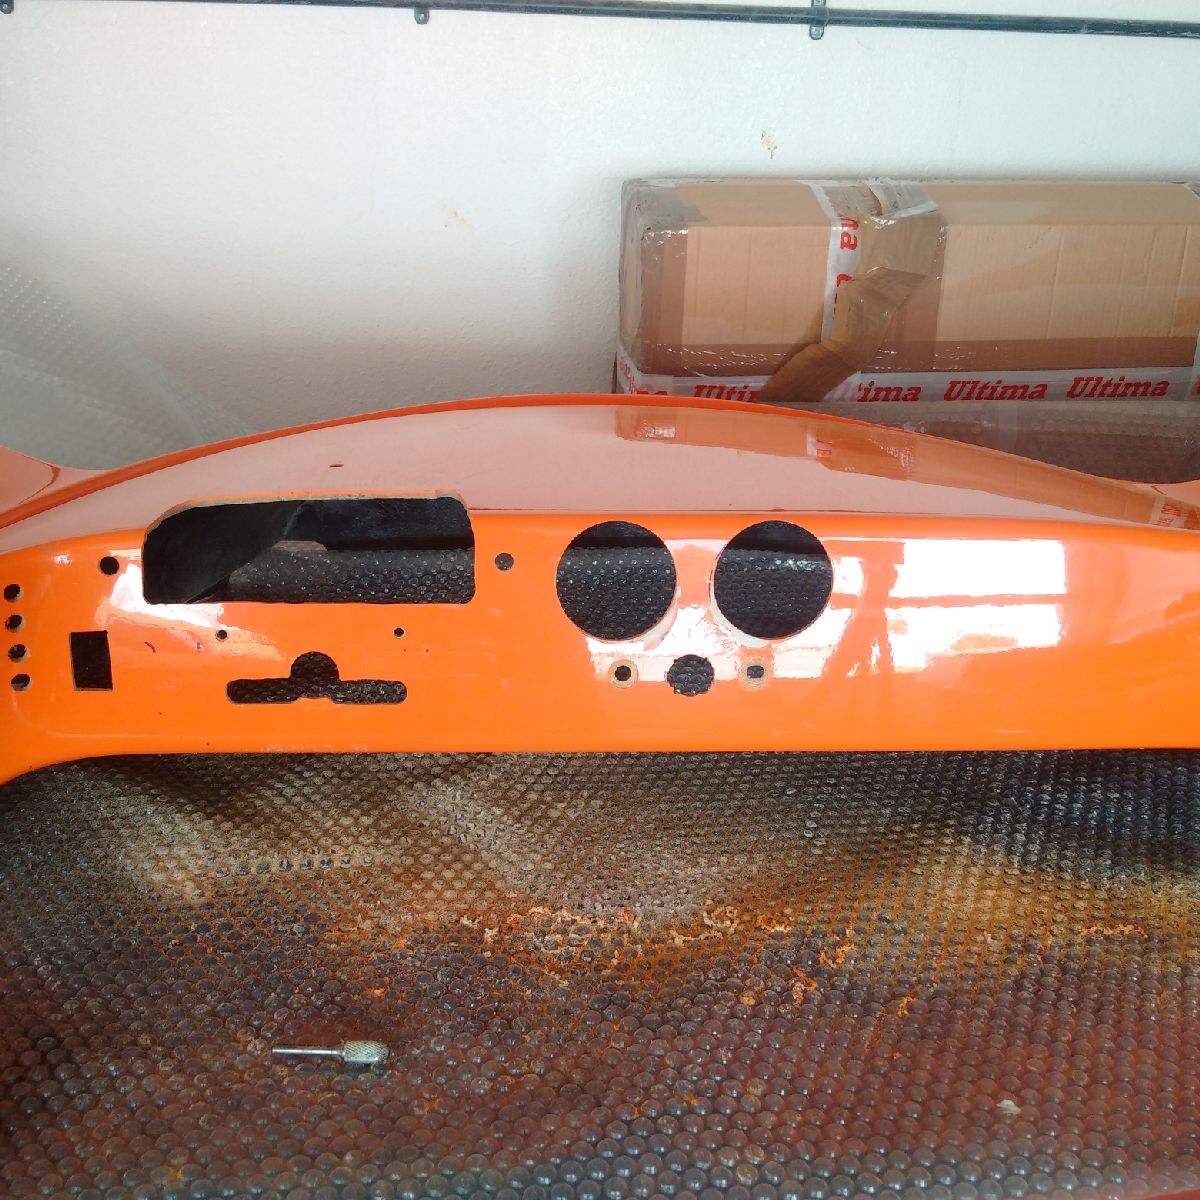
I ended up buying a new pair of vents today - from an Audi S3... The vents are with a chrome bezel and look a lot nicer than the standard Ultima or even the hotrod vents I had purchased earlier... However, the vents are much larger, and that meant I would have to enlarge the hole in the dash for the vents.. I ended up applying epoxy and 'sticking' the old GRP piece (removed for the old smaller hole) back onto the dash.. I then let it dry, and then recut a larger hole using a new hole saw (80mm)... a little fettling and the new vents went in perfectly!
I also worked on finishing up the speedo sensor install... Its a VERY tight fit between the front upright to try and get a washer and nut on the sensor, but patience and time resulted in a perfectly fitting sender unit... the wire was zip tied away behind the wishbone, and the unit is now ready for testing...
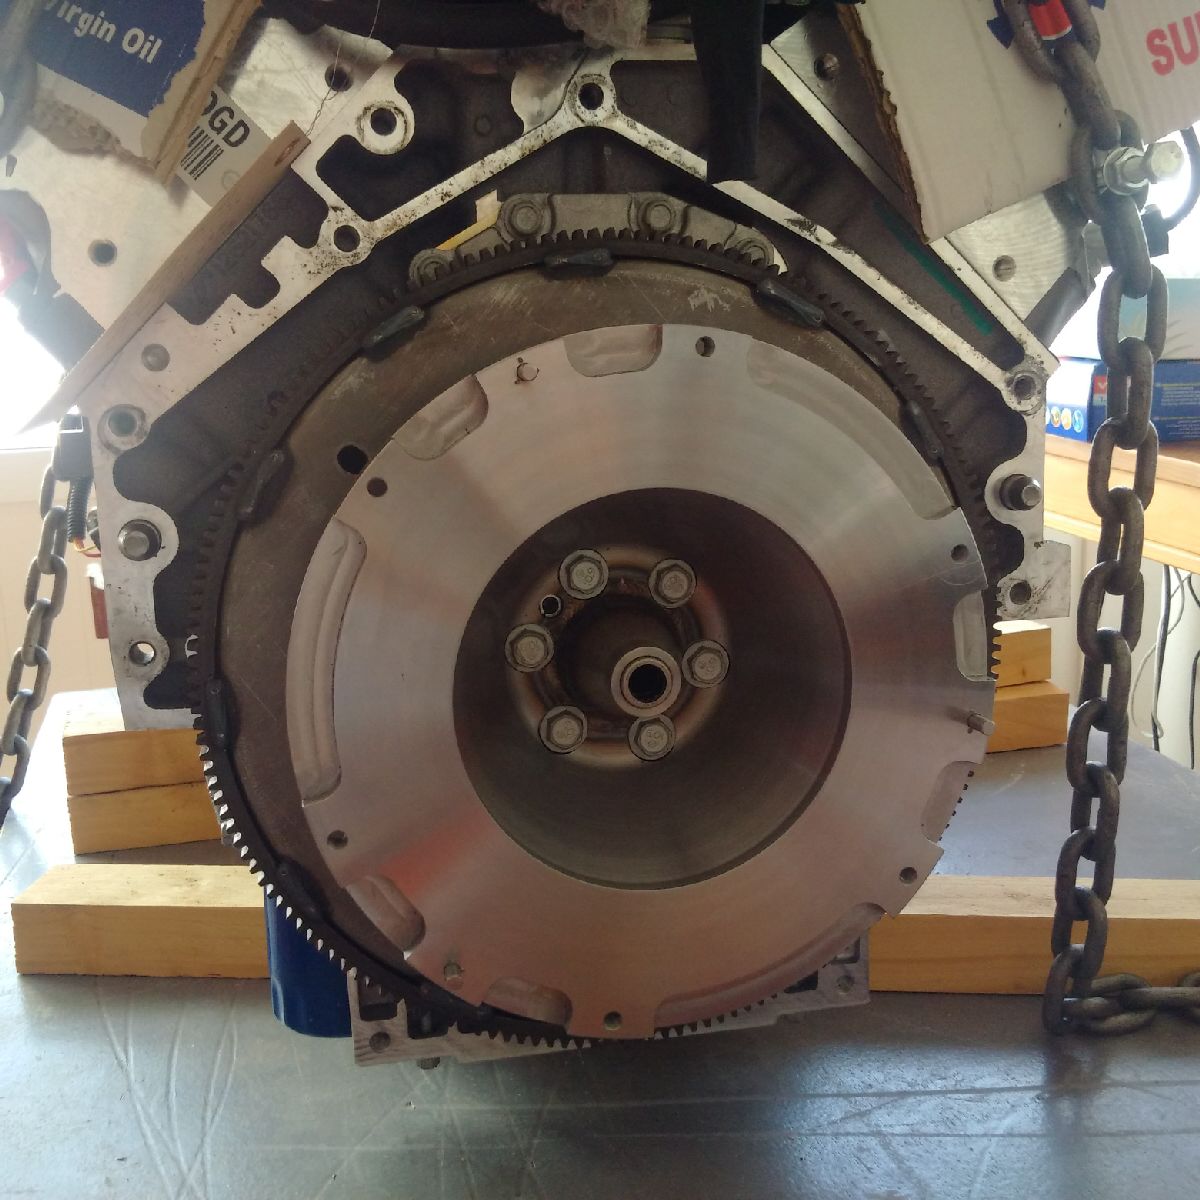
I then started work on the engine!!! The starter ring and flywheel were the first to go on... However, I ran into an issue as the flywheel would not slip on - the metal clip on the crankshaft that drives the flywheel was slightly too large (11.2mm vs 10.6mm hole on flywheel) - some light drilling and sanding of the hole resulted in the hole widening up just enough to accept the metal clip.. The ring gear and flywheel were bolted onto the engine, and the bolts were torqued upto 40 ft/lbs in two steps... Final torque is 65 ft/lbs, but that will be done after the adapter plate and starter motor are installed...
The adapter plate will not go on because of mismatching size of stud/hole, so I have sent an email off to the factory and will wait their reply before getting back to the engine build...
Oct 6-7, 2015
Build Time Today: 2 hours
Total Build Time: 290 hours
The adapter plate was fixed by removing two inserts that had been mistakenly installed by the factory on the wrong side... new inserts had to be made and then the adapter plate was ready to fit on... The bolts were torqued up after applying some loctite, and the adapter plate is now on..

Oct 8-9, 2015
Build Time Today: 3 hours
Total Build Time: 293 hours
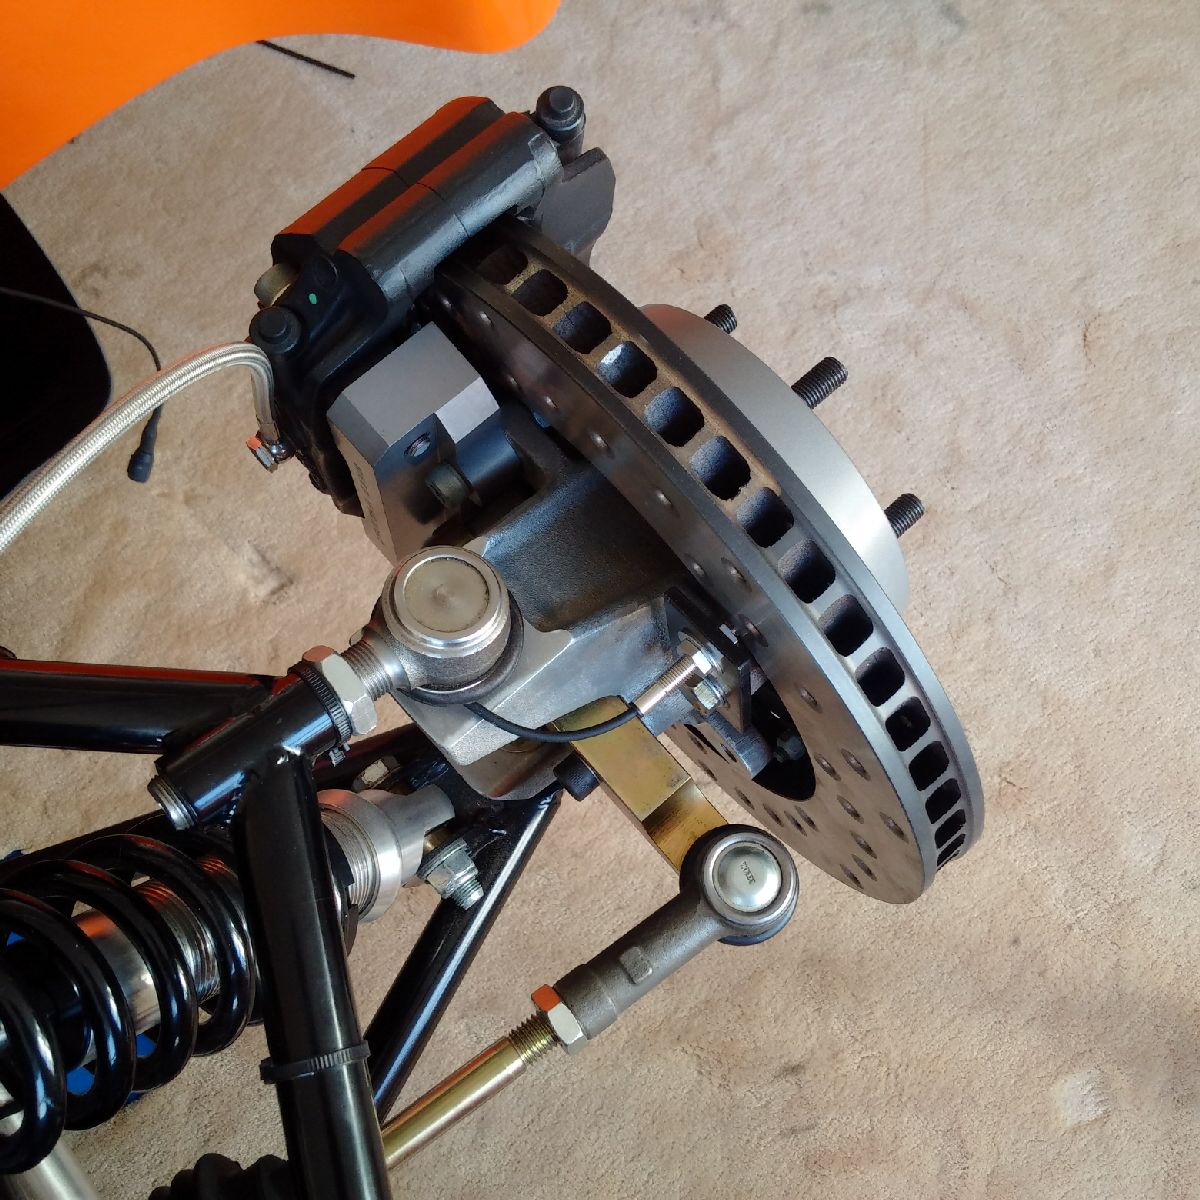
I spent some time getting the car ready to go back on its feet - the side pod trim panels were made water tight with the use of Sikaflex, and the brakes were bled - this process showed a leak in the 4-way switch, so I need to replace the copper washer and re-bleed/test... Bleeding the brakes took a while as I did it myself - hopefully, the second round of bleed/test will be done with help to make it quicker and final...
Oct 10-11, 2015
Build Time Today: 5 hours
Total Build Time: 298 hours
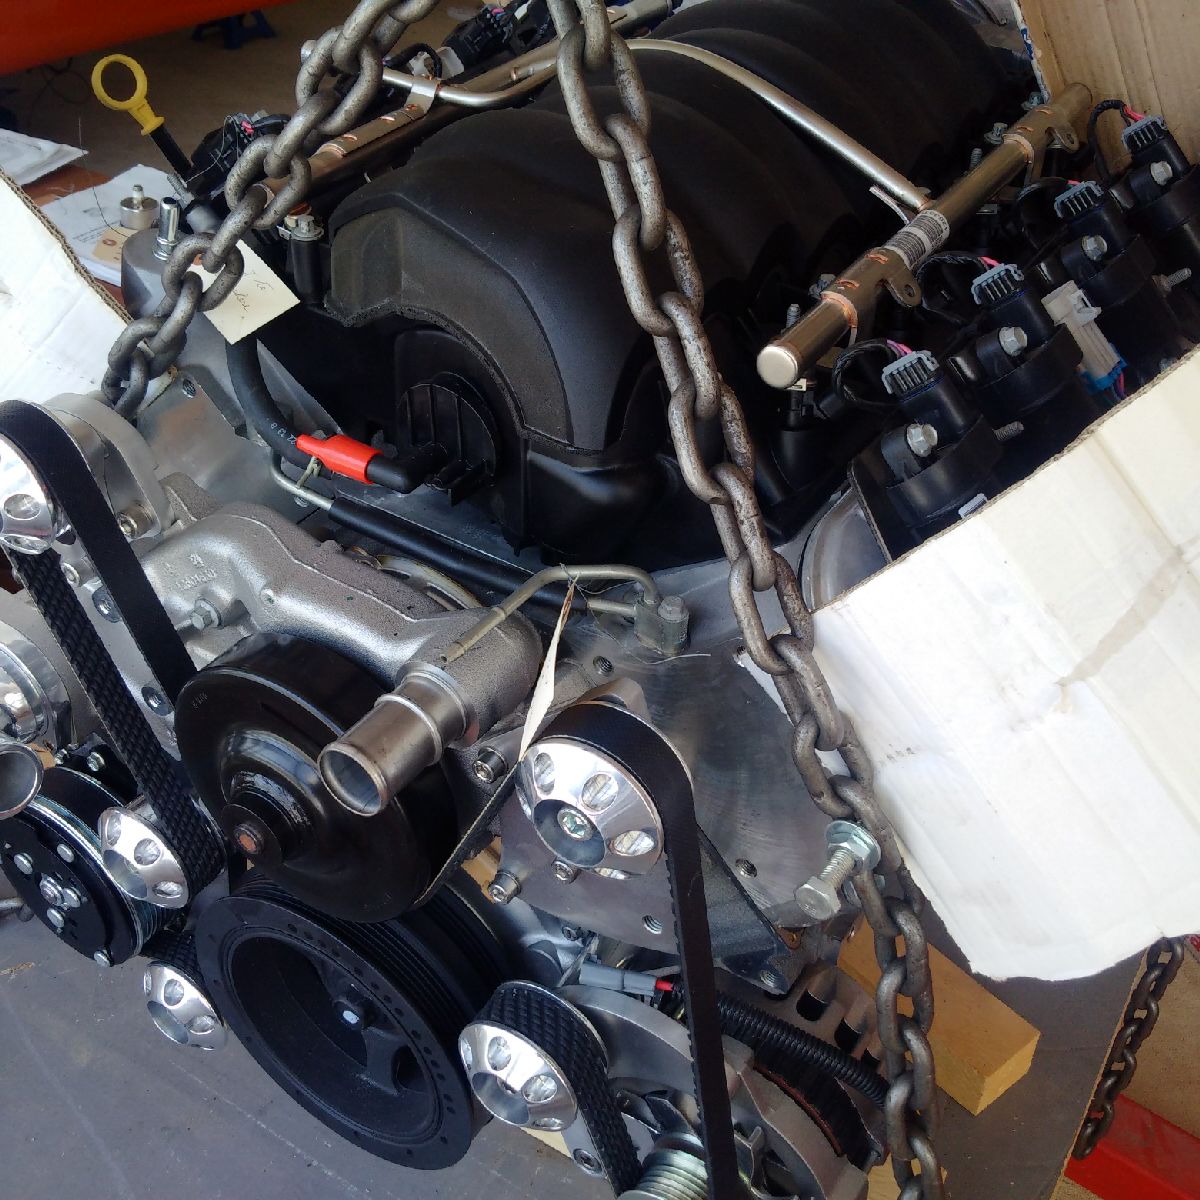
I spent some time on the engine installing the Lakewood Engine mounts... One of the holes in the engine had to be countersunk, and then the mount was installed. The passenger side mount took a while because the AC compressor was in the way of one of the bolts... I ended up removing one of the rear compressor bolts, installing the mount, and then re-installing the compressor bolt.. The location of the mount also has me concerned about the chassis-mount bolt, but that will be something to fix once the engine is lowered in the car...


I also cut down the coolant outlet on the engine as recommended by Ultima
I spent some time on the gearbox getting the various bits modified for use with the Ultima parts - the original drain plug was tapped to accept the new breather connection, the old breather connection was taped to accept a bolt (now the drain), a side bolt was tapped to accept the return breather connection, the original cable supports were removed, and the original cable connection were cut off and a hole drilled to accept the new bolts for the rose joints...

I also spent a little time finalizing all the dash wiring - all wires have now been P-clipped, zip tied or duct taped as required. I have also installed the AC switches (behind dash part) which includes the thermostat wire that goes into the blower...
The build will pause for a few weeks as I wait for parts from the
factory to continue with the engine/transmission build, and also while I
am out of the country till Oct 25th...
Oct 26, 2015
Build Time Today: 8 hours
Total Build Time: 306 hours
Back from my break, I started work on the car early this morning as I was up due to jet lag...
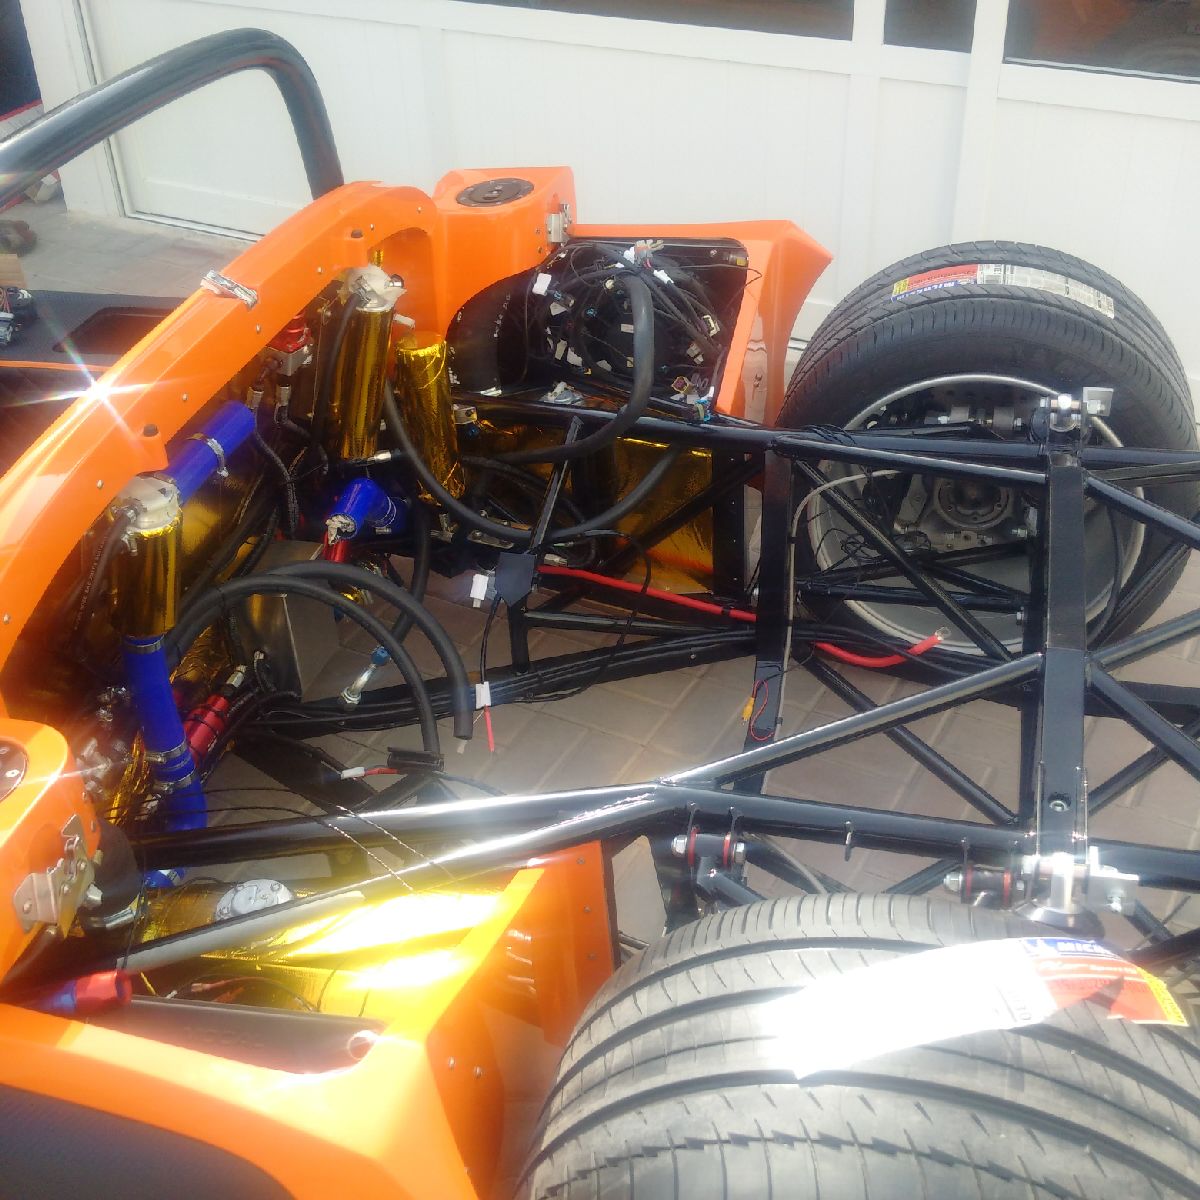
First order of business was to fix the fuel system - as previously reported, there is a leak in the two take off pipes from both tanks... the use of the dye did not fix the problem 100% and the leak was a small drop-by-drop leak from both sides... Before going on holiday, I had ordered some parts which came in during my break, so I started the work: the fitting on the driver side was replaced, conical seals and fuel lube were used on both sides, and then the fittings re-threaded back onto the tank... This took a while as I had to remove the LP pump and the LS engine harness from their locations as they were blocking access to the passenger side fittings... Once all done, I said a little prayer and filled both tank with 20L of petrol.. and waited... and waited.. NO LEAKS!! I connected the battery and decided to test the system with a little pump pressure - each side was tested and everything looks to be holding the fuel in!! Success!!!
Now that the fuel system is working, my engine compartment is ready for the engine! Which means, I need to final prep the engine for installation:
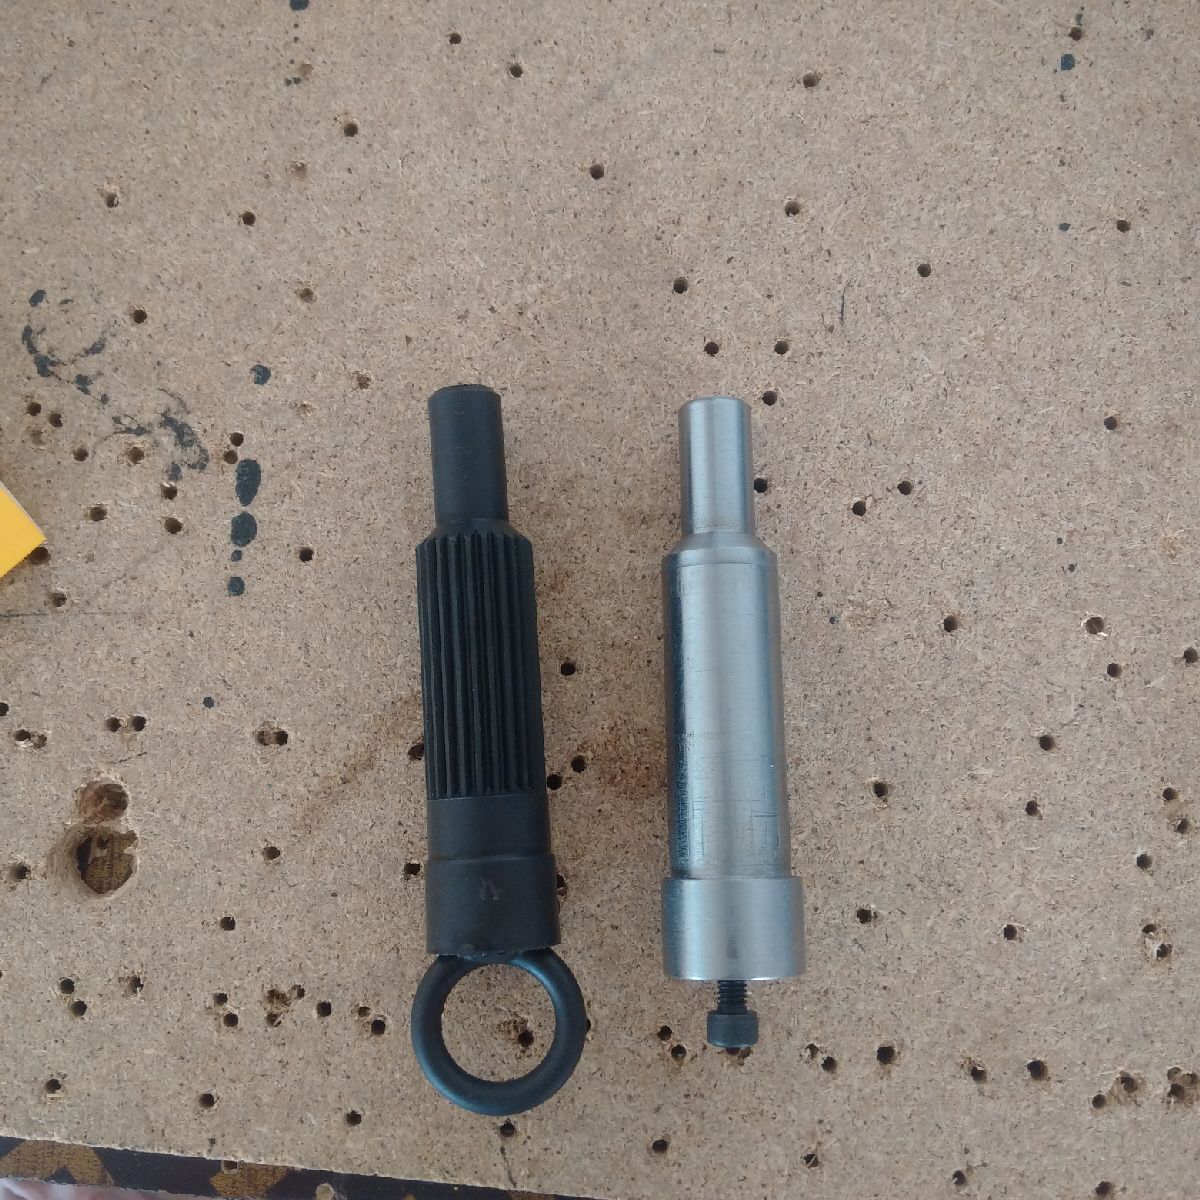
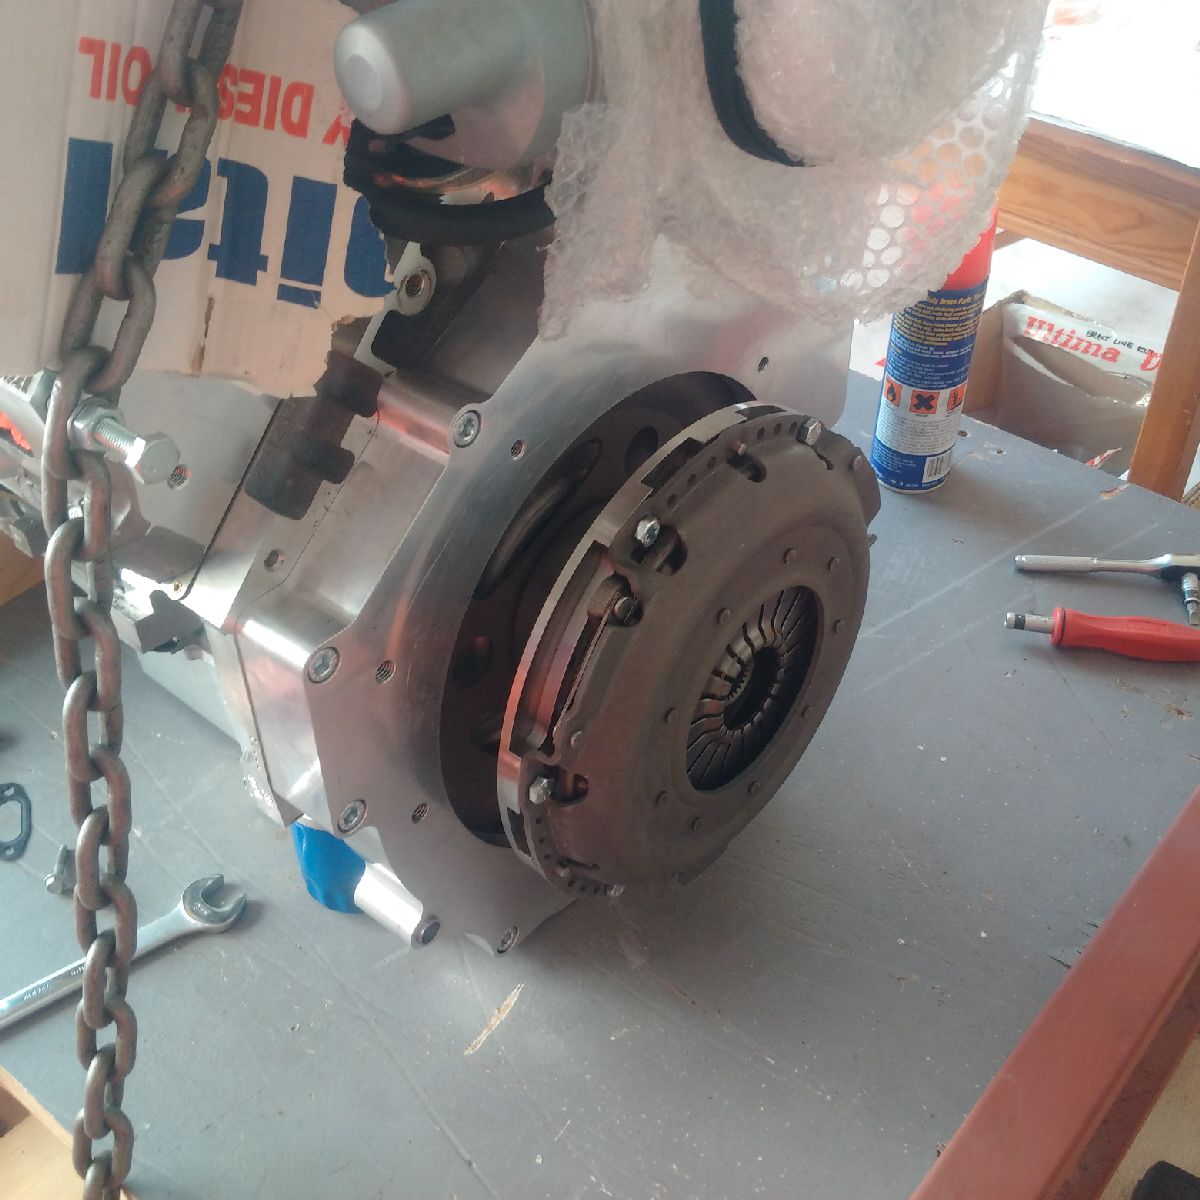
I started with installing the clutch - I bought a clutch alignment tool off the web for a Porsche 996 (which *should* work for my 997 box) - however, when trying to use the plastic tool, it is very flimsy and still allows to clutch to move about 1mm from side to side - I ended up chucking the tool and making up my own clutch alignment tool with a lathe. It worked perfectly - the clutch disk was put on the tool and the tool inserted into the engine bearing. The pressure plate was installed and torqued up, and the clutch tool removed.

I then worked on the oil connections: I purchased a take off adapter to attach the oil cooler, and the adapter also provides ports for the oil senders - I ended up using one port on the adapter for the oil pressure sender, and a port on a fitting for the oil temperature sender. The adapter was then installed onto the engine.

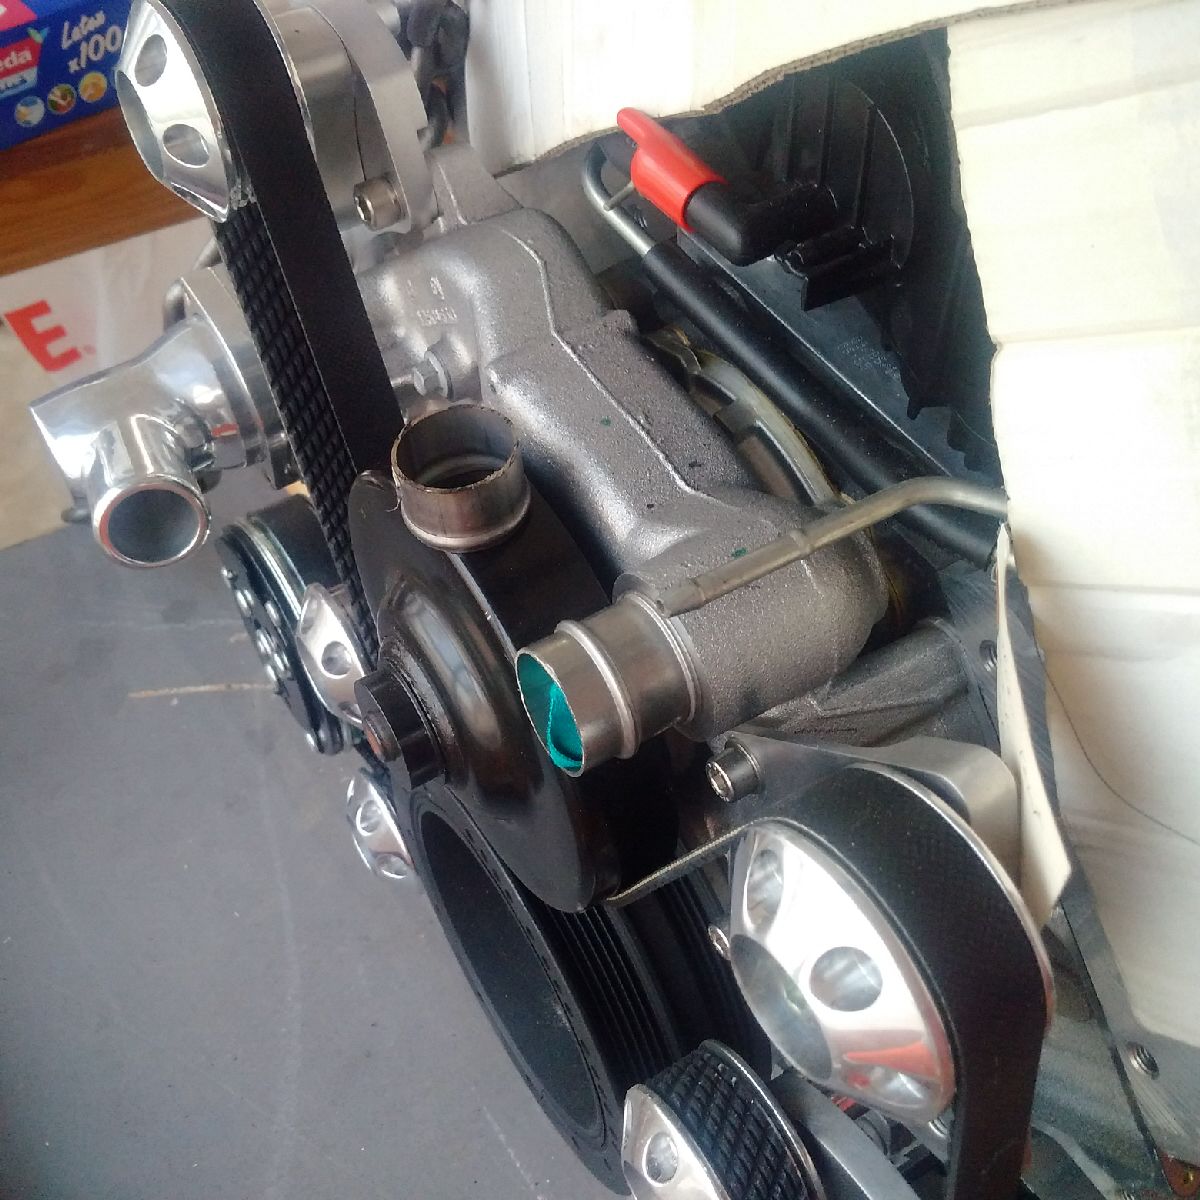
I then took a quick few minutes to turn the water inlet connection the right way around (American Speed ships with the inlet facing the center of the engine, whereas the Ultima required the inlet to be at a 45 degree angle to the ground...
Final work on the engine is installation of the water temperature sender into the head - this is where I ran into trouble! The sender is 1/8" NPT where as the engine has a M12X1.5 hole. I had purchased an adapter to convert the size, but the adapter broke during install! Now looks like I will need to purchase another one (will again take a week to get here!) ... However, I can continue with the engine install and then install the water temp sensor after the engine is in the chassis...
Oct 27, 2015
Build Time Today: 2 hours
Total Build Time: 308 hours
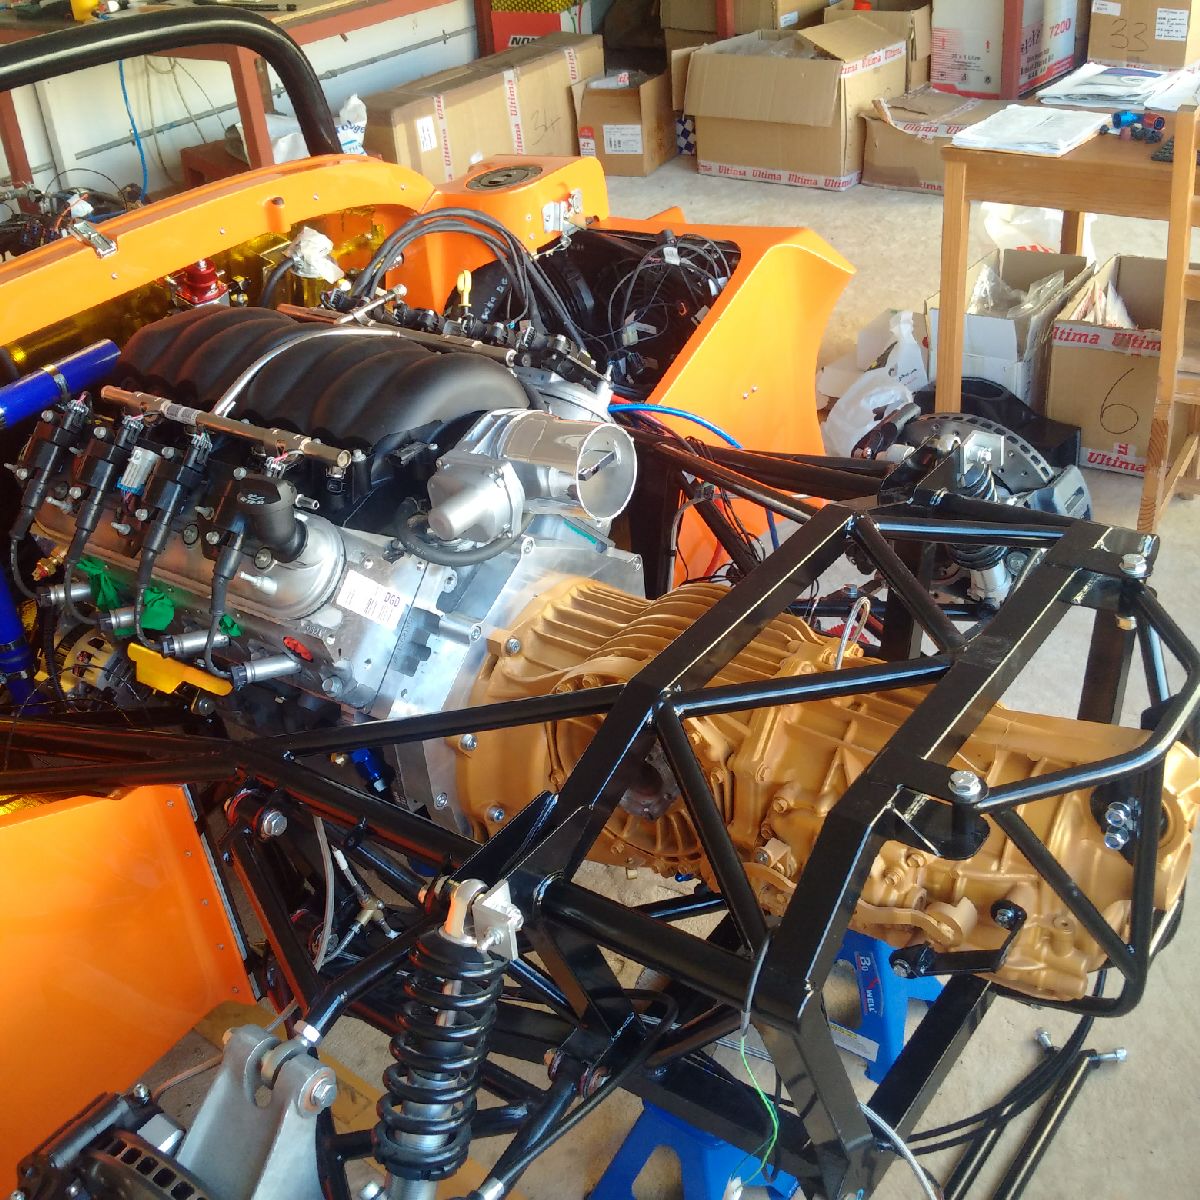
I spent some time today trying to trial fit the gearbox on the engine... and Im glad I did this before dropping the engine in the car! The box would not go on the last 3mm, and it turns out the problem was the inserts on the adapter plate - they are too large to fit in the gearbox by about 0.1mm! I drilled the hole out to make it a little bit larger on the gearbox, and then was able to jiggle and wiggle the gearbox all the way on!!
I also used this opportunity to test fit the headers to make sure they clear the gearbox and the oil cooler take off adapter - all looks well!
I was also able to trim the oil pan casting a little to allow the starter motor to be wired - the original GM casting allows for a block of alloy to protude below the oil level sender, and this protrusion was blocking access to the starter motor hot stud...
Oct 28, 2015
Build Time Today: 3 hours
Total Build Time: 311 hours
A BIG DAY!!
I started with final engine prep work - the temp sensor was installed using a larger adapter (M14) and taping out the engine head to a M14 size/thread. The adapter then slid on.
The starter motor was installed as it was the final pending item...
Finally, I spent most of the afternoon wrestling the motor into the car.. A couple people were over to help, and it took us about 2 hours to get the engine into the chassis! However, it is now in, and all the bulkhead placement looks spot on...


Done for today, I hope to start wiring and connecting the engine tomorrow...
Oct 29, 2015
Build Time Today: 3 hours
Total Build Time: 314 hours
Another day getting the other big item into the chassis - the gearbox!!
I started day with prepping the gearbox - the slave cylinder was attached, the clutch release bearing was installed onto the guide tube, and the guide tube, pivot point, splines and shaft end were all coated in grease to aid install and extend usage life.
The gearbox was then wrestled onto the chassis, and it took a while to align it correctly and get it onto the engine adapter plate - that is when I ran into trouble - two of the holes don't line up correctly, and one of the other holes is tapped incorrectly!! ARGH! Not having the correct tap size (M12), I decided to leave that till later. Instead I checked all the other holes and got the gearbox chassis support installed to aid in the weight distribution.
Oct 30-31, 2015
Build Time Today: 3 hours
Total Build Time: 317 hours
The gearbox was removed halfway, and one of the adapter plate holes was re-tapped. Two of the holes on the gearbox were also enlarged so that the bolts would line up... The gearbox was then slid back on, and all the bolts were tightened. The rear gearbox support was installed and the gearbox is now in place!