July 2, 2015
Build Time Today: 4 hours
Total Build Time: 67 hours
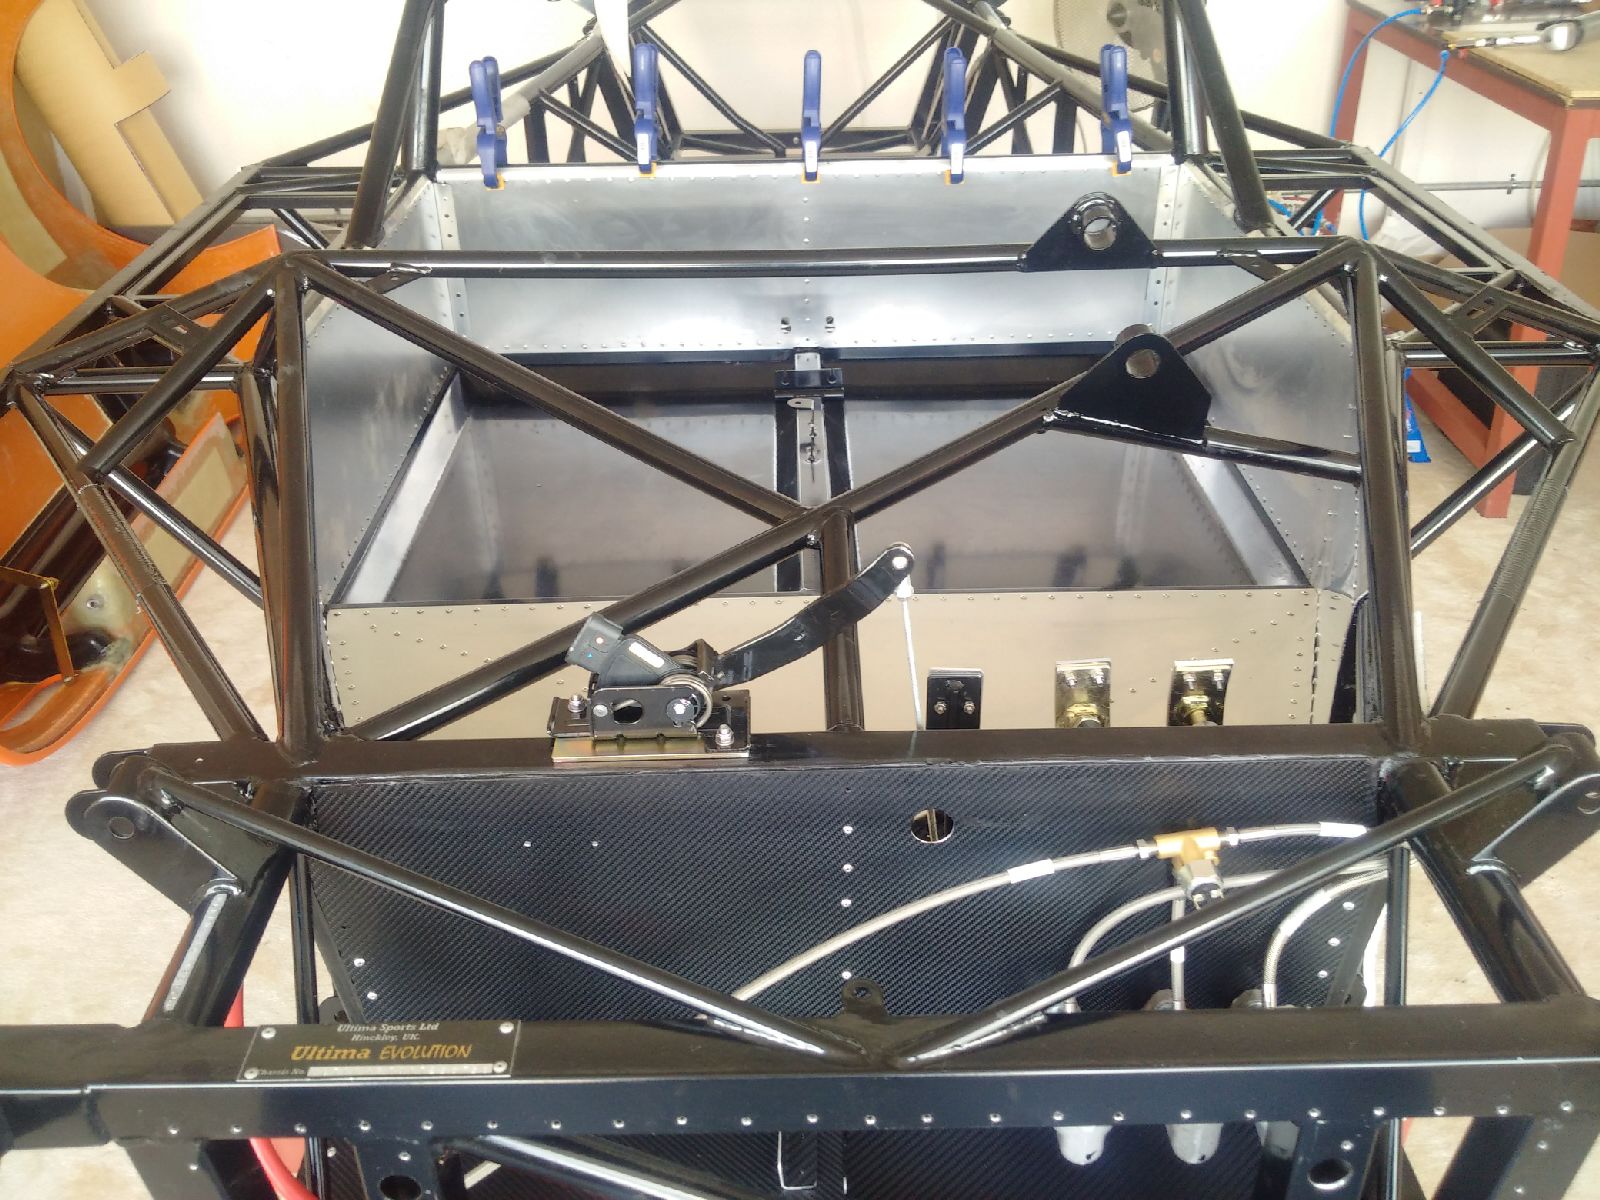
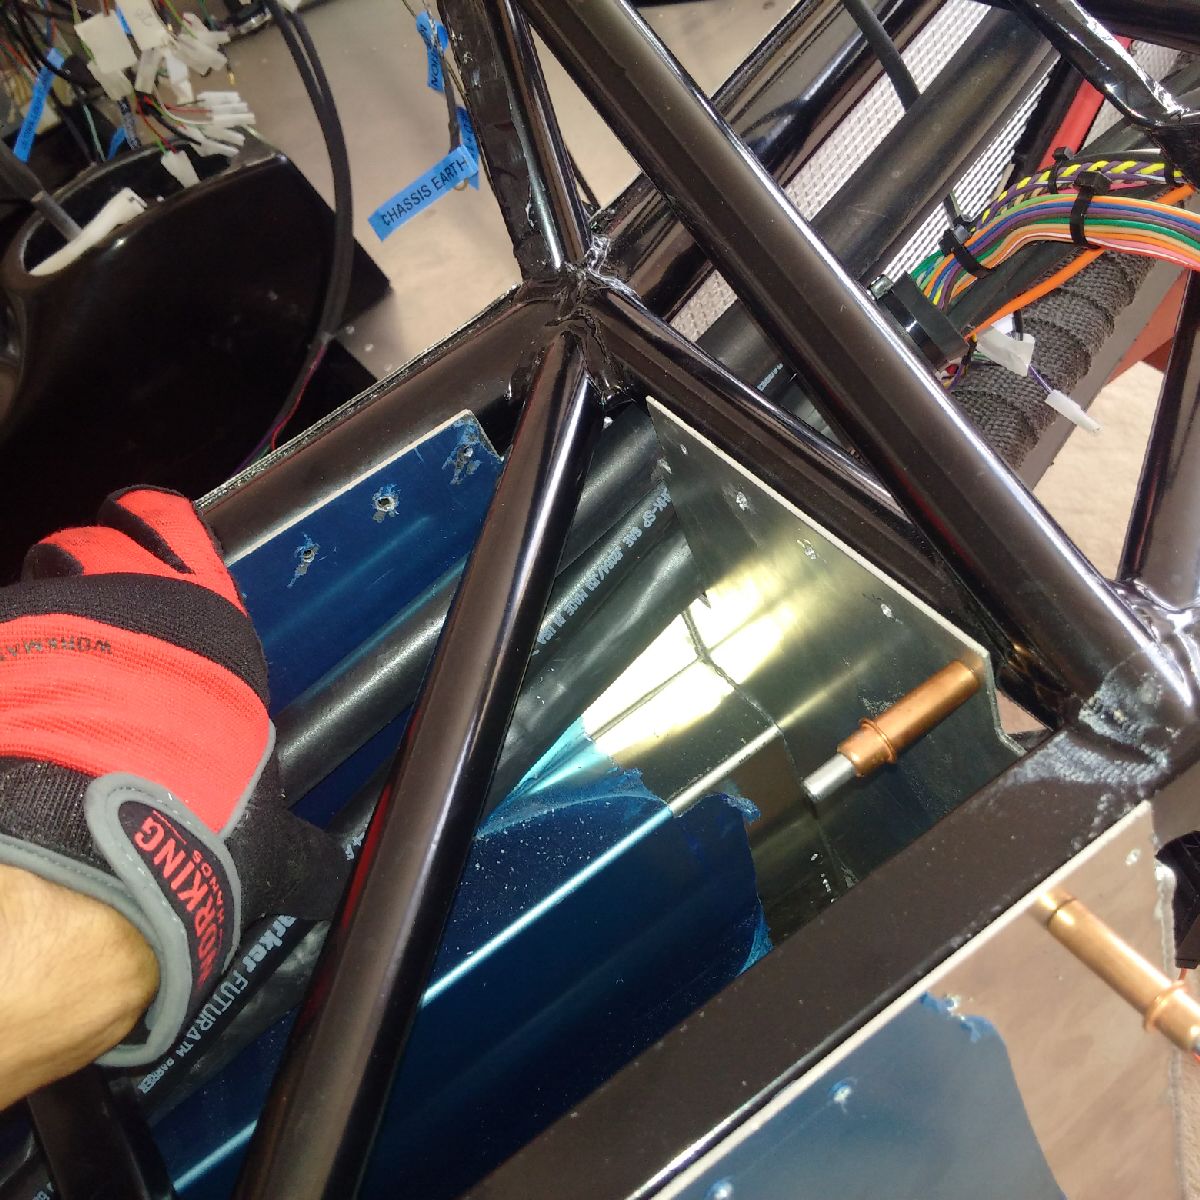
Got back to the build today after 2 days off. I was able to get the brake and clutch lines riveted to the chassis along the sides, and also finally riveted the final panel - the engine bulkhead panel. I have left some off the rivets off the bottom (clecoed in place) so that the future fuel lines that will need to share the rivets can all be put in together. Similarly, I also did not rivet the entire top of the engine bulkhead but just clamped it in place, so that the bodywork can eventually fit on top and then all be riveted together.
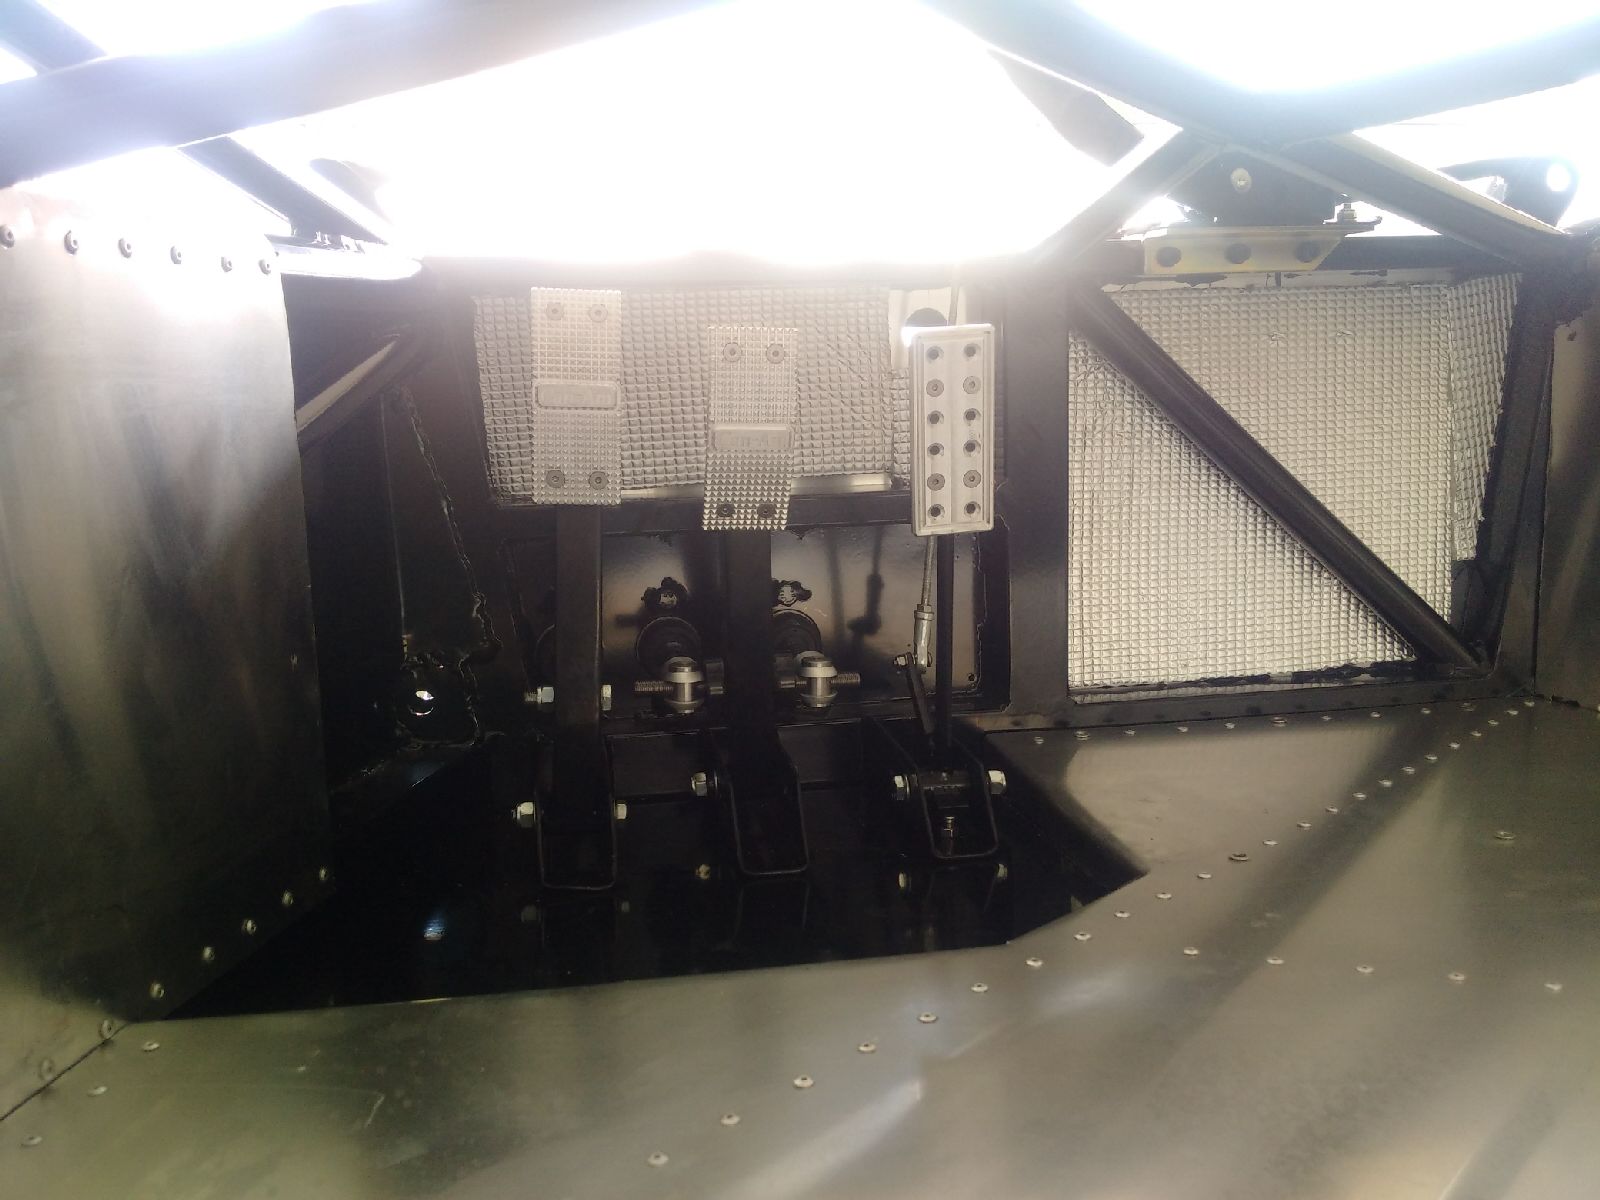
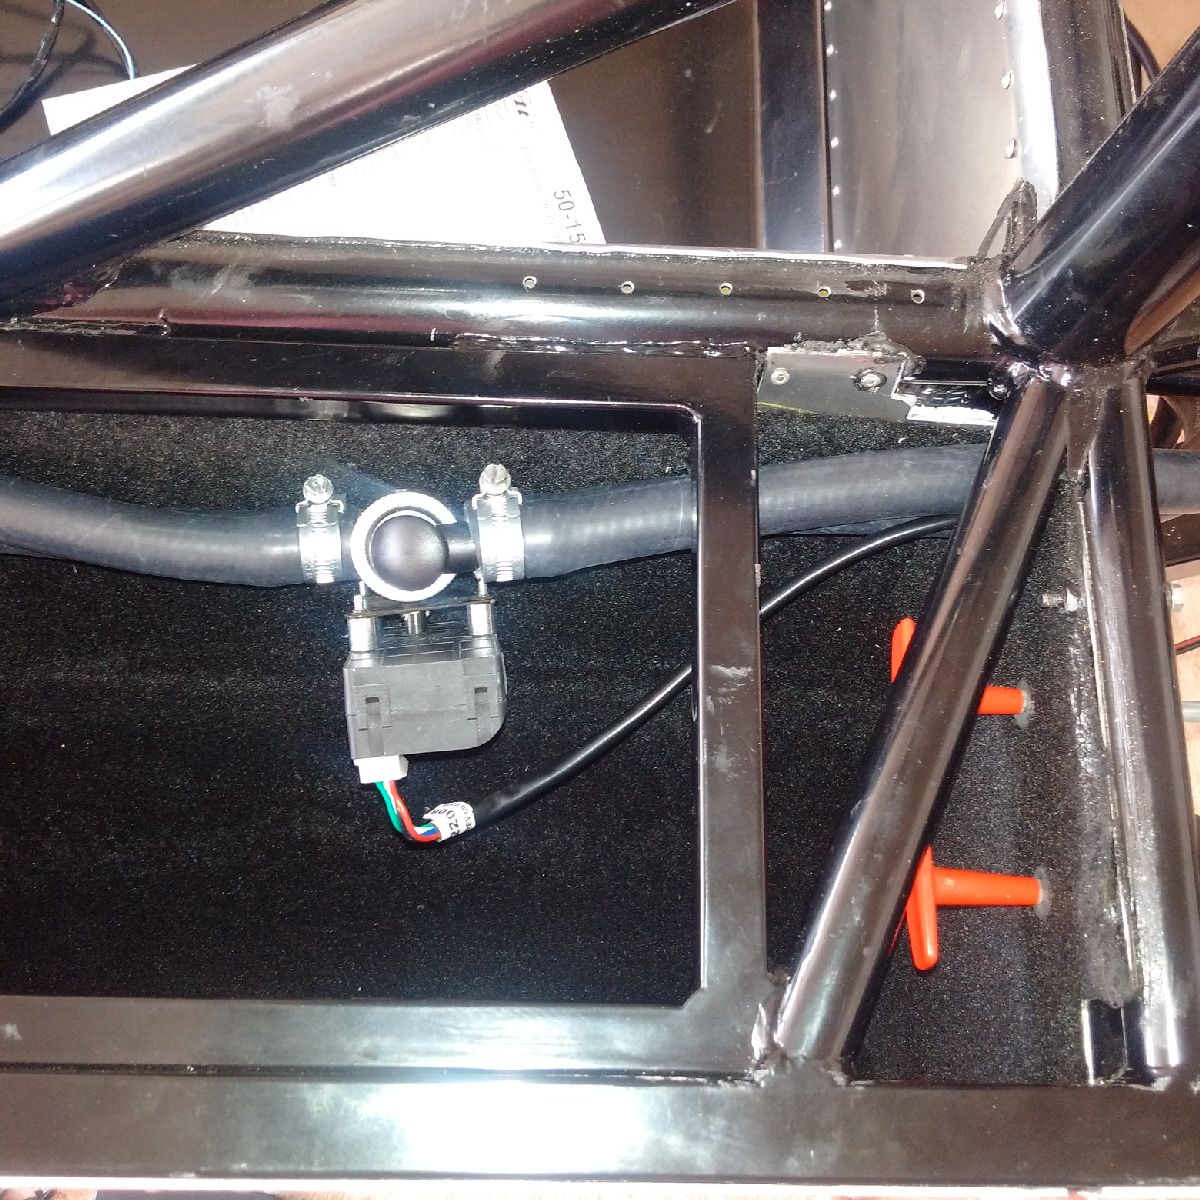
Once all that was done, I finalized the fitment of the pedals, and also attached the LS throttle sender - this little piece of equipment took an entire TWO hours!! 3 rivnuts that need to be installed in the top chassis bar - the location made it difficult to drill, and the rivnuts once installed were out by 1mm (height wise) and it took a while to get the bracket installed with a lot of filing and refitting required. However, the bracket and throttle sender were eventually installed, and now I can move forward...
July 3, 2015
Build Time Today: 3 hours
Total Build Time: 70 hours
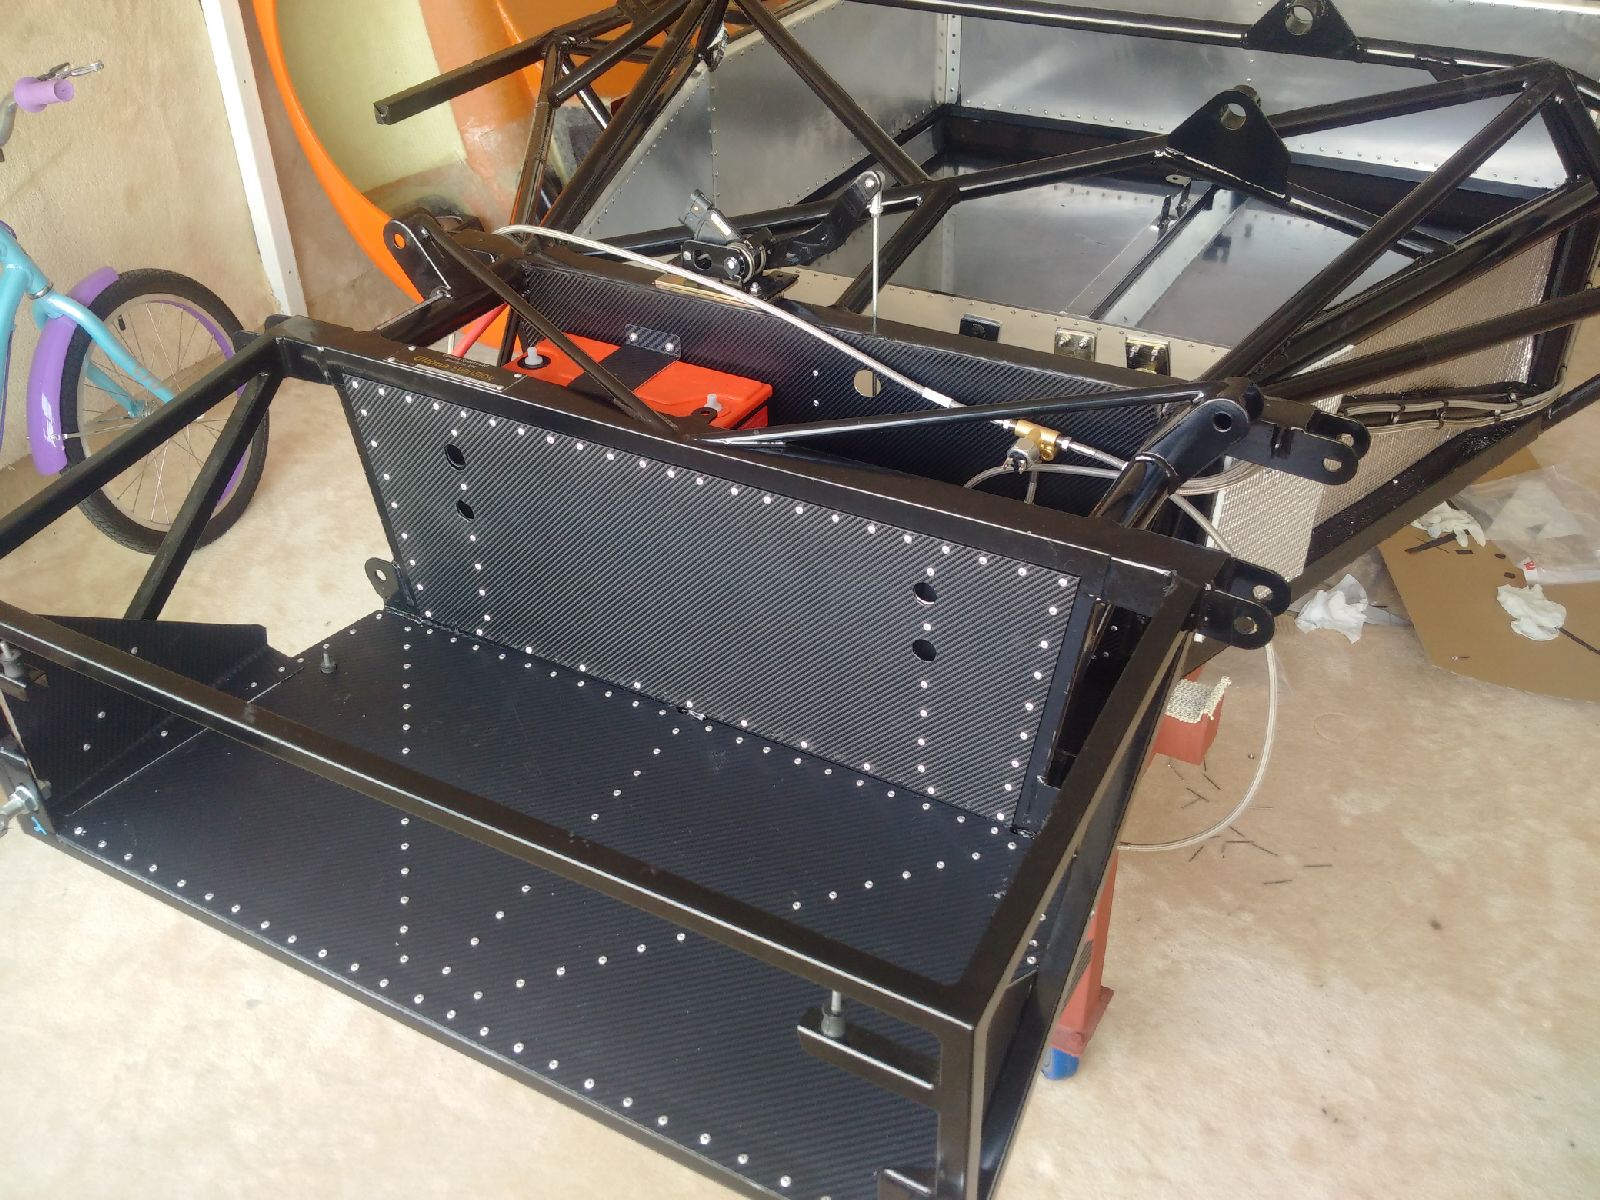
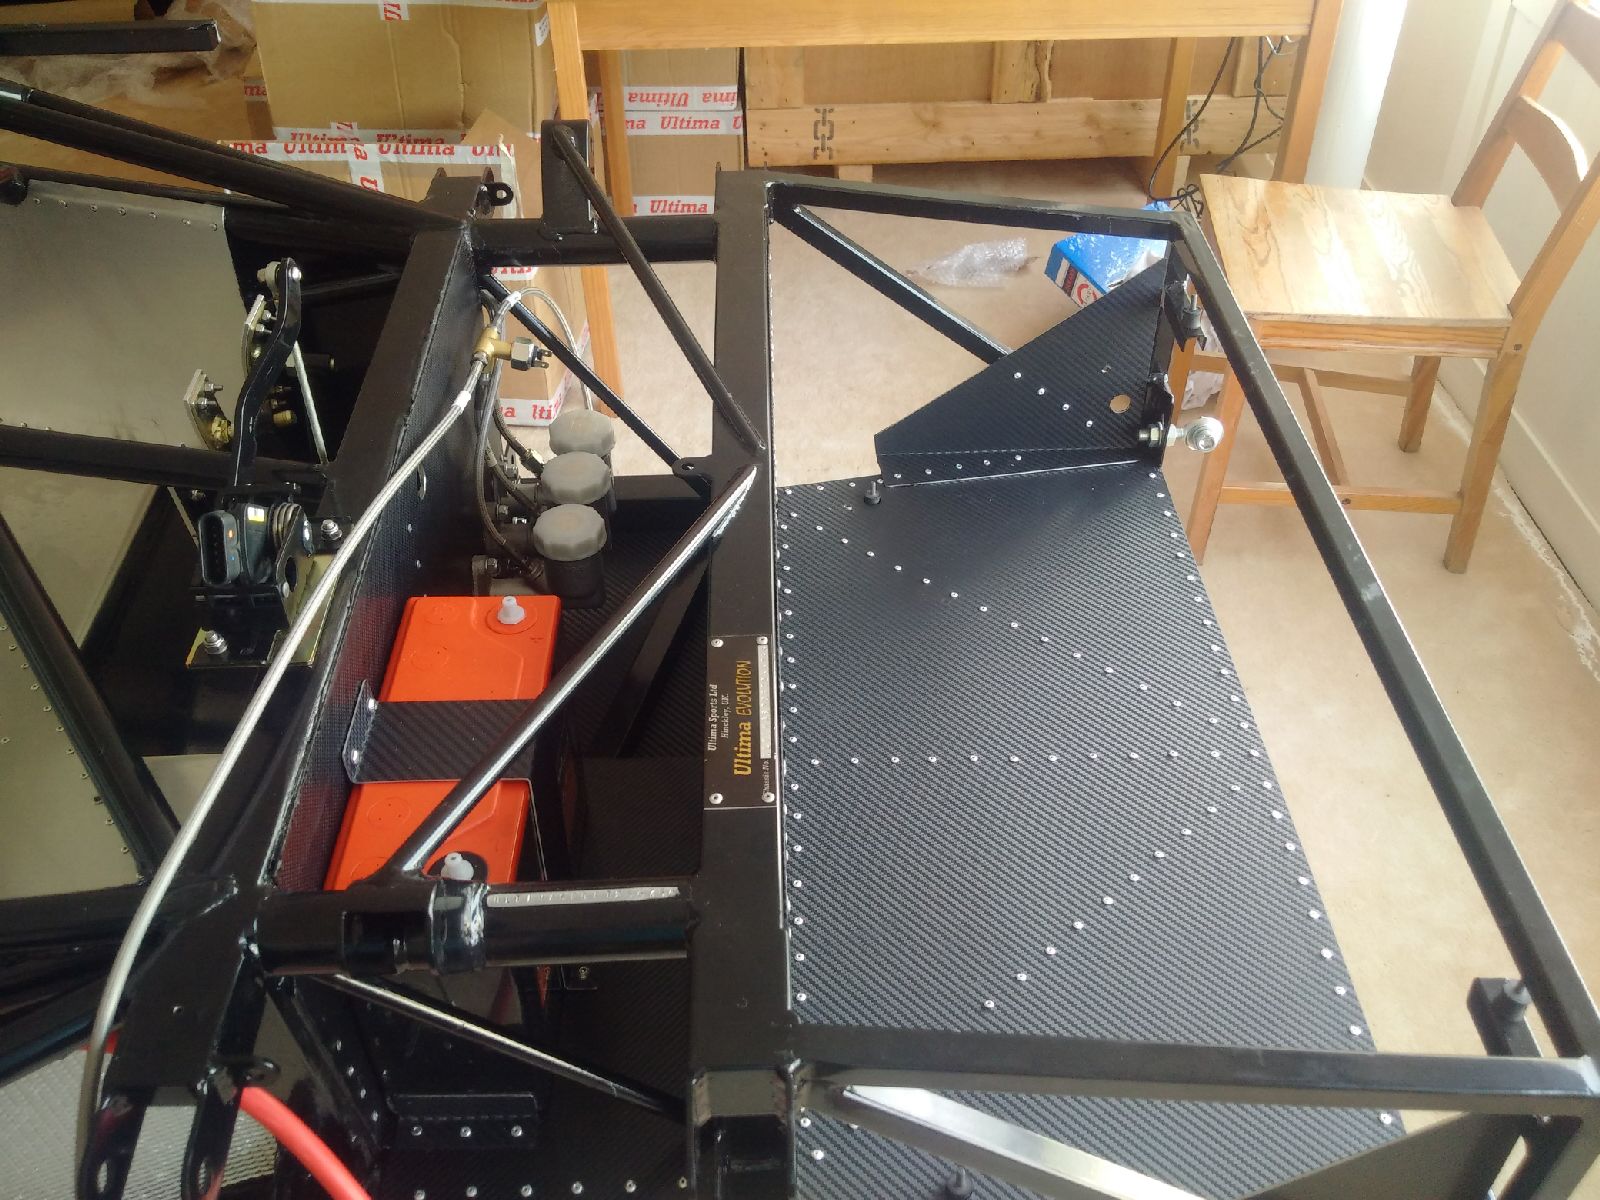
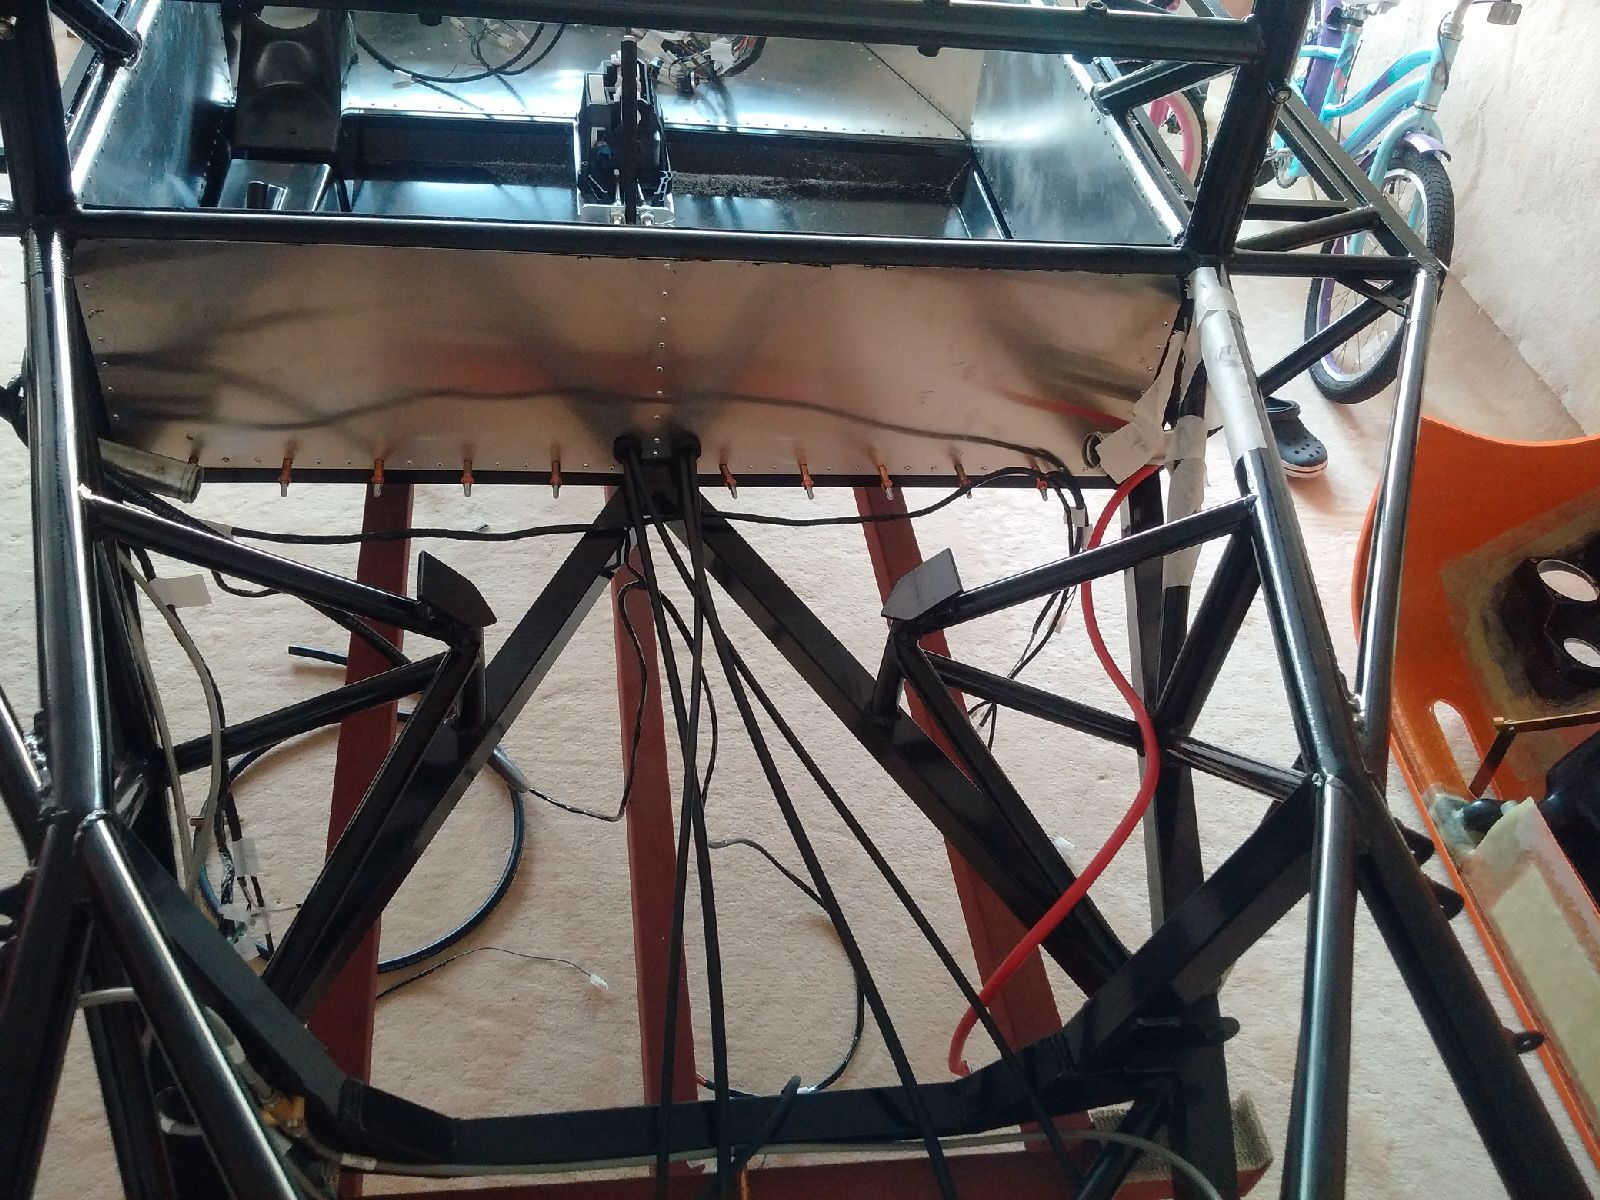
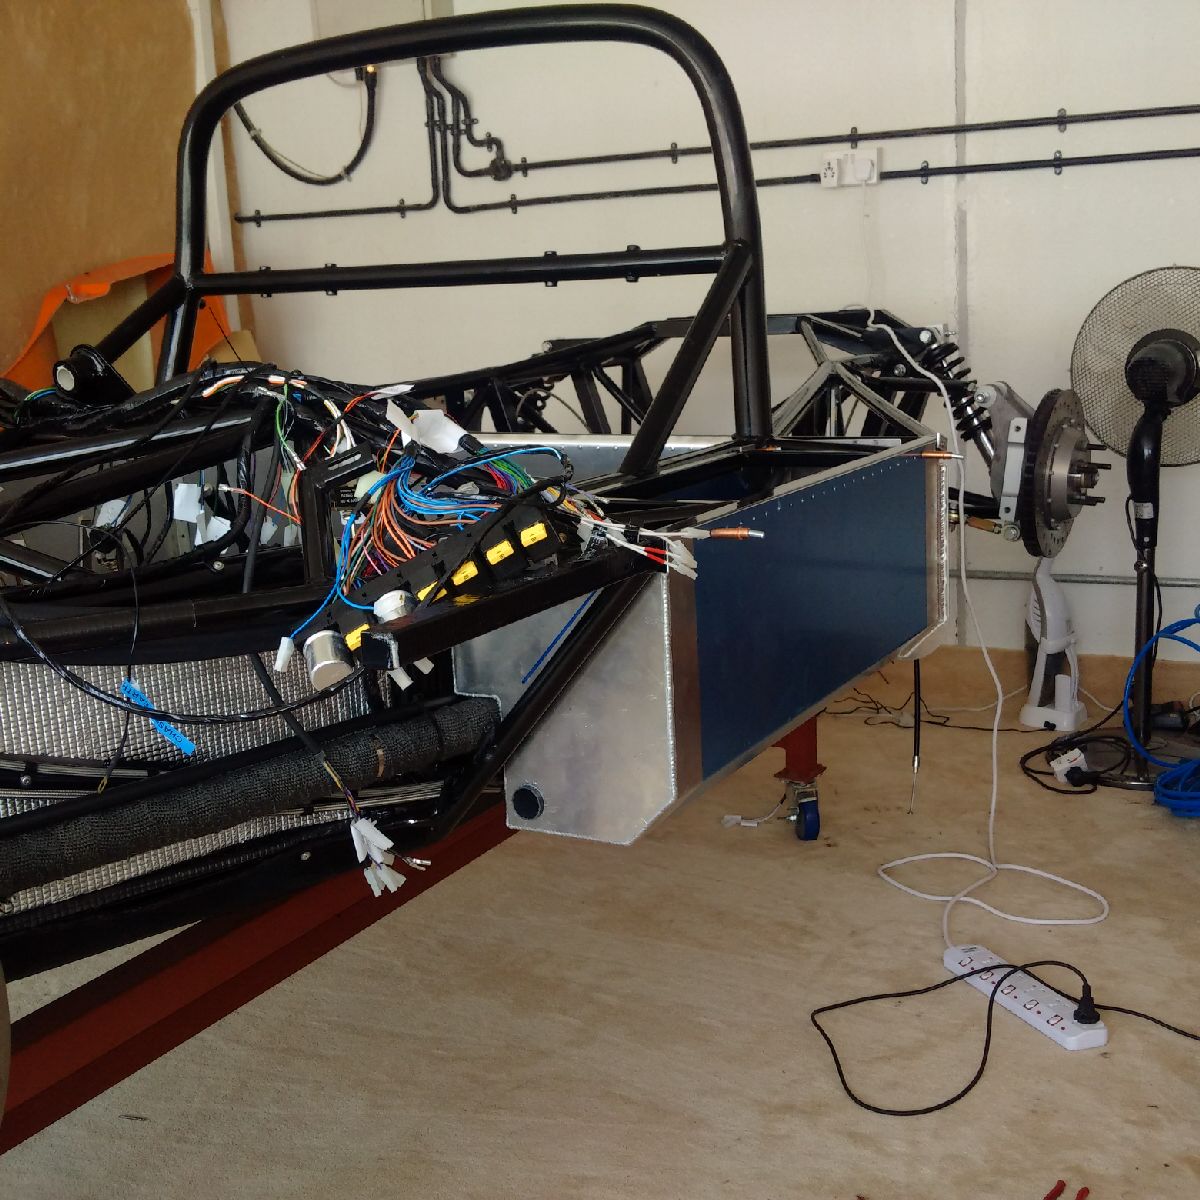
Today saw the final panel being fitted! The custom radiator back bulkhead panel was fitted in preparation for the radiator install. Once installed, I finished up installation of the battery and battery clamp.
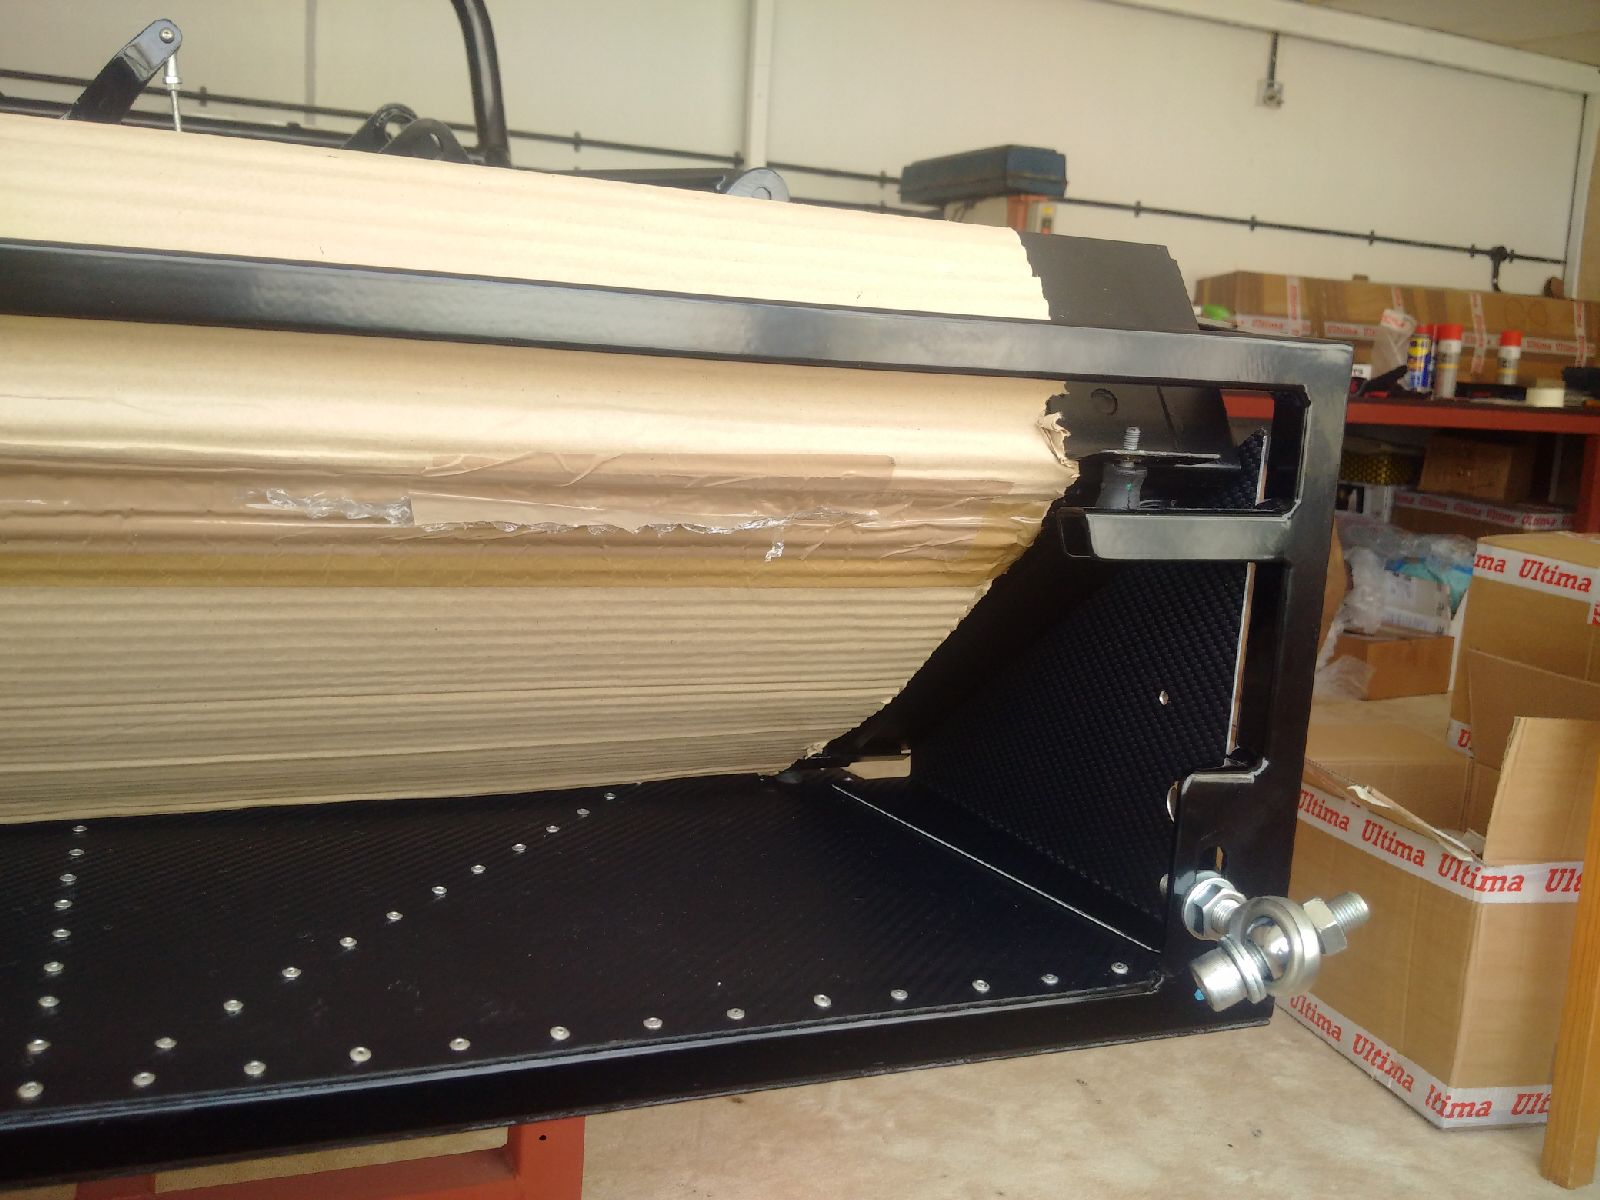
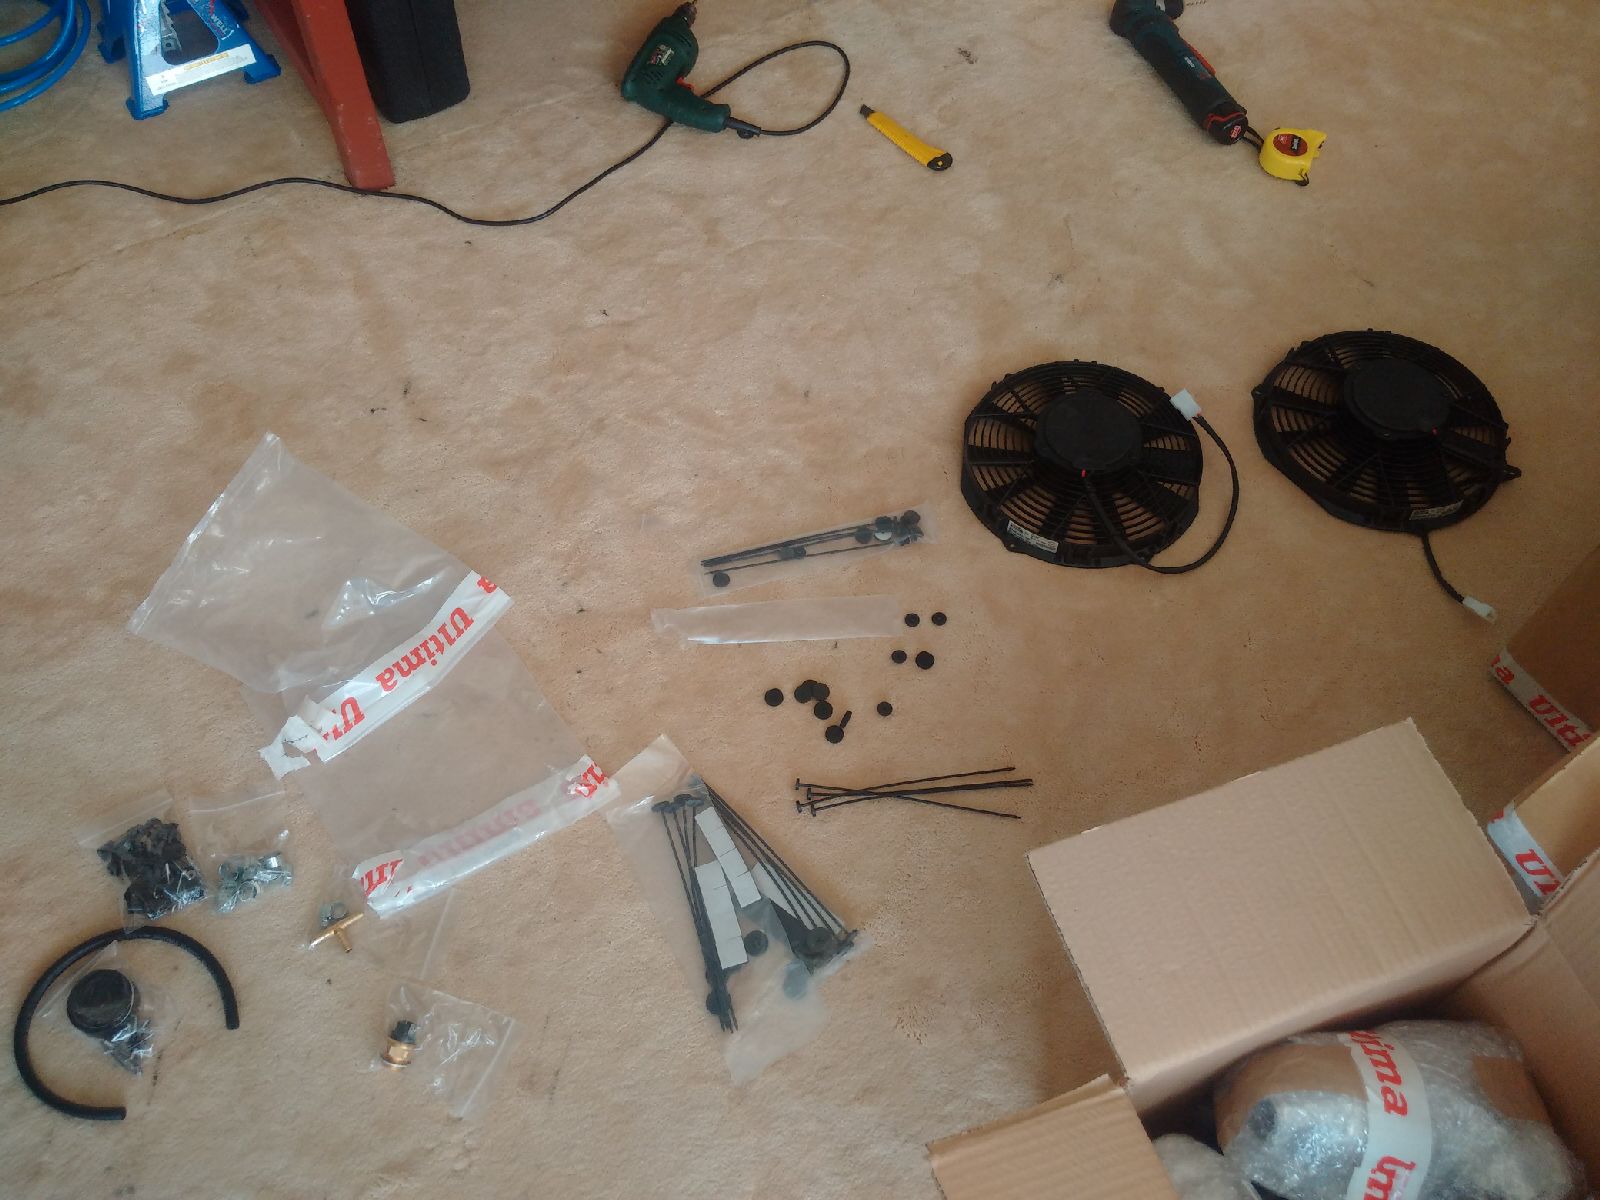
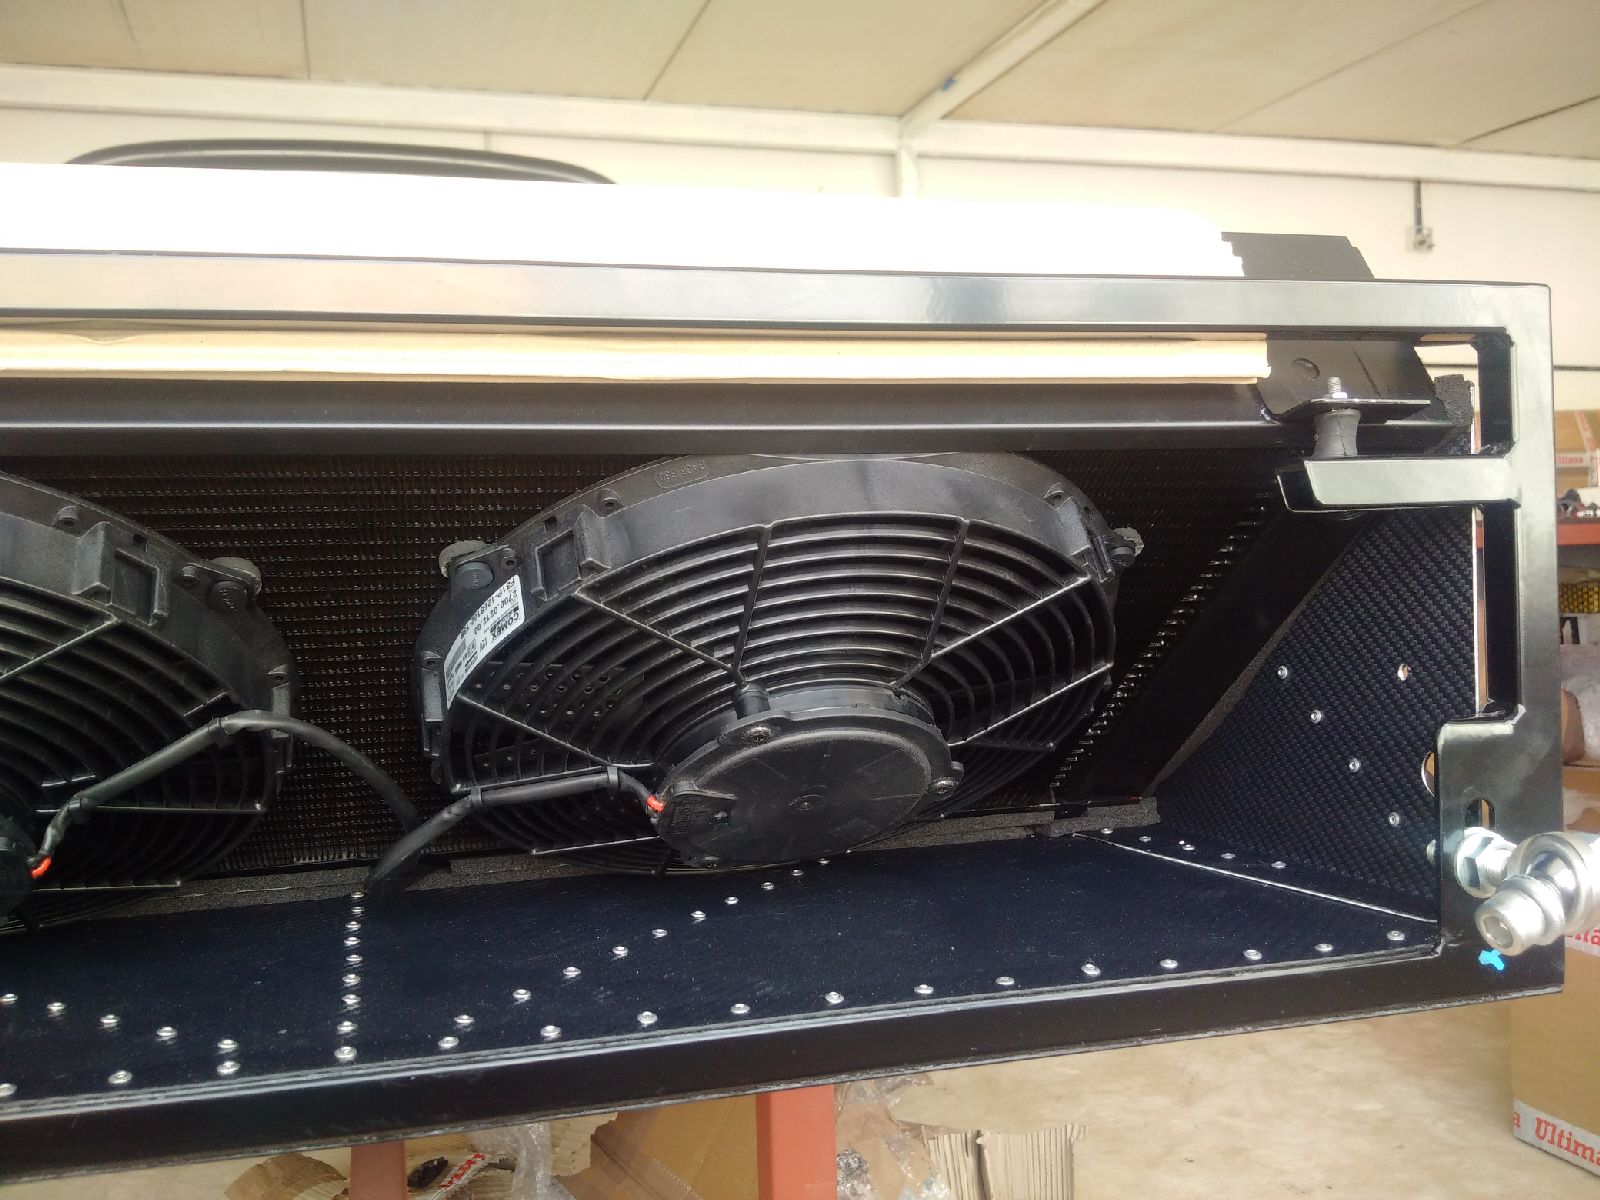
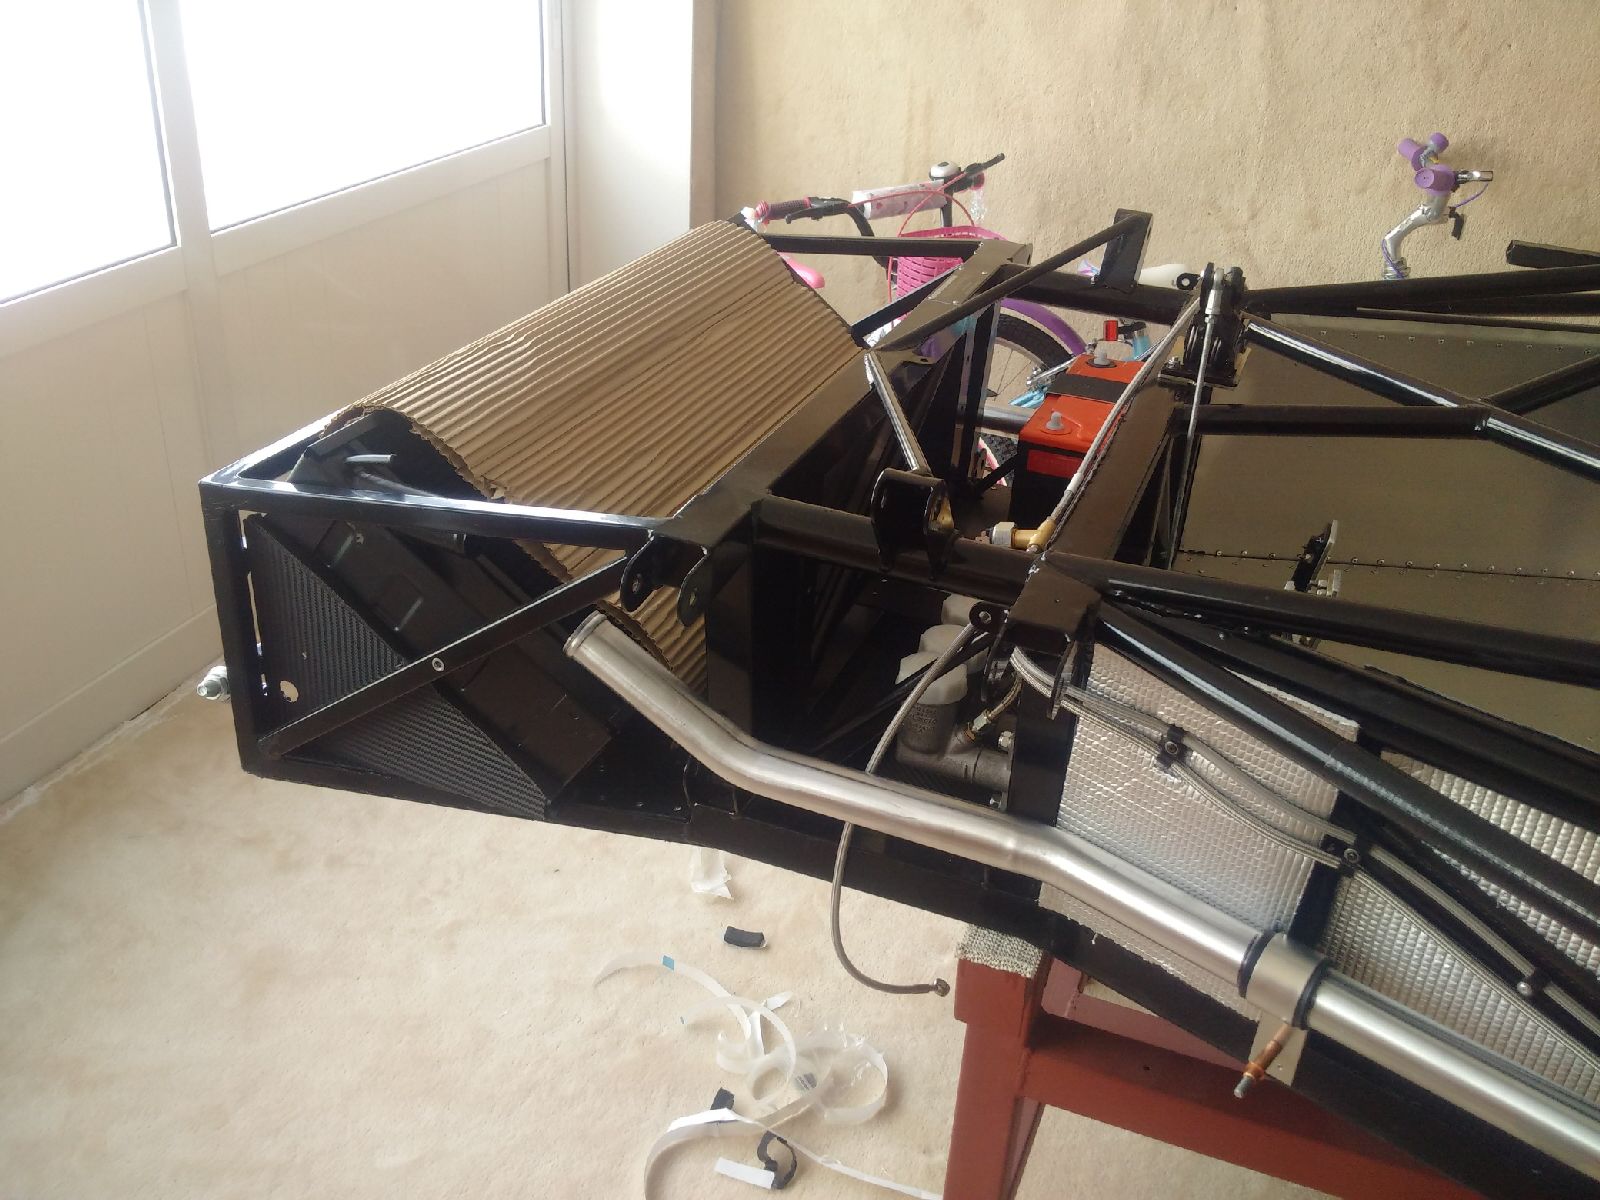
Then I started preparing the radiator - it was first placed in the chassis and the holes were drilled for the bobbins to fit. The hole were drilled into longer slots to allow the radiator to move a little during final fitment. I then proceeded to install the fans (new EVO push type) underneath the radiator using the nylon ties provided. Finally, I finished up the day by checking the fitment of the radiator installs and riveting them into the chassis. Tomorrow will see the radiator being installed!

July 4, 2015
Build Time Today: 2.5 hours
Total Build Time: 72.5 hours
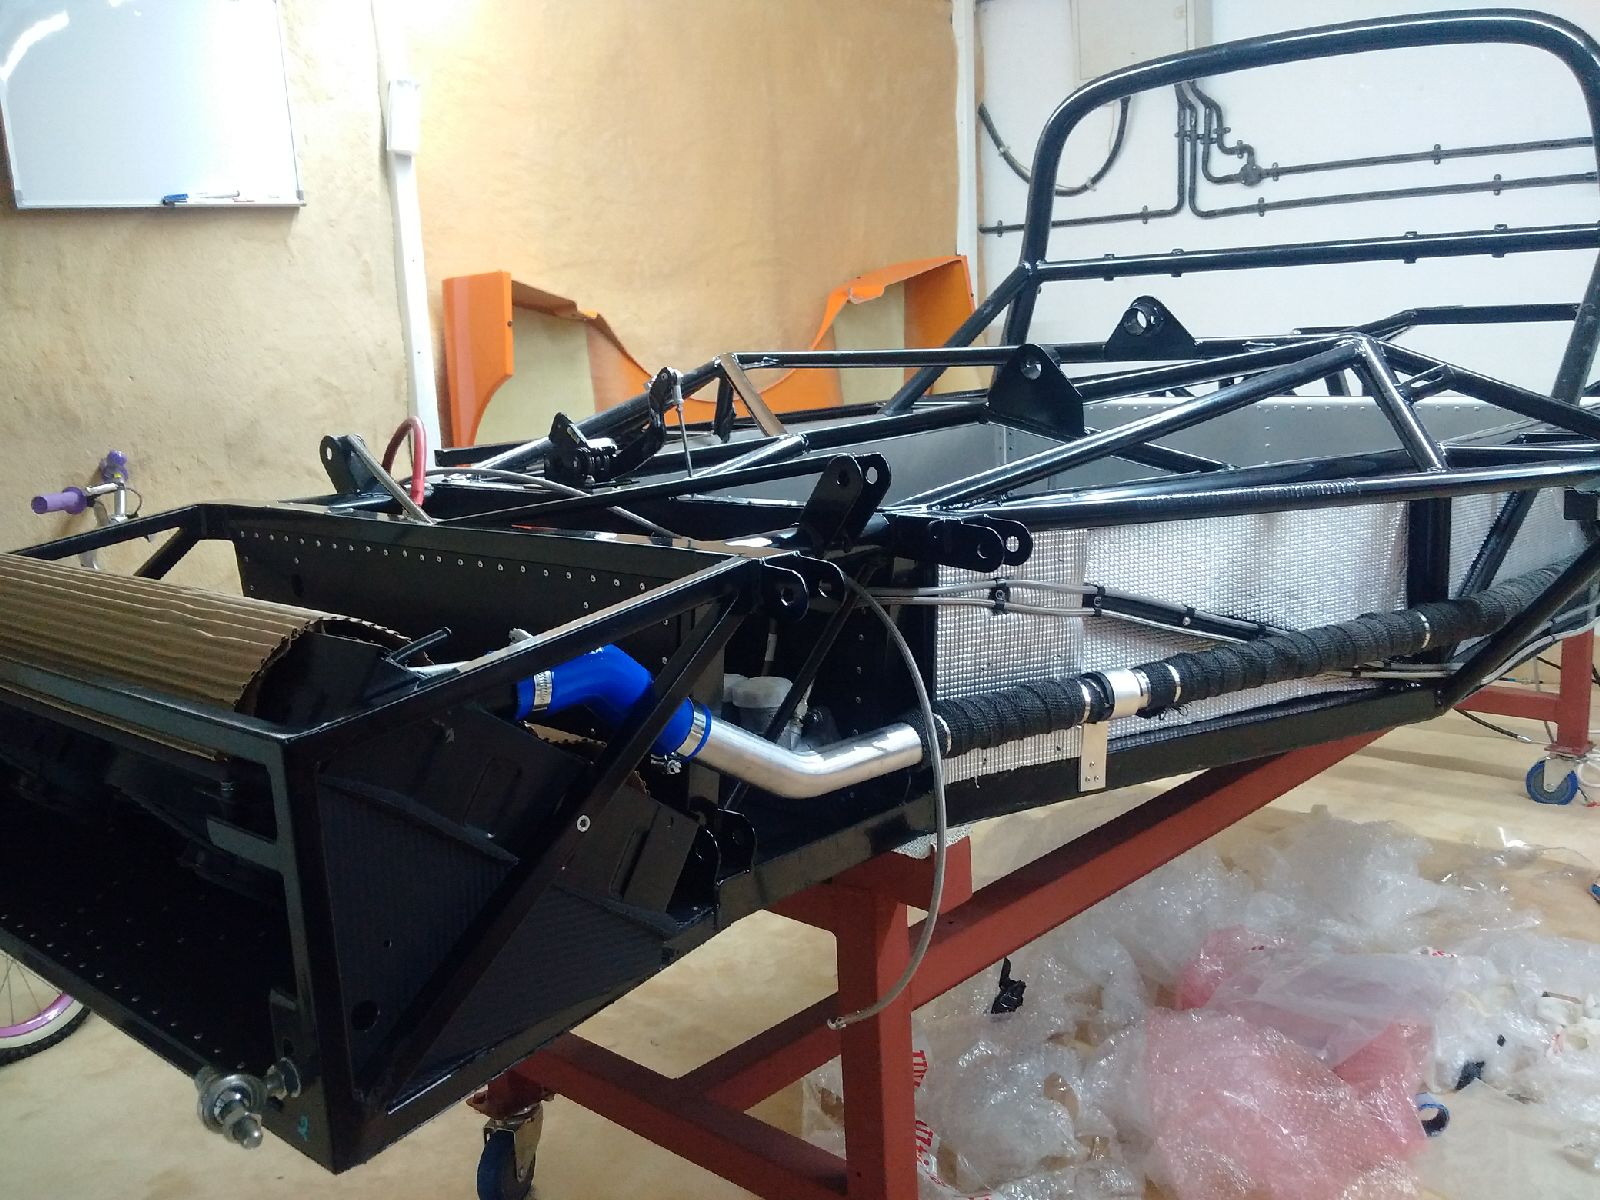
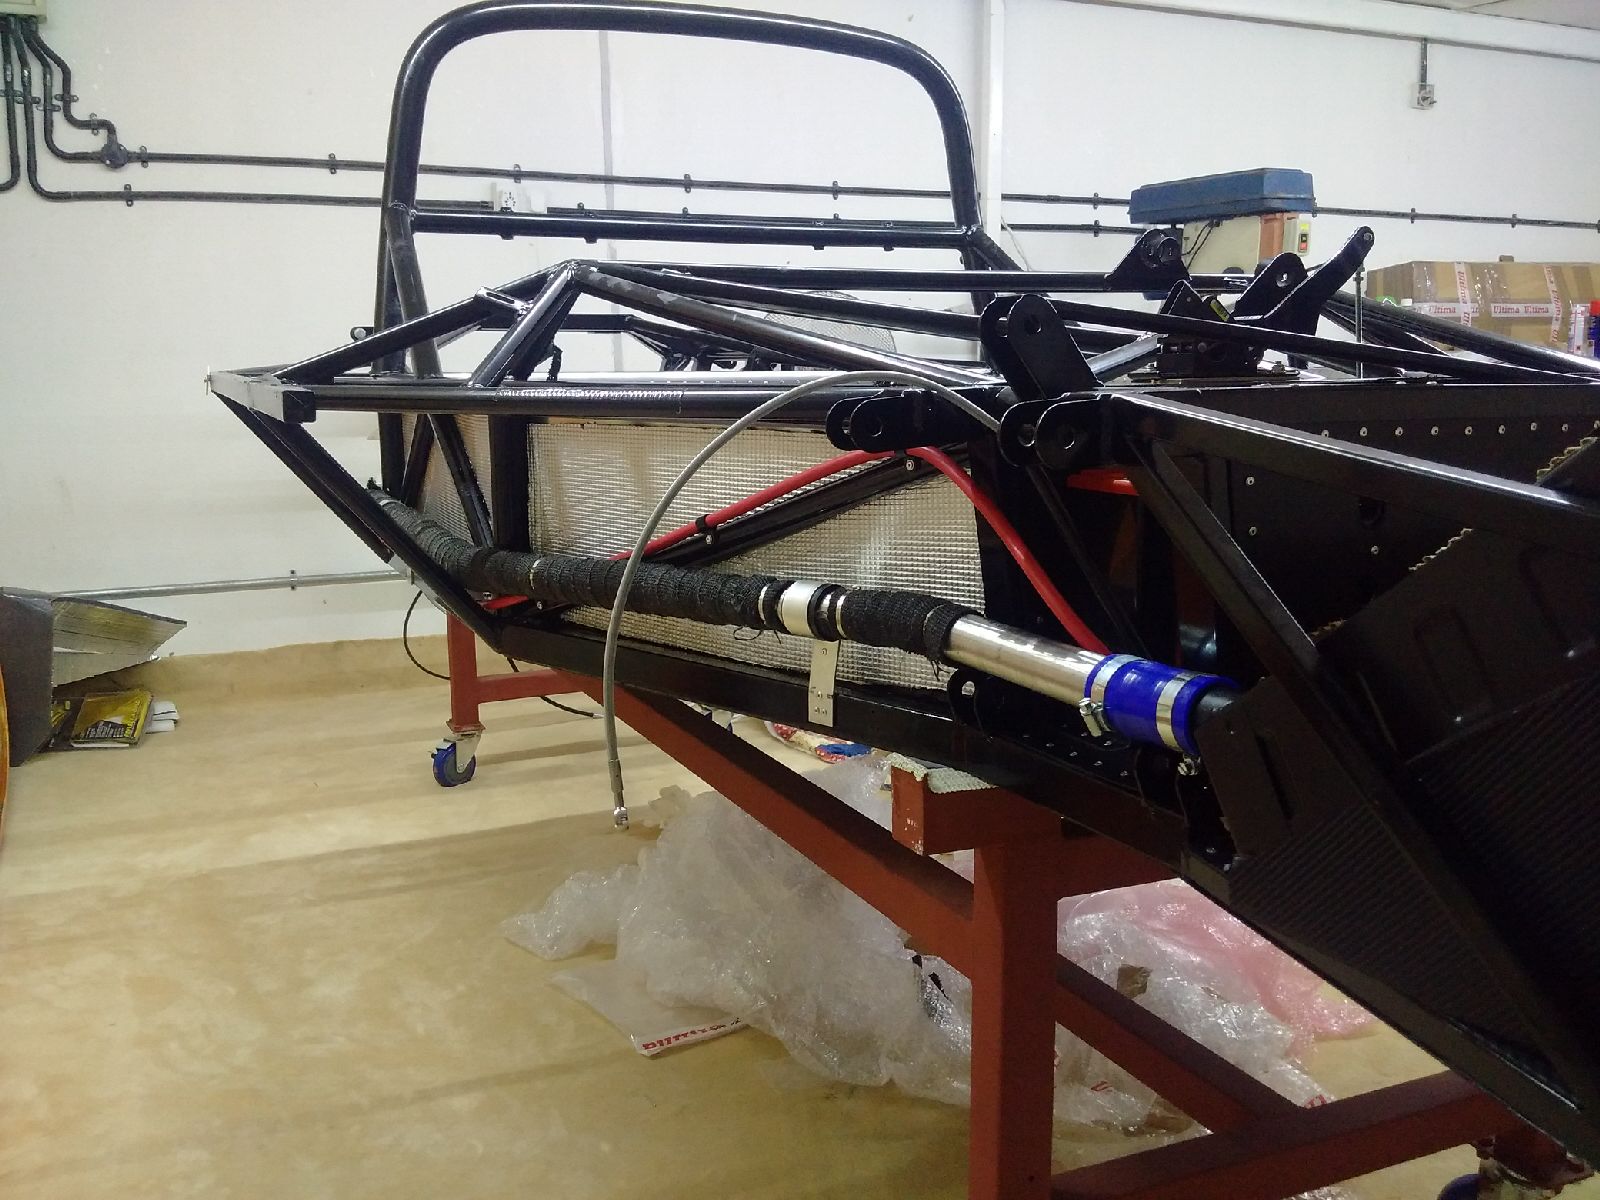
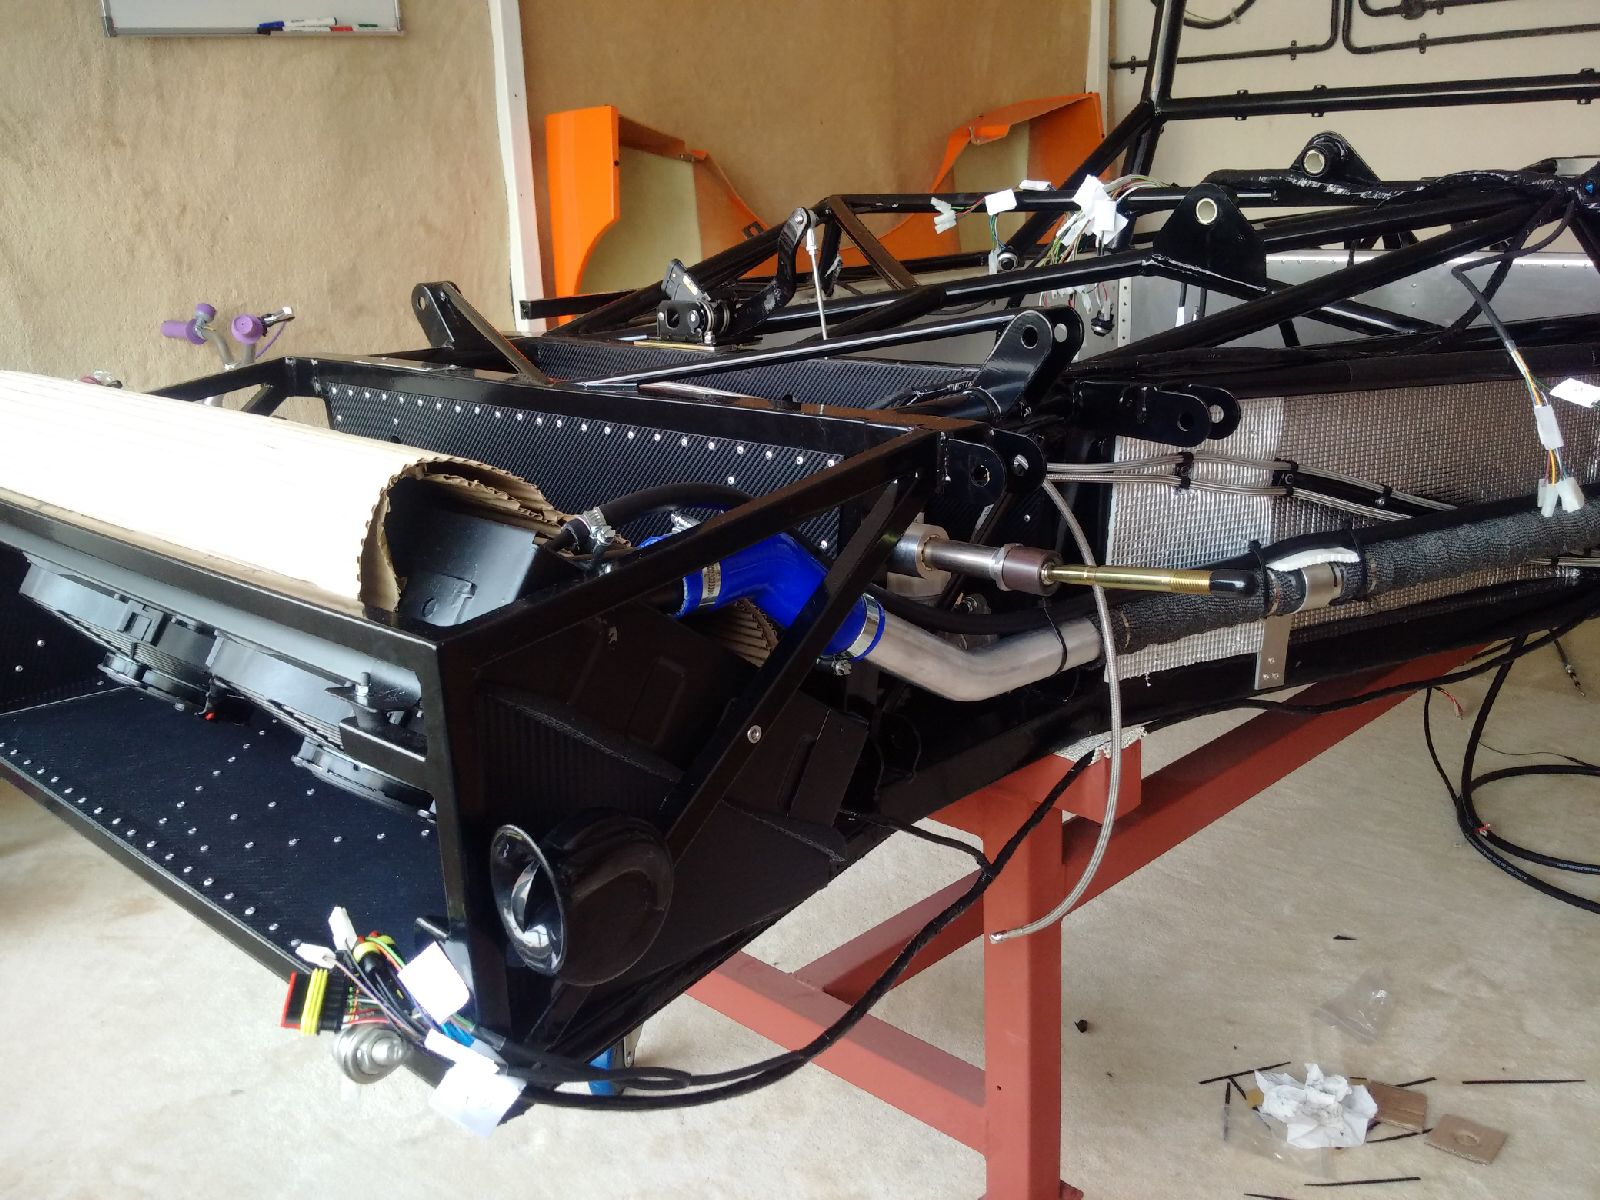
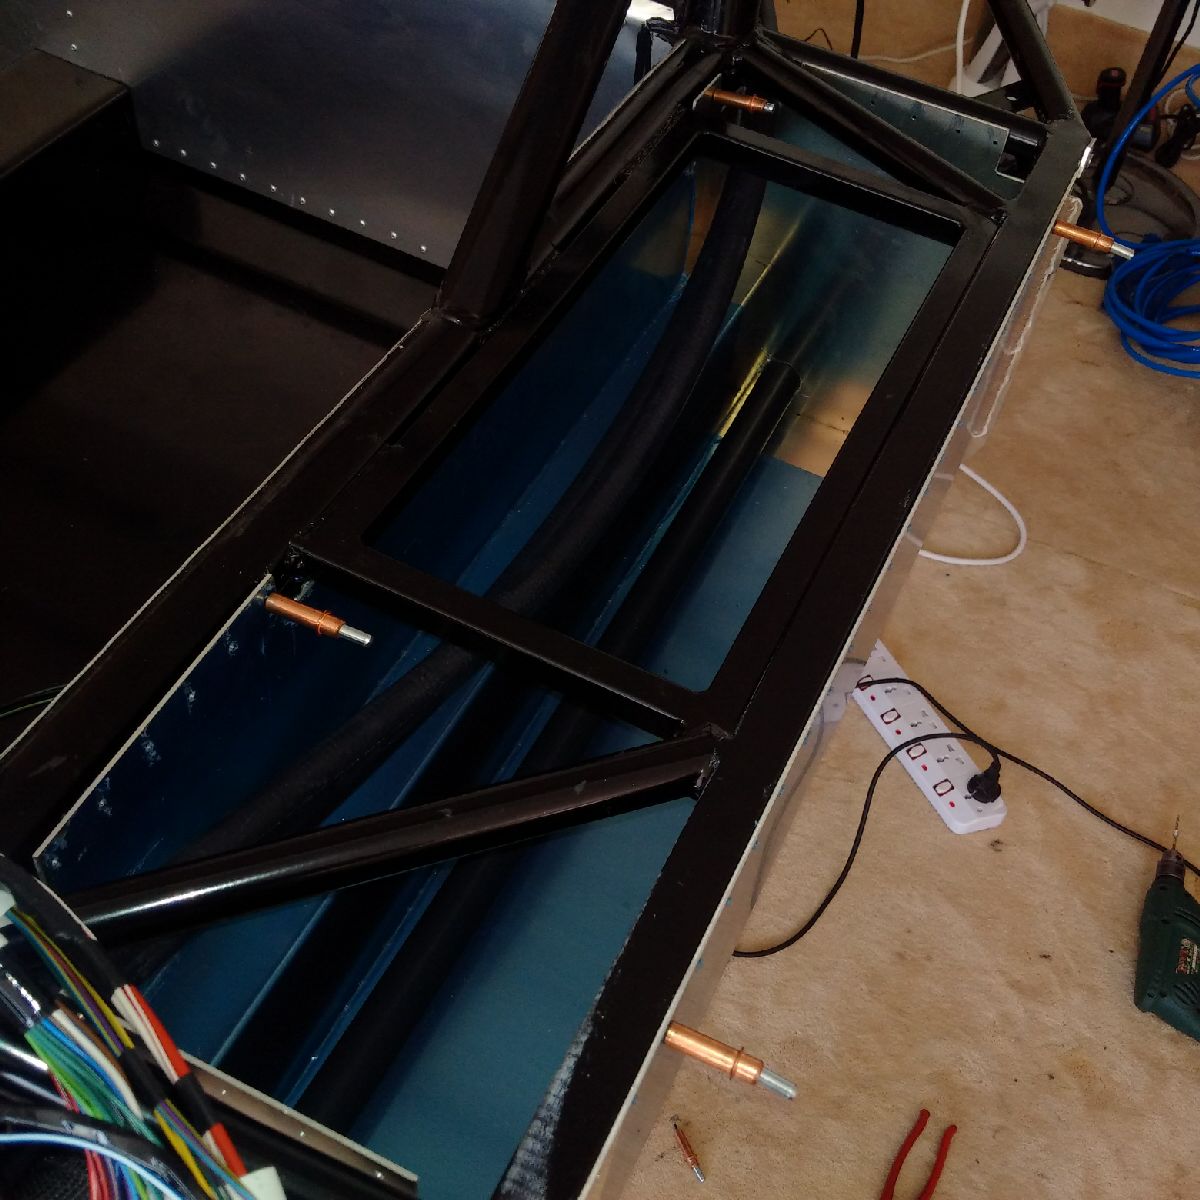
I started the day today with installing the radiator. It was placed in the chassis and foam tape was cut for the entire bottom and the sides (near the ears). The radiator was removed, foam tape placed, and radiator re-installed. I had to be careful to get the wires to the 'front' side as I have the old CanAm loom, which has the radiator connectors on the front side. I made sure to keep place for this in the foam tape, and when the radiator was bolted down, the wires were perfectly placed for the connections. I placed a corrugated cardboard on the radiator for safety and started work on the cooling system.
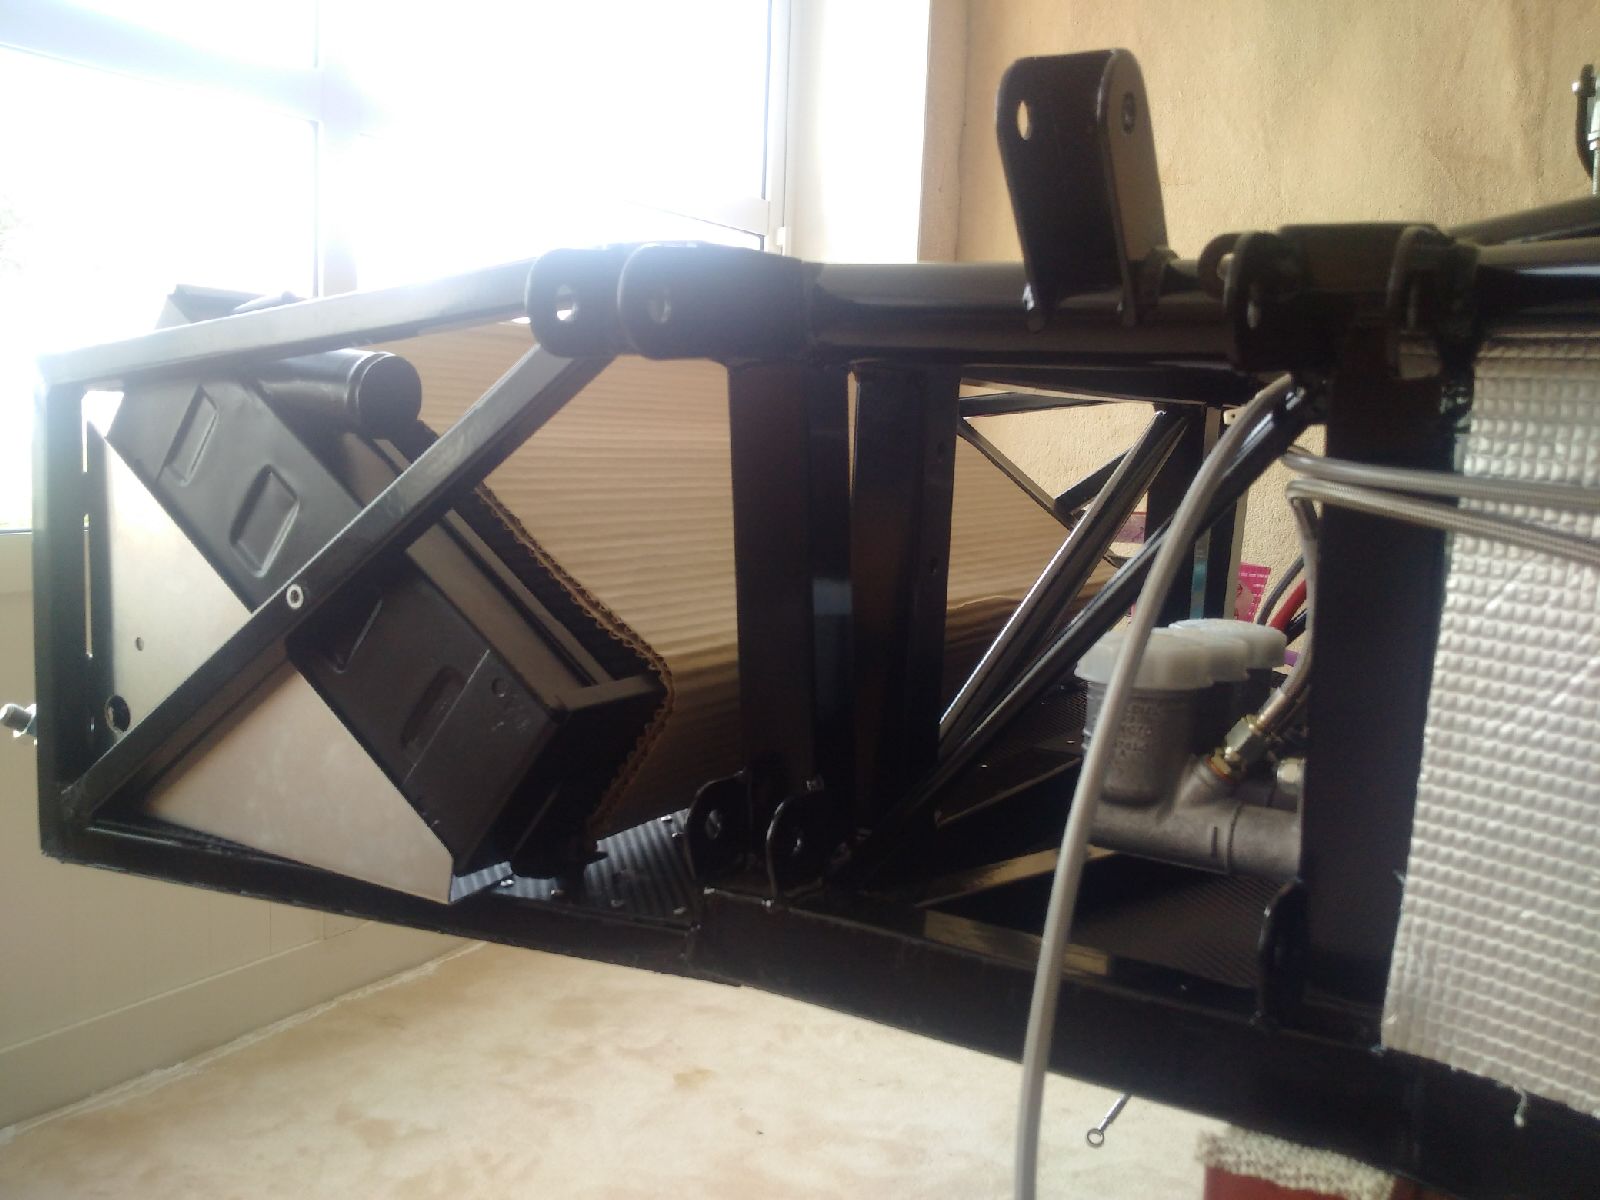
The long aluminum pipes were threaded in the chassis, and the ally P-clips were drilled on the table and then placed around the ally pipes. The chassis was drilled, and then the rubber inserts were installed as well. The P-clips were not riveted as the pipes need to be removed for insulation before final install.

July 5, 2015
No work today as there was live relay...
July 6, 2015
Build Time Today: 4.5 hours
Total Build Time: 77 hours
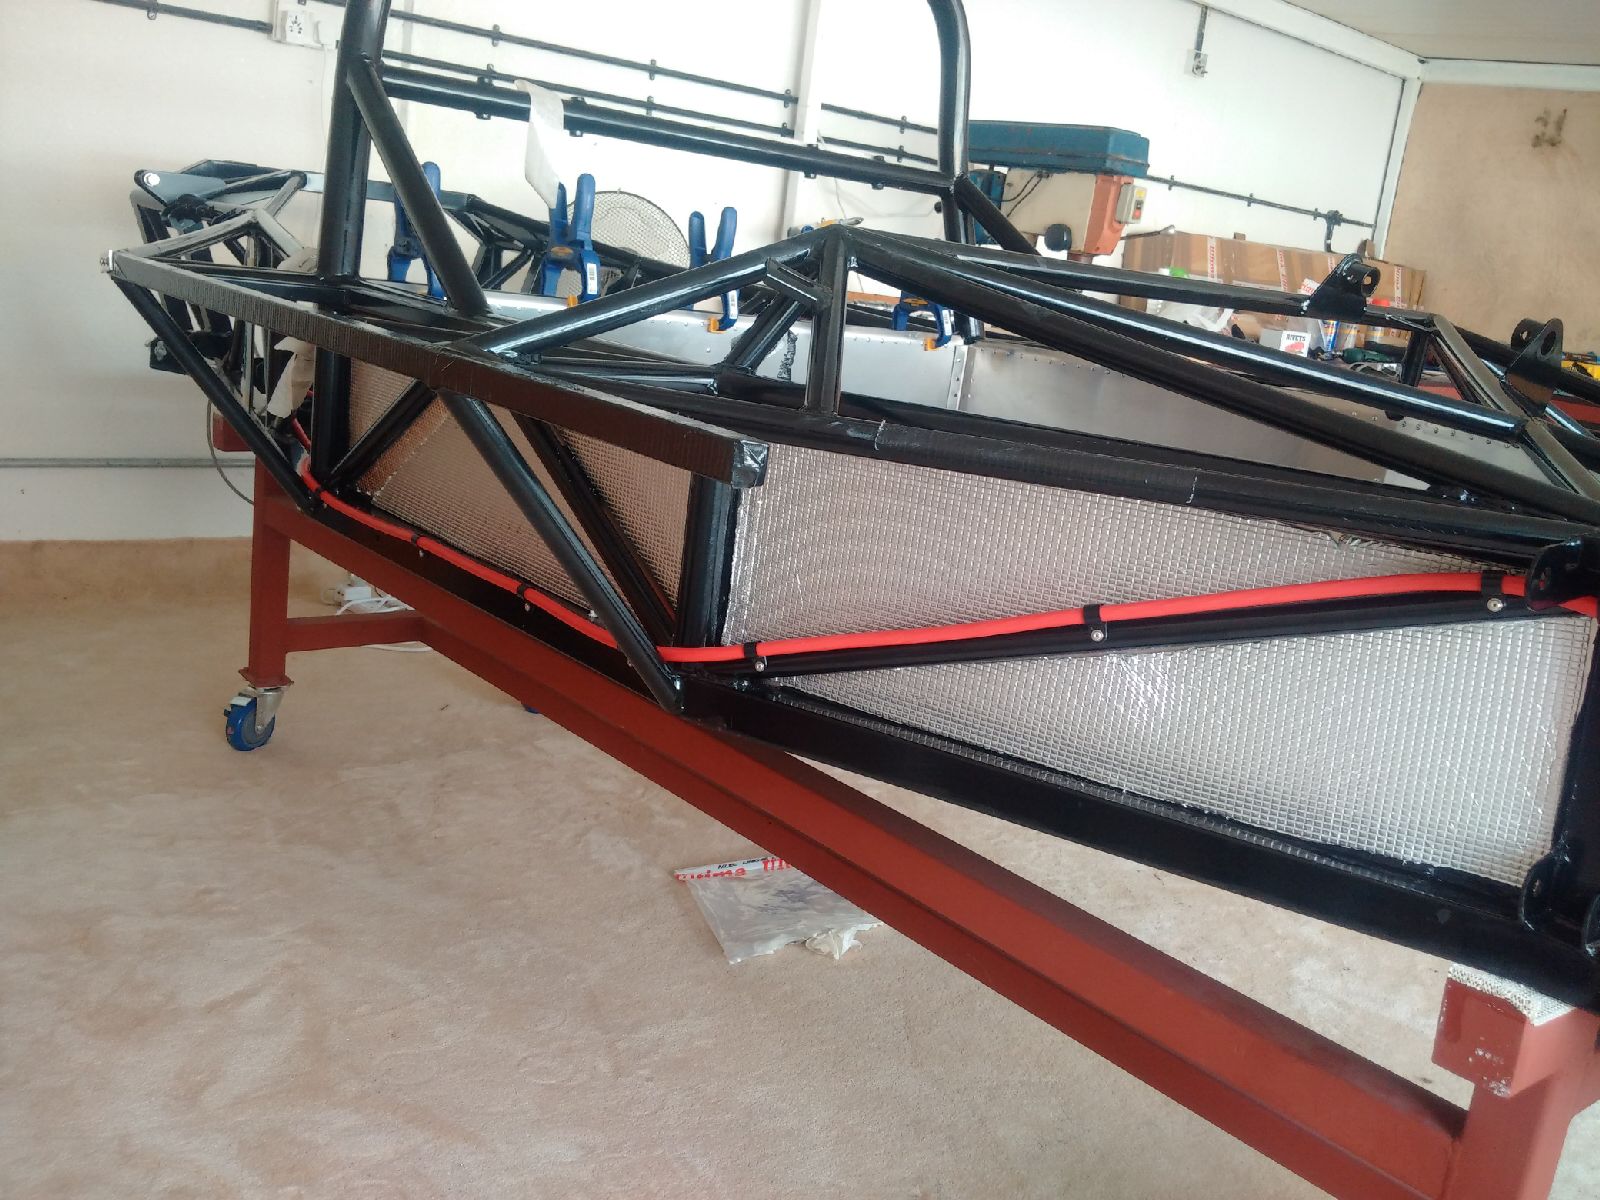
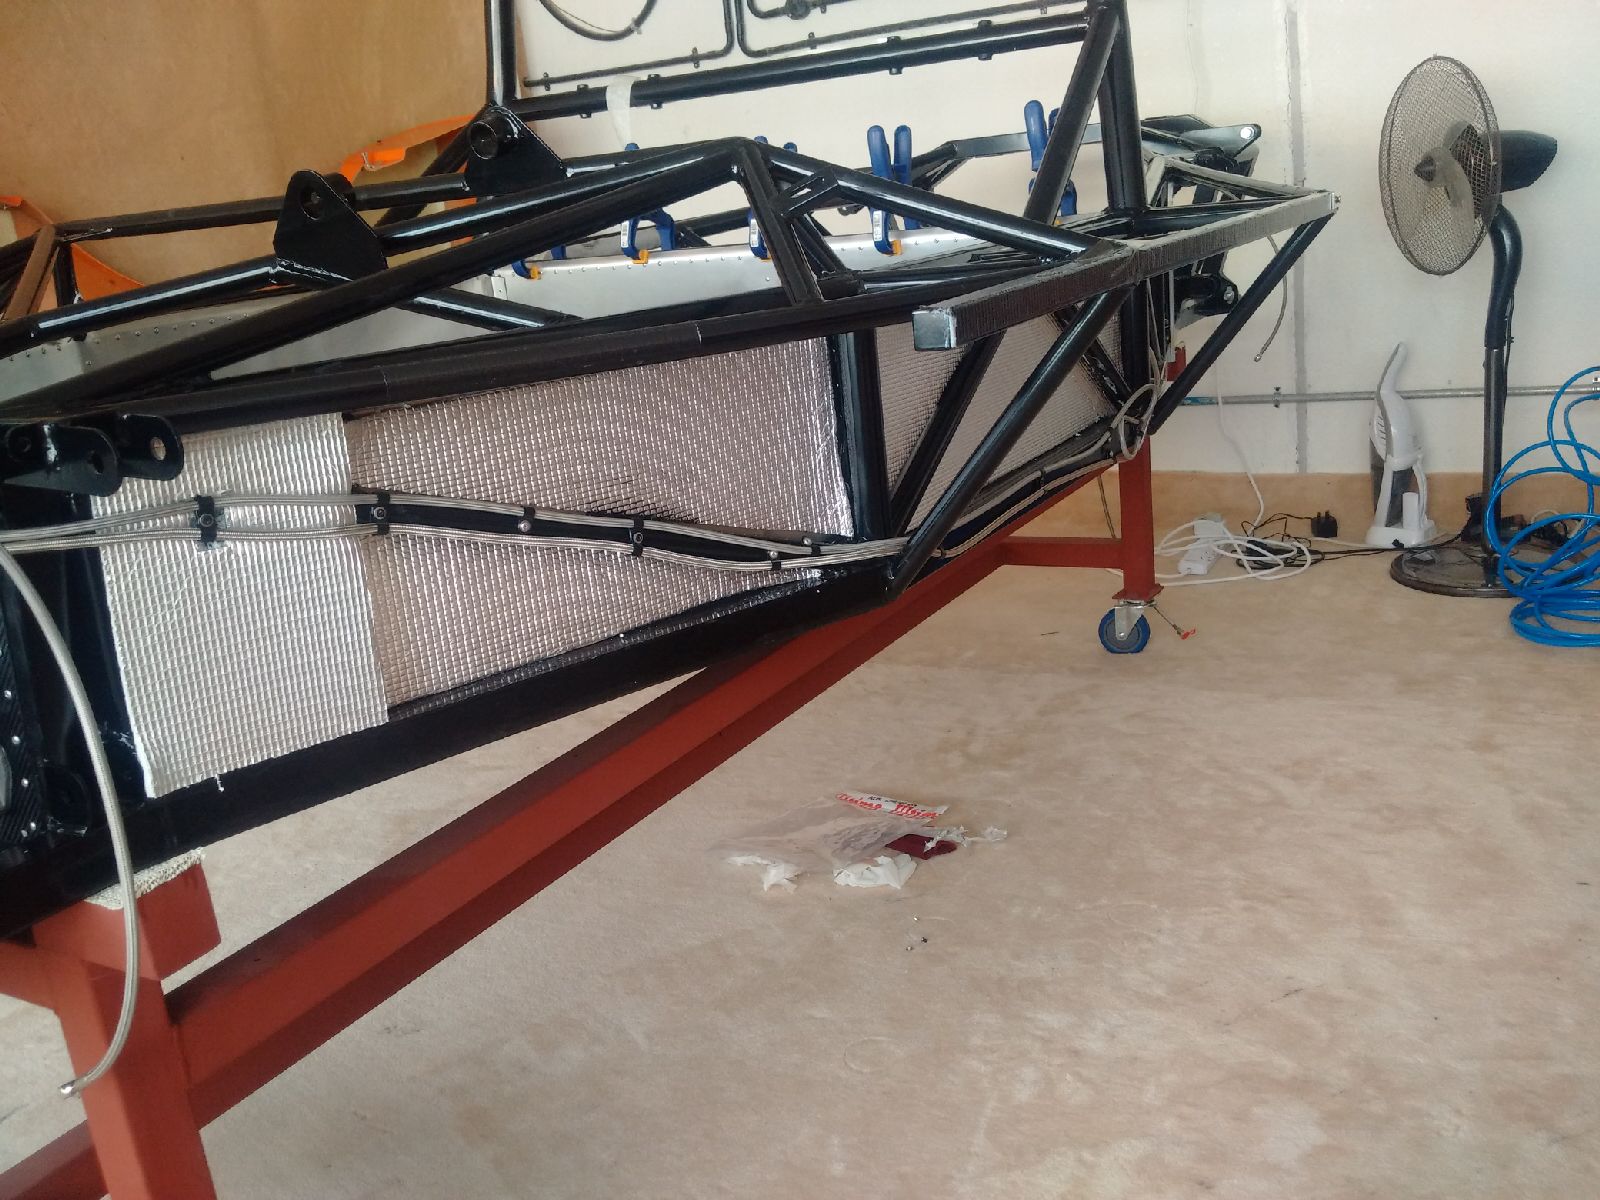
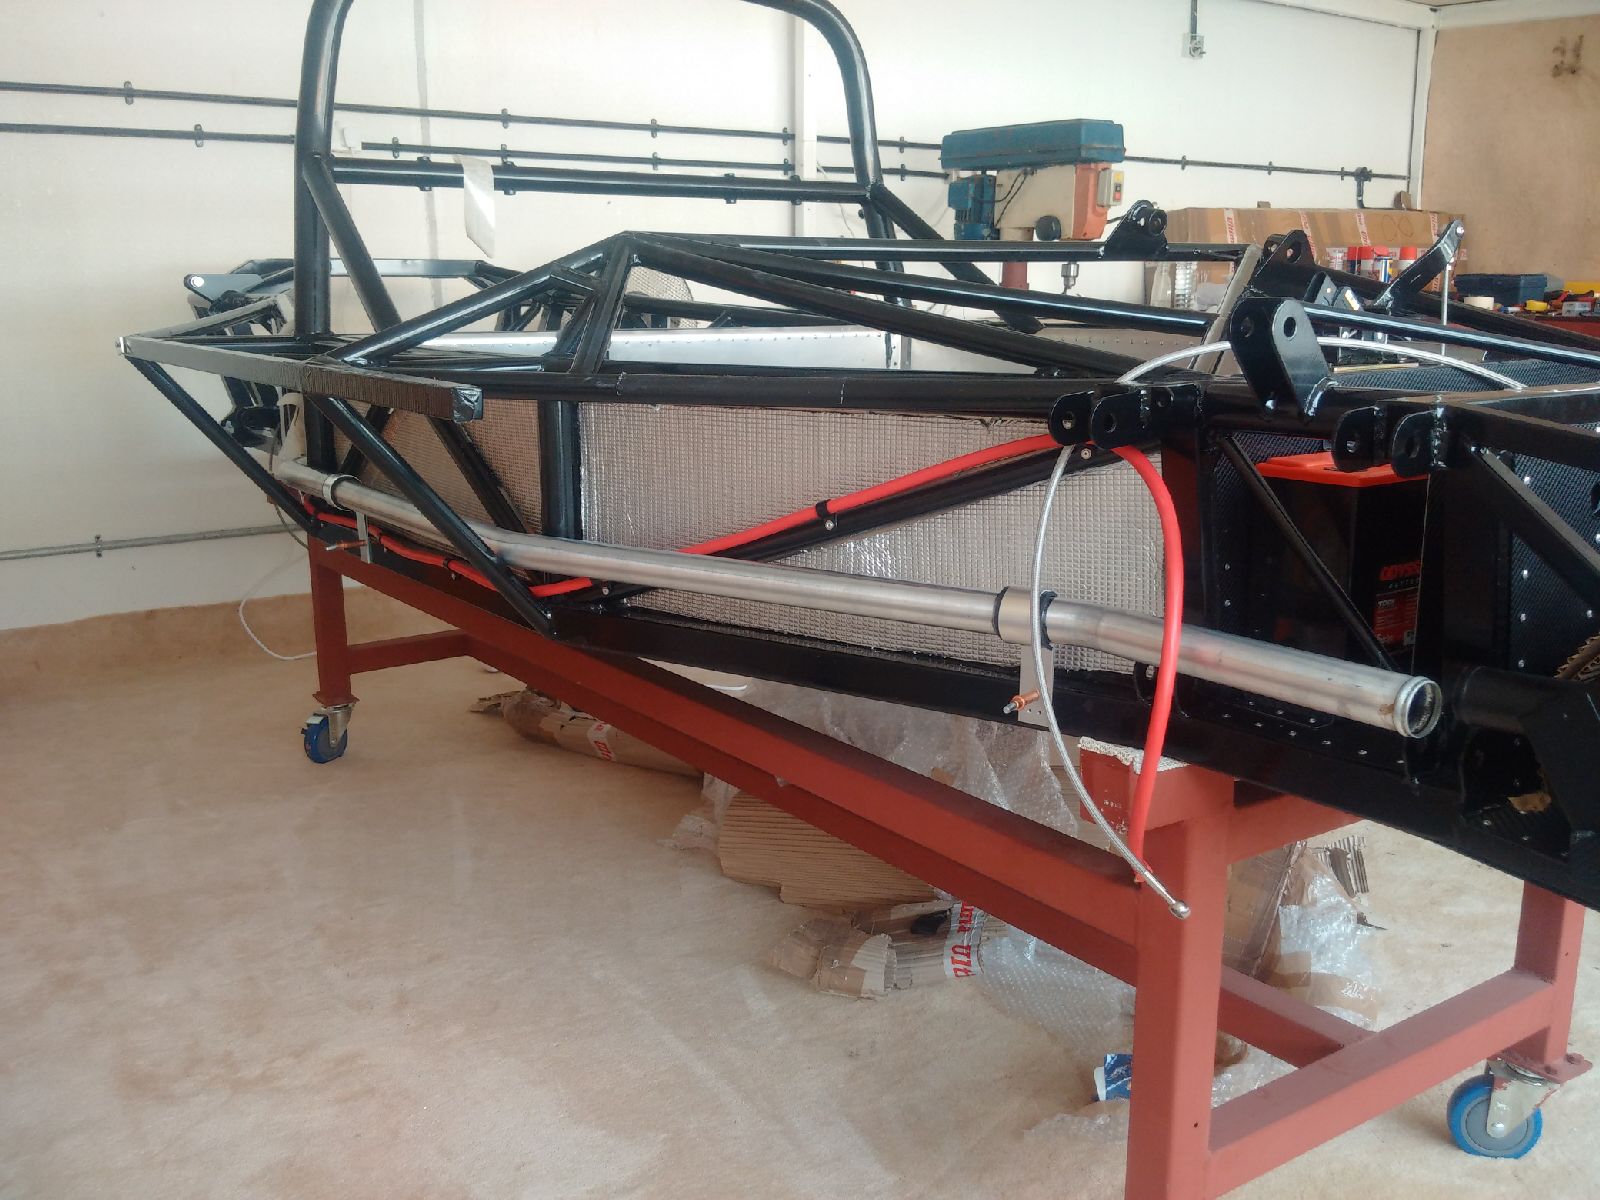
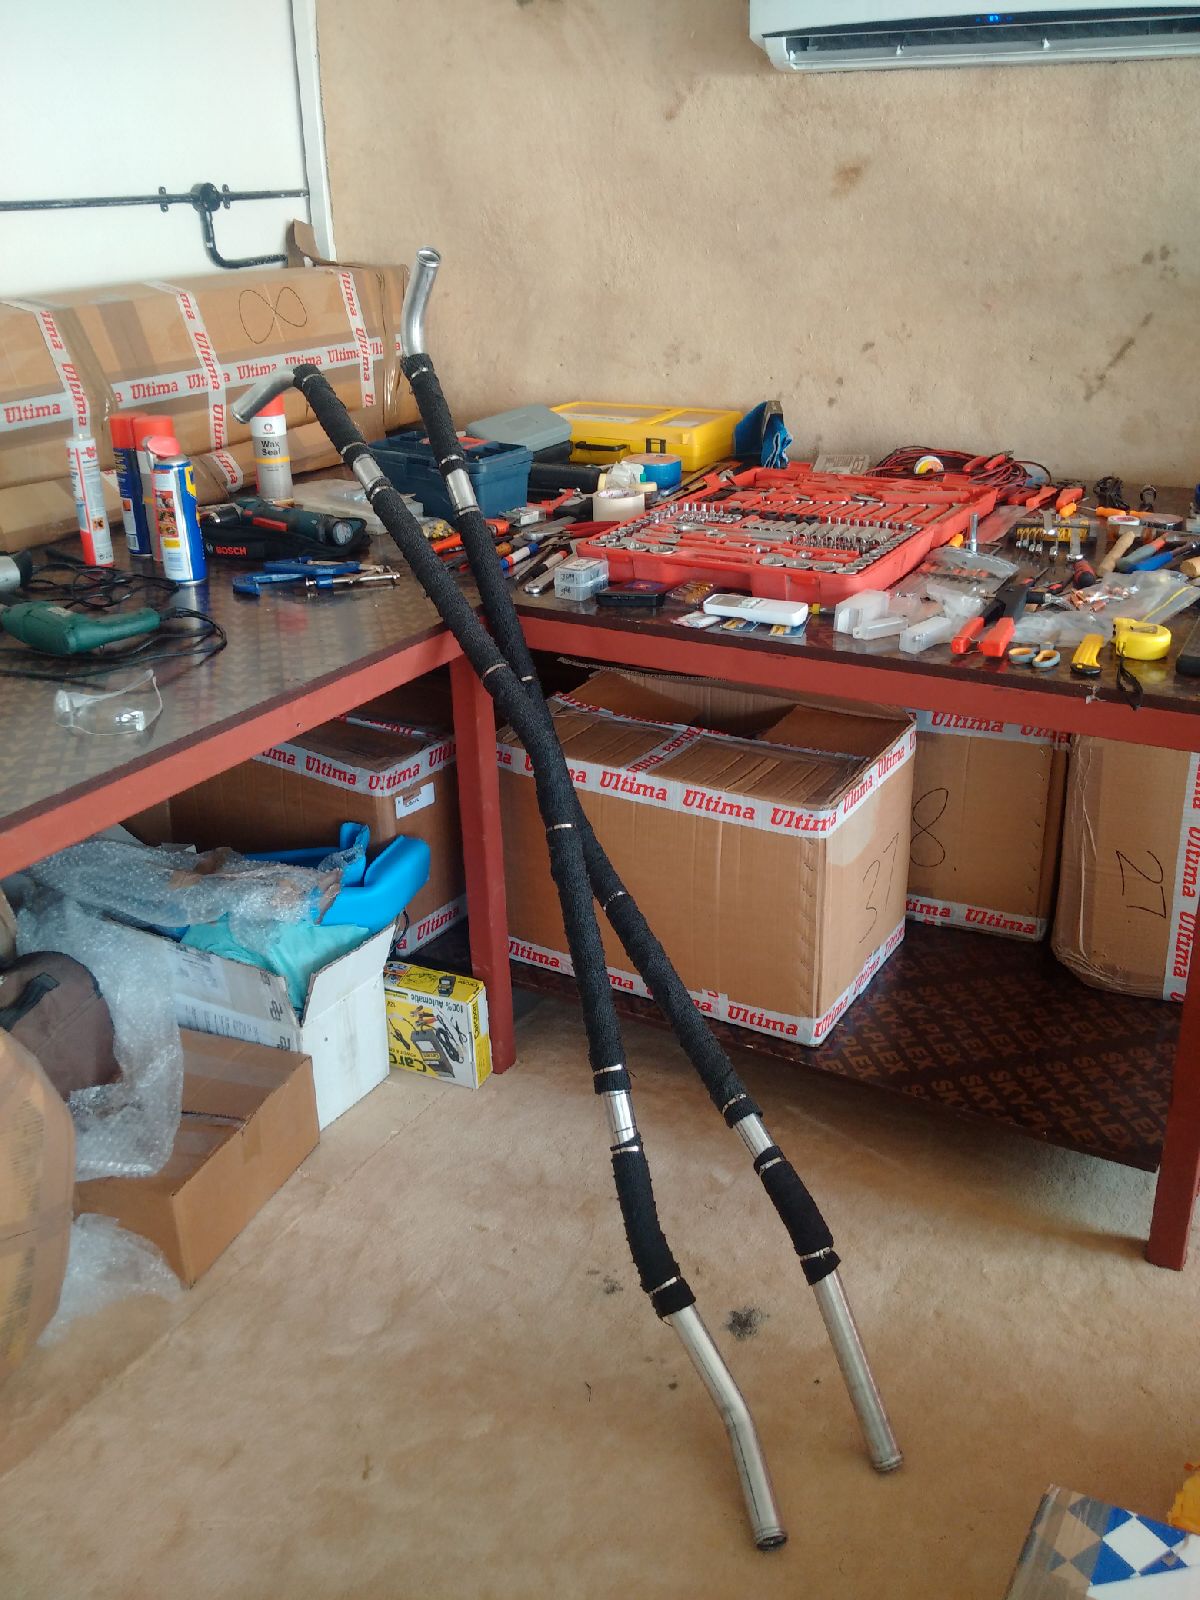
Spent quite a bit of time in the workshop today. First order of business was finishing the install of the cooling pipes. I removed the ally pipes, and wrapped them in titanium exhaust wrap - to prevent heat from entering the passenger cabin. My wife gave me a hand with this as it is really a two person job to get a good tight wrap. Once the wrap was on, the pipes were offered back to the chassis. I then installed the two silicon connectors to the radiator, and then finally riveted the pipes onto the chassis.
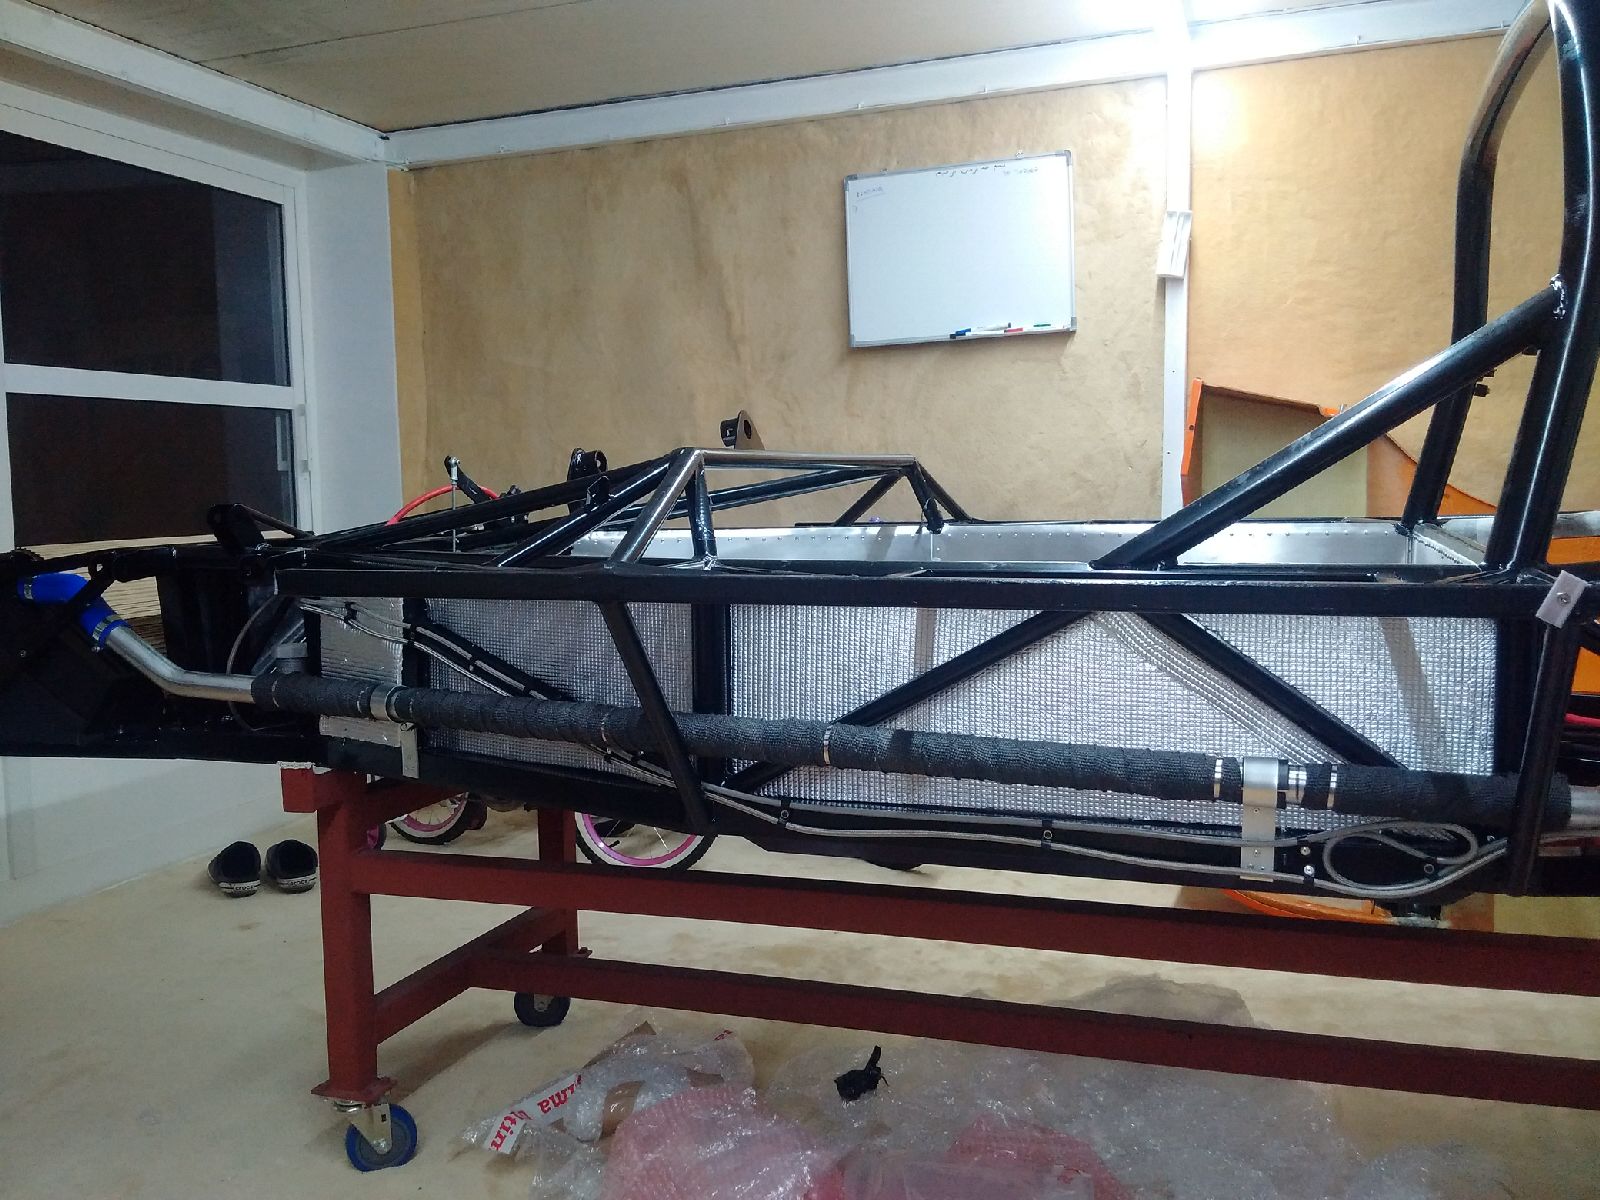
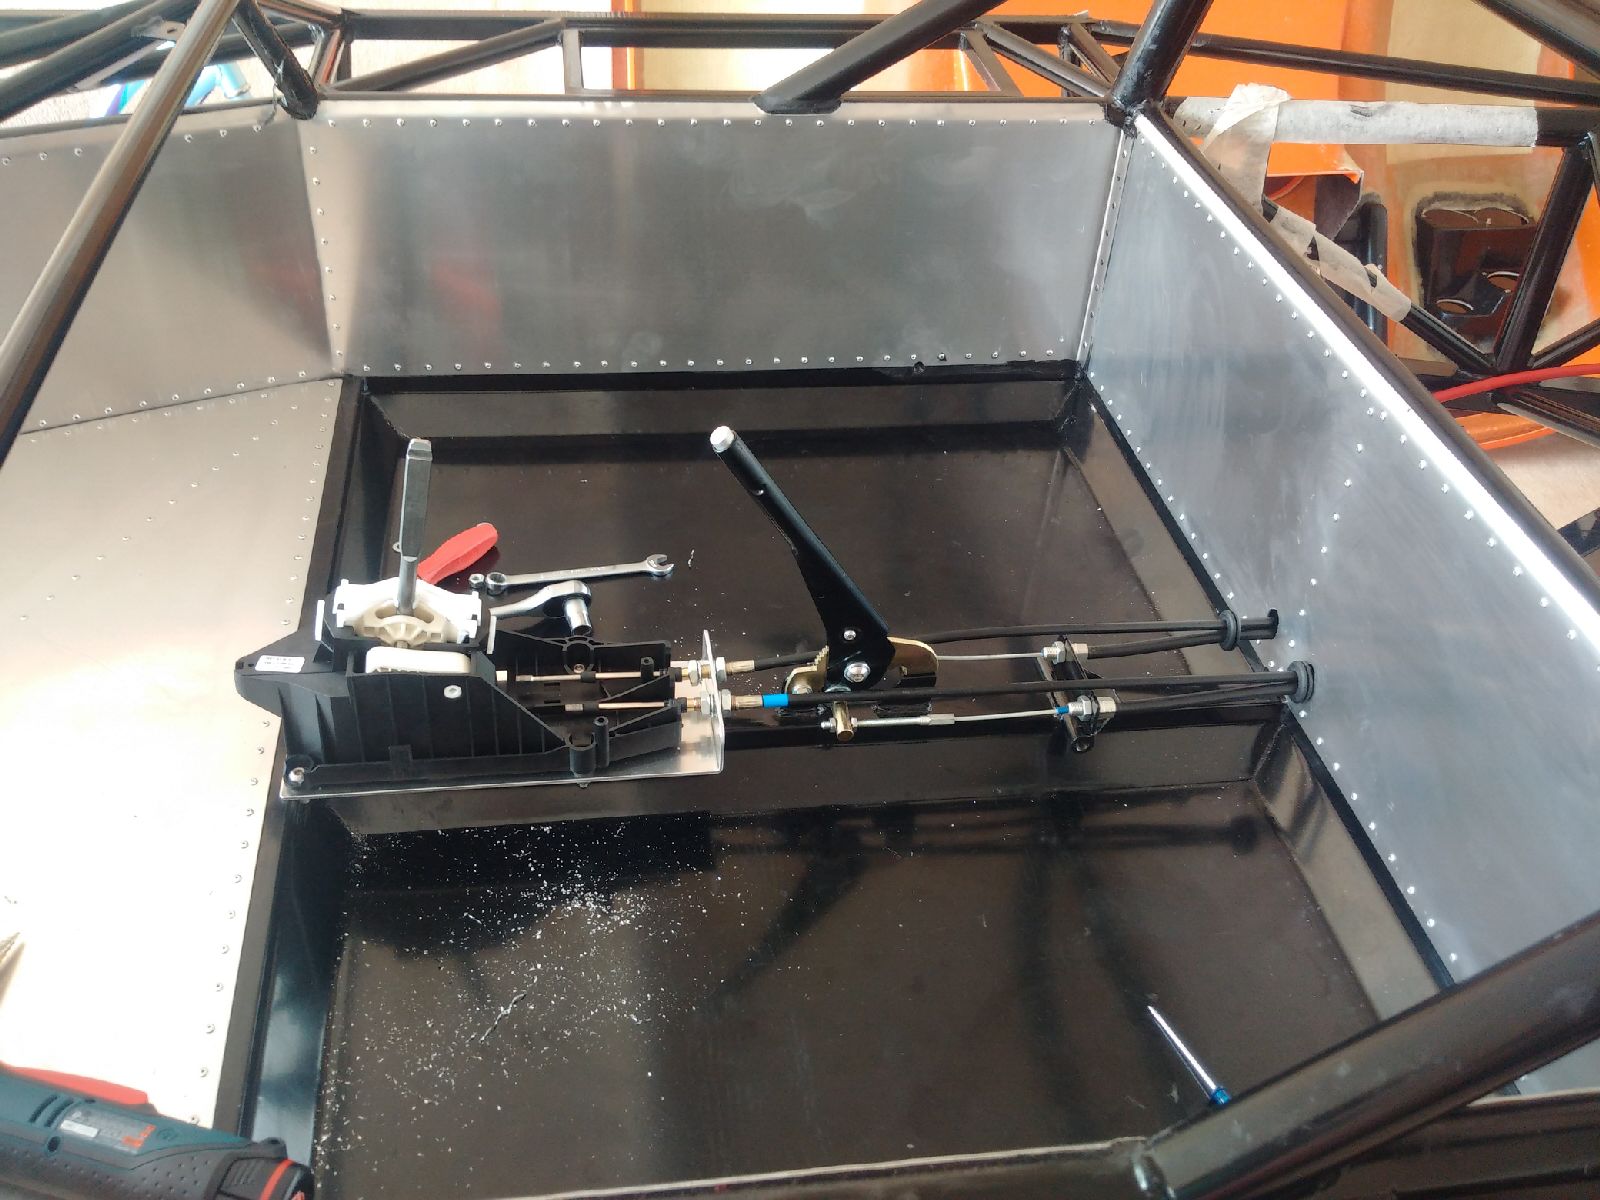
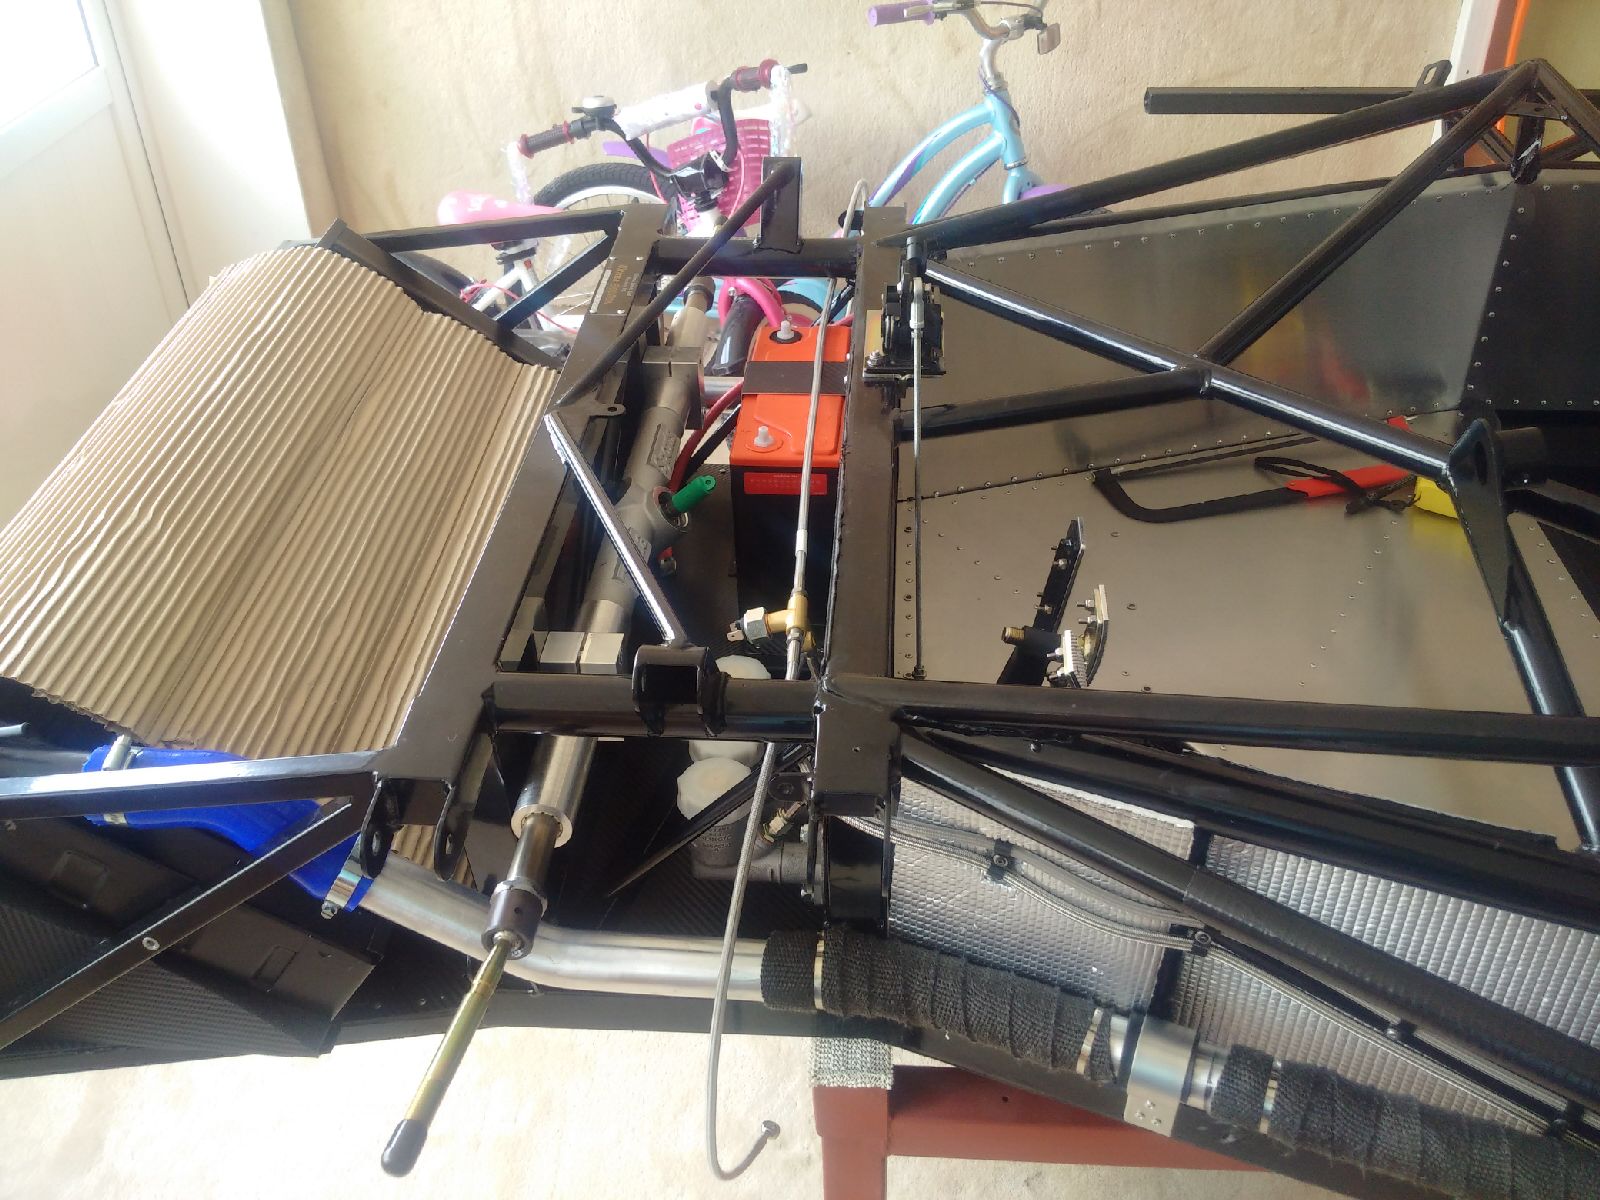
After the cooling system, I decided to work a little on the interior. So I setup the gear change mechanism and the handbrake. For the Porsche gear change, all the bits and bobs were retrieved from the boxes, and installed as per the manual. It took quite a bit of fiddling to get the mechanism to install on the base plate due to incorrect alignment of holes. However, at the end it was ok. I then threaded the cables from the engine side to the interior and installed them onto the supports. Final fitment of cables will be done when the gearbox is installed.
After the gear change, I installed the handbrake - fairly simple: Setup the handbrake with all the small pieces, and then bolt it to the chassis. Again pass the cables from the engine side, and install onto the supports. The ends were then connected to the handbrake lever. I also took a moment to check clearance for the central GRP cover (over handbrake and gear change) - it needs to be filed and holes cut out, which I will leave for tomorrow.
Final job for the day was installing the driver dead pedal - can be seen in the last picture to the left of the clutch. It has also been powder coated black.


July 7-9, 2015
Build Time Today: 5 hours
Total Build Time: 82 hours
I was not able to edit the website so this will cover work for the past 3 days - which admittedly has been very slow.
First I installed the small rubber vent pipe for the radiator, the radiator water temperature sensor and the horn.
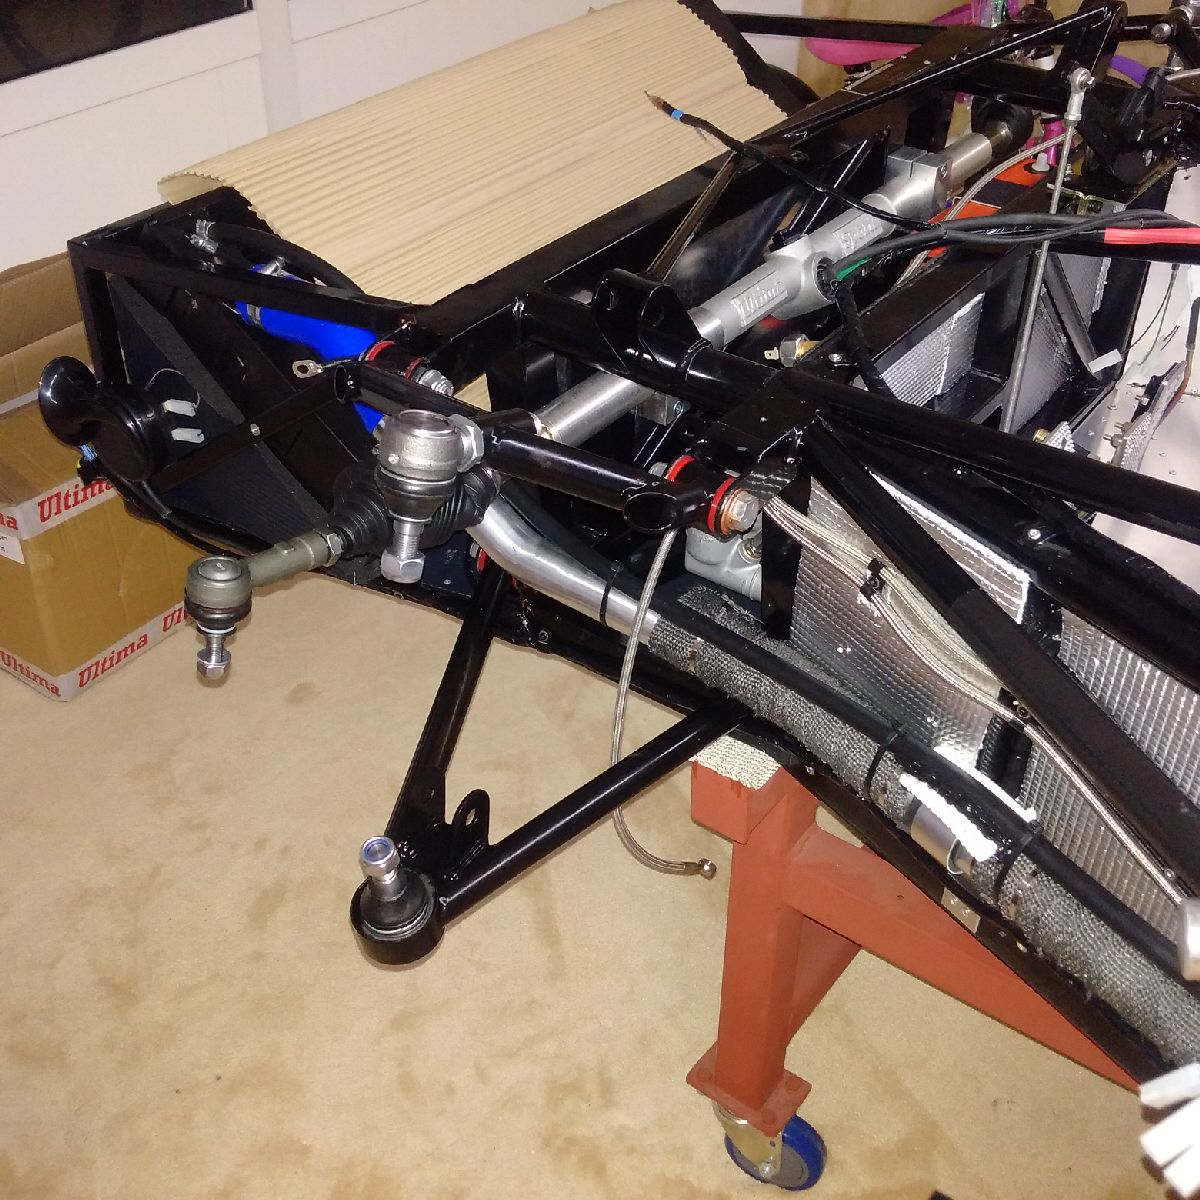
Then I decided to work on the steering system - I extracted the rack from the box, placed the clamps on it, and slowly put the entire thing in the chassis and somehow got the bolts on - all with just a pair of hands (this is one step where HELP is beneficial). It took a while to get the rack on as I was working alone, but its finally on there. I left the bolts a little loose to allow fitting of the steering column - which will have to wait because I have not yet received the column from the factory. There is a delay on my order, and I am hoping to receive it soon. I also installed the two rubber bearings for the upper steering column.
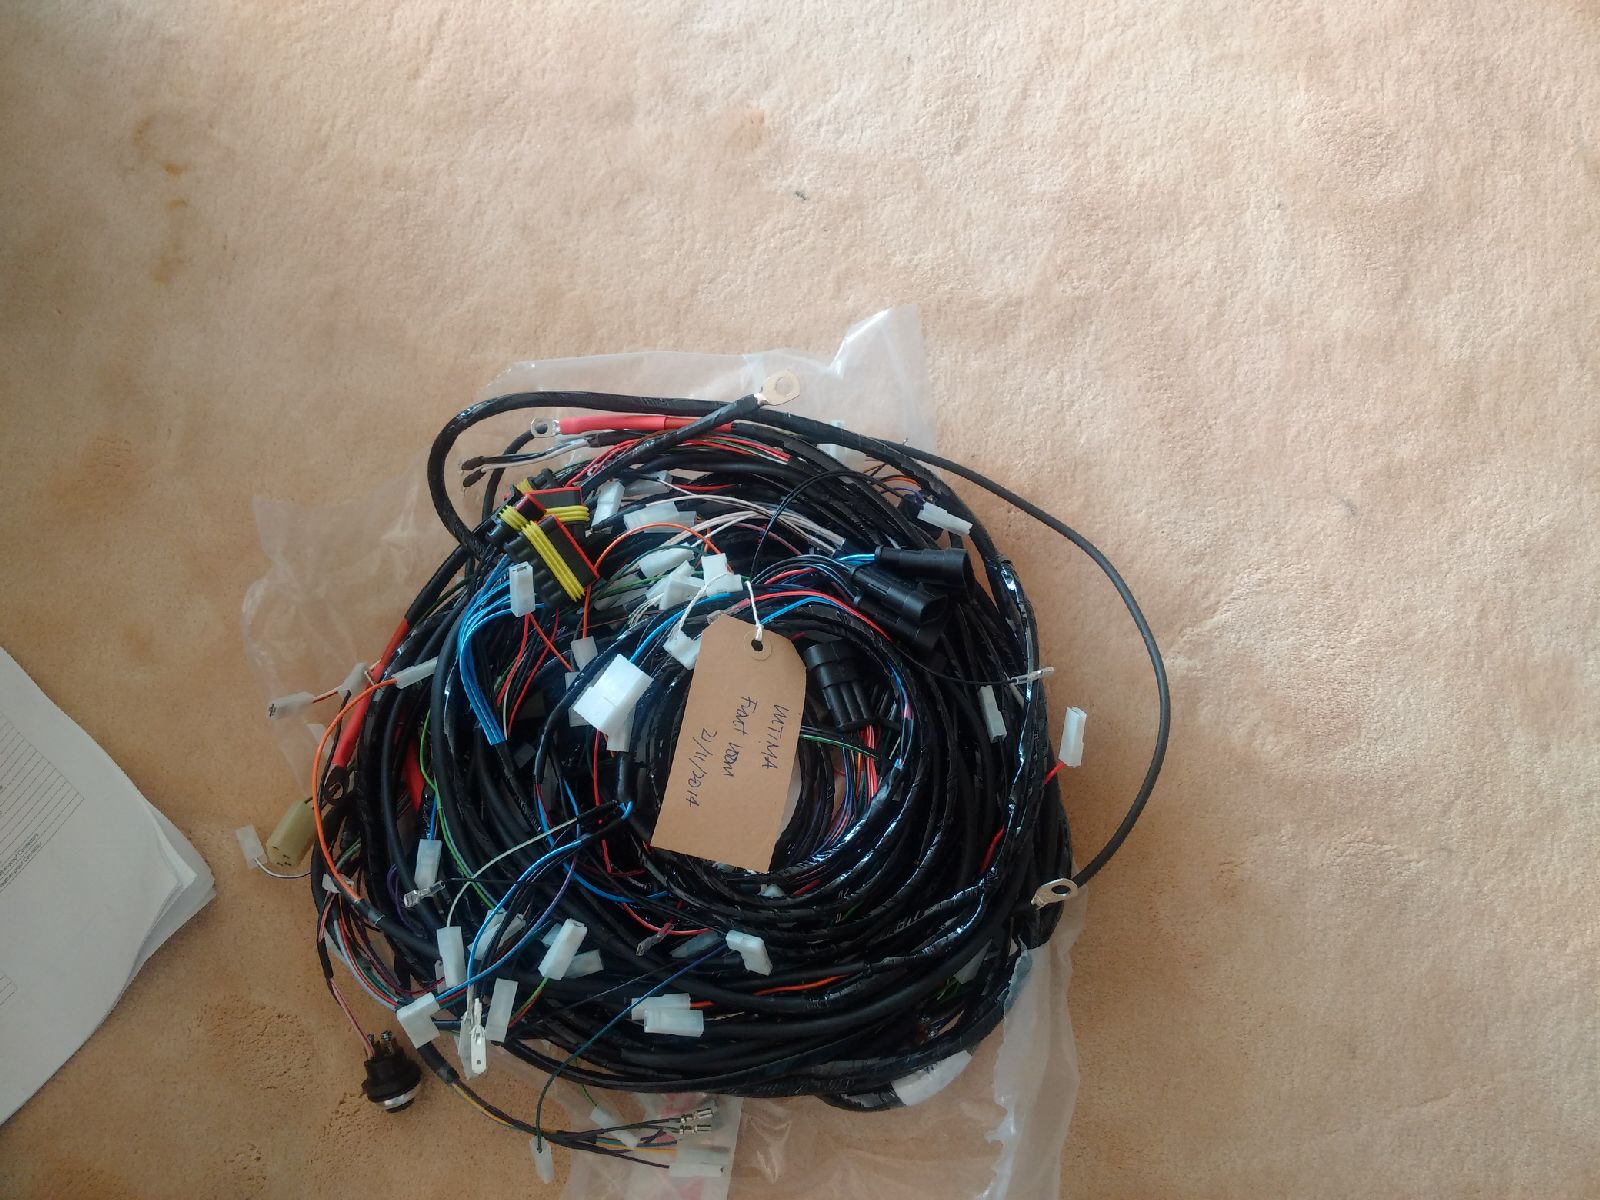
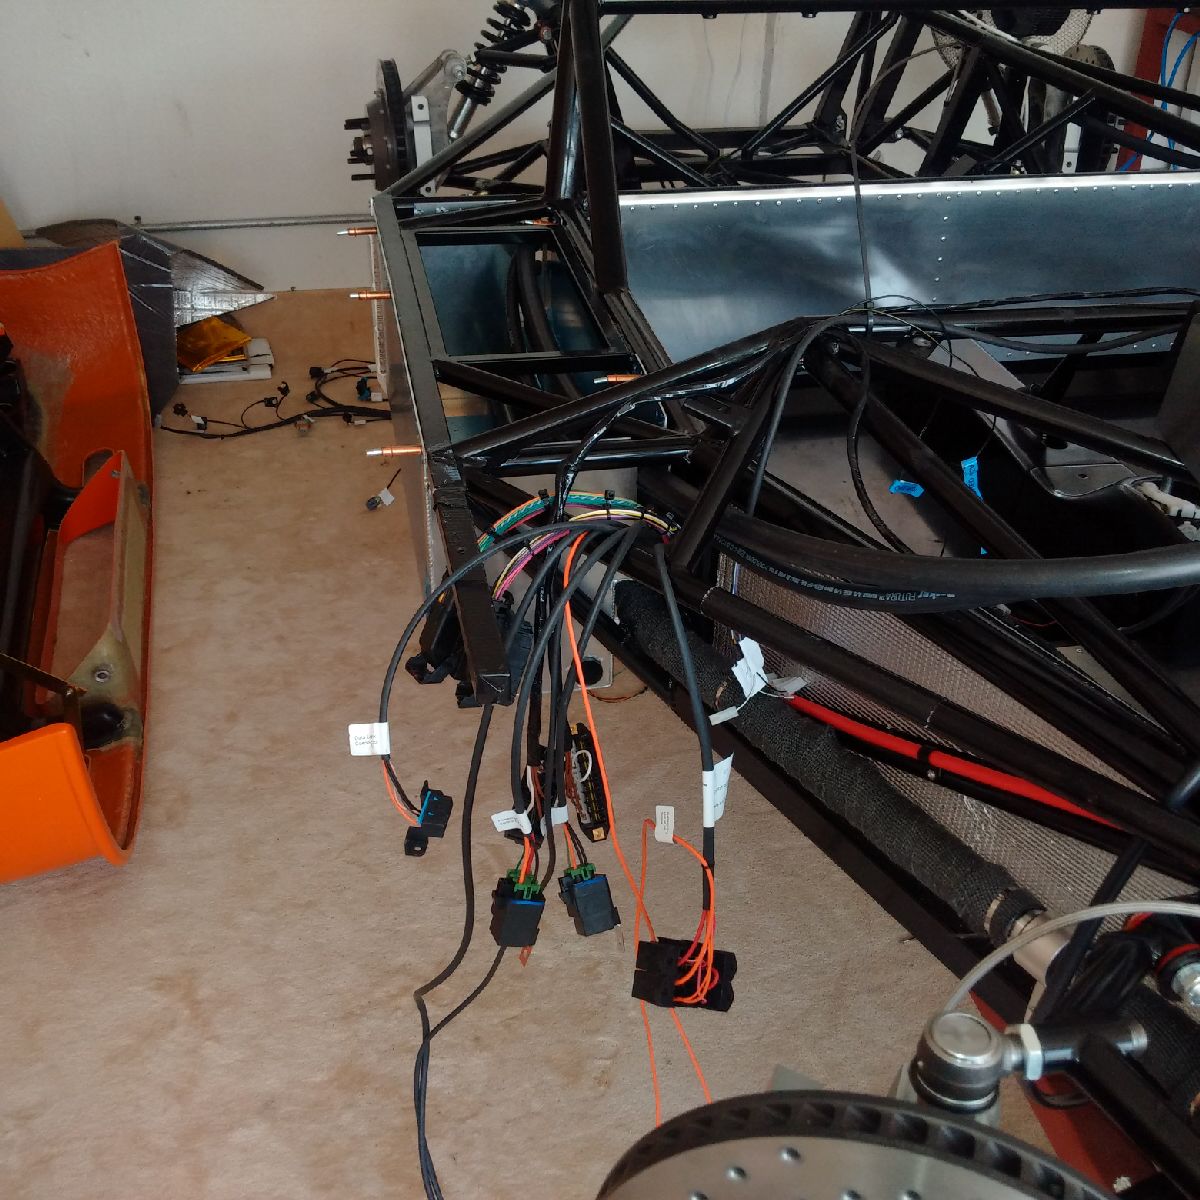
I then started work on the loom - the spaghetti roll was laid out of the ground, and all the wires were pain-stakingly marked for future reference. The loom was then put on the chassis in a rough position.

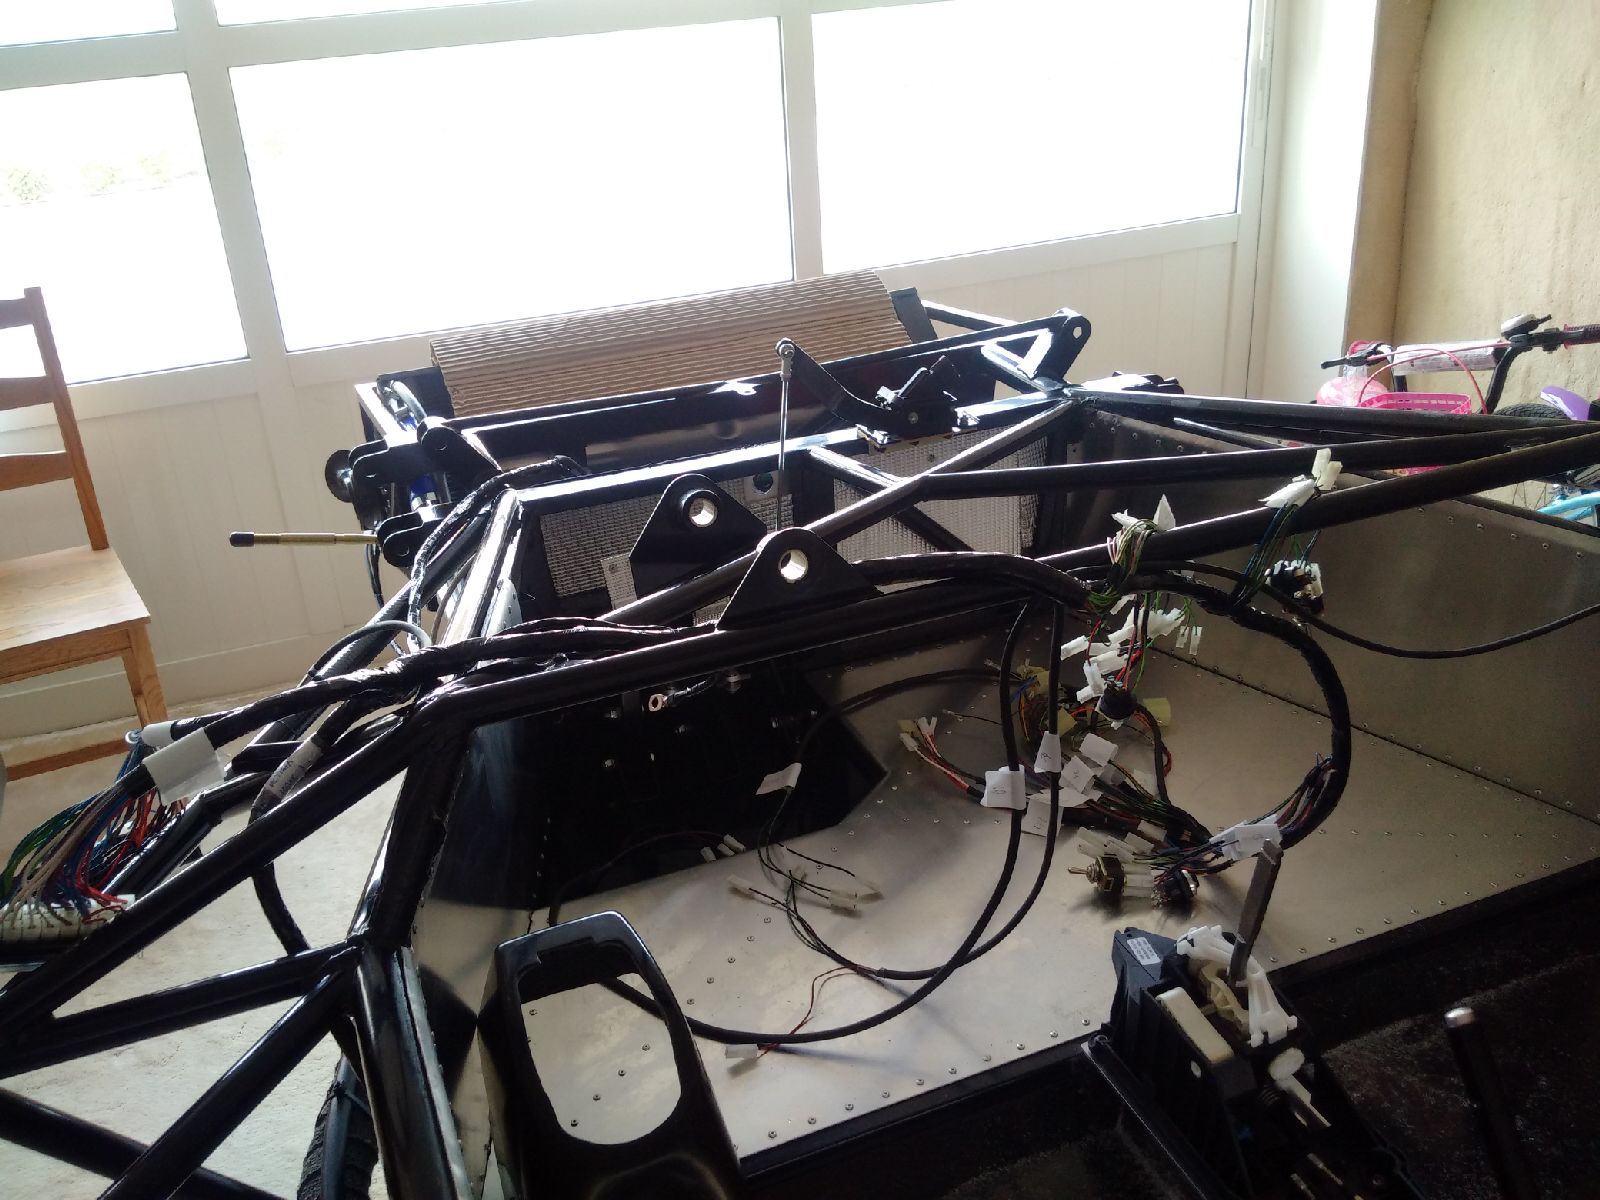
The engine bay now needs to be cleaned up a bit before I get back to adding additional parts. The handbrake cables, gear change cables, battery cables, wiring loom, brake and clutch lines all need to be drilled and clecoed into place. I will do this tomorrow, and then get back to the build next week.
July 10, 2015
No work today
July 11, 2015
Build Time Today: 3 hours
Total Build Time: 85 hours
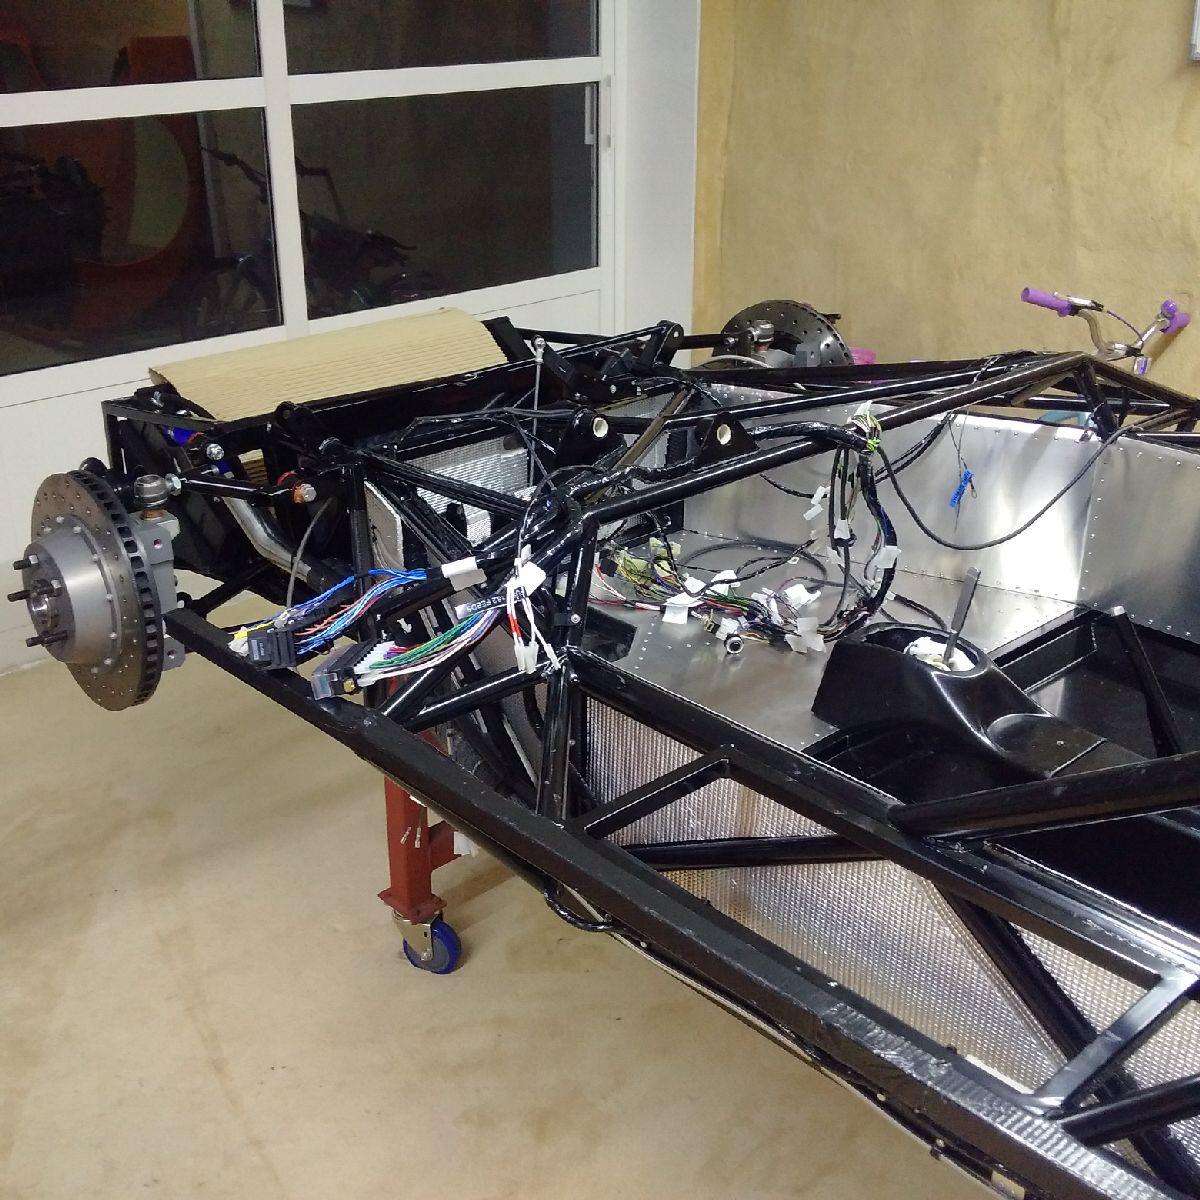
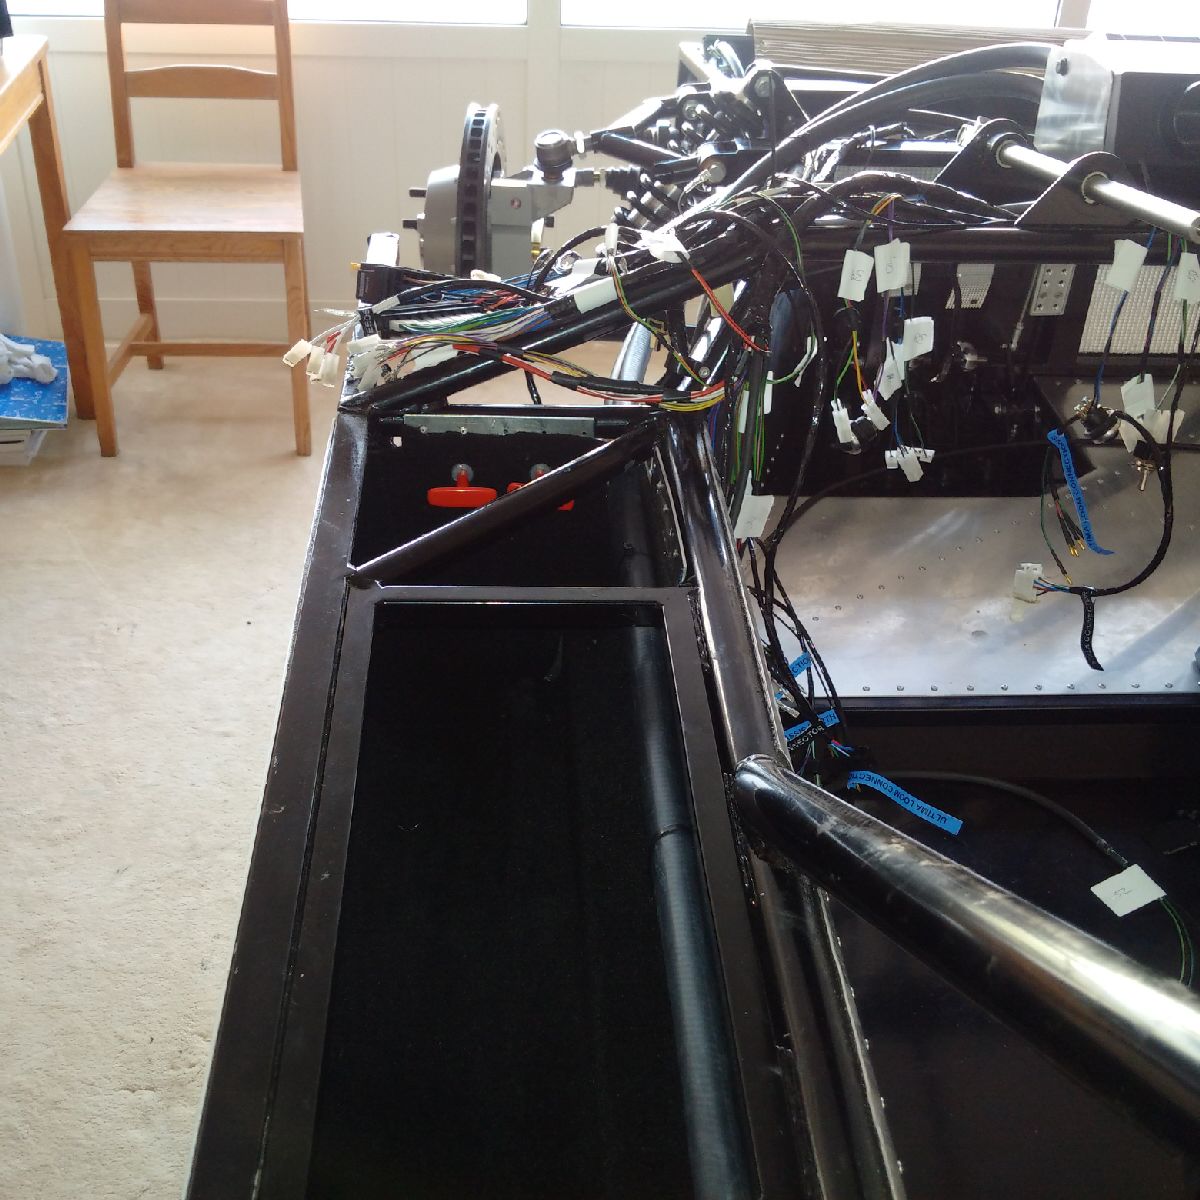
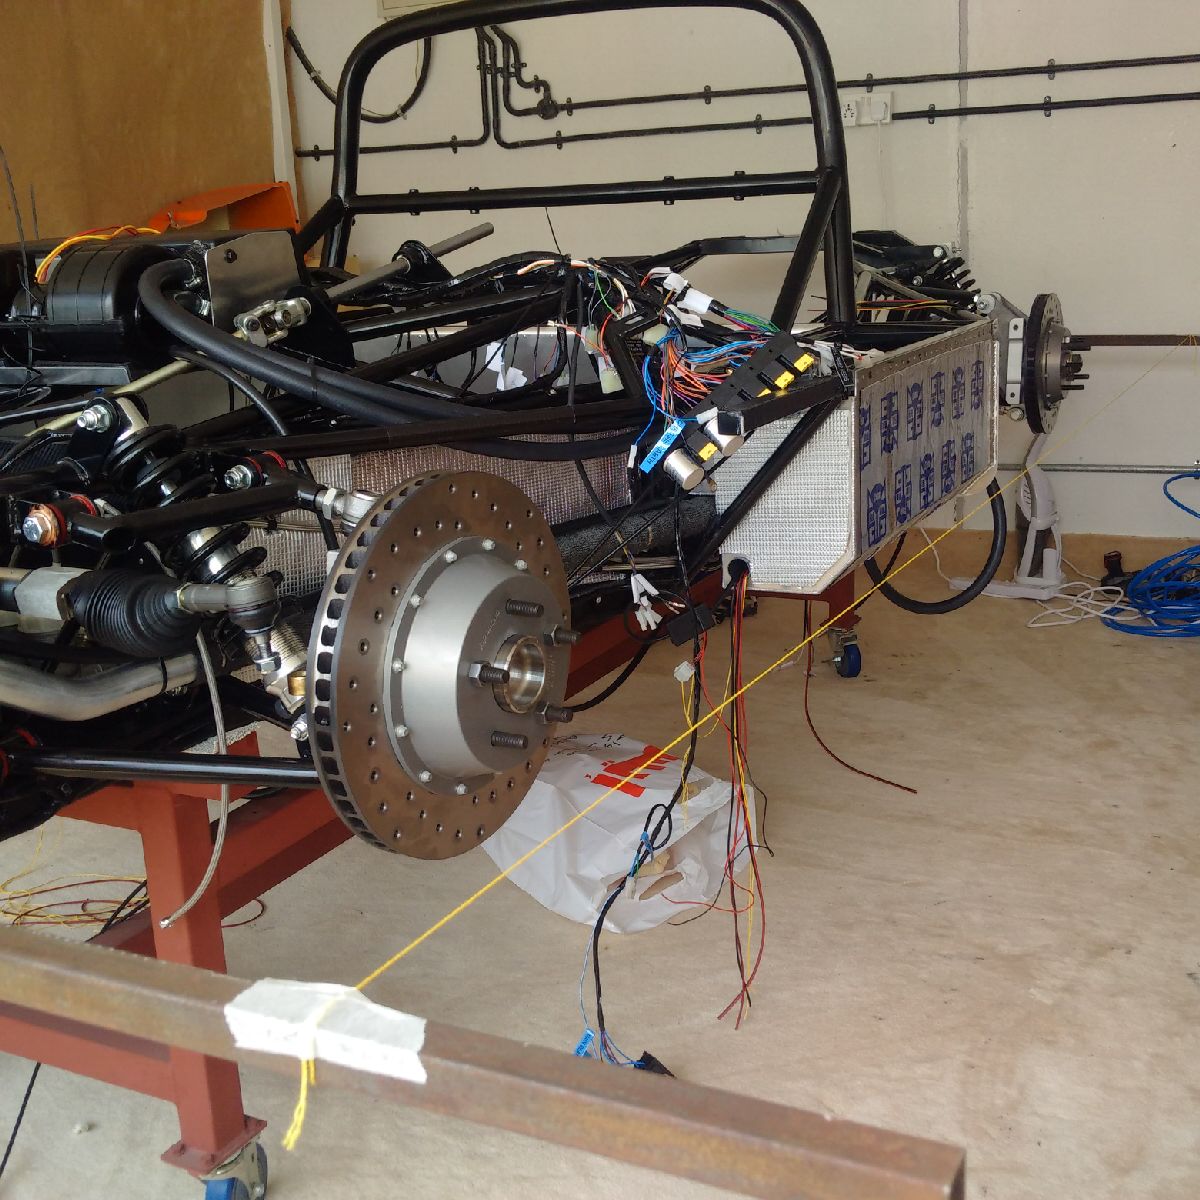
I spent most the afternoon today cleaning up the engine bay - all cables, lines and wires were drilled and either riveted or clecoed to the chassis. I took a while and a toll on my back, having to bend over the chassis to drill and rivet the lines in...
July 12, 2015
Build Time Today: 6 hours
Total Build Time: 91 hours
Today was a long day in the garage.
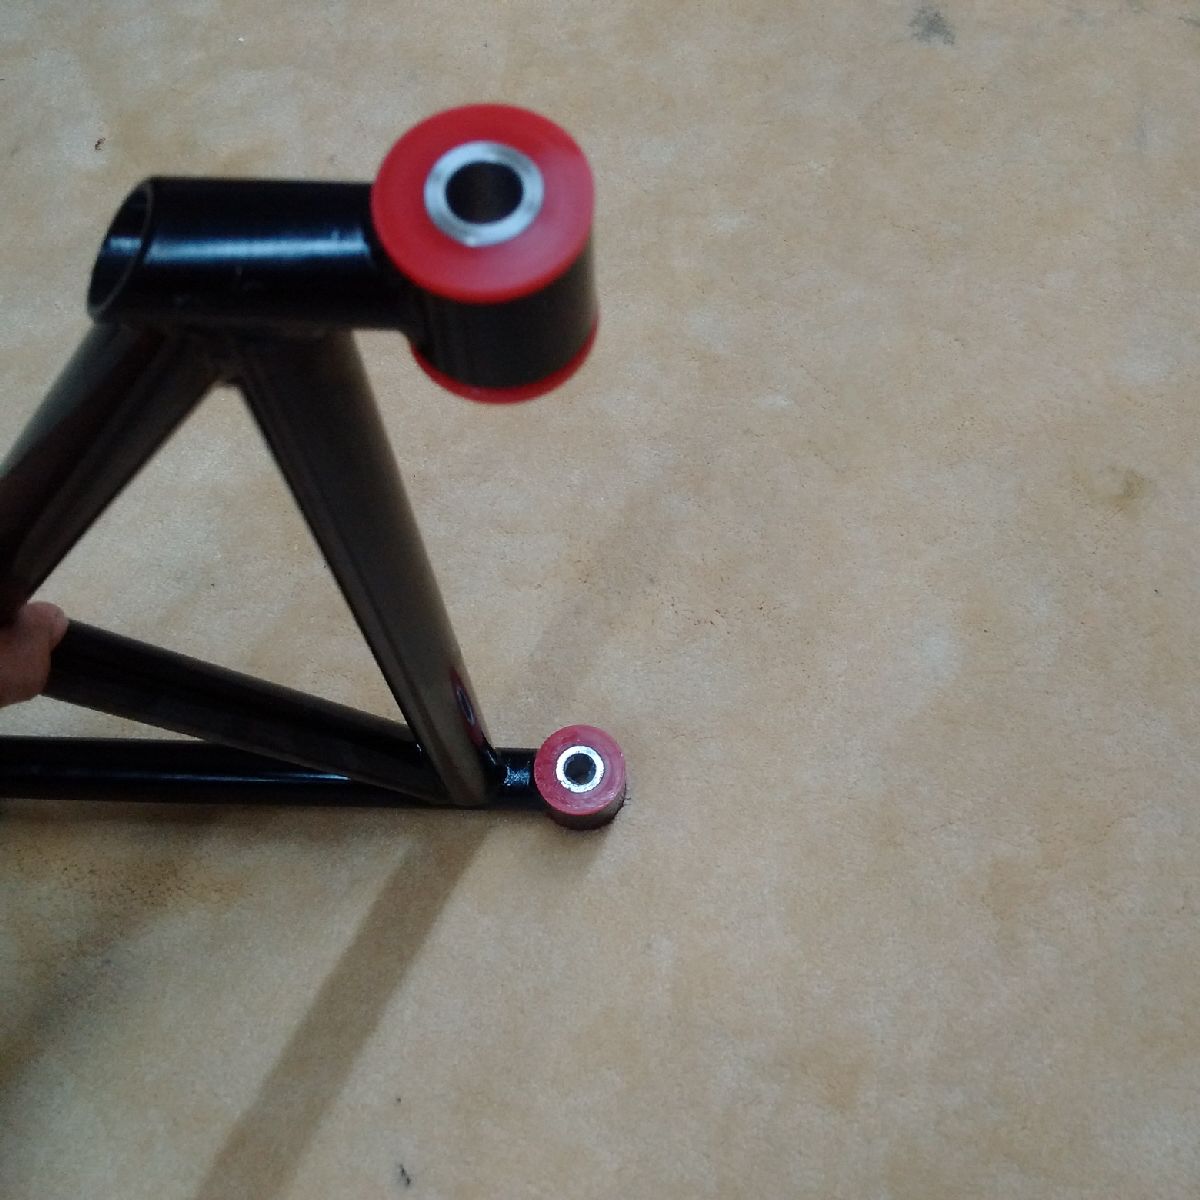
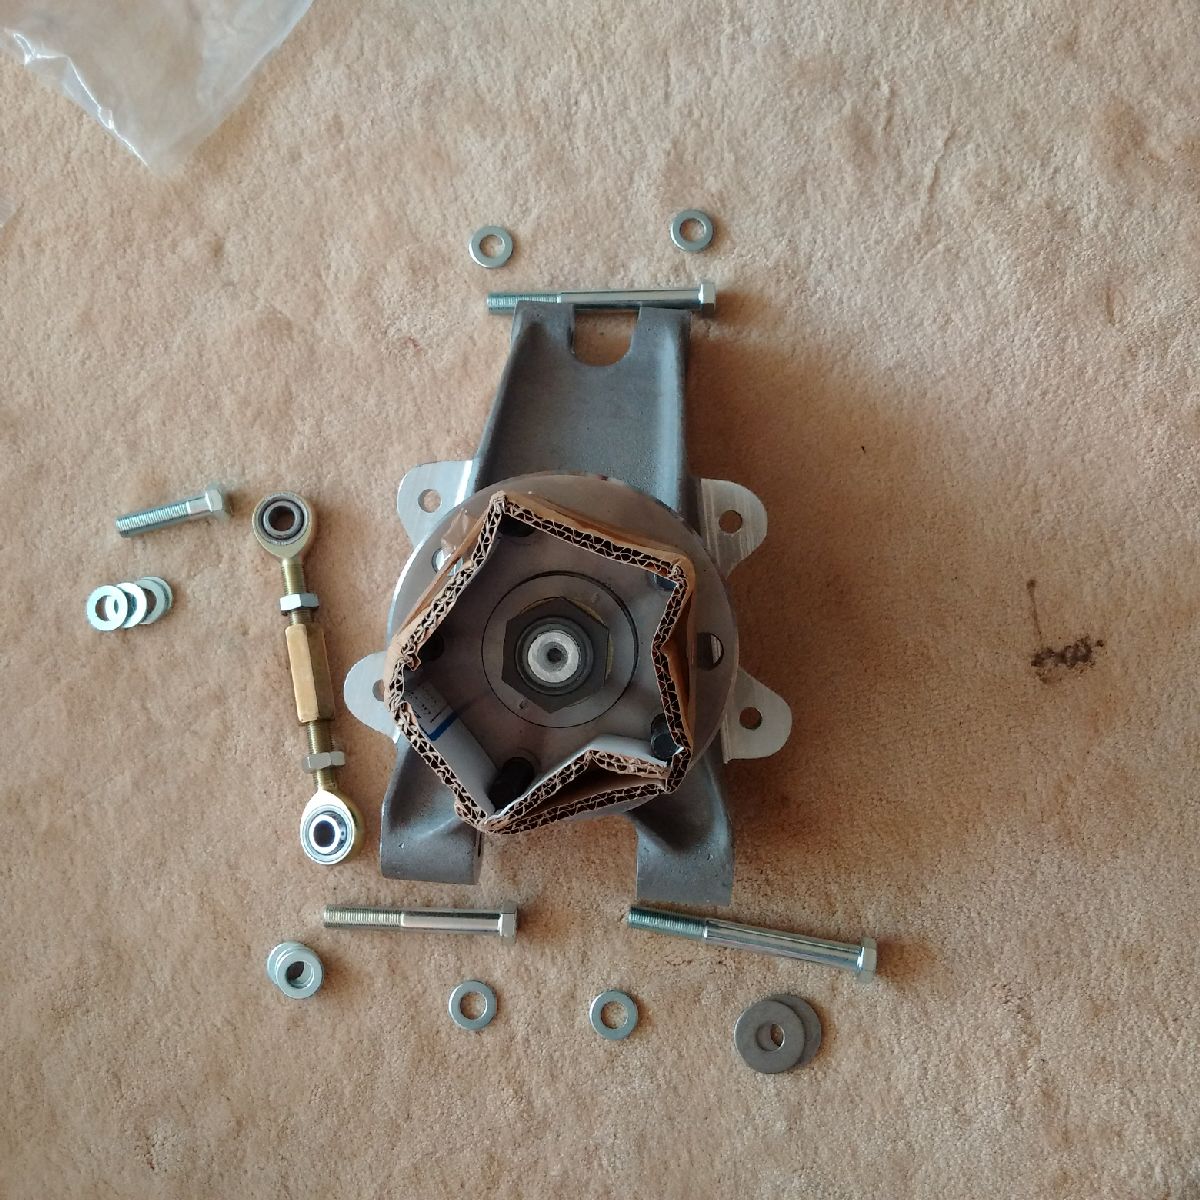
First, I spent about 3 hours getting all the bushes and sleeves into the front and rear wishbones. This took a long time as the bushes did NOT want to go in, even with a generous helping of grease and a vice. Slowly but eventually, I was able to get all the bushes and sleeves in.
I then got to work with the front wishbones. The chassis support were separated with a rubber mallet, and wishbones installed with more grease on the sides, and copper ease on the bolt. It again took a while to get the supports opened sufficient for the wishbones. A general tap with a drift was required on the lower ones to get them to open up completely. Once installed, the bolts were torqued up to 35 ft/lbs.
July 13, 2015
Build Time Today: 4 hours
Total Build Time: 95 hours
I started off today with completing the rear wishbones. I had to post a question last night on the Ultima forum because the lower rear wishbones would not fit - apparently, the new chassis design has a steel support on the lower wishbone mounting lugs, and this support makes separating the lugs difficult. The support is also welded in and there was quite a bit of weld splatter that would not let the wishbone in. A lot of filing later, I was finally able to get both rear wishbones in.
Once done with the wishbones, I worked on the front and rear uprights - simple as bolting them in. For the time being I have not torqued them until I am done with the initial suspension alignment.
July 14, 2015
Build Time Today: 6 hours
Total Build Time: 101 hours
A month today in the workshop! And I hit 100 hours!
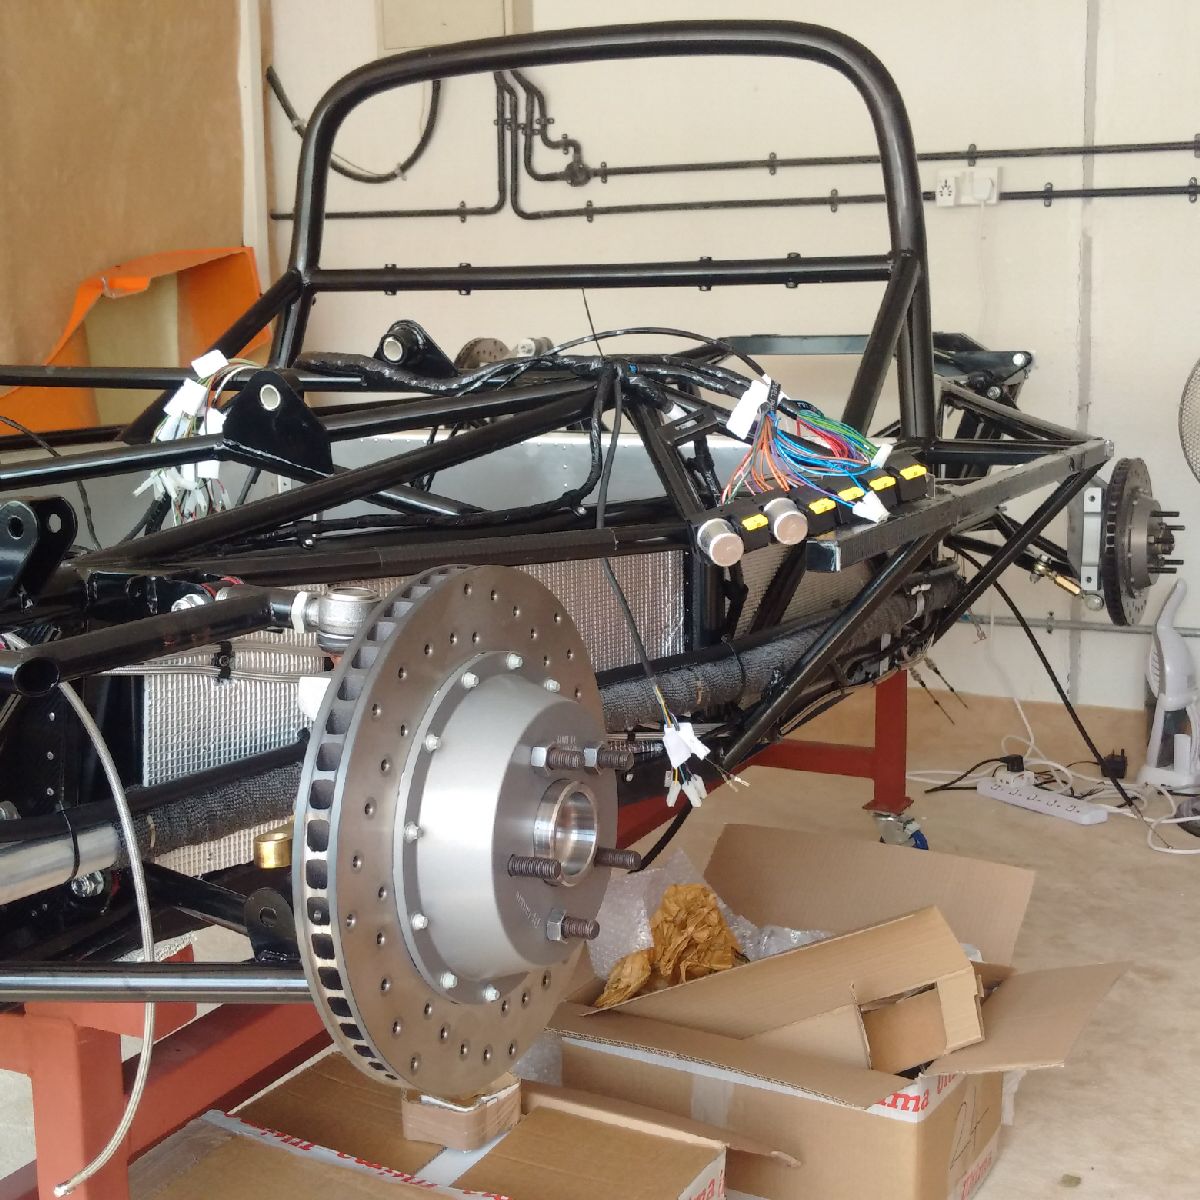
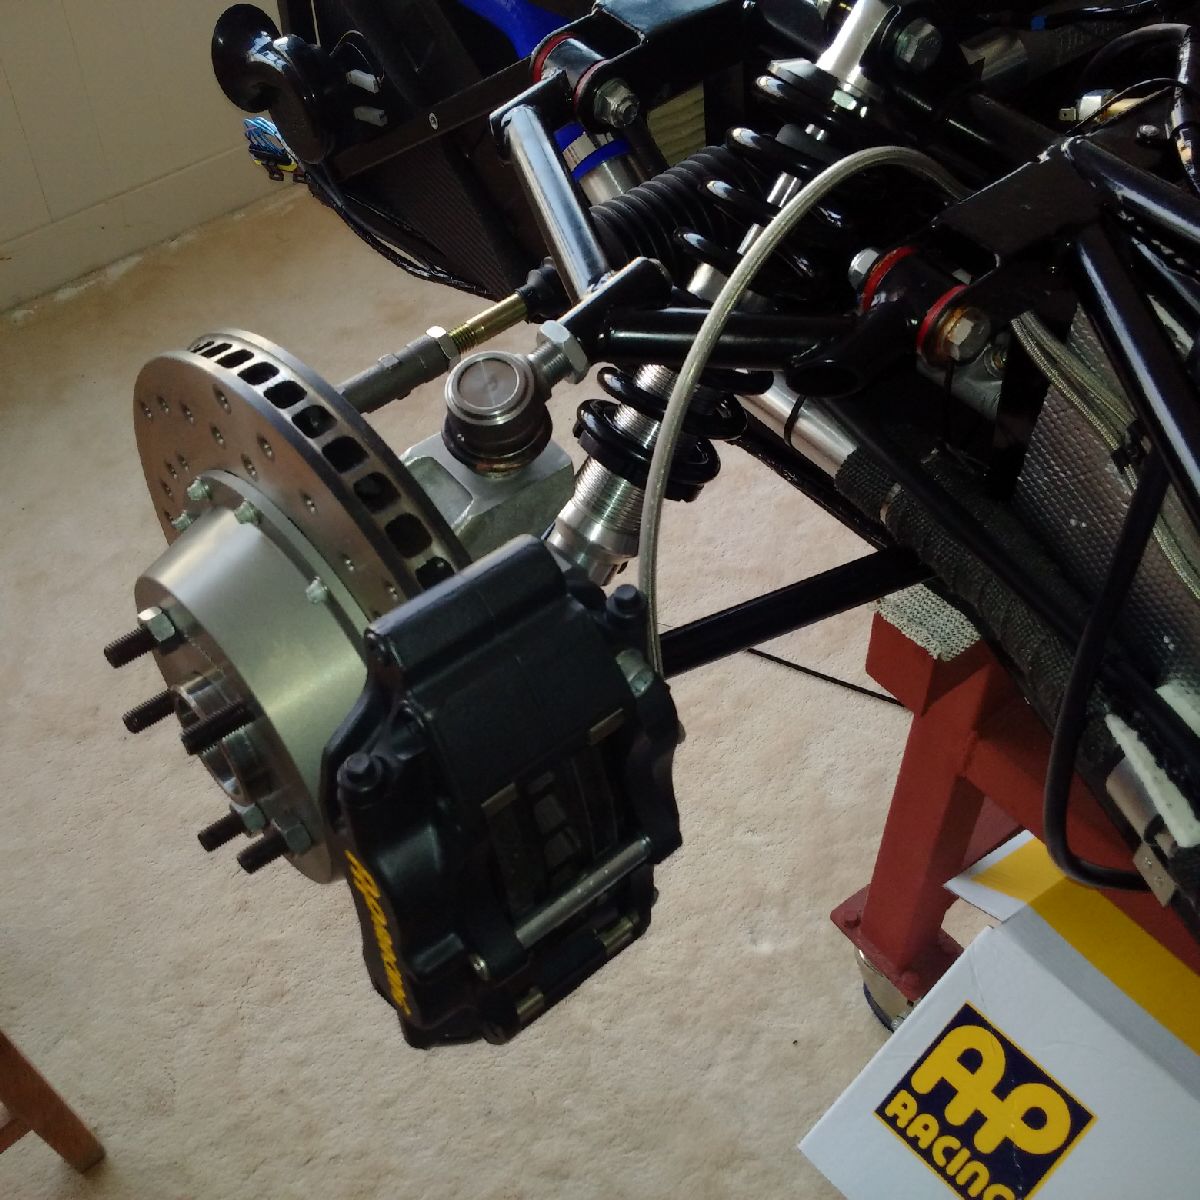
Spent a long time in the garage today trying to get the rear rotor on - took me 6 hours to do one side!! I was having problems all day - the holes on the rotors were too small for the lugs, the center hat would not go all the way back and sit flush with the upright, and then I could not get either the brake or handbrake calipers to sit straight...
A lot of hammering, cussing, (some bleeding) and a day later, I have finally got the rear left rotor on... now I also know how better to approach the other three...
July 15, 2015
Build Time Today: 5 hours
Total Build Time: 106 hours
Well I definitely must have learnt something yesterday - because I was able to get the other 3 rotors on within 3 hours today. Still longer than it should take, but that was because I had to drill out the holes and file the center part to get the rotors to sit properly on the hubs. I also dry fitted all four brake calipers and both handbrake calipers. Those were immediately removed, and will be installed after the initial alignment (forgot to take pic with the brakes on)...
The next thing I tackled today was the fitment of the center console. This again needed alot of filing of the ally gear change base plate, and of the GRP center console itself. A lot of filing, sawing, sanding, and trial fitting later, I had the center console fitting correctly. Only the seat belt bolt holes need to be drilled, but those will be done later when I fit the seats...

July 16, 2015
Build Time Today: 3.5 hours
Total Build Time: 109.5 hours
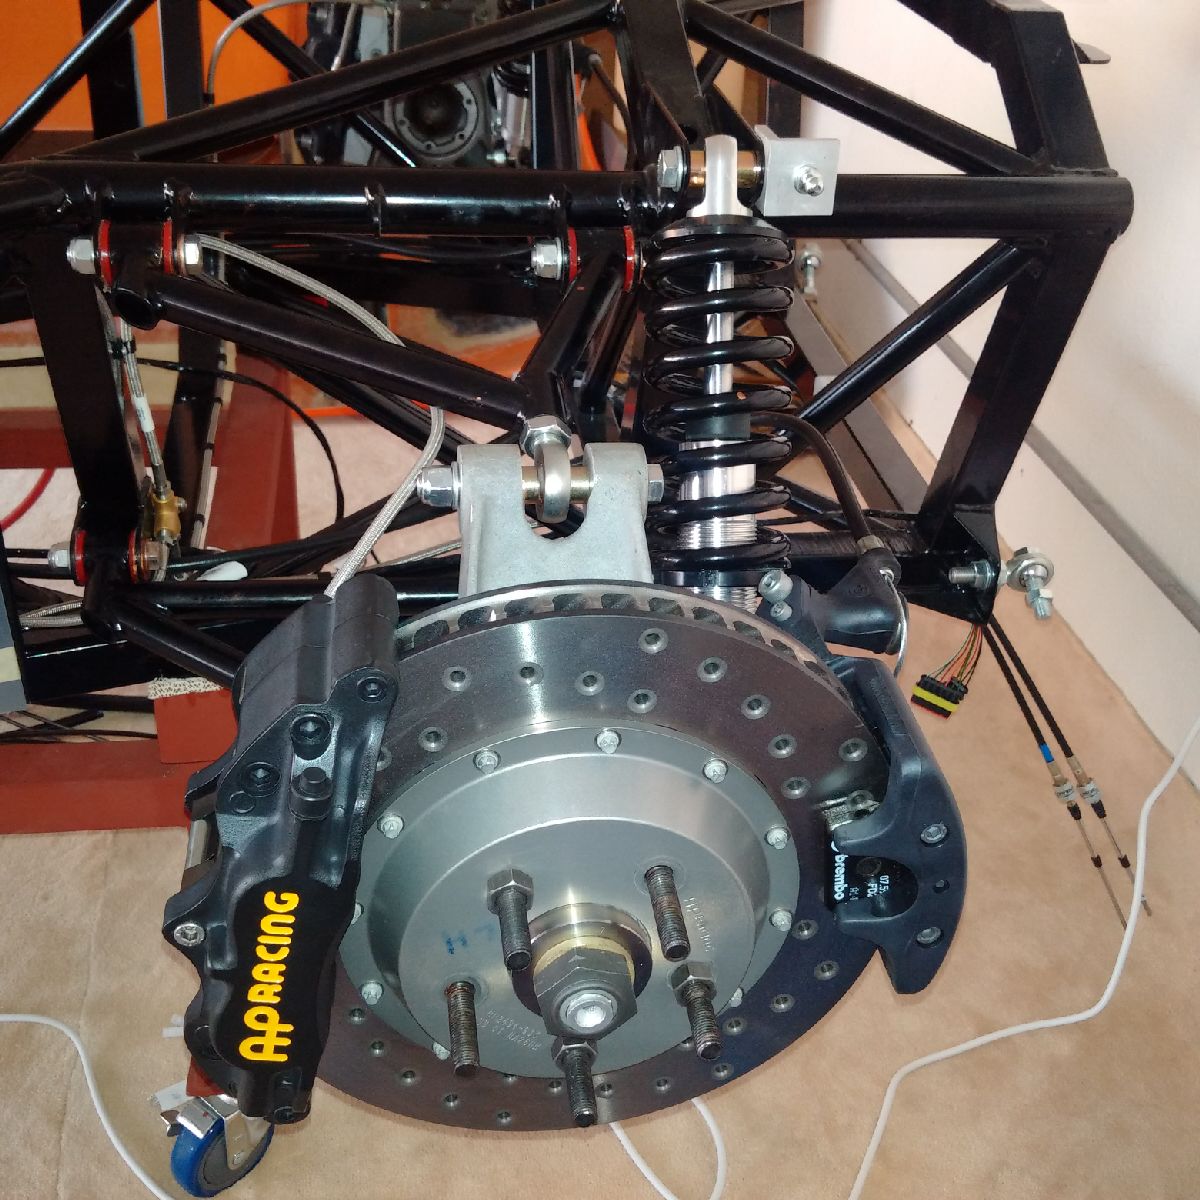
First job for today was the fitment of the dampers. It took over an hour to fit all four, but that was primarily because I was working alone and had to juggle holding the damper in place with one hand, holding the wishbone in place with the other, and then inserting the bolt with a washer, thought he chassis hole, into a spacer, into the damper, through another spacer, pass the second chassis hole and then tighten with a washer and bolt - it would probably be a lot easier with help!
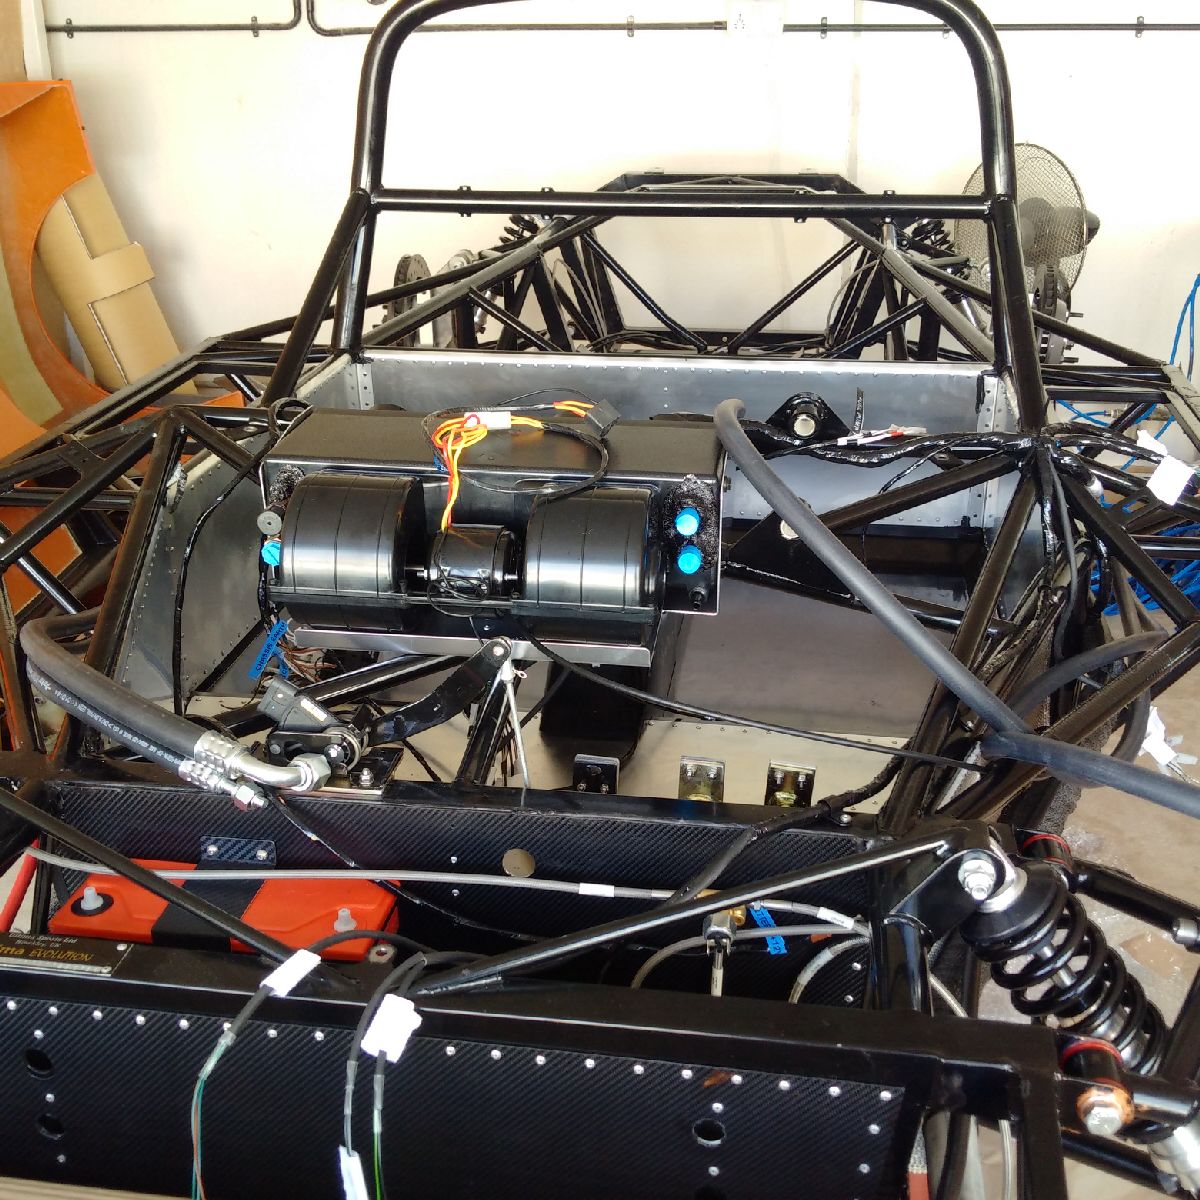
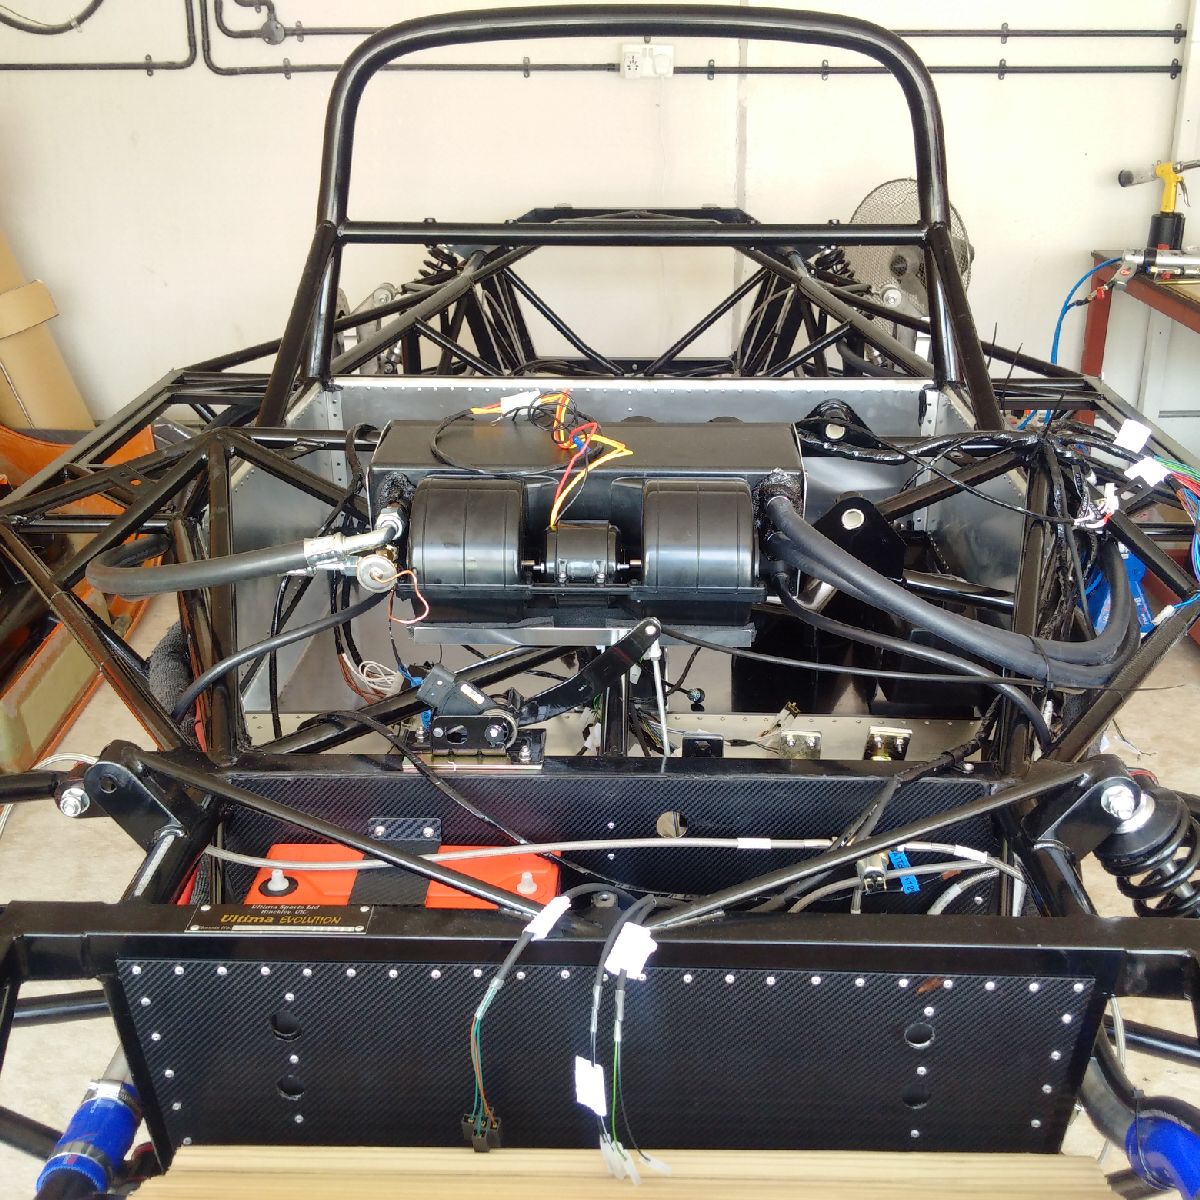
Once the dampers were in, I decided to open another box - the AC!! Fitting of the AC base plate was done with the usual mark chassis members, drill, drill chassis, debur everything, waxoyl, sikaflex and then rivet. The location of the base plate took a little while as I had to refer to the build CD and various other build sites to make sure I was putting it in the right place.
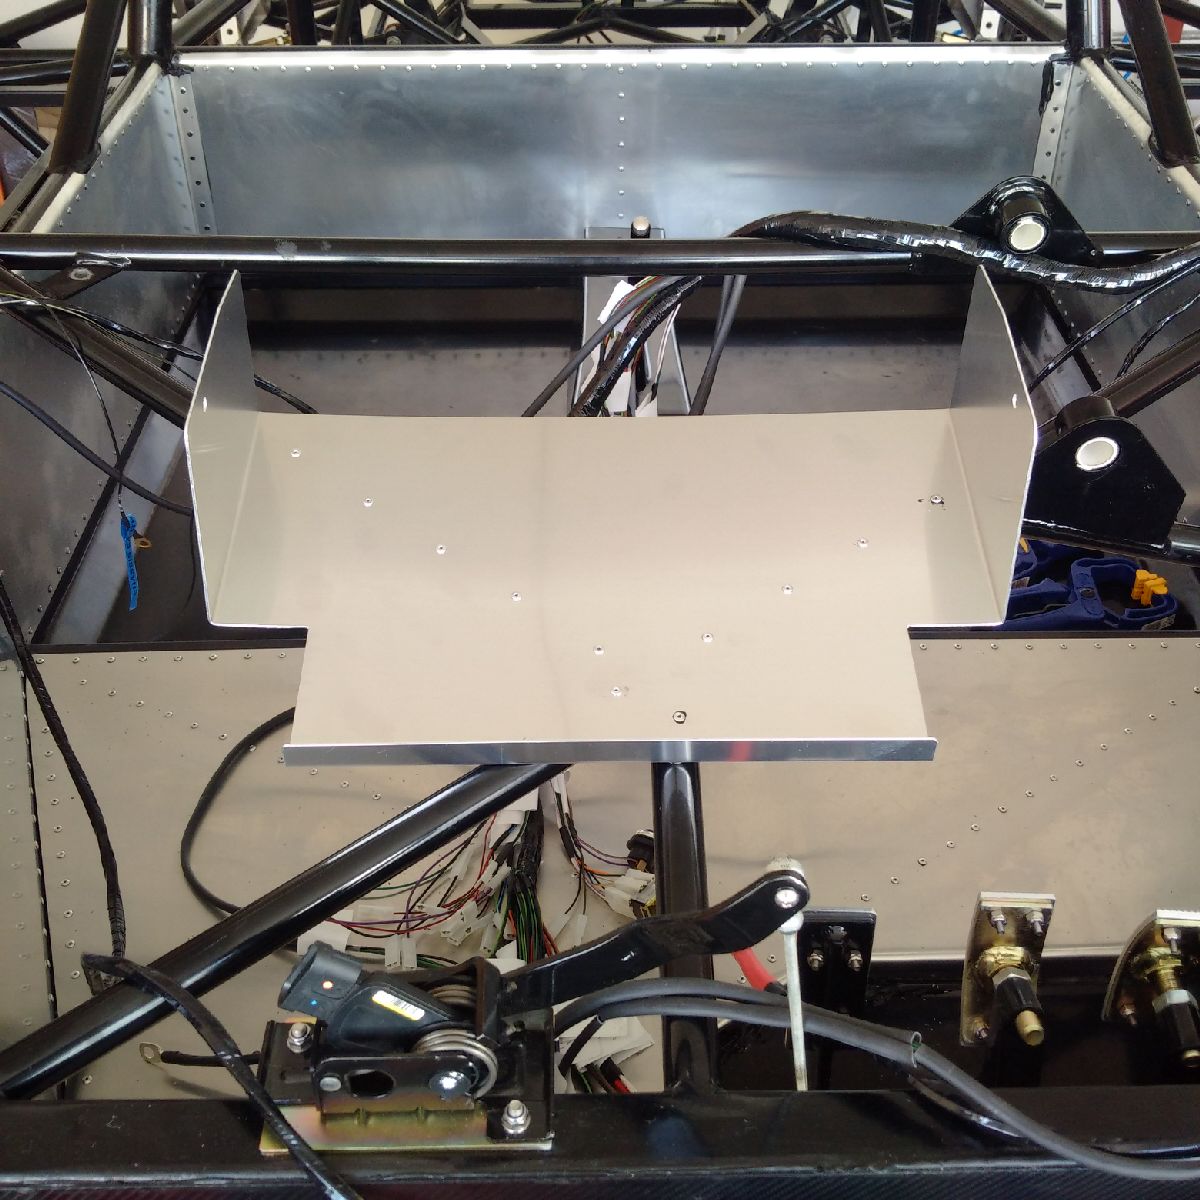
Once the base plate was in, I added a bit of the foam tape inside to prevent the blower unit for rattling, and installed the blower unit with a pair of floating bolts. The hoses for the AC and the heater were then passed through the chassis members and left for installation tomorrow.
July 17, 2015
EID Mubarak! Spent the day visiting family and friends to celebrate Eid... work will continue tomorrow...
July 18, 2015
Build Time Today: 5.5 hours
Total Build Time: 115 hours
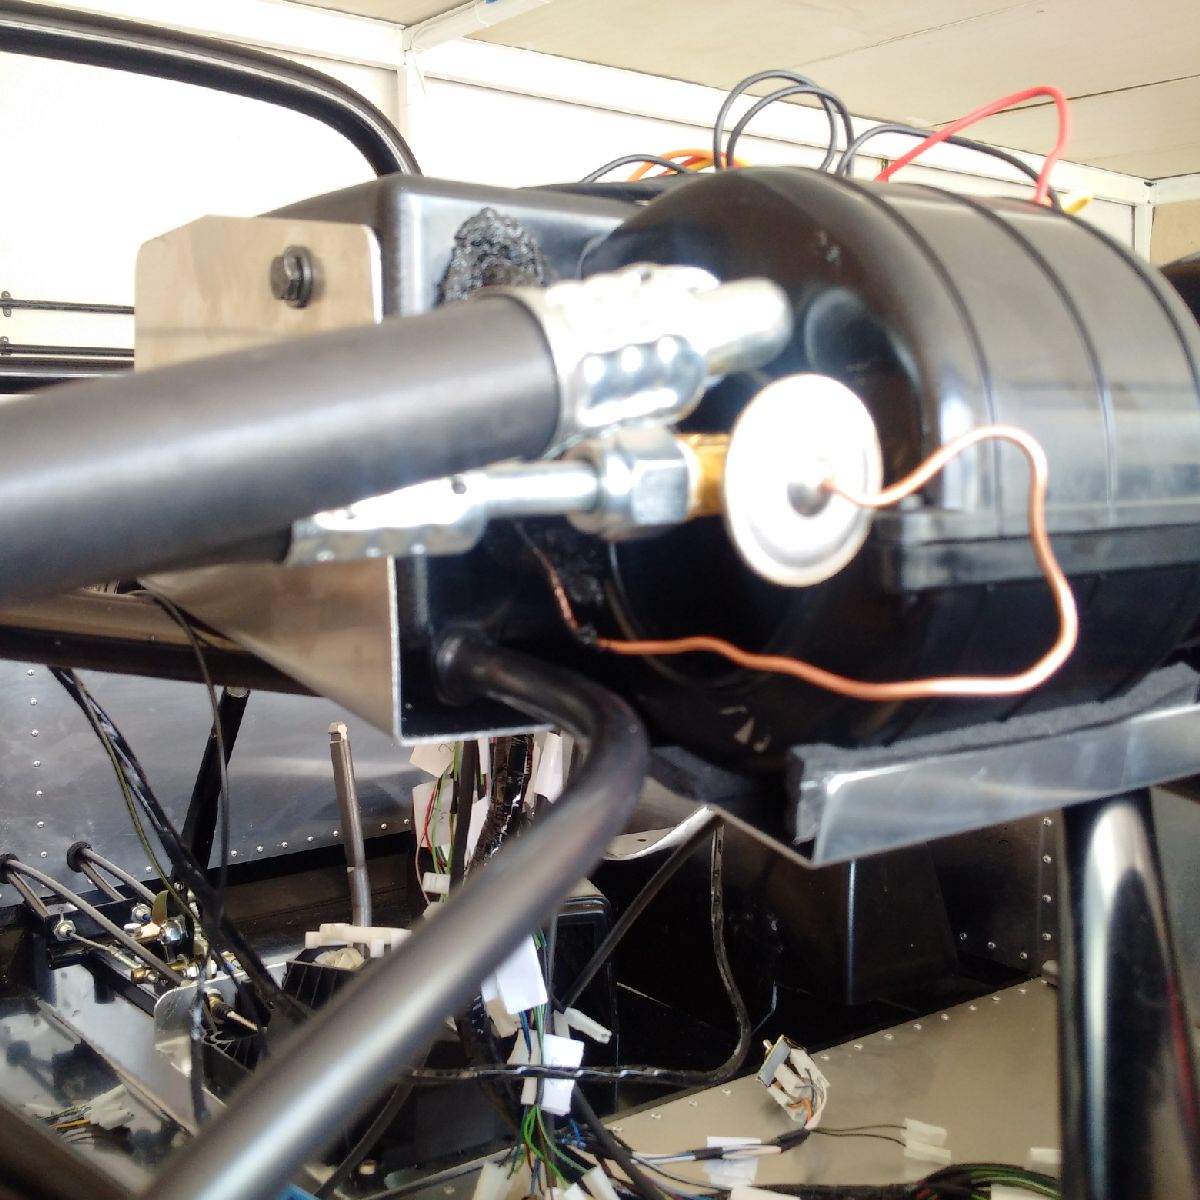
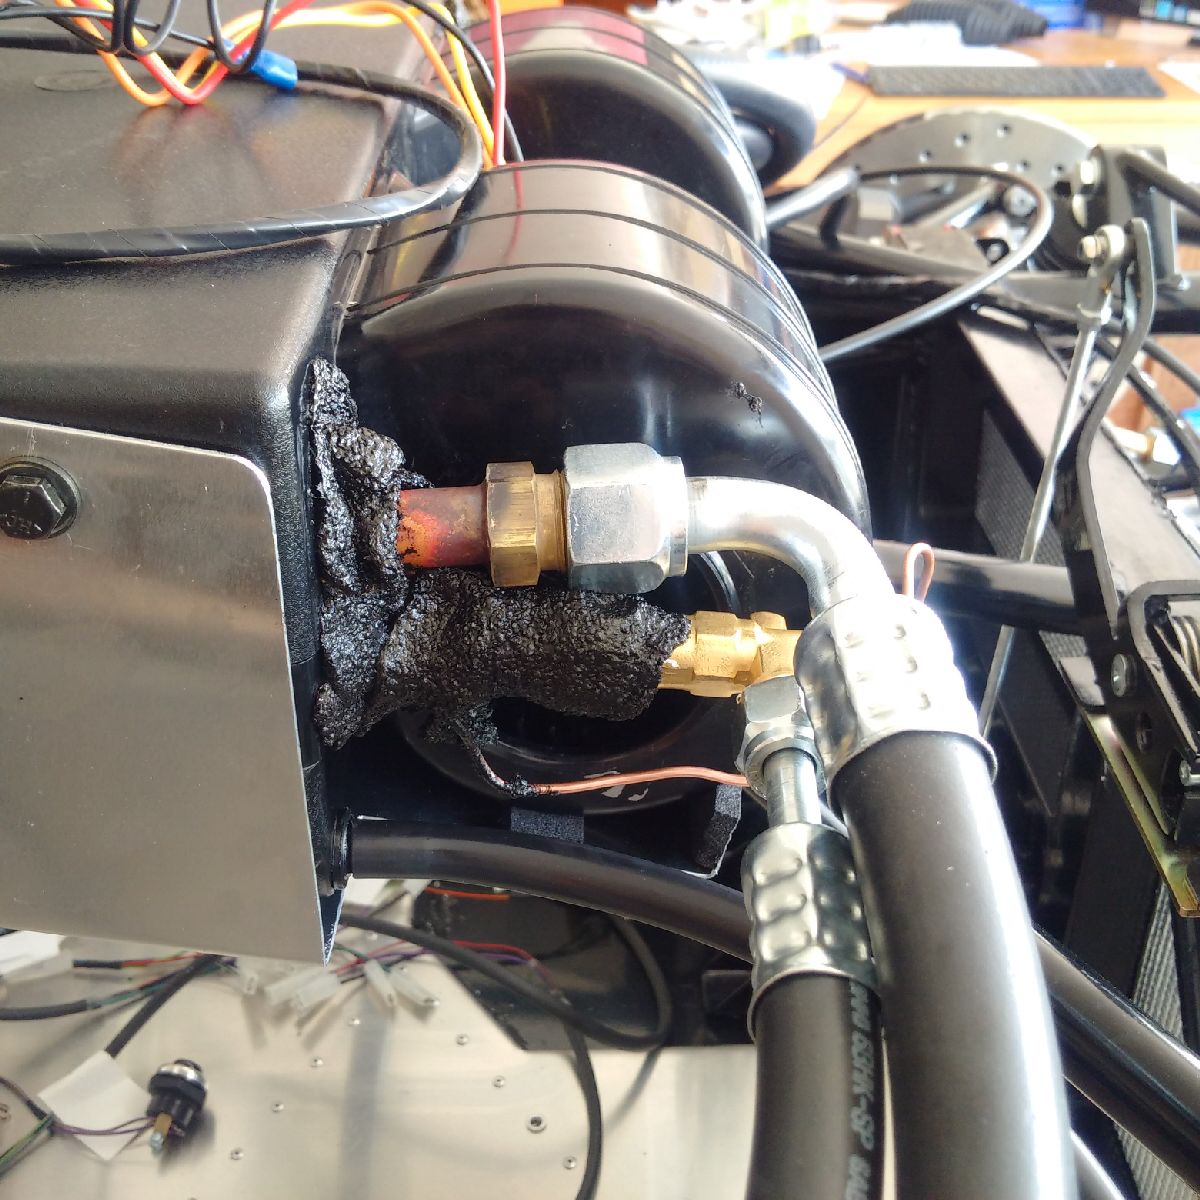
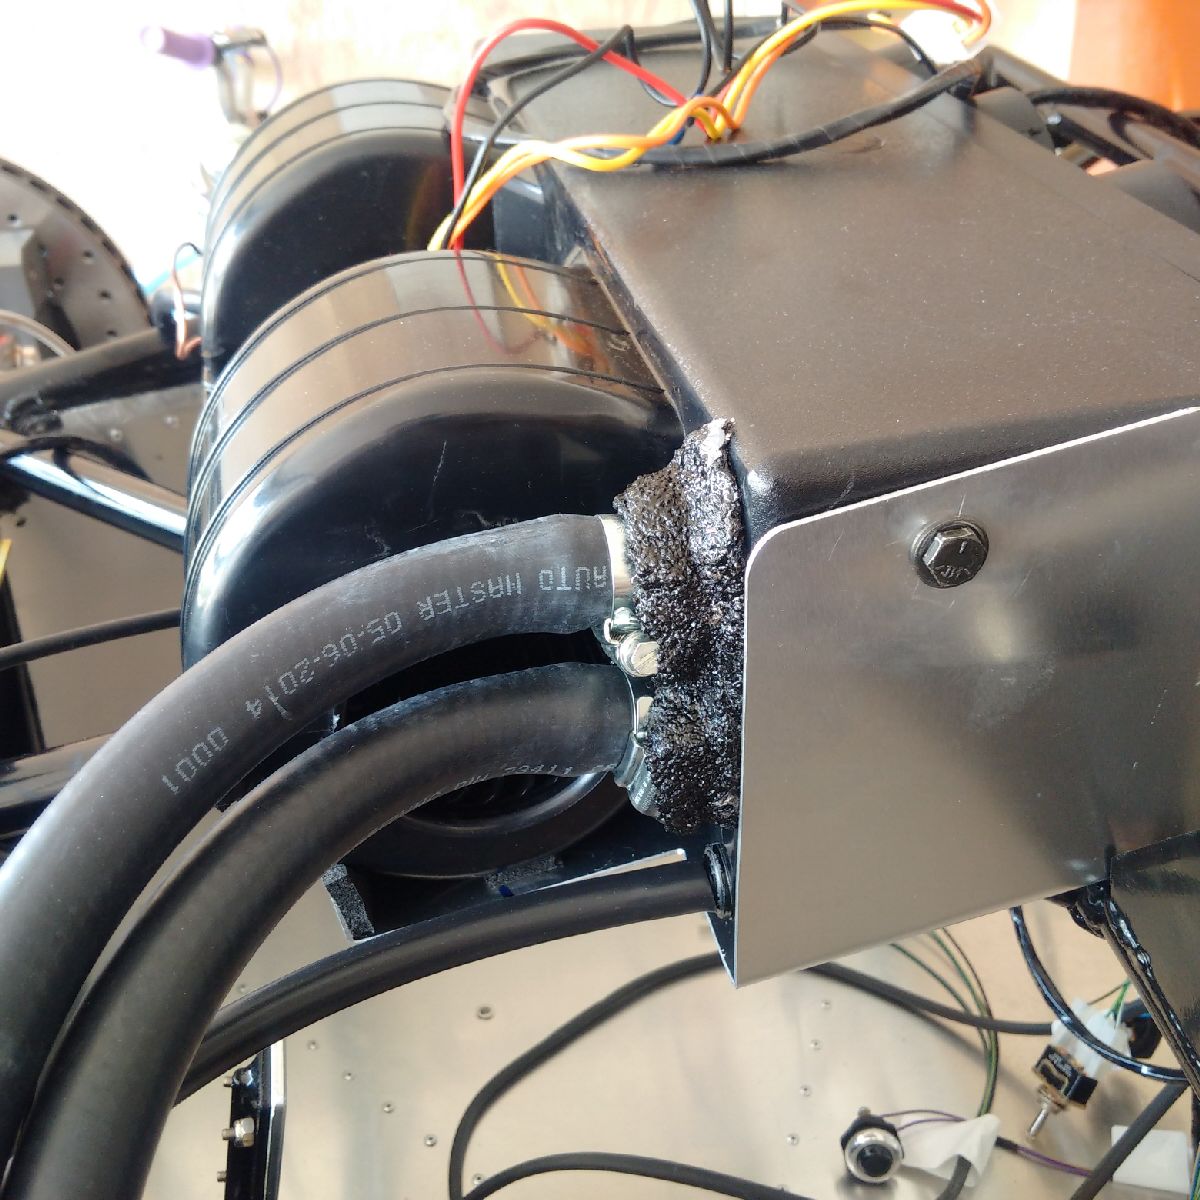
Spent the morning finishing up the AC and heater connections - the heater hoses were dipped in boiling water and then threaded on to their ports on the blower, and tied down with clips. The AC hoses were fitted with the green O-rings, the thermostat installed on the lower AC pipe with the sensor and sticky tape put back into the blower housing unit, and then both AC hoses were tightened down with the large screws. The AC and heater hoses were then zip tied along the chassis all the way to the engine bay alone the sides in preparation for the luggage container.
I then spent a few hours pre-fitting the luggage containers. The factory does a good job in getting the basic notches taken care off, but there was still quite a bit to remove from the corners, for the AC/heater pipes, and along the bottom outer side where the radiator pipes go back to the engine. The passenger side fitted on quite well, but the driver side would not fit - it became apparent that my radiator pipe was sitting too high and the luggage pod would not be able to fit over it... which means I will need to remove the radiator pipe rivets, lower the whole thing, and retry everything - which I am leaving till tomorrow as I am tired on the luggage pods now...
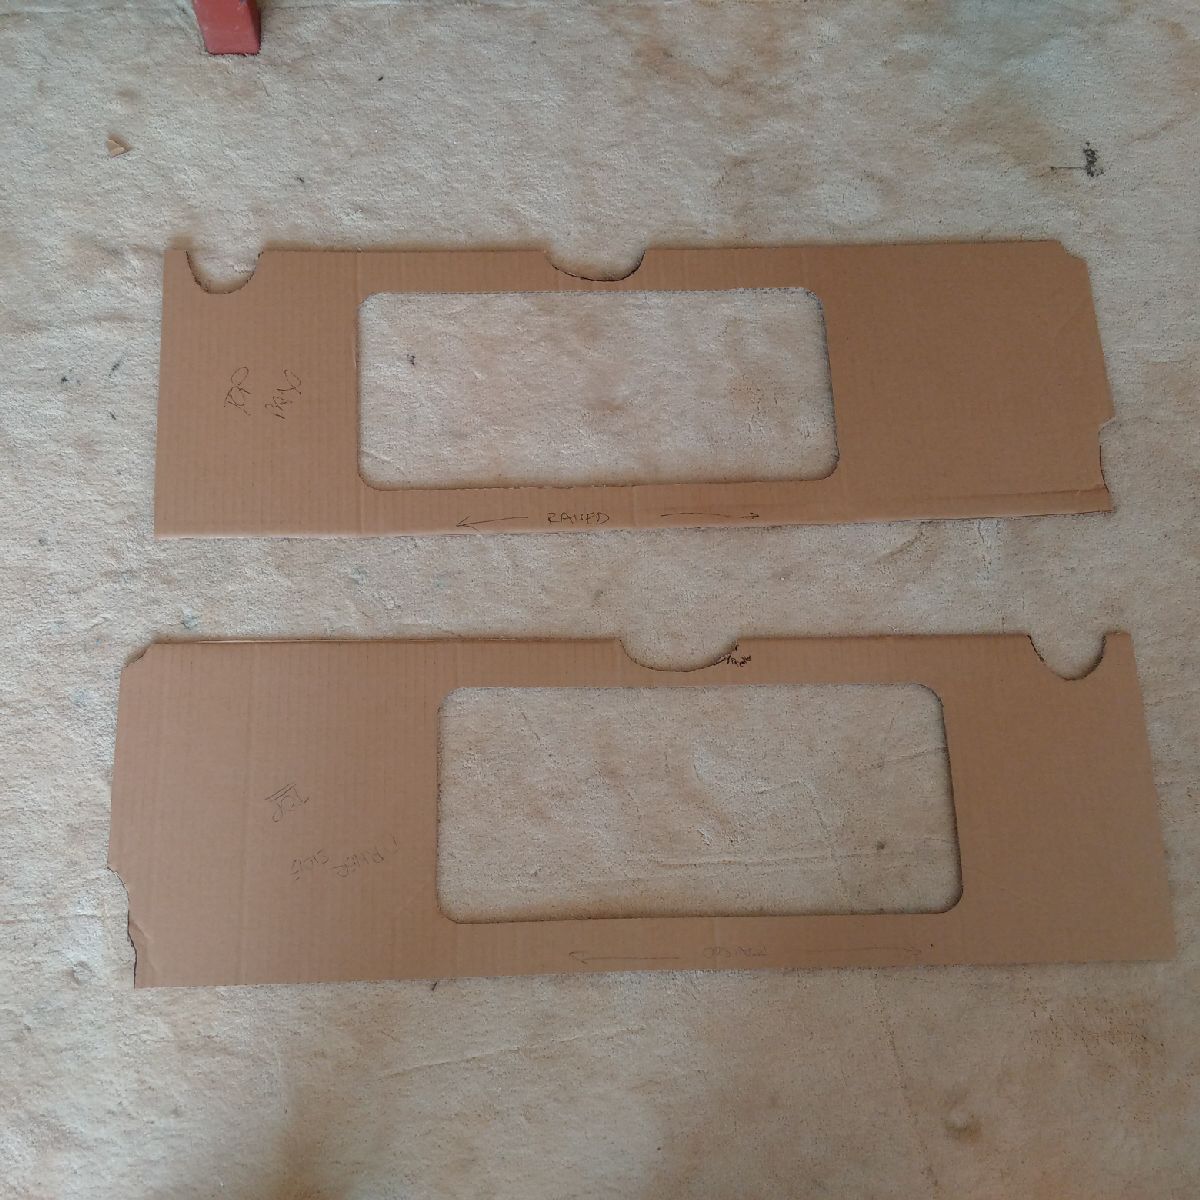
Instead I decided to work on the Cill Covers - now these are the MOST IMPORTANT panel on the car... they are the first thing you see when you open the door, so they have to be perfect. I decided to make a template from the factory cill cover, and then trim and fit that until I got a perfect fit. The template was then transferred to the cill, and the cill will be cut into shape tomorrow.
Final job for today was going over all the interior electric connections on the loom and making a note for all the interior holes that will need to be cut into the centre section of the GRP. I studied the paperwork of the loom, went through the switches, and edited my notes to account for the stack display and the stalks that I will be using - my list now stands at about 25 holes - 5 for stack (stack + 4 buttons), stalks, AC controls, AC vents, ignition/push button, radio, some extra switches for mods, and 5 light bulbs - the light bulbs might eventually also be replaced with a light 'stick'...
A long day in the garage today - tired, so will be back tomorrow...
July 19-21, 2015
Build Time Today: 7 hours
Total Build Time: 122 hours
This is an update for the last 3 days: Didn't get much work in as real work has kept me busy. However, I spent a little bit of time in the garage the last few days and was able to do the following:
The luggage pods were drilled for holes for a pvc pipe (back to front) for future wiring - on both sides. The driver pod was also drilled for four latch cables. Finally, both pods were drilled for the cable tie holders. The pods were then placed on the chassis, and chassis drilled, deburred and waxoyled. The radiator pipe was also lowered a bit to allow the drivers side pod to fit. The pods were then covered with insulation on the outside, and black carpet on the inside - the first bits of interior trim are now on!! The pods are now ready for final fixing - which will hopefully be done tomorrow.
Also, time was spent on leveling the chassis on the dolly - it took a while, as the rear passenger side was lower by almost 5mm that the rest of the chassis - I guess either my floor isn't level, or the dolly isn't... anyway, the chassis was finally leveled, and the preliminary alignment can now be carried out - again a job for later this week.
Finally, I spent a little time trimming the cill cover in place. They are still not 100% done, but the time spent on this will pay off as they need to be perfect!
Also, sharp eyes will notice that I have three hoses/cables running on the passenger side - 2 AC hoses, and the LS engine loom. I layed the loom out from now along with the AC hoses, so that the luggage container can be trimmed for all 3 together, rather than have to cut a separate hole in the future. This will also save me from having to work inside the pod...

July 22, 2015
Build Time Today: 4 hours
Total Build Time: 126 hours
Another long day in the workshop. I was able to get quite a bit done... First, the luggage containers were riveted to the chassis. The usual combination of sikaflex and riveting most of the time today - I was not able to get a drill or rivet gun into the engine facing side, so ended up drilling a larger hole from the outside and securing that end with a bolt/nut. Both luggage containers were finally in! I also installed the 4 canopy latch release cables, and ran some extra wires and rope inside the pvc pipe for future wiring.

I then got both cill covers trimmed and fitting perfectly. The cill covers were then marked for matching rivet holes from the side ally panels. That done, I decided to call it a day.
July 23, 2015
Build Time Today: 6 hours
Total Build Time: 132 hours
A long day in the workshop again!
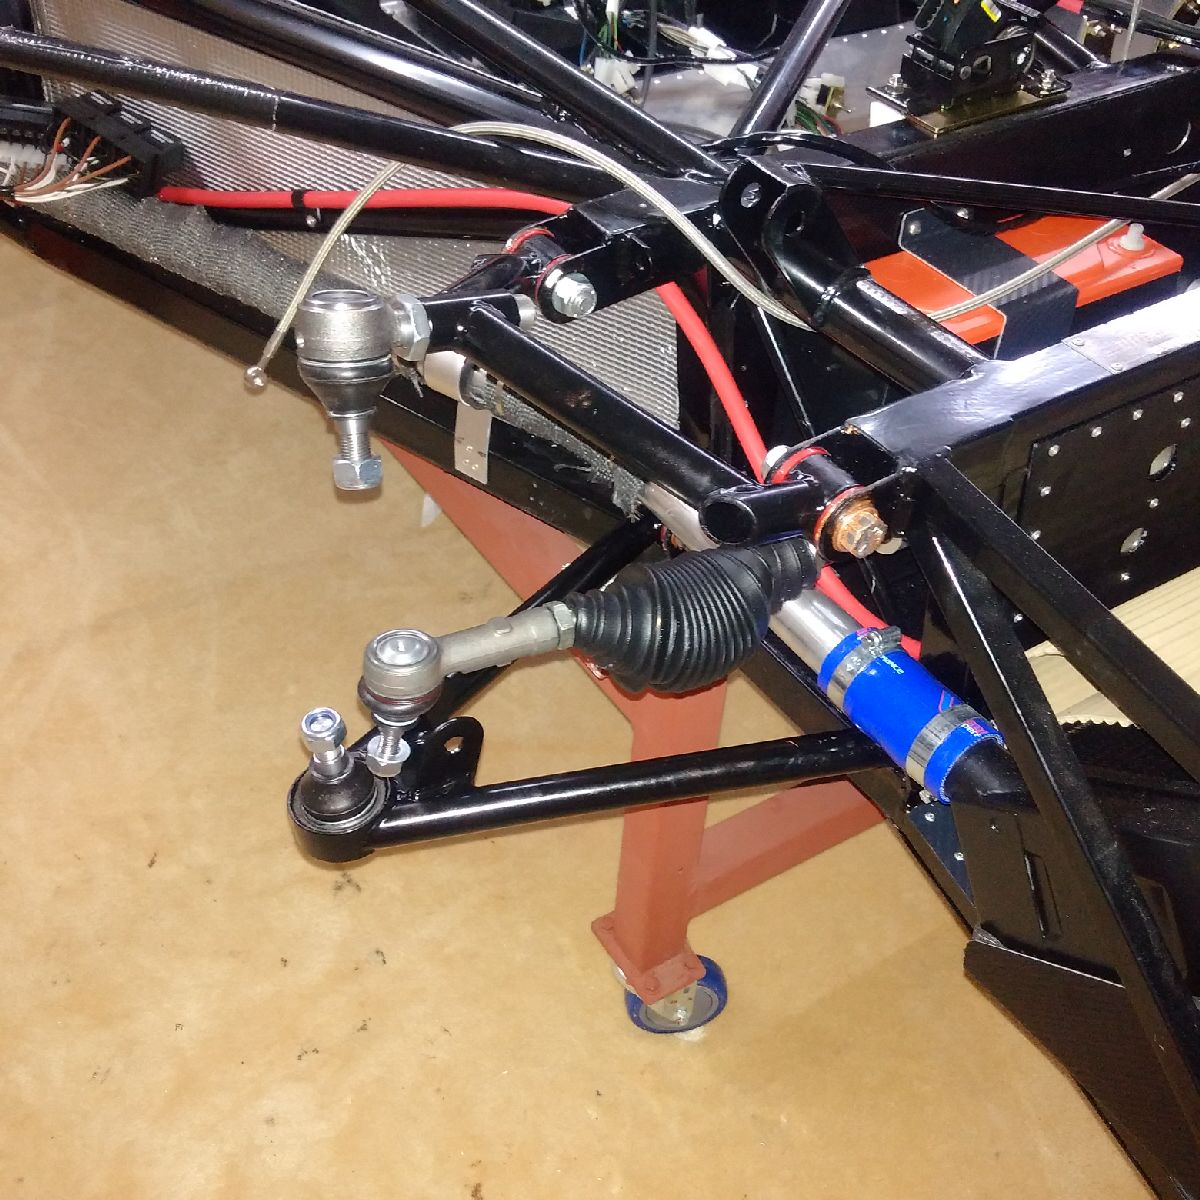
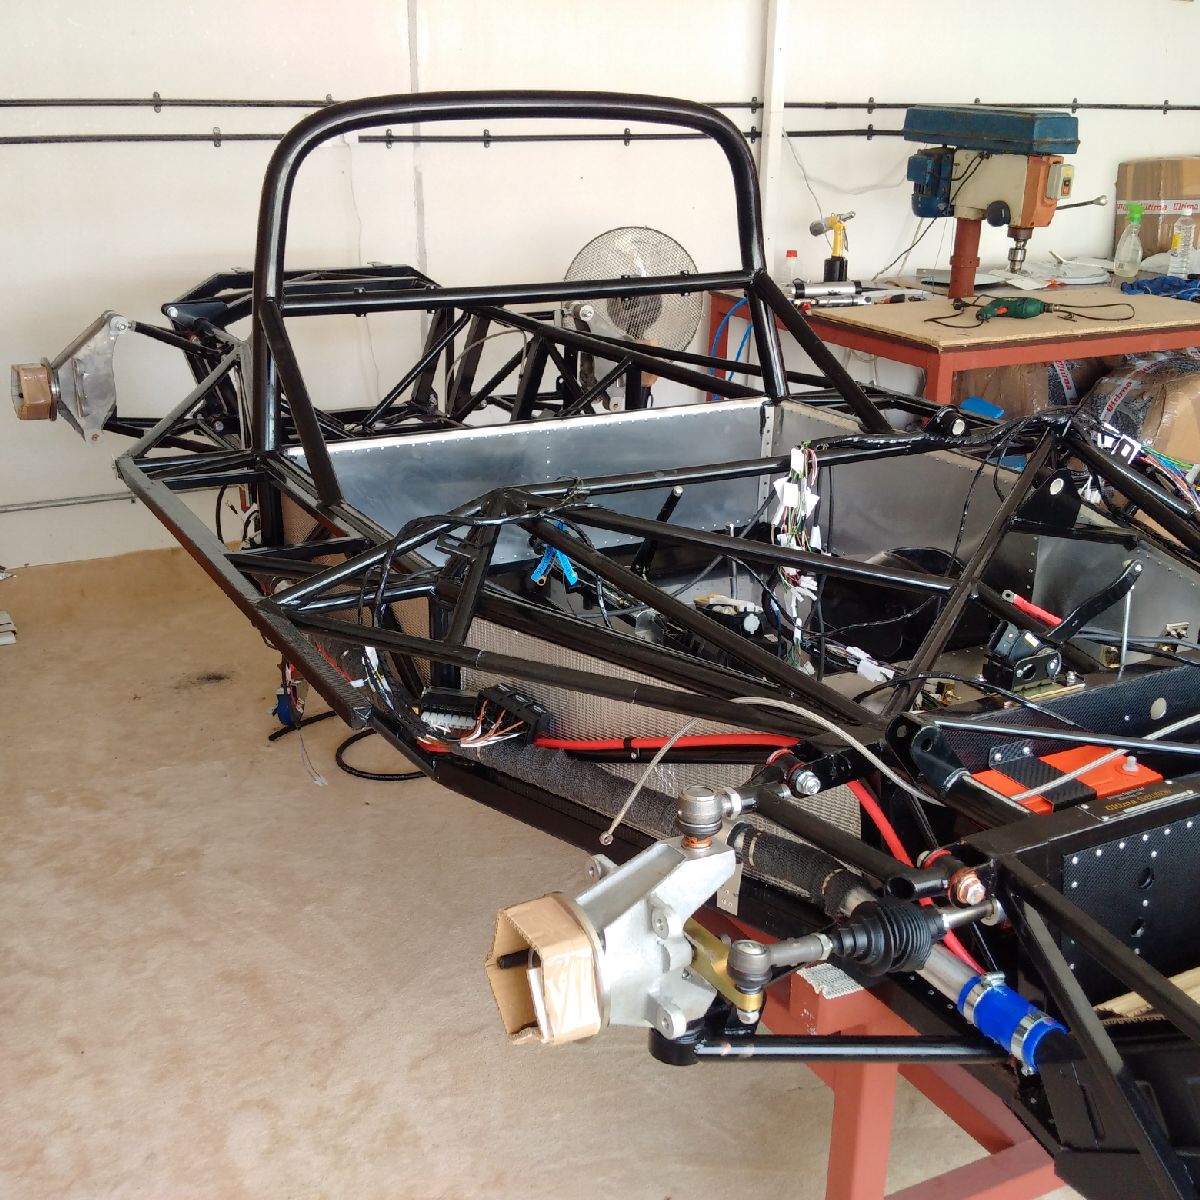
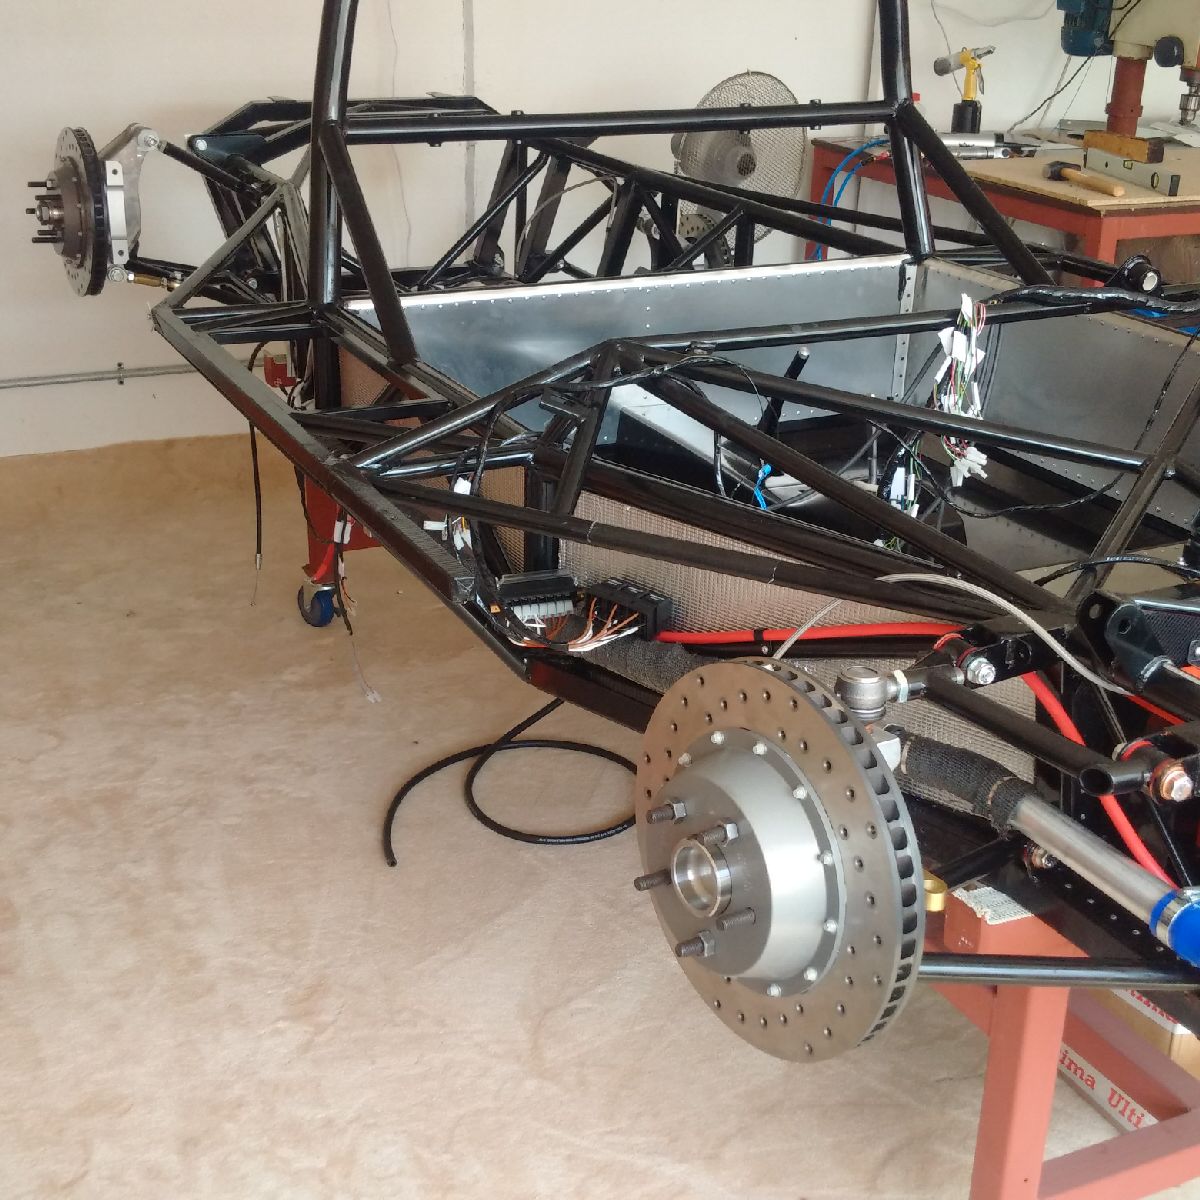
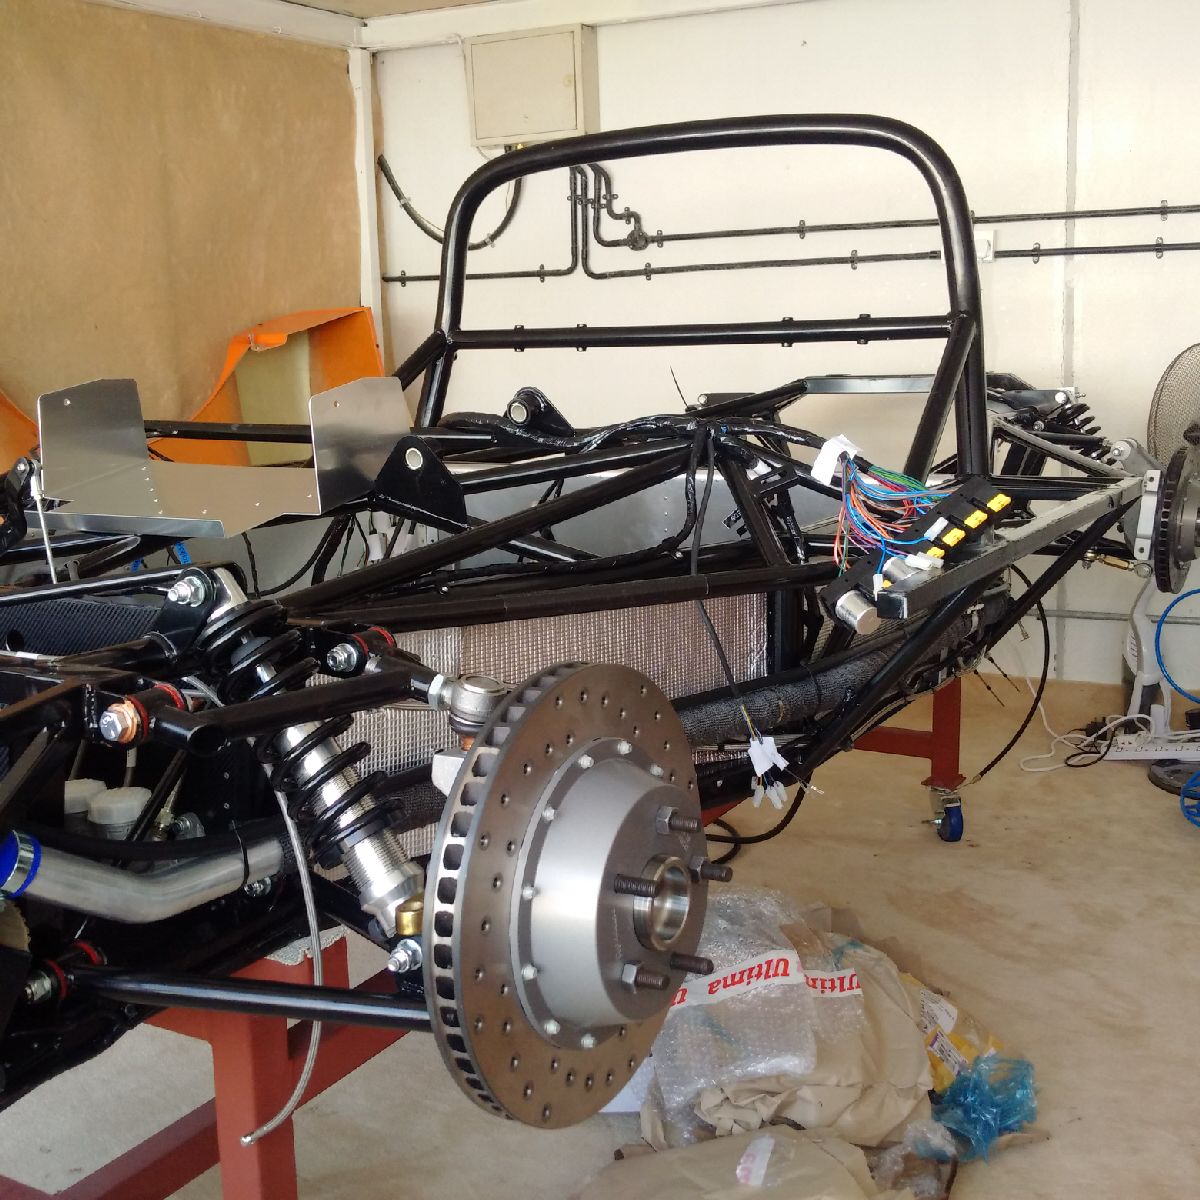
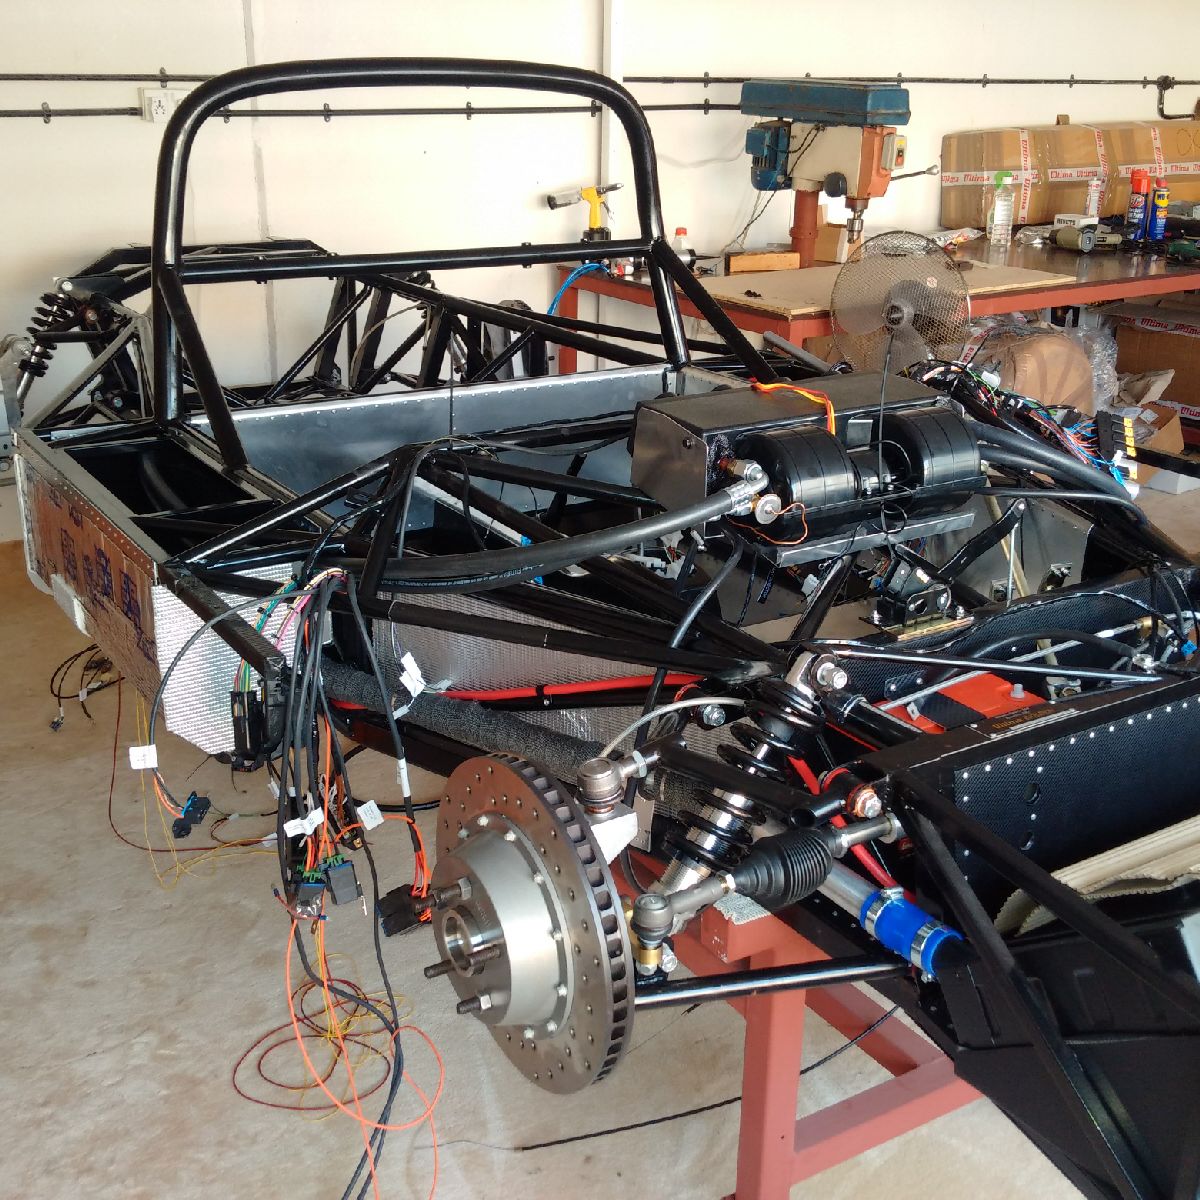
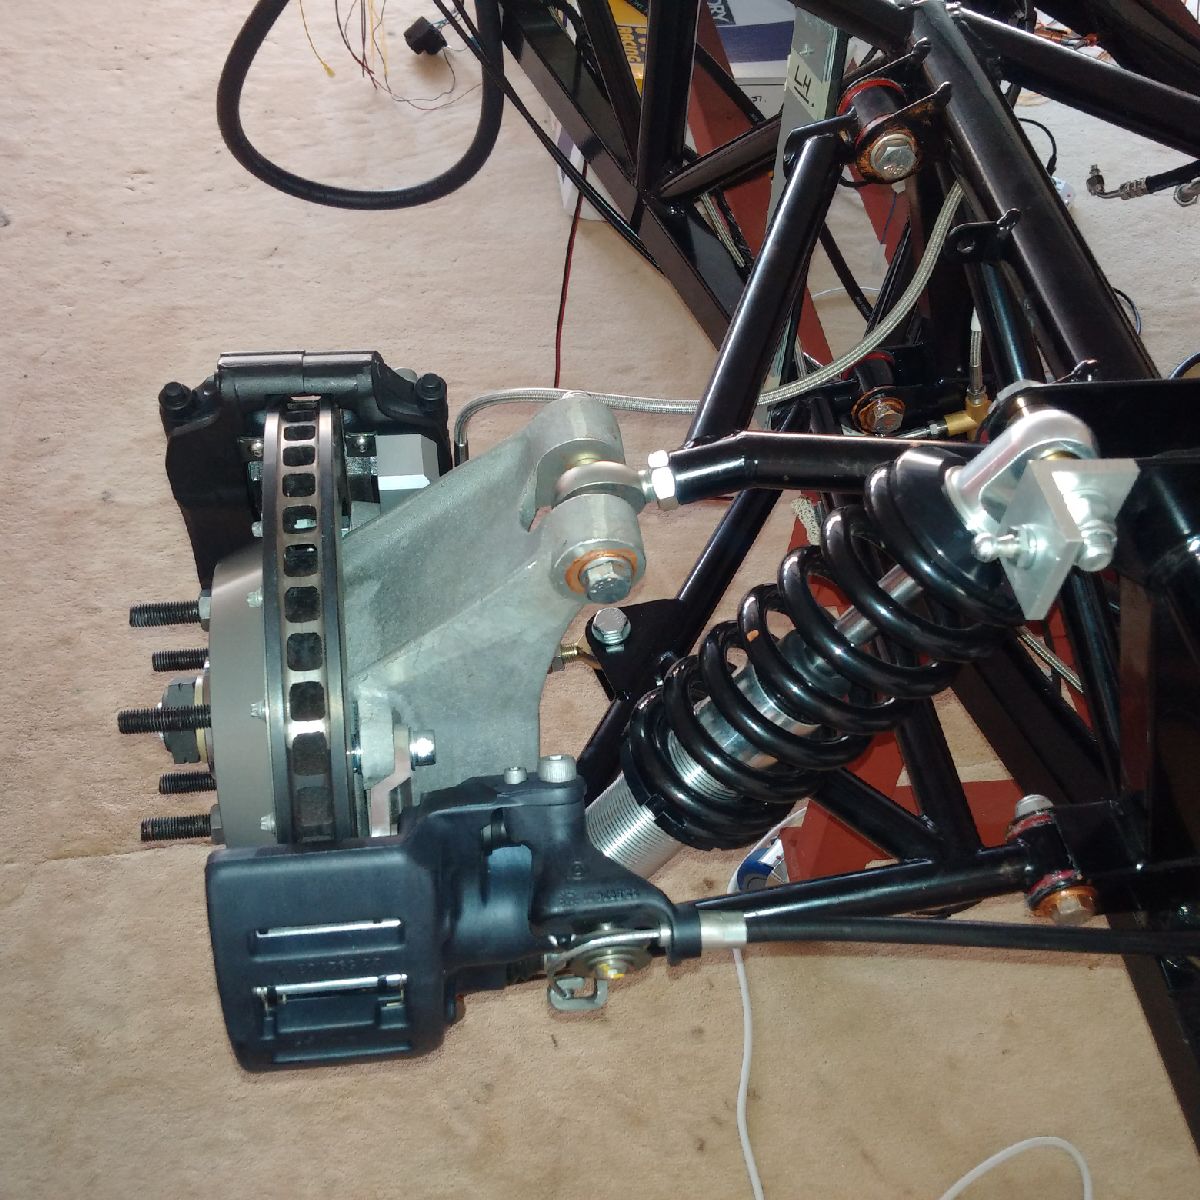
Started the morning with getting the preliminary alignment done... First I created a box using 2 straight steel box bars and some rope. The box was then used to align each individual wheel - first toe (set to zero), then camber (also set to zero), re-adjust toe and camber until both were exactly straight ahead and vertical. All four wheel were done, and then all the bolts were tightened down as per specifications - bolts for wishbones, dampers, uprights, and steering rack.
Once the alignment was done, I then proceeded to install the AP brakes and handbrakes. The calipers were mounted onto the brackets with loctite, and the pads and anti-rattle clips were then installed. The brake lines were installed into the calipers. Handbrakes were similarly installed, with the handbrake cables also being connected to their clips. All done, and I almost have a rolling chassis (save the steering column which is still pending to receive from Ultima)

July 24, 2015
Build Time Today: 5 hours
Total Build Time: 137 hours
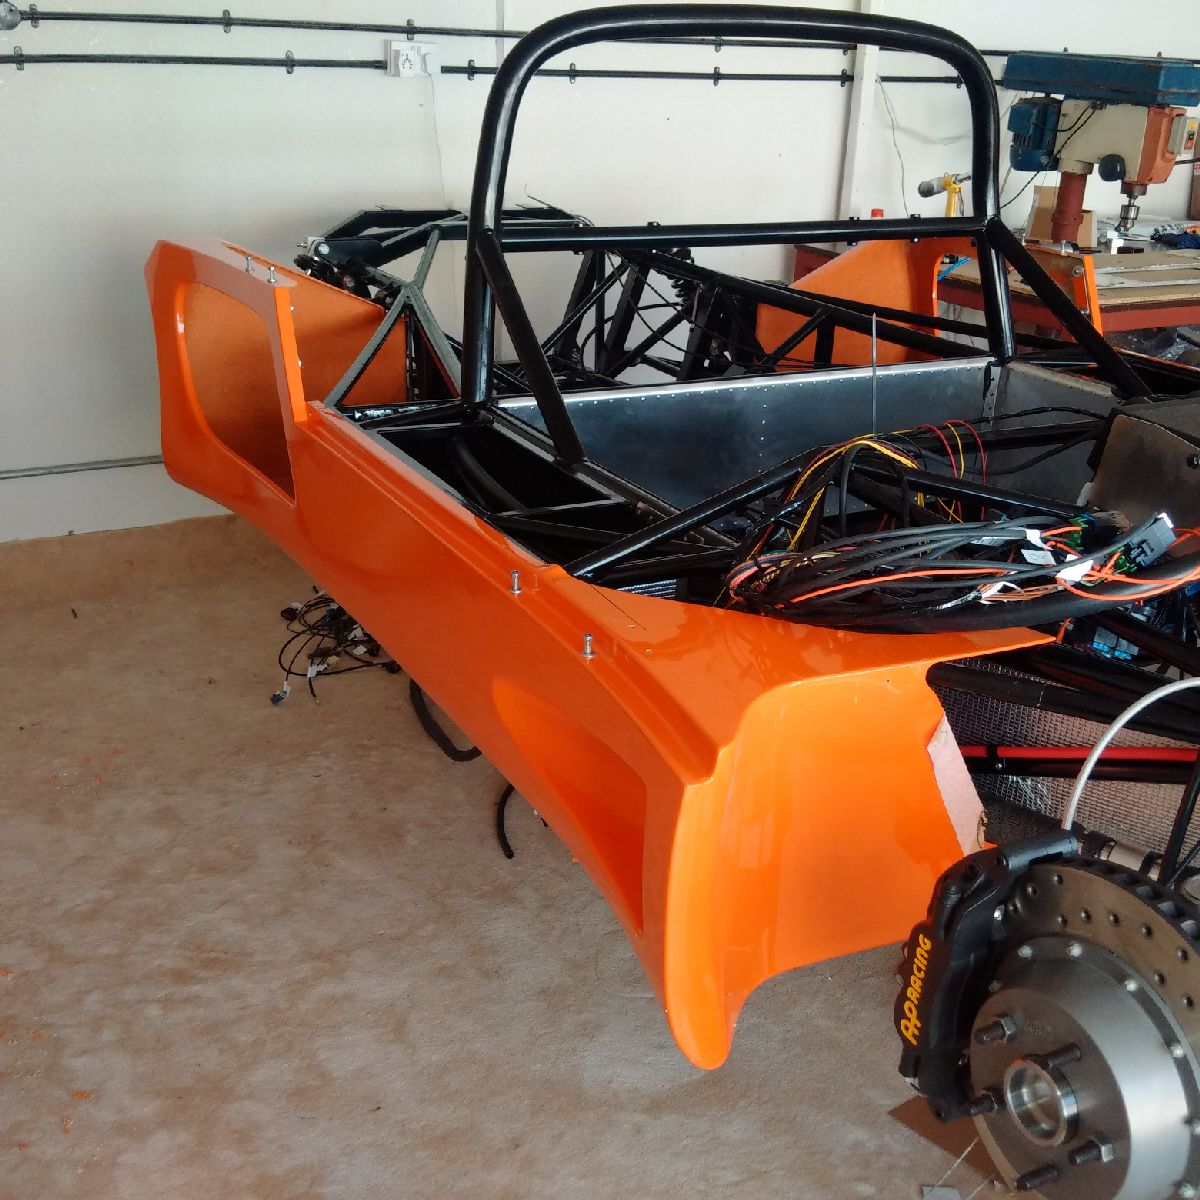
Today I finally started to work on the body!
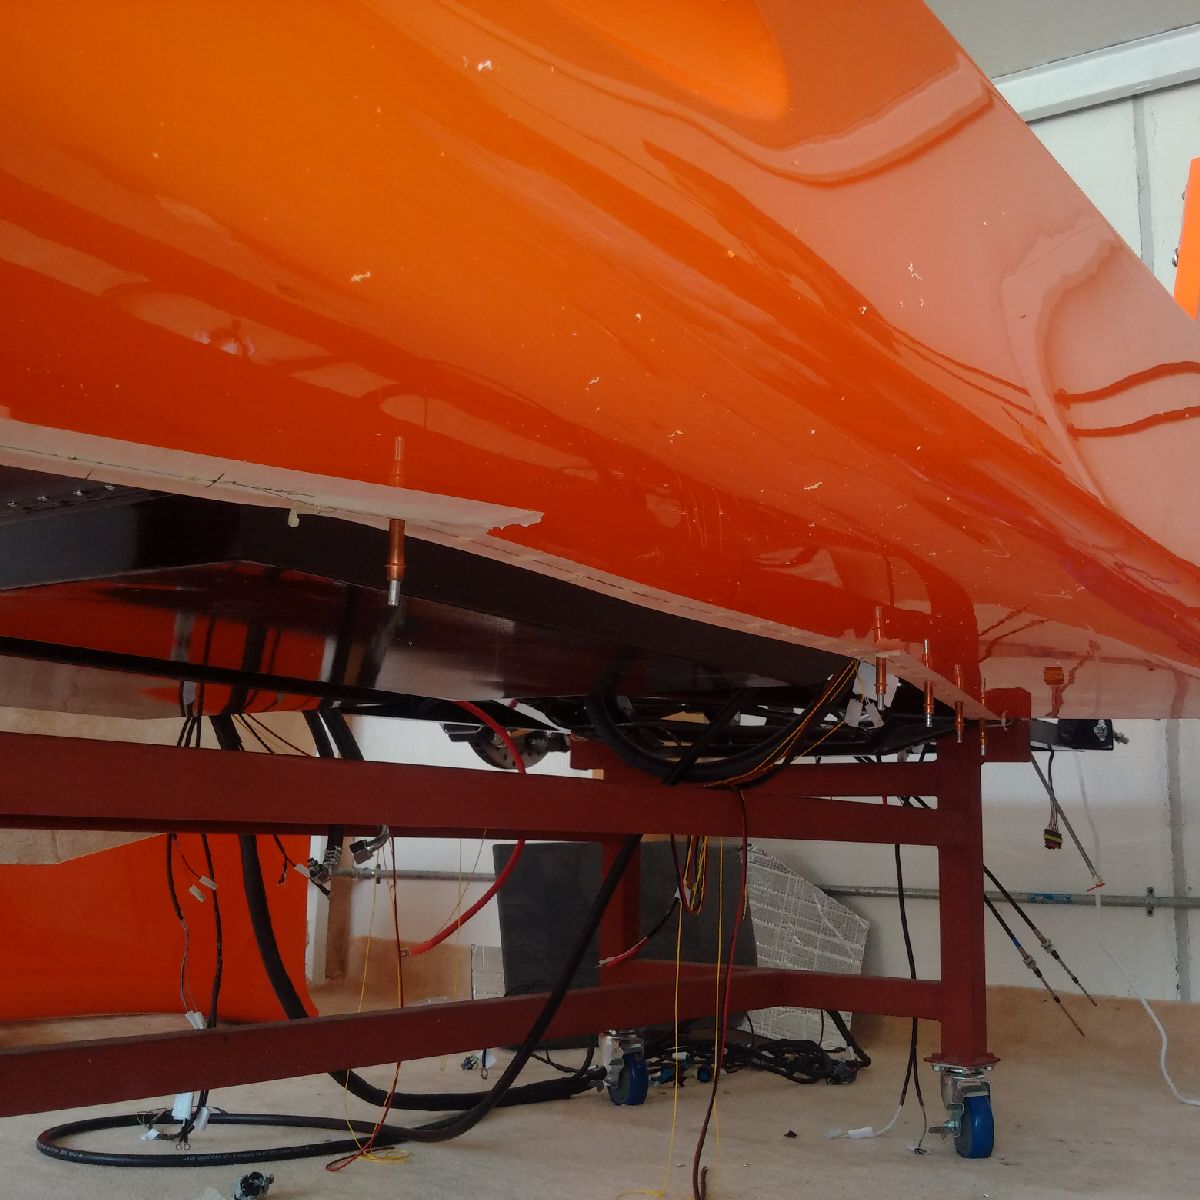
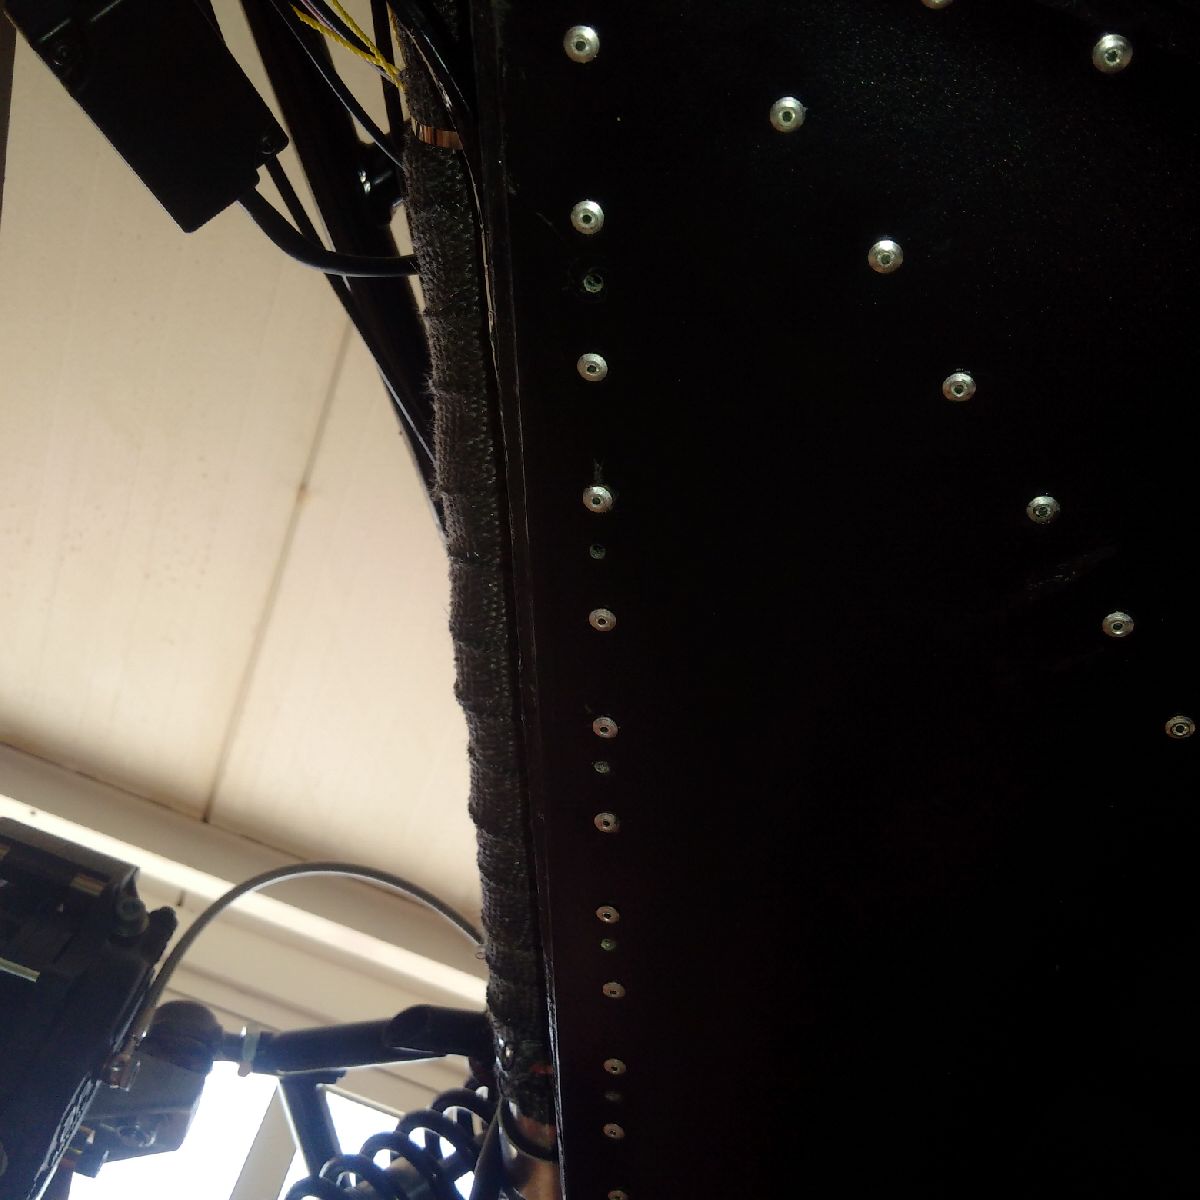
The driver side pod was the goal of the day... First, I placed it on the chassis using the factory pre-fit marks, and marked for the front radiator pipe area which needed to be cut away. The area was slowly nibbled, and the side pod trial fitted on the chassis again and again until a very close fit was found. I would say it took about 6-7 iterations before the cutout was perfect. Once the side pod was sitting properly, I marked the bottom edges for the chassis rails using some basic match. The side pod was then drilled for rivet holes, and the side pod then placed on the chassis, and the chassis drilled and waxoyled. My math paid off because the chassis holes are placed perfectly on the lower rails!

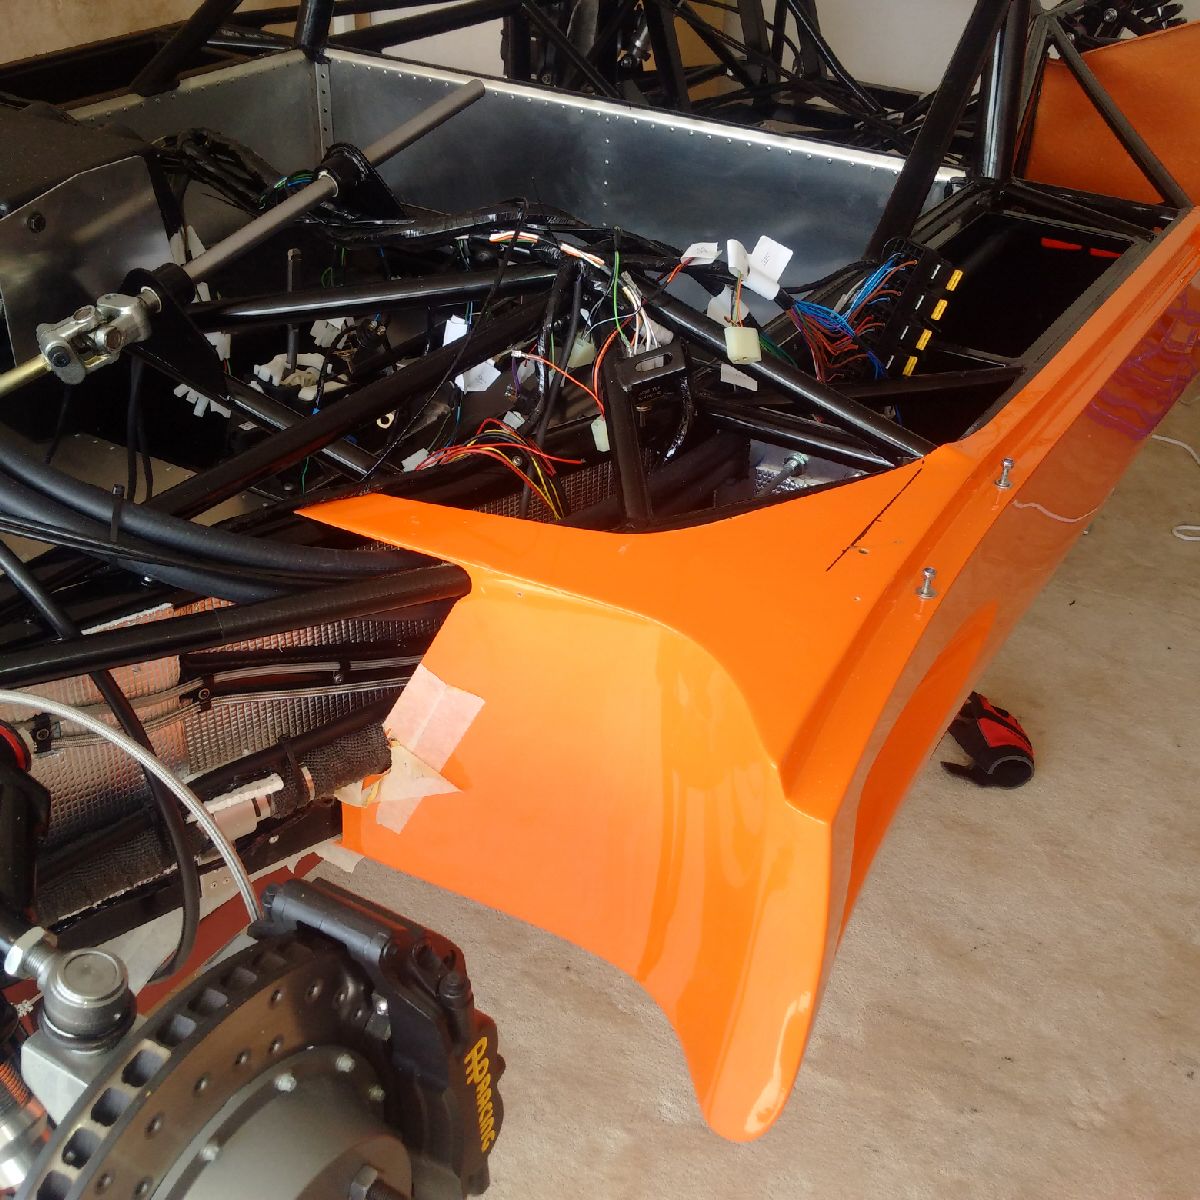

I then started work on the passenger side pod. It was similarly placed
on the chassis and the area for the return radiator pipe was cut out.
Once perfect, I marked the bottom edges for the rivet holes. Drilling
the holes in the pod and the chassis will be done tomorrow.

July 25, 2015
Build Time Today: 5 hours
Total Build Time: 142 hours
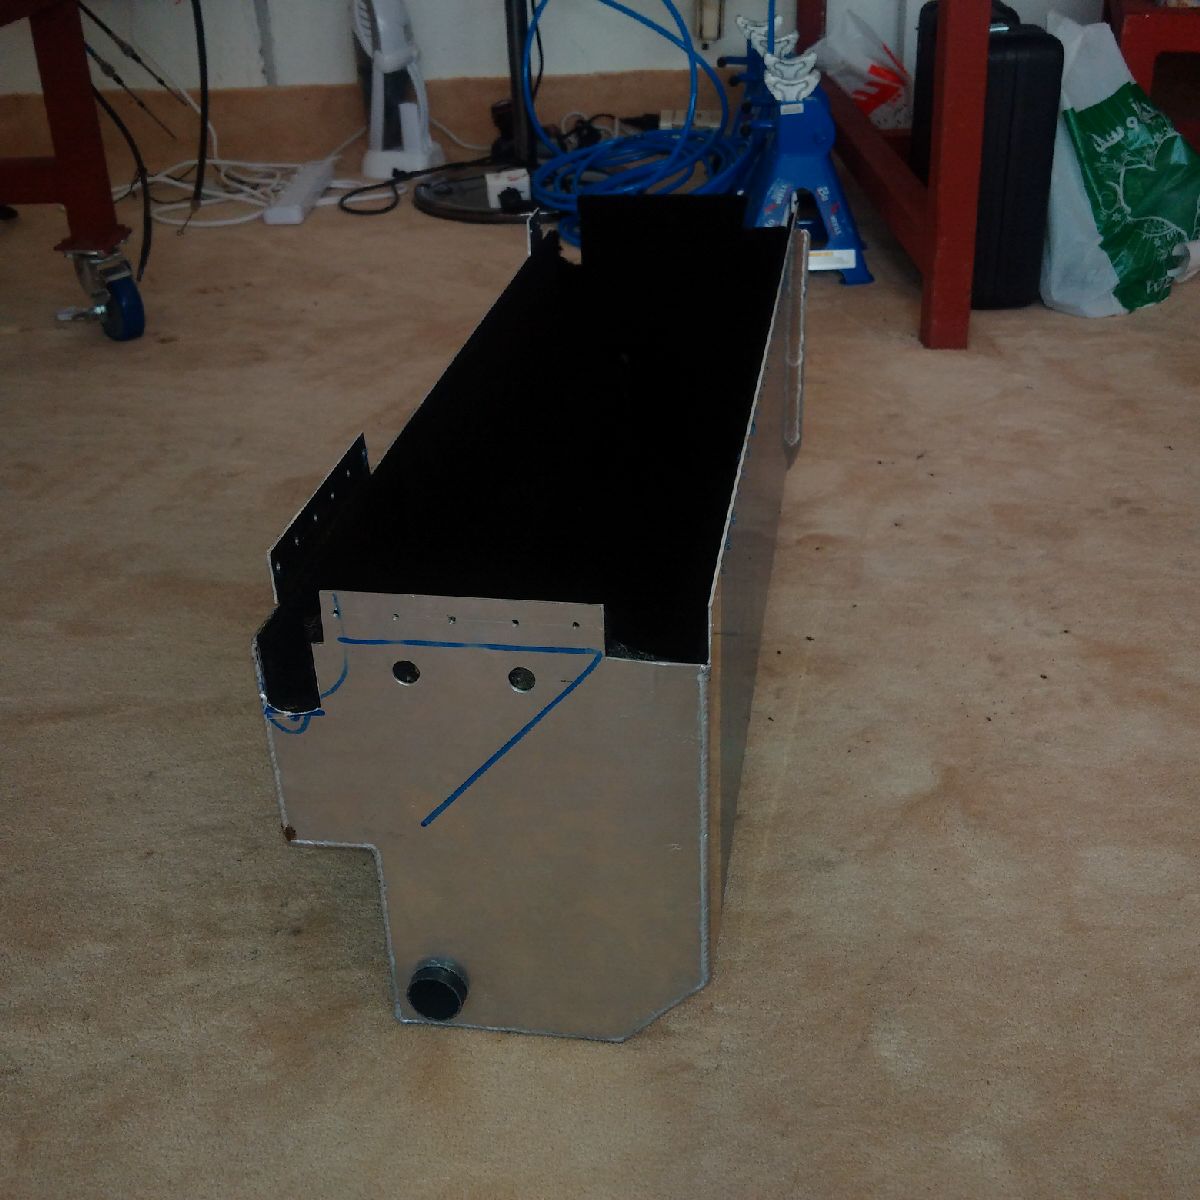
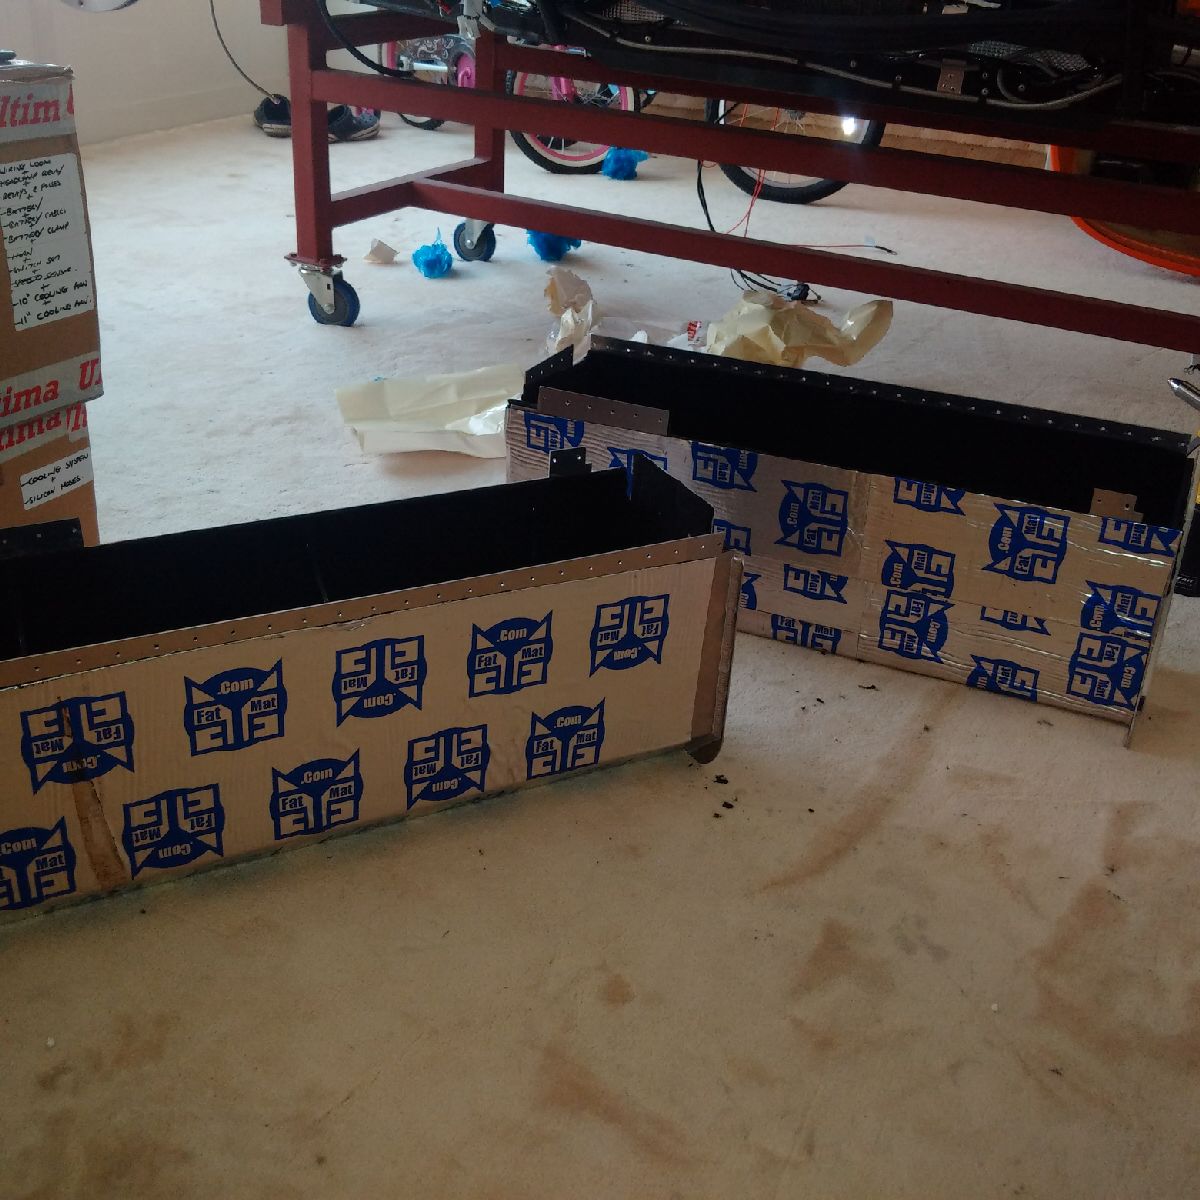
The passenger side pod was drilled, and then placed on the chassis and the chassis drilled as well. The chassis waxoyled, and both side pods were put on the side while I prepare the fuel tanks - the tanks need to be installed before the side pods are final riveted onto the chassis.
The fuel tanks were prefit to check for clearance of the radiator pipe, and then covered with paper and tape so that the non-visible parts can be painted with tough black. Once the tanks were dry to touch, I took them back into the workshop and started covering them in DEI Gold - an extreme heat insulation to help keep the fuel cold during use. Then the VDO fuel level sensors were installed, taking care to remove the pin from each sender before inserting it into the tank.

After the tanks, I decided to work a little more on the cill covers. The ally spacers that sit between the cill and chassis were glued to the cill cover using the sikaflex. A little extra is on there, but that will be removed when I CF the cill cover tomorrow.
July 26, 2015
Build Time Today: 2 hours
Total Build Time: 144 hours
A real short day in the workshop. I basically only had time to do a few small things:
I installed the electronic heater valve. I am not using the Ultima pull cable valve, instead I have sourced a 4-port electric valve that opens/closes with a turning knob. The valve itself was installed the driver luggage container where the heater hoses run through.
After that, I taped up the side pods, and painted them with the tough black on the inside. Once painted, I left them to dry for the day
July 27, 2015
Build Time Today: 3 hours
Total Build Time: 147 hours
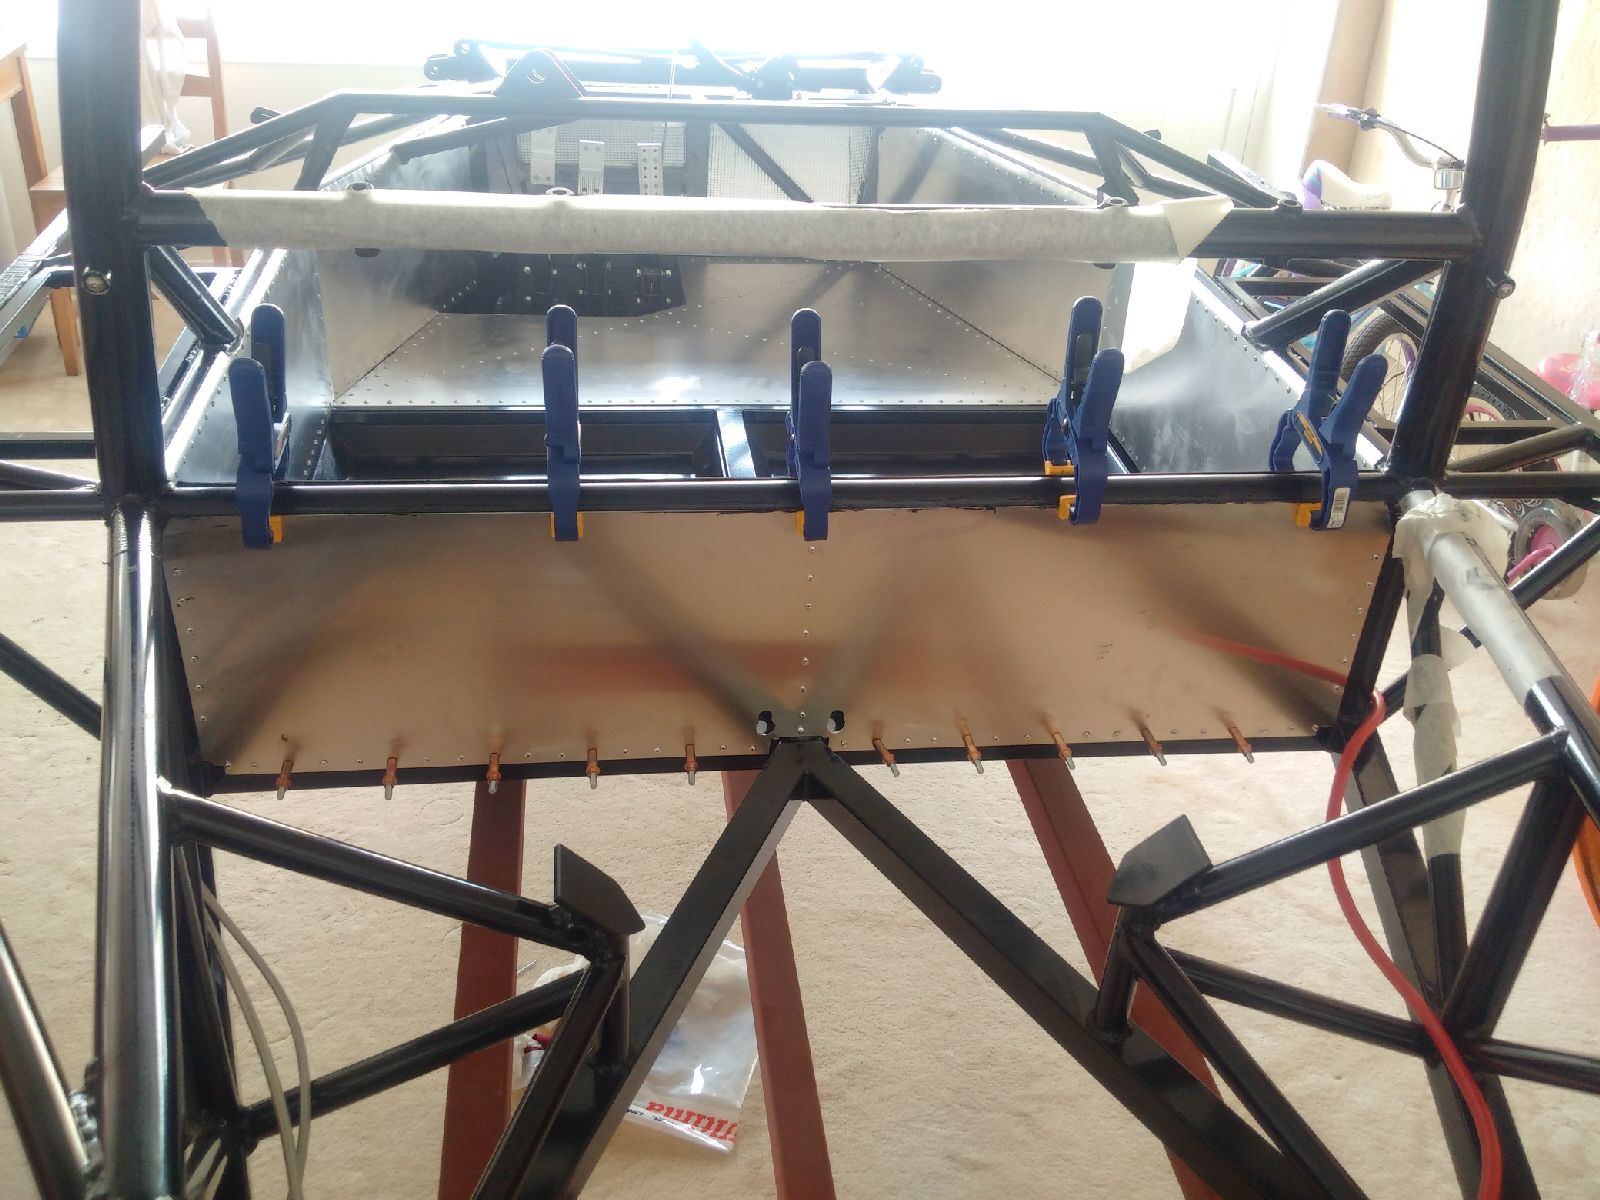
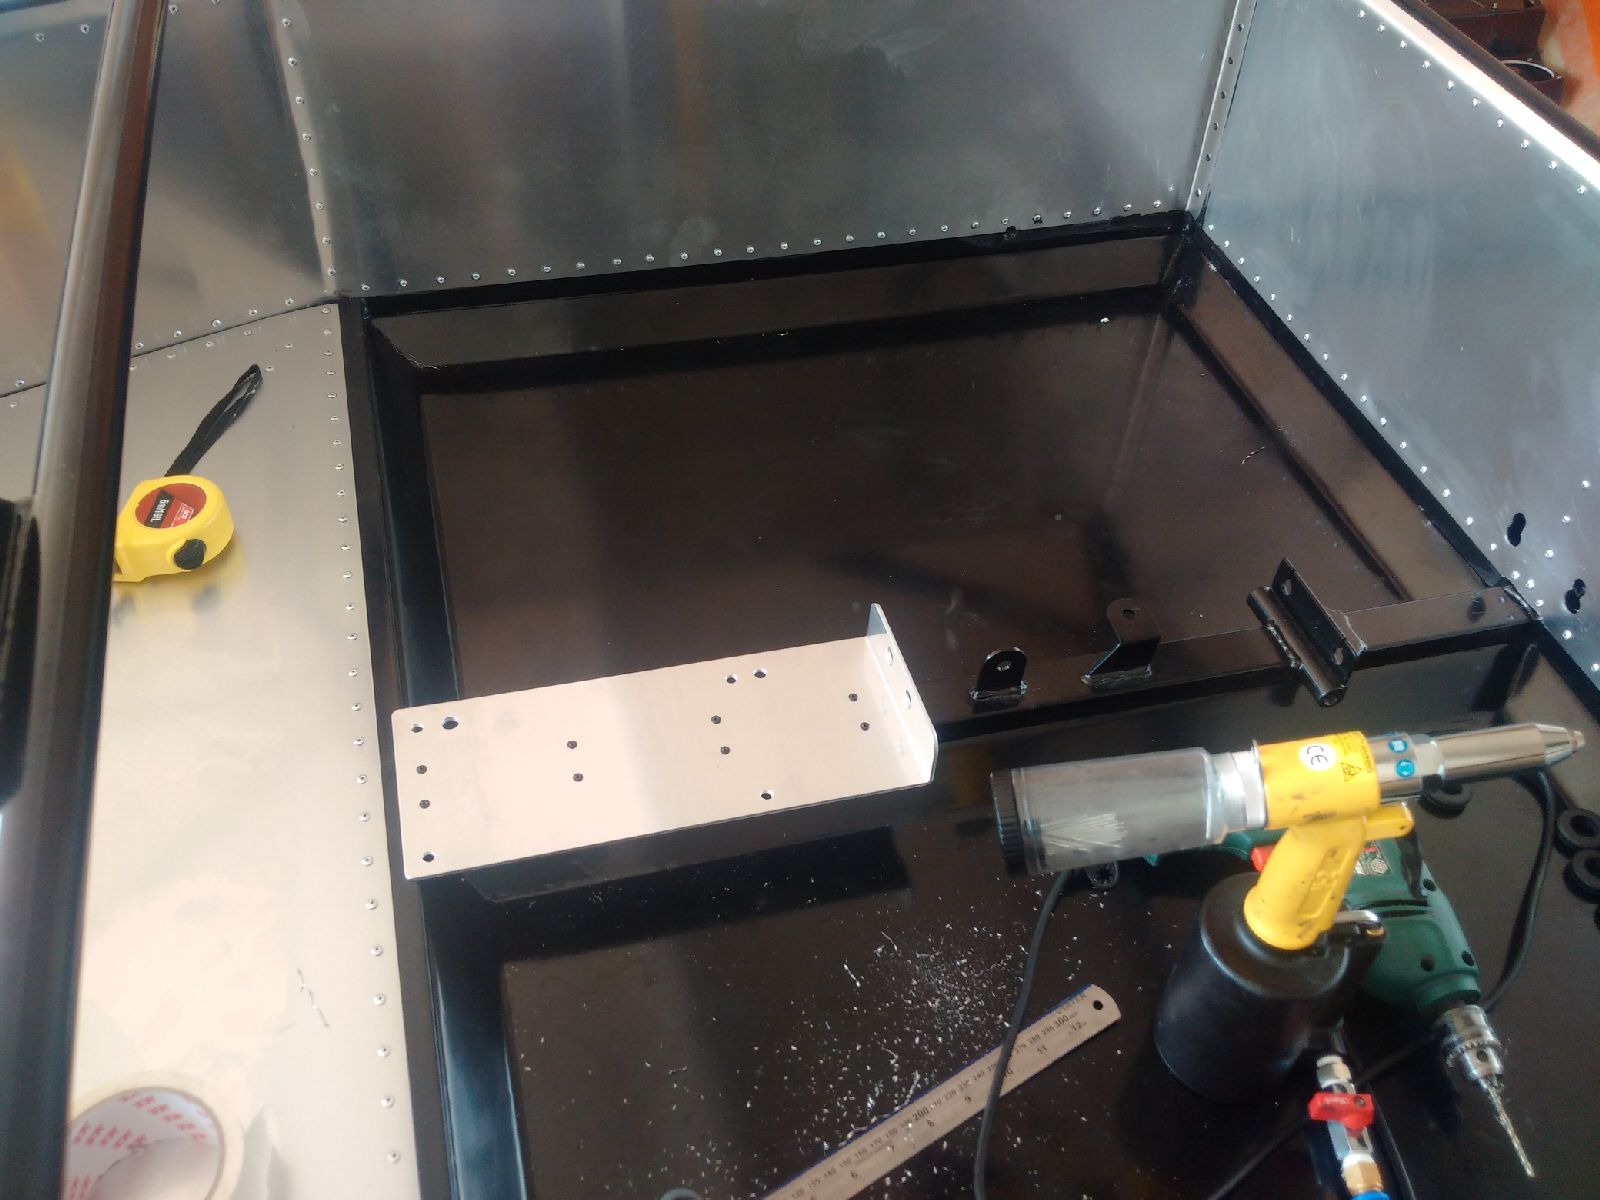
The fuel tank and side pods were fitted to the chassis (temporarily) so that I could start work on the engine bulkhead panel. I am still waiting for the final parts from Ultima (including the grill mesh) so I cannot rivet the sidepods yet.

The center rear section was then temporarily put on the chassis, so that I could mark the rivet lines in the middle. Then I removed the center section and laid it on the floor to mark all the holes required for the swirl pot, expansion tank, AC drier, regulator, and cable ties. After marking the section, I called it a day and left the drilling for tomorrow.

I am doing the center section holes together because I will having the
car interior installed soon, and I don't want to have to drill through
the leather later on. Thus by making all the holes now, I can safely
trim the interior without worrying about having to drill more holes.
July 28, 2015
Build Time Today: 6 hours
Total Build Time: 153 hours
Despite spending almost all day in the garage, at the end of the day there seemed to be NO visible progress! It was just one of those days:
All rear center section holes were all drilled, including the lower line rivet holes which will overlap the ally engine bulkhead. I had ended up double checking a lot of holes to make sure they were in the right place, because space in the engine bay is at a premium and I had to make sure the positioning was correct so that the engine could fit later on.
After the rear center section holes, I decided to continue with the same strategy and ended up marking and drilling all the holes on the engine bulkhead - holes for the radiator, cooling, heating hoses, electrical wires, cables, fuel pump and filters. The only holes not yet marked or drilled are for the Pollack valve, which I will try and get to tomorrow when I start installing the items on the bulkhead.
So despite a lot of marking and drilling, there seems to be no visible progress today (except a bunch of holes)!!
July 29, 2015
Build Time Today: 1 hours
Total Build Time: 154 hours
Just a short stop in the garage today to finish up the engine bulkhead drilling - I drilled the holes for the Pollack 2-tank change over valve, and also fitted the rivnuts for the valve and HP pump. Thats it for today!
July 30, 2015
Build Time Today: 3 hours
Total Build Time: 157 hours
Today I started work on the electrical system!!
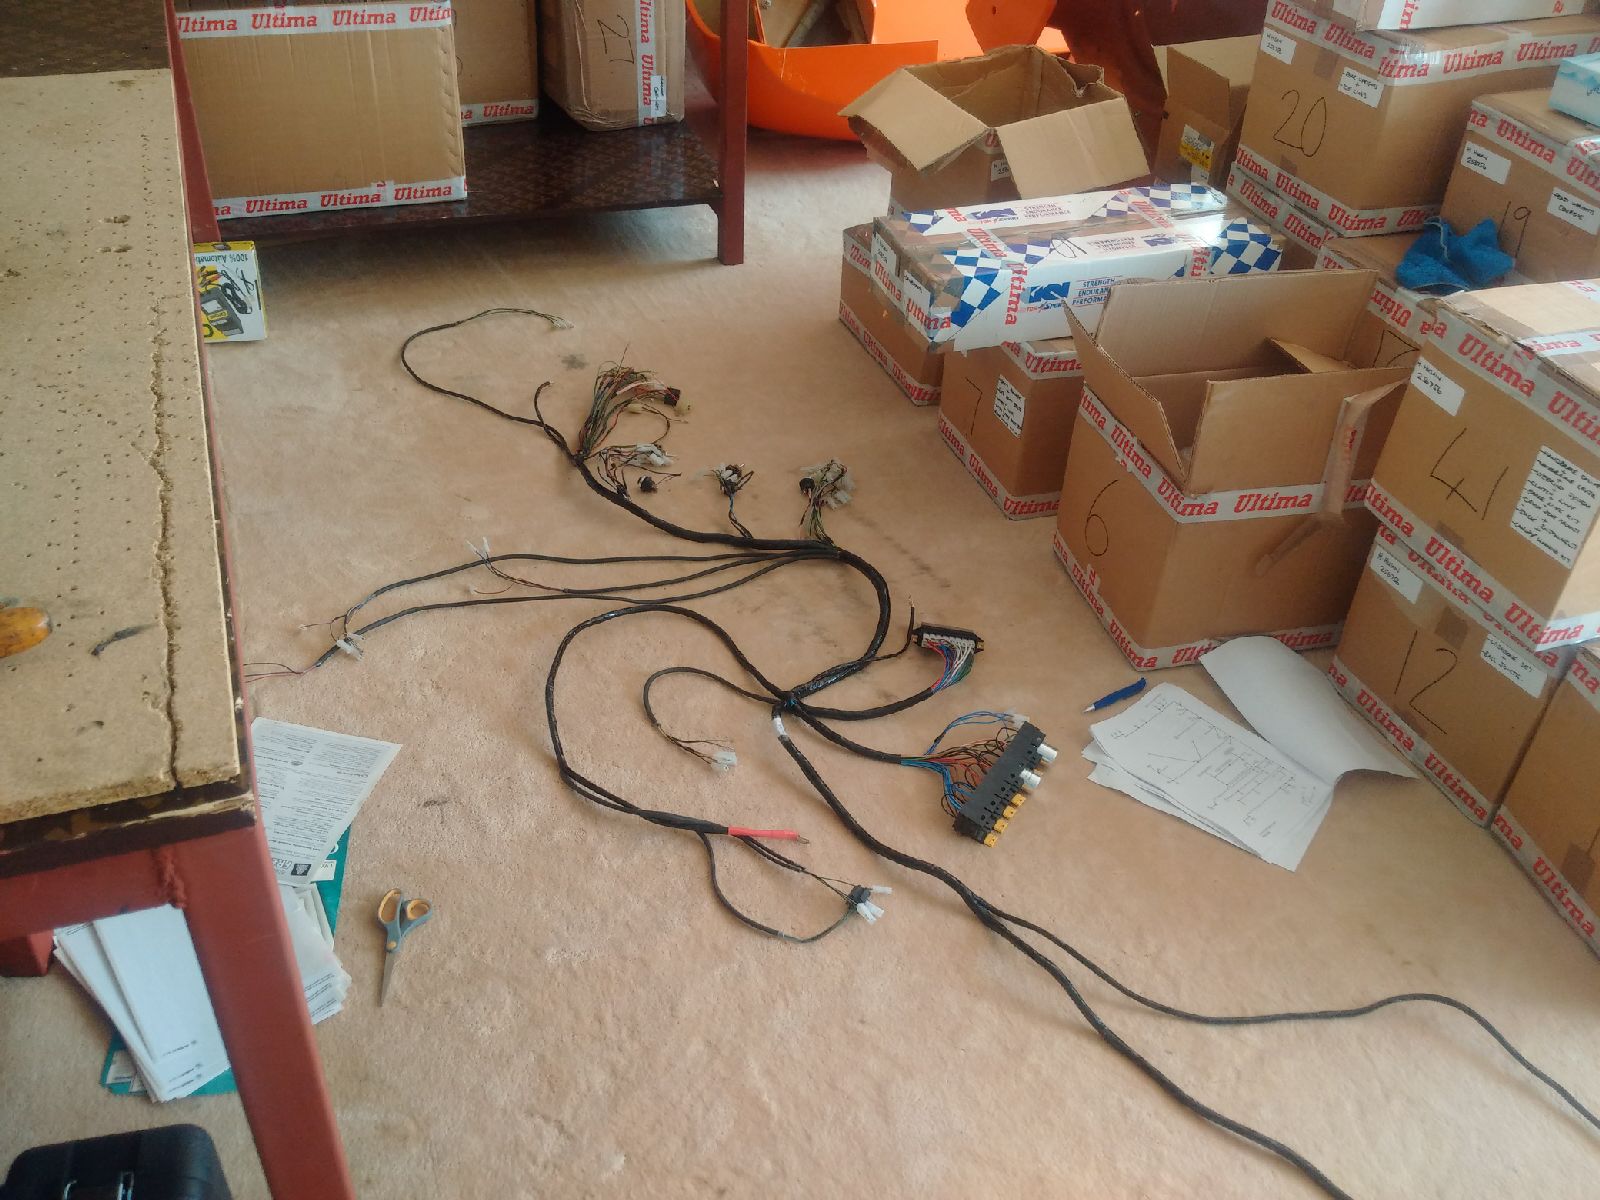
First thing was to start connecting the stalk kit - AutoBionics has supplied a very nice stalk kit made up of a Ford stalk unit and a custom wiring harness that connects to the Ultima wiring harness. It took a while to get the harnesses laid correctly on the chassis, and then it was a matter of checking both the AB and the Ultima harness drawings to figure out which wires to cut, solder, tape over, etc... Now the stalk kit is connected and ready to test in a couple of weeks once I have most of the wiring connected
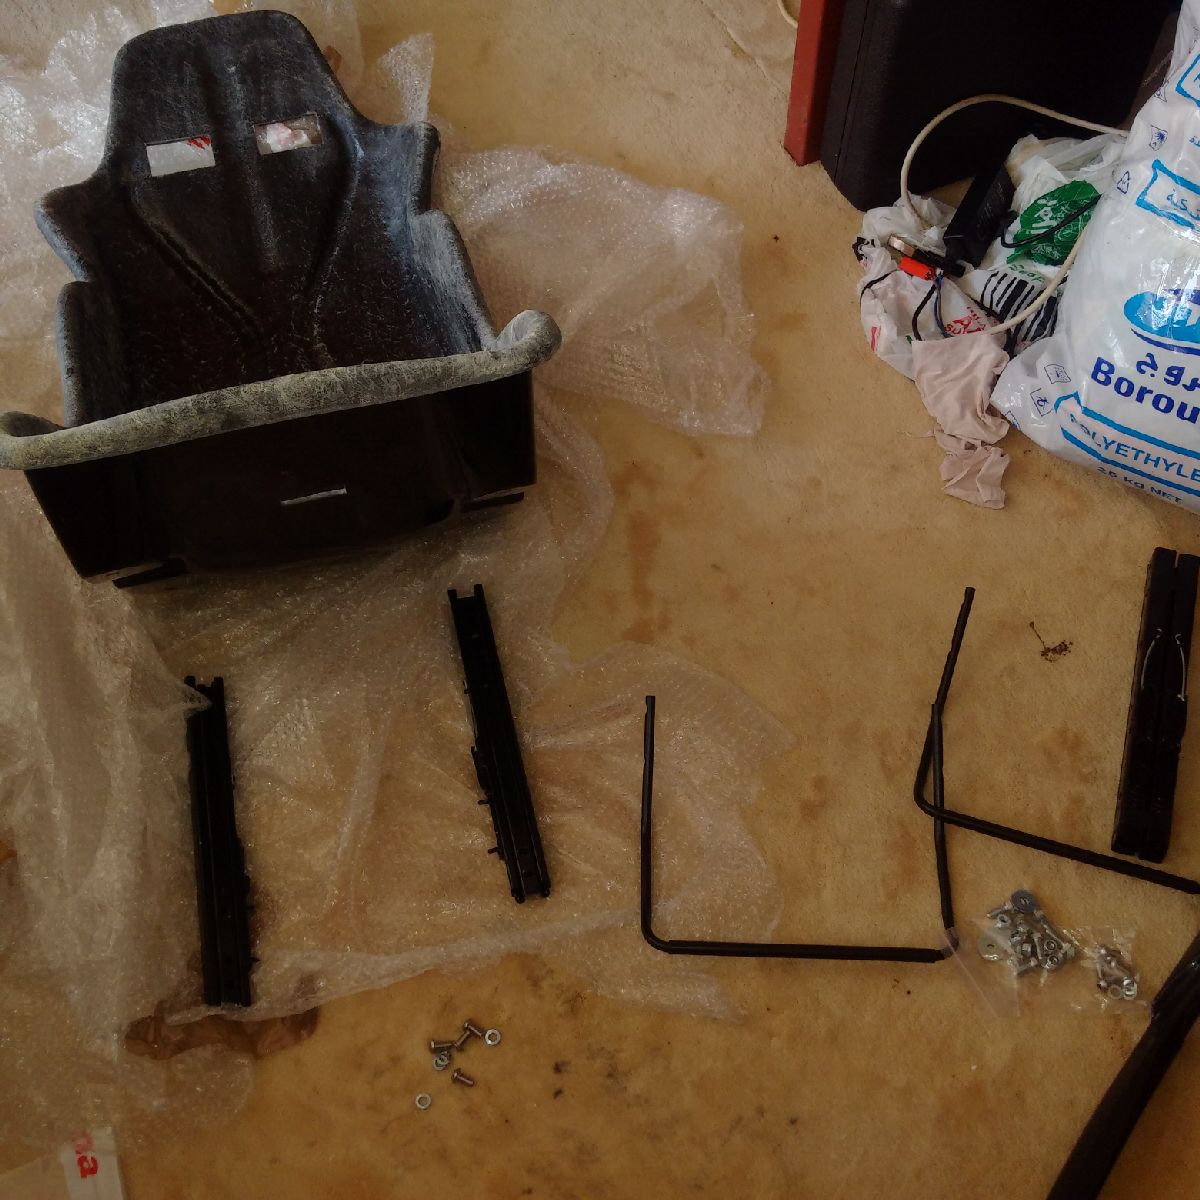
Next I started to work on the seats - I have only ordered the seat shells, and will get them trimmed locally. First thing was to install the runners - which was done and the seats were then sent to the trimmer, so that they can be installed later
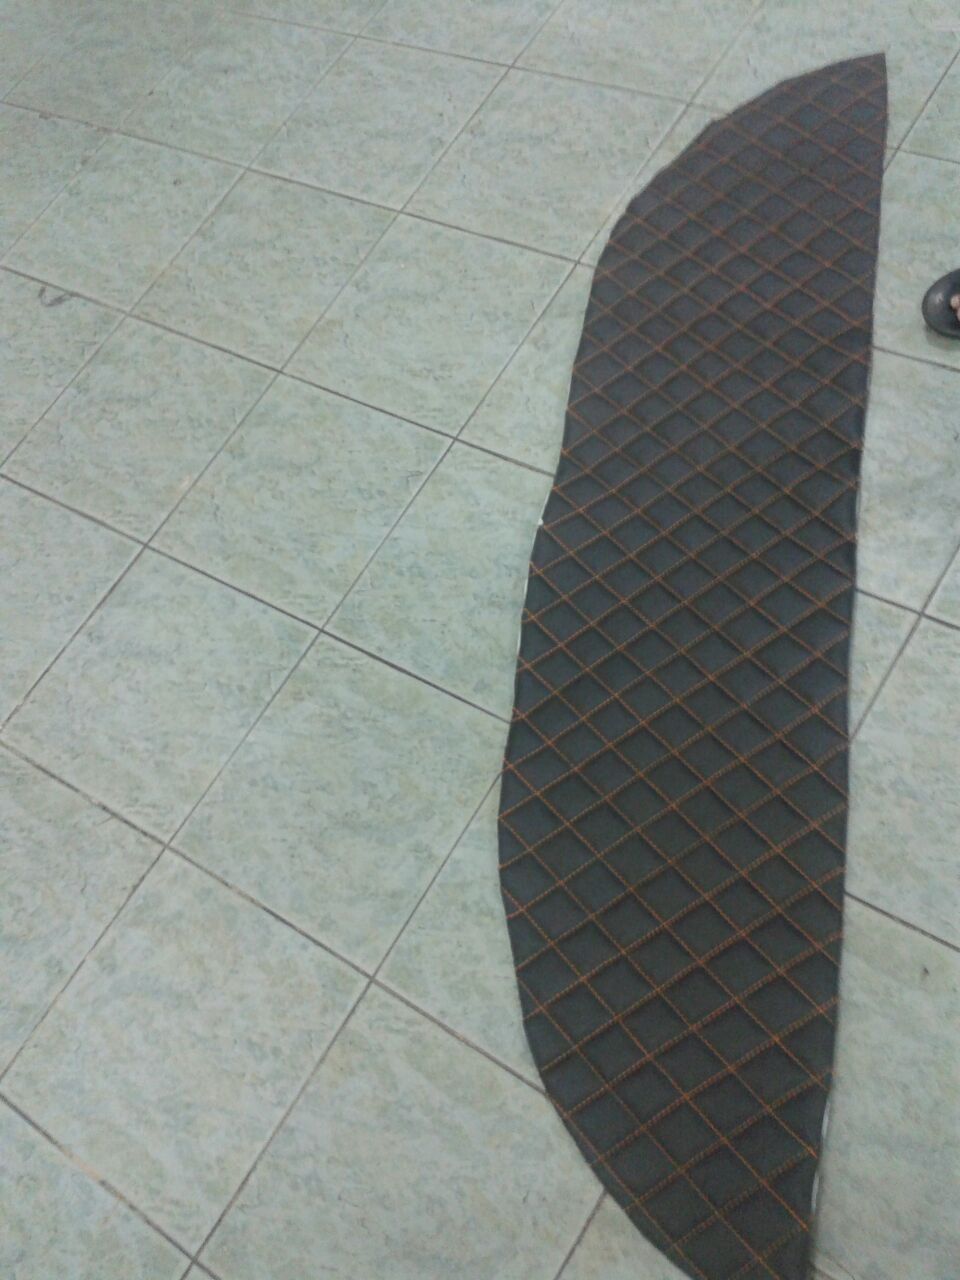
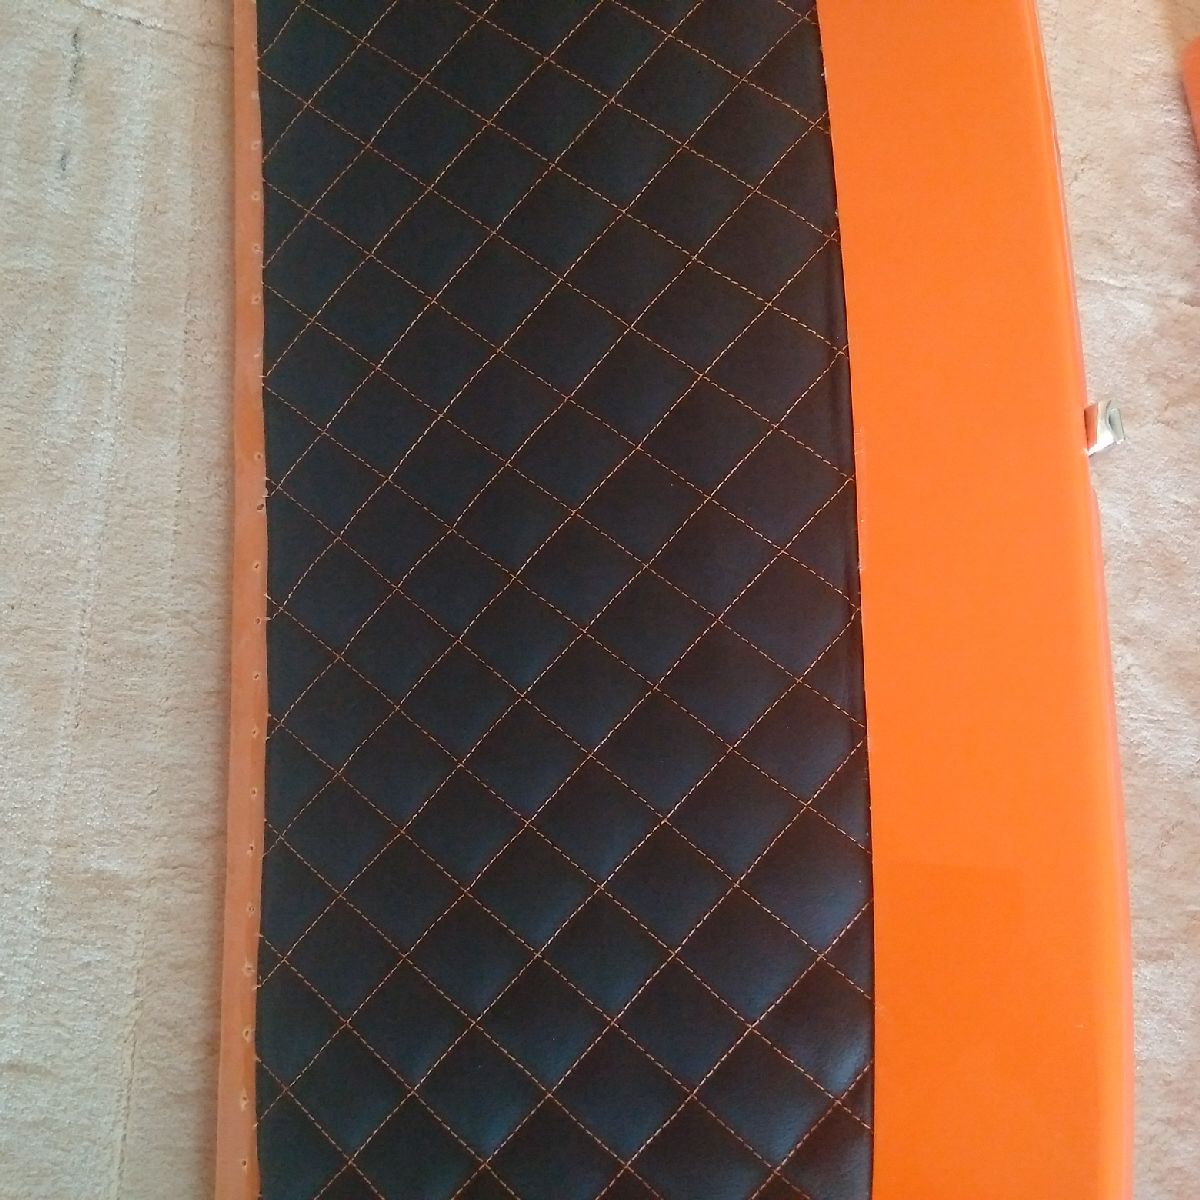
While at the trimmer, I also picked up the first piece of my leather interior - it will be glued and installed tomorrow.
July 31, 2015
Build Time Today: 7 hours
Total Build Time: 164 hours
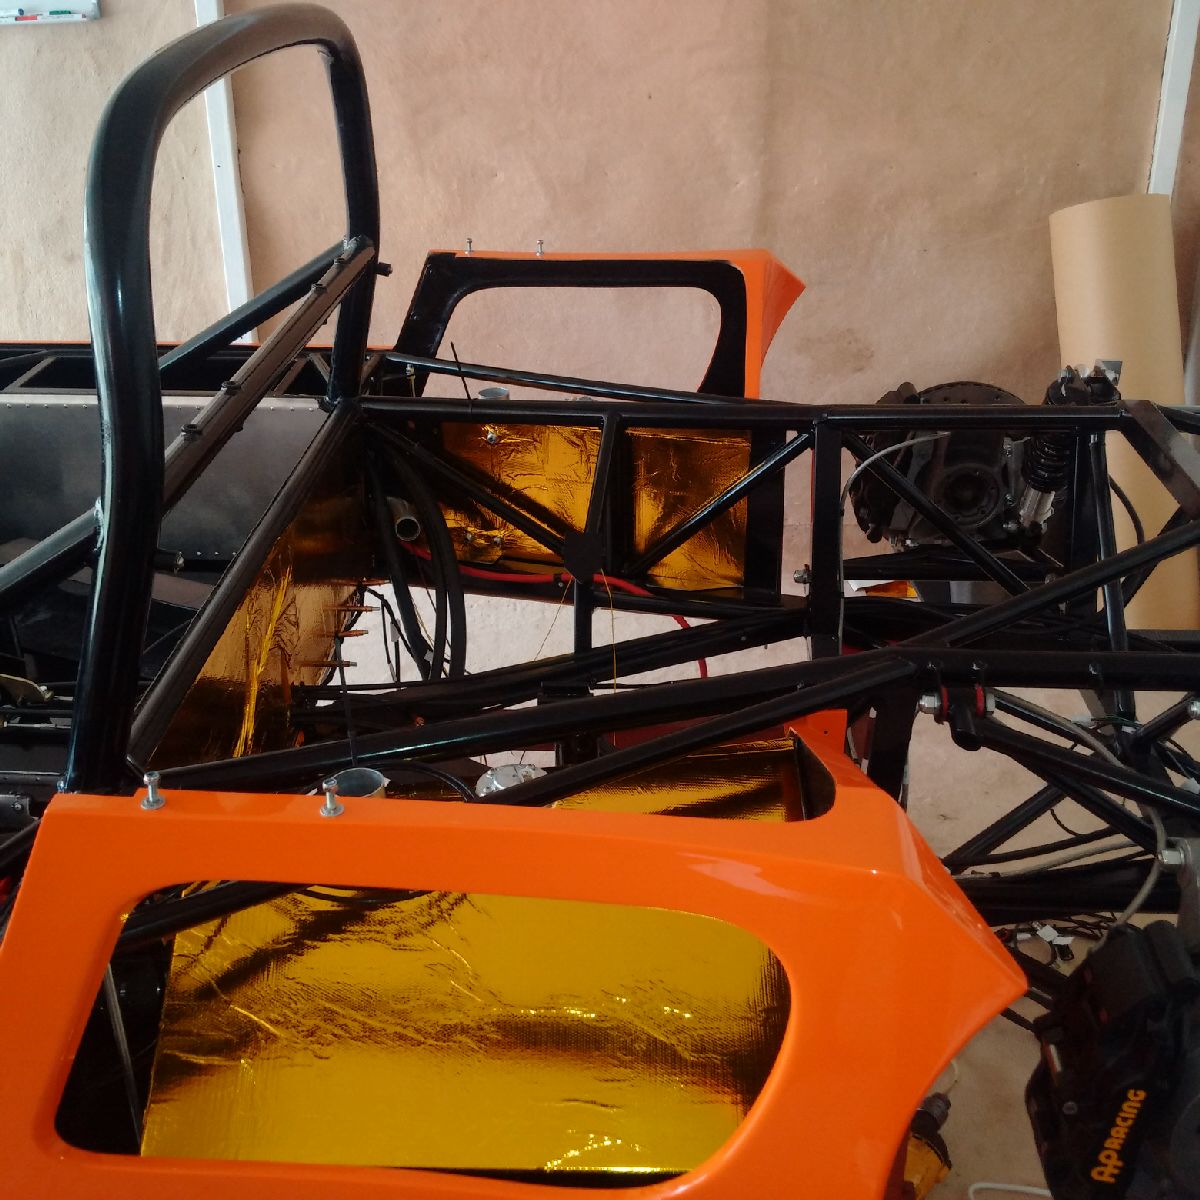
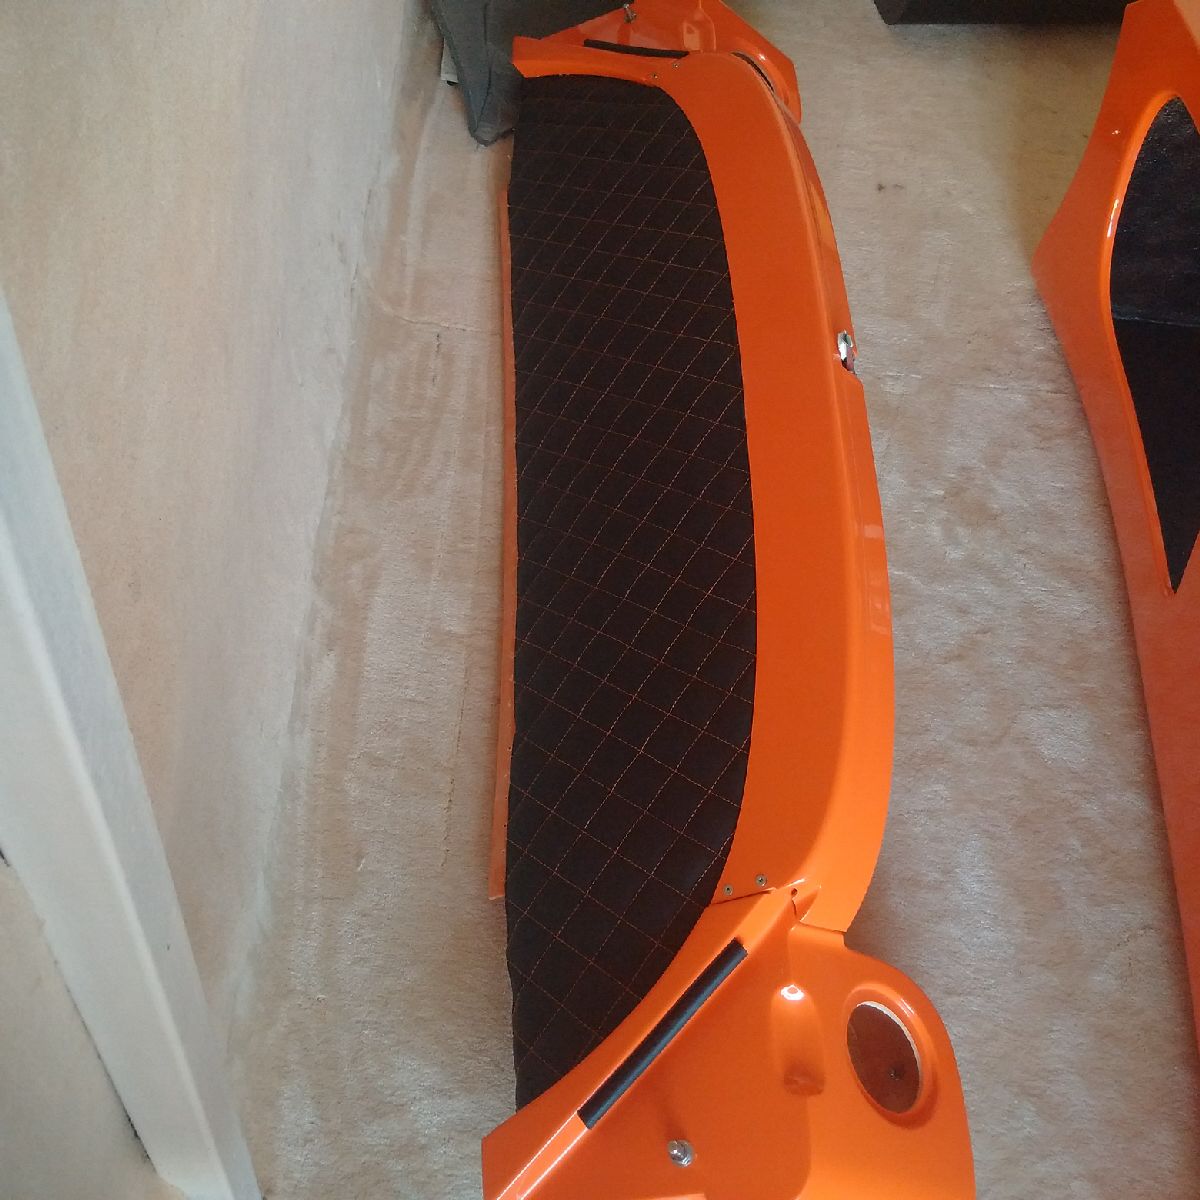
First thing for today was installing the leather on the rear bulkhead - it looks amazing!
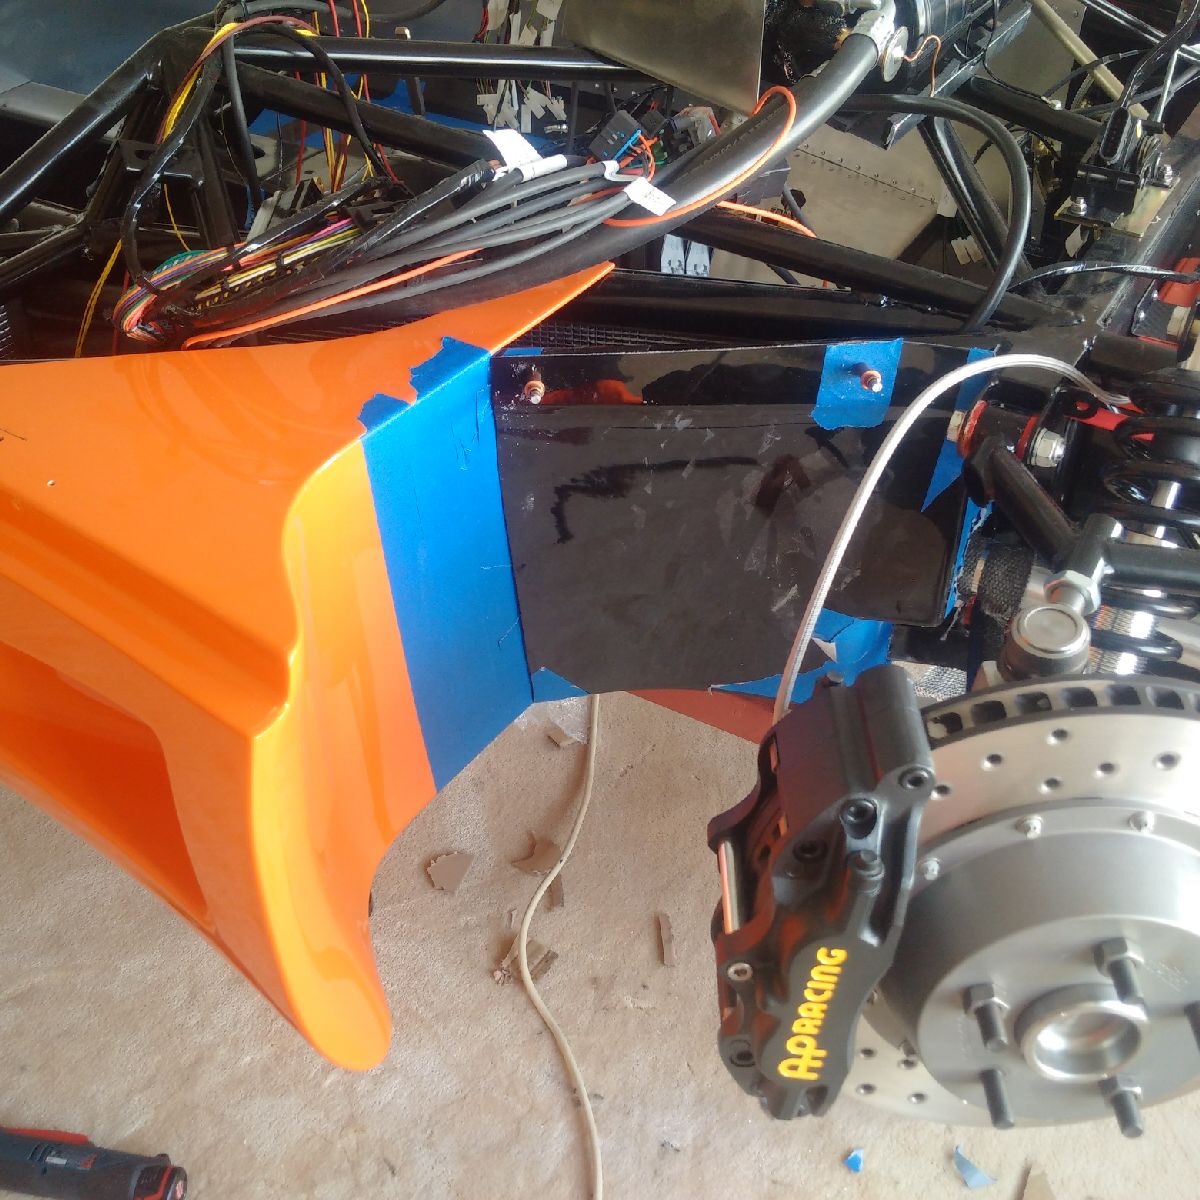
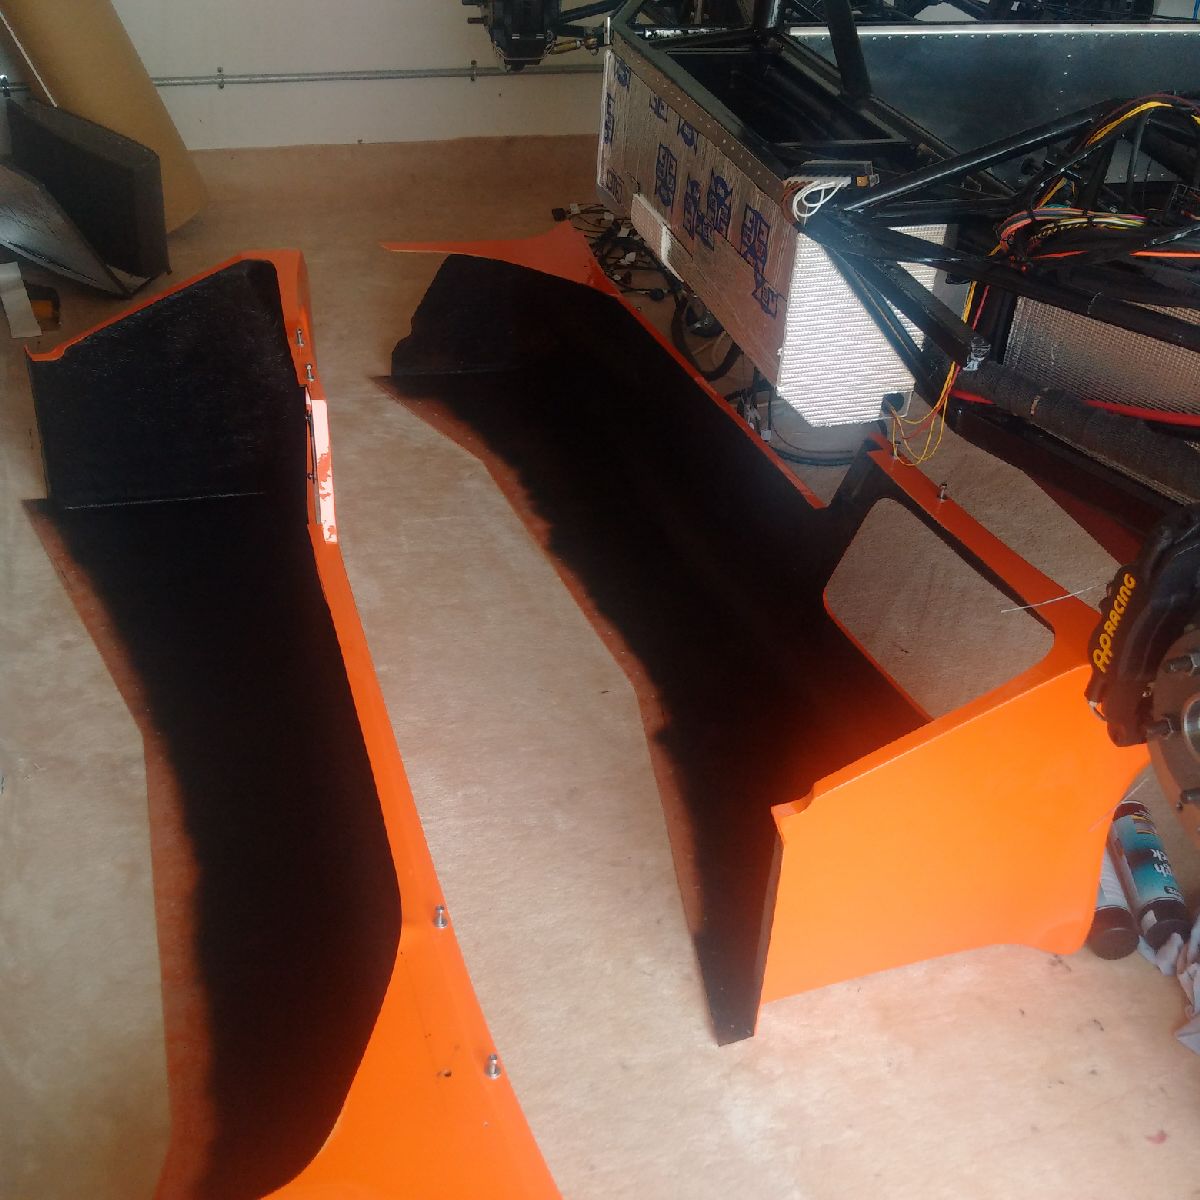
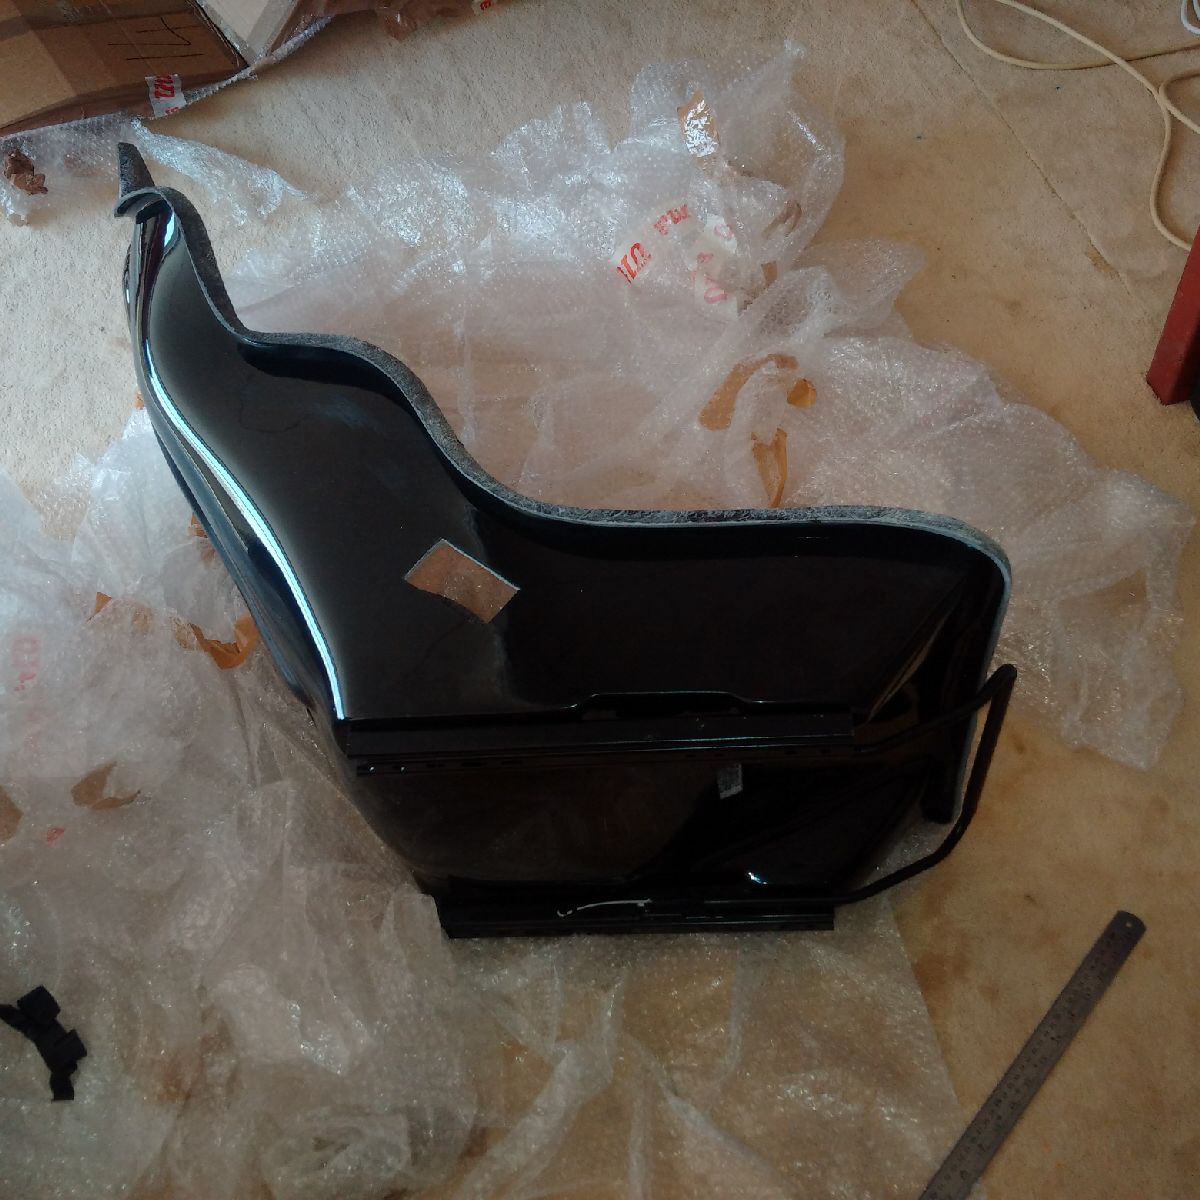
Next thing on the agenda was the side pod trim sections: both the passenger and driver side pods have small GRP sections that are moulded to sit in front of the side pod, behind the wishbones. They provide protection against the elements, and also complete the wheel well.
These small trim parts take A LONG time to fit - they must be trimmed in 3-dimensions, with cutouts made for the chassis, radiator pipes, battery cables, clutch/brake pipes, etc... Almost 6 hours was spent getting the two trim sections to sit correctly, and then the trim sections were drilled as required and attached to the chassis with clecoes. They will riveted on after the side pod is finally installed.