Jan 1, 2017
Happy New Year!!
Jan 2, 2017
Build Time Today: 2 hours
Total Build Time: 53.5 hours
Feeling unwell with the flu since yesterday - New Year partying showing ;)
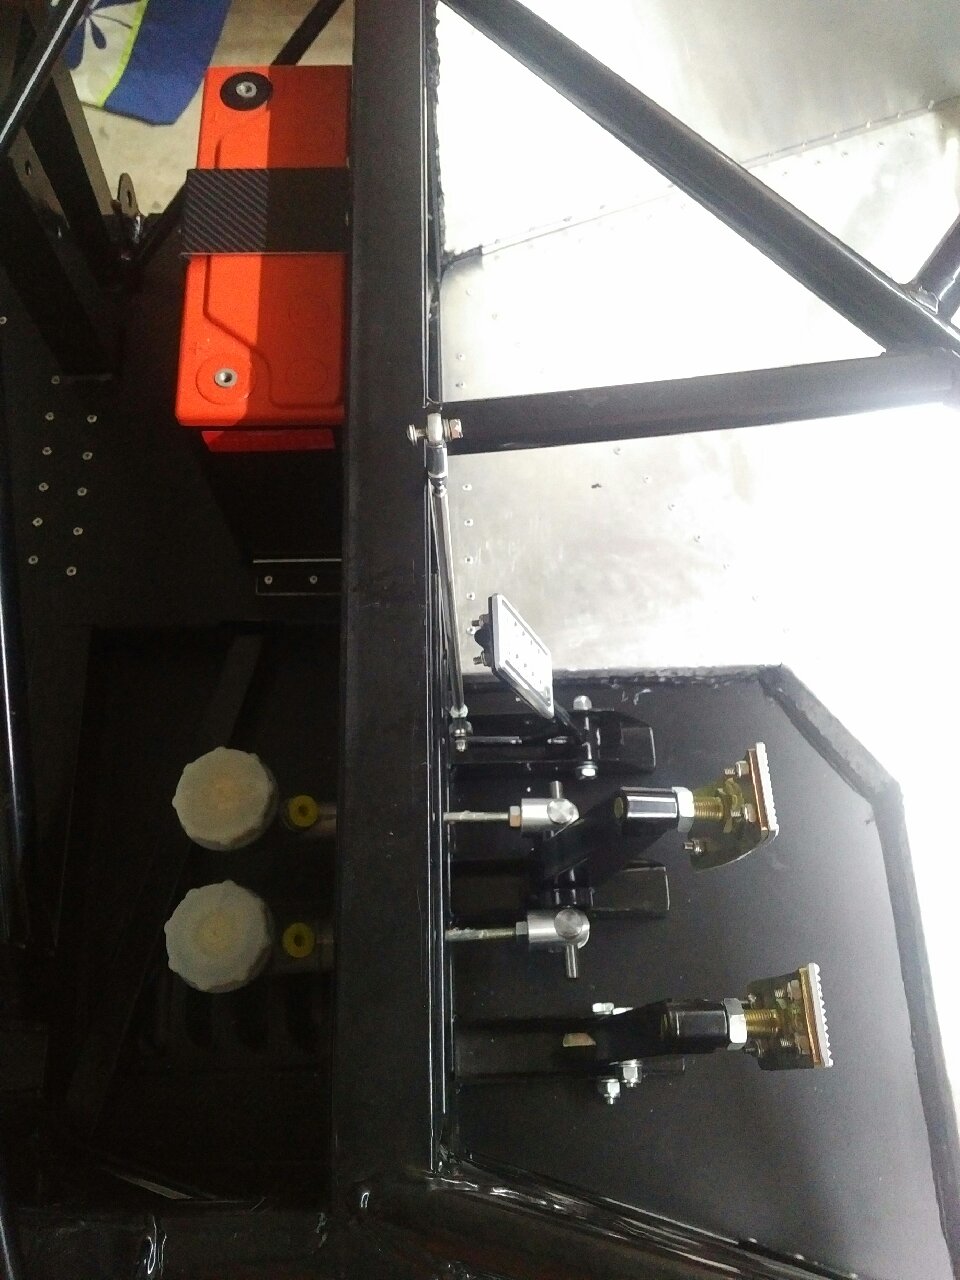
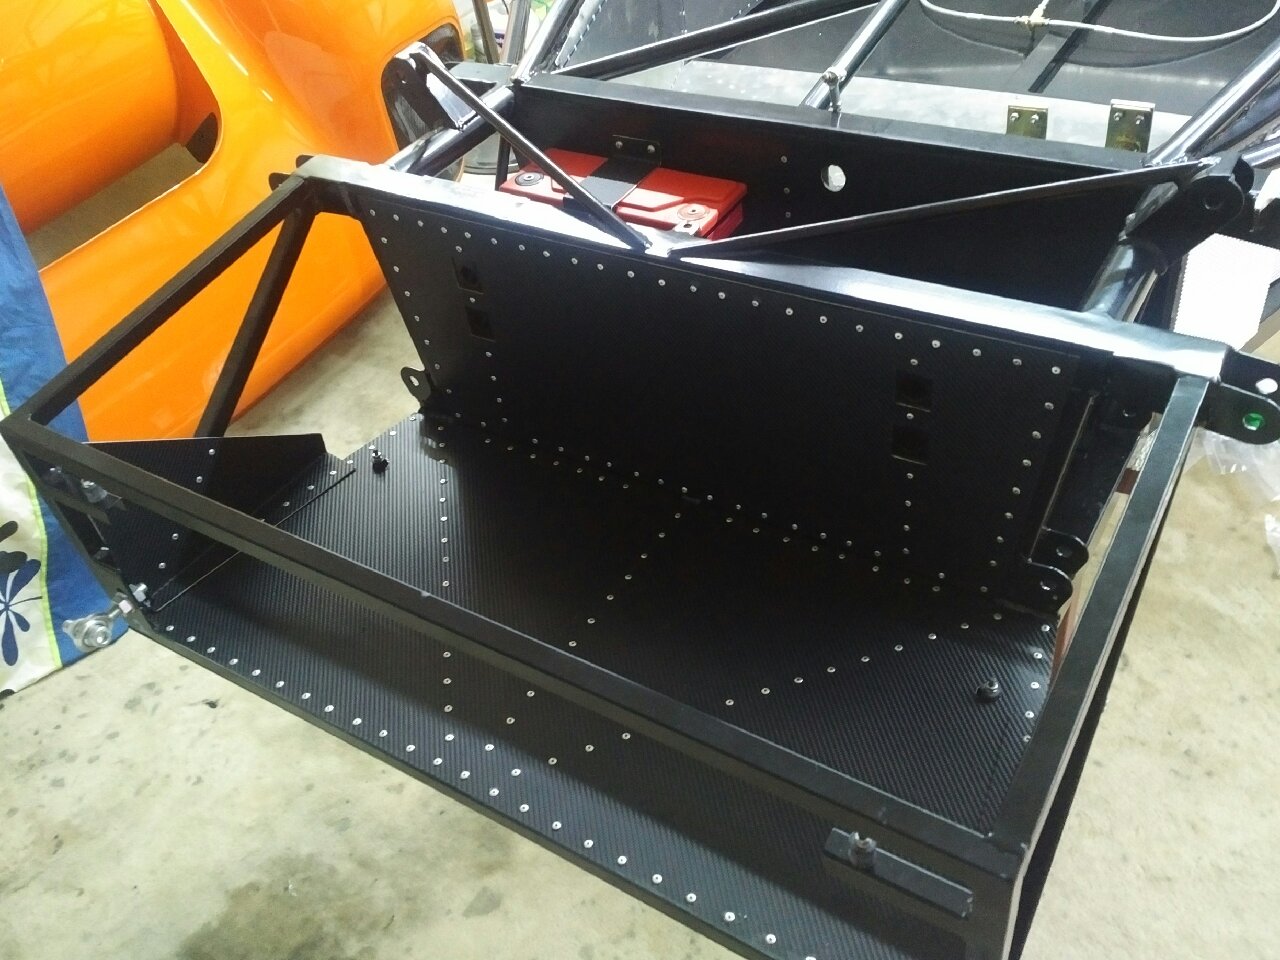
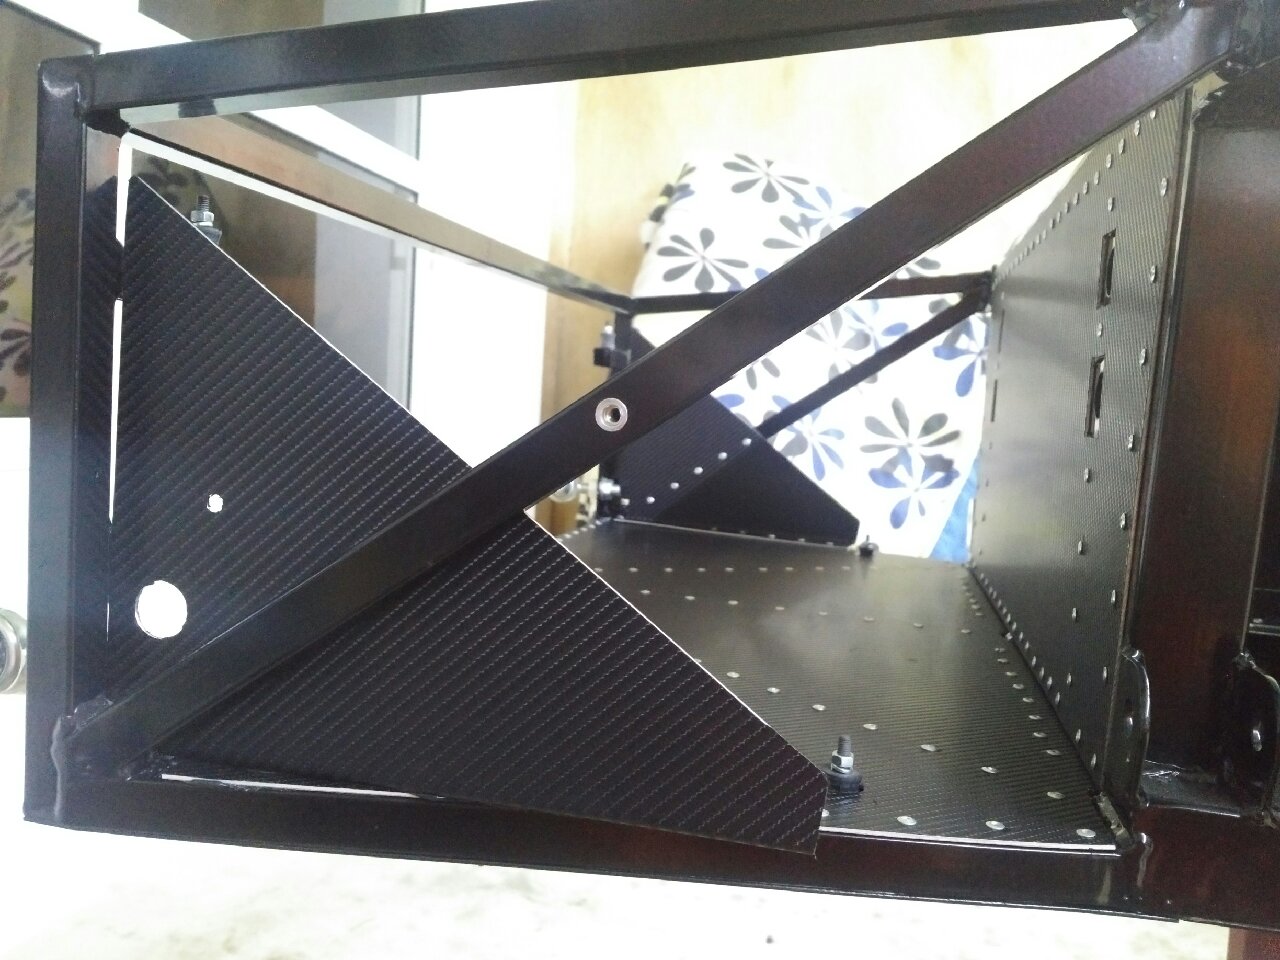
I spent a little time doing a few pending jobs - sikaflex was put between the chassis diagonals and ally side panels to prevent drumming. I also riveted on the engine bulkhead panel (leaving a few rivets off on the bottom for future wiring runs). I also spent time installing the battery clamp pieces - the battery was put in place, and clamps placed around it - rivet holes and rivnut holes were drilled, and the battery floor was covered with foam tape to prevent battery from vibarating. The clamp panels were then CF-ed and left to try till tomorrow. The battery was placed on the trickle charger to get it to full power!

Jan 3, 2017
Build Time Today: 3.5 hours
Total Build Time: 57 hours
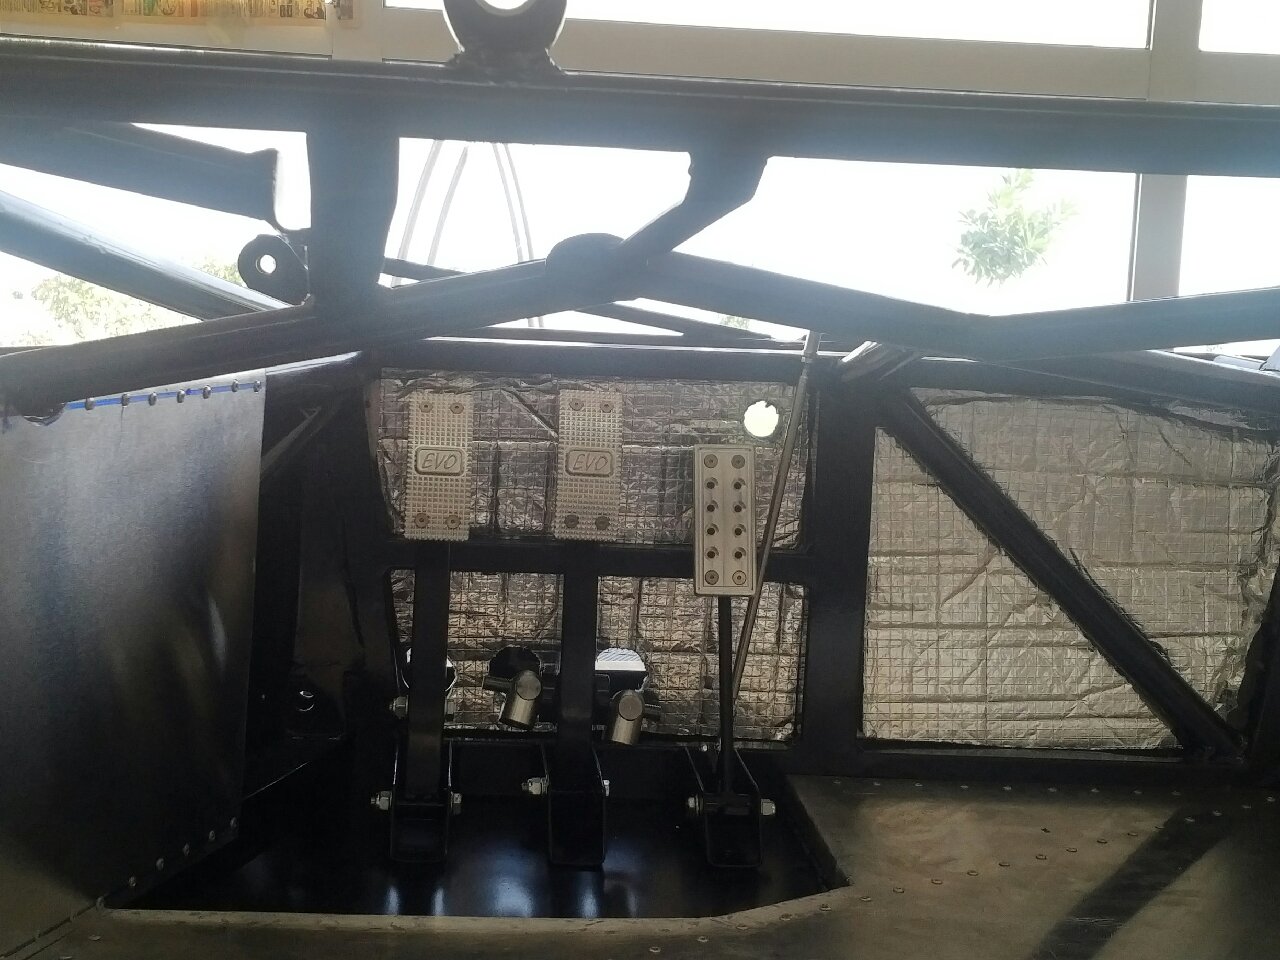
I started the day with installing the pedals - but before getting to that, I added a layer of insulation on the panel behind the pedals, making holes for the mastercylinders in the insulation... Then all three pedals were installed after greasing the pivot bolts - the chassis pedal supports had to be separated a bit to make the pedals fit, but I was able to get all three pedals in and bolted tight - while still allowing easy front and back movement with no squeaks...
Then I decided to work on the radiator area rather than work with MC/brake lines, etc... SO the radiator was removed from its box and placed in the chassis... the bobbins locations were marked and the radiator was drilled with a 5mm bit and test fitted on the chassis - and it fits like a glove! I then got the radiator 'ears' out and placed them on the chassis, marked the chassis lines, drilled rivet holes in the ears, then drilled holes in the chassis and waxoyled it... The ears were then CF-ed...
Jan 4 2017
Build Time Today: 2 hours
Total Build Time: 59 hours
A quick couple hours in the garage today - the battery was placed in position and clamp installed (with addition of a little foam tape to keep it secure)...
Then the master cylinders were installed - front and rear MC were placed in their respective positions and bolted on... the brake bias bar/pedal was attached to the MC with the correct factory bias setting.
The clutch MC was NOT installed - instead the hole was blocked off with an ally piece - I am hoping to do a different gearbox this time around, so I will come back to this when the time comes...

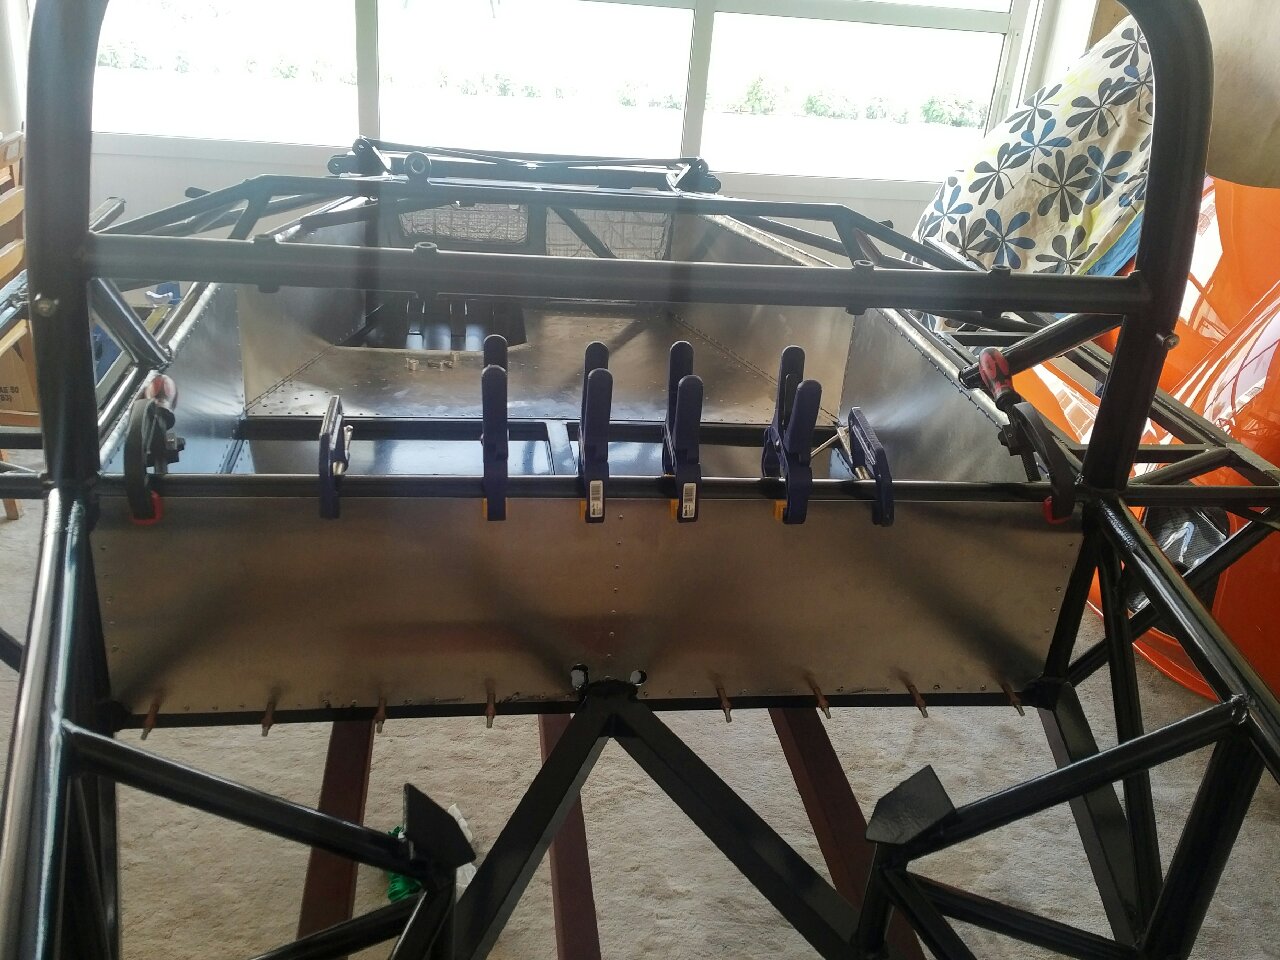
I then riveted on the custom radiator bulkhead panel and the radiator ears in preparation for the radiator install...
Jan 5 2017
Build Time Today: 2.5 hours
Total Build Time: 61.5 hours
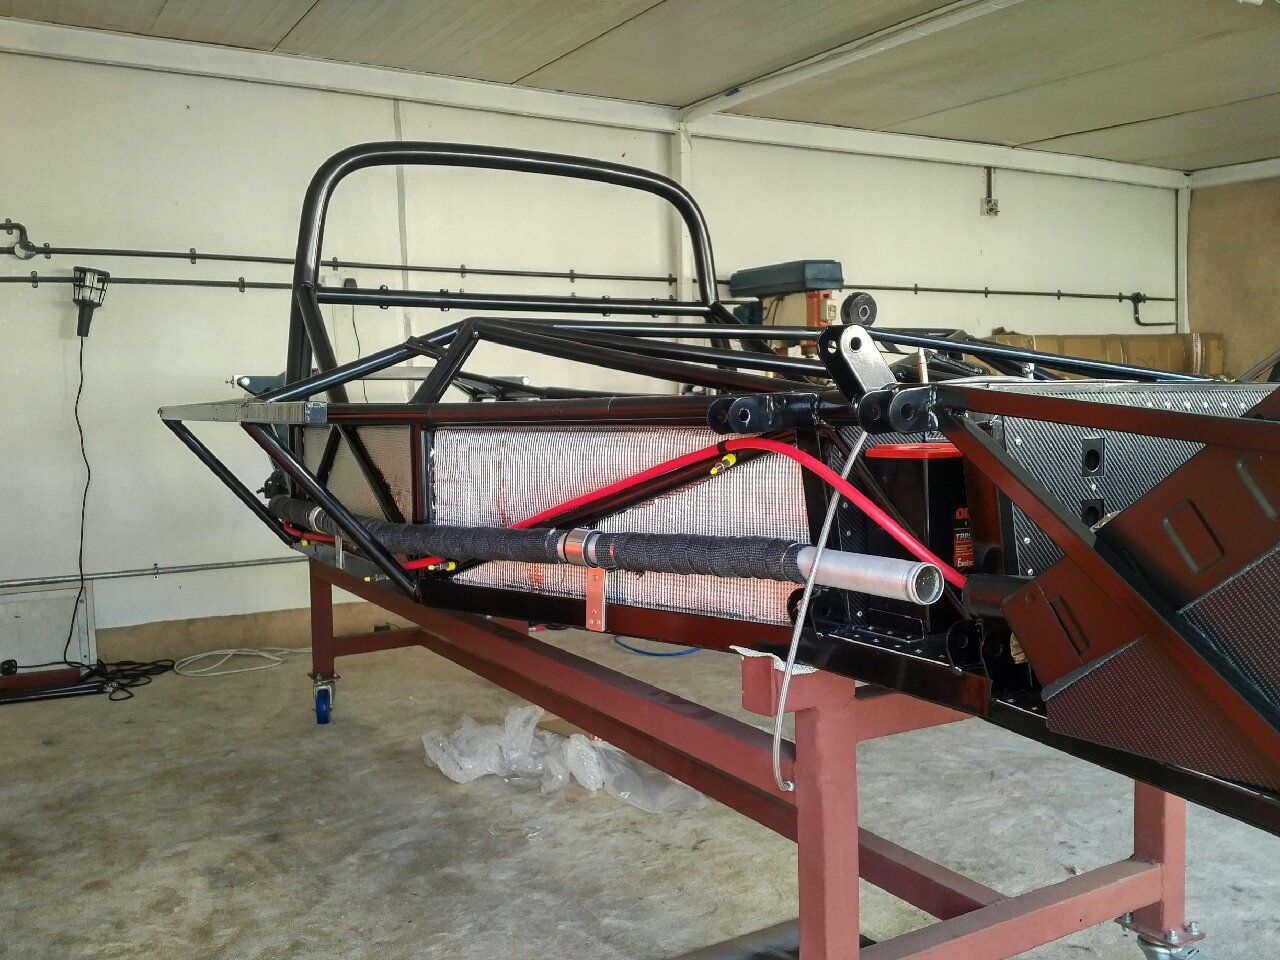
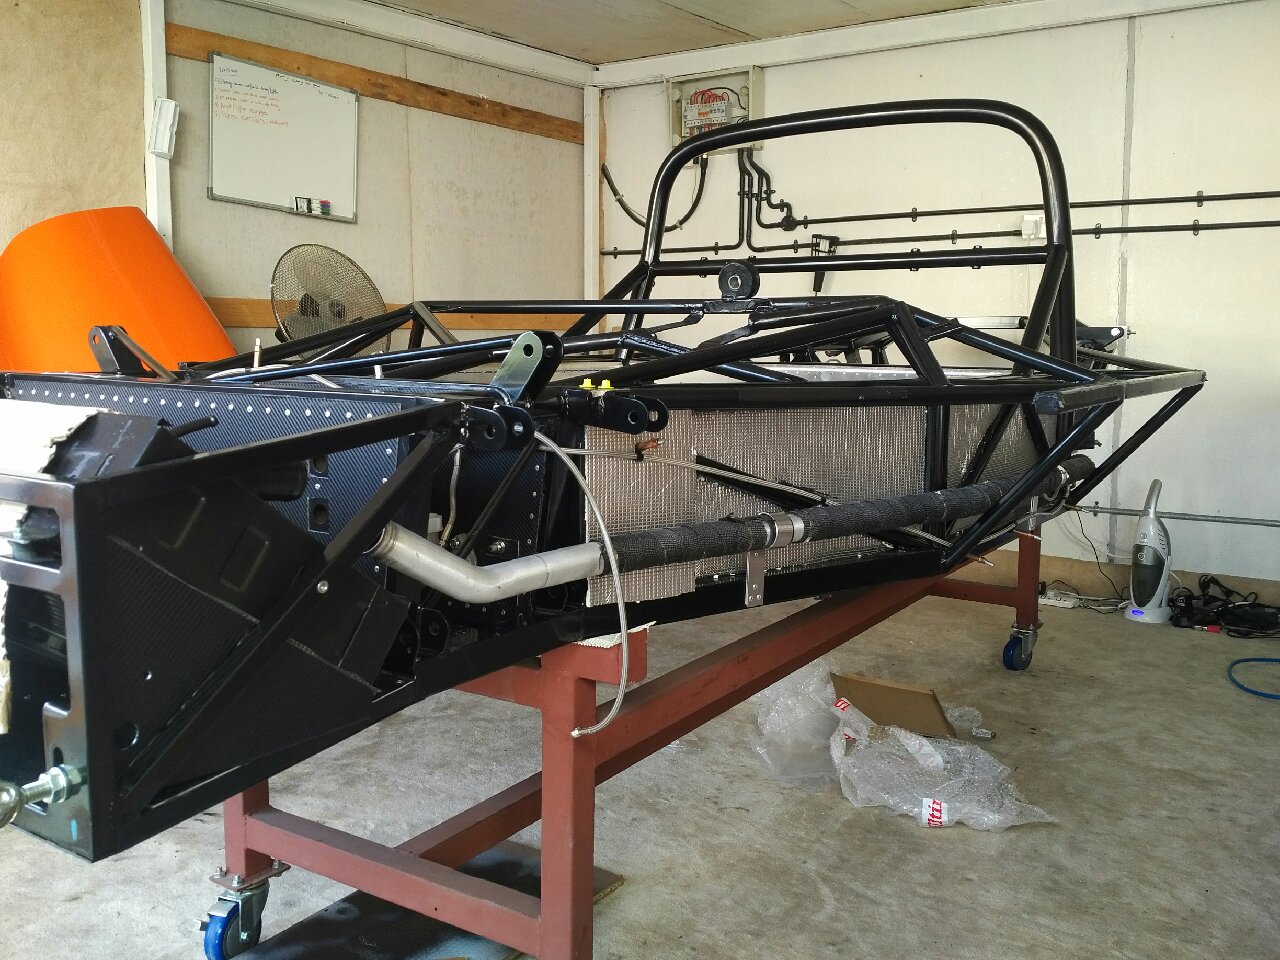
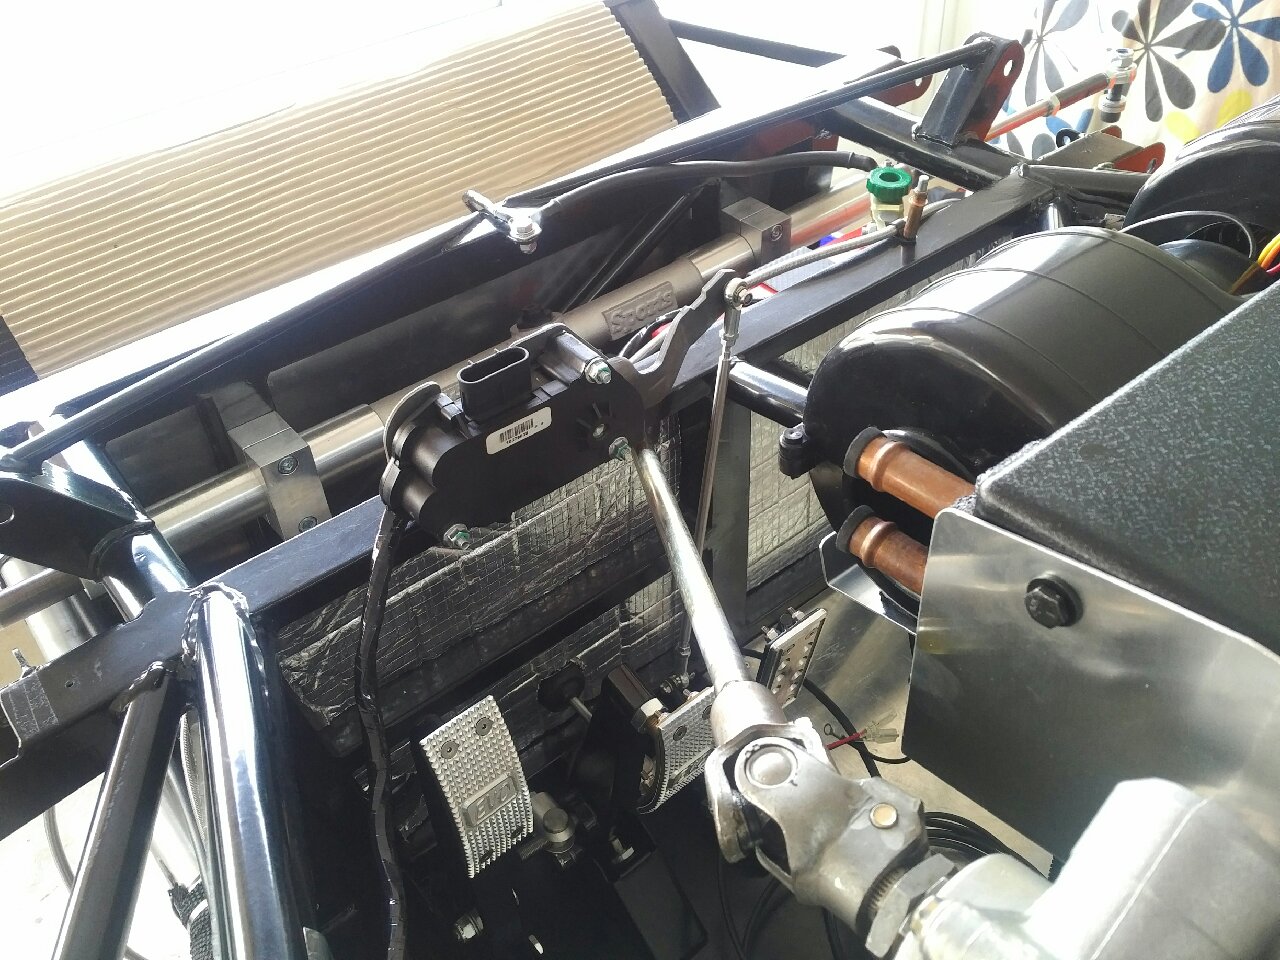
The radiator was installed today - foam tape was applied to the sides and below to prevent any air leak passages, and the radiator was then installed... I also installed the thermo switch before installing the radiator as it is much easier to install it outside than after placing the radiator in the chassis...
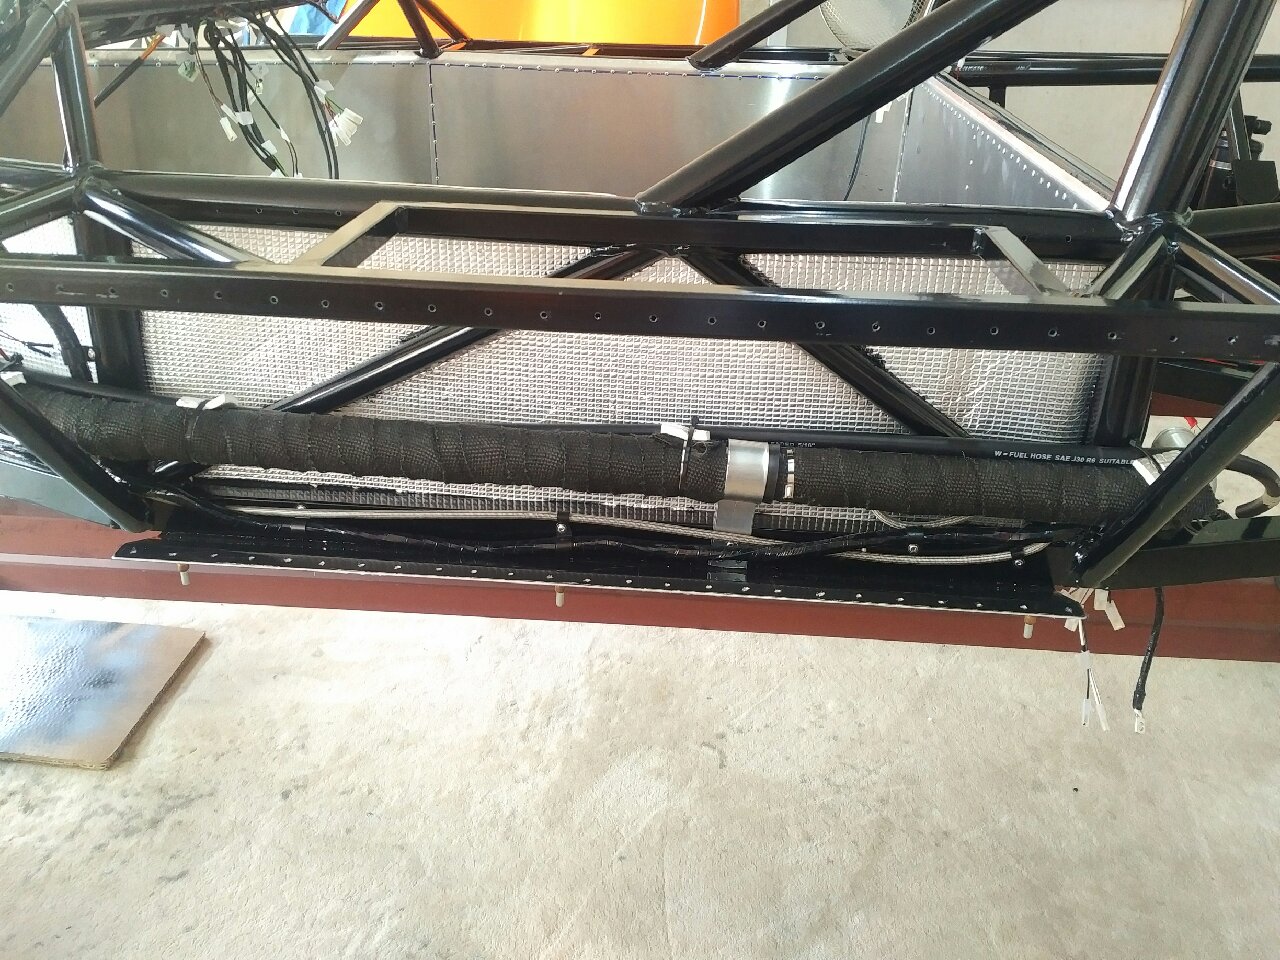
I then opened the long coolant pipes and threaded them in the chassis, marked the ally support areas, and then drilled the supports for rivet holes... The coolant pipes were then wrapped in the titanium exhaust wrap to prevent heat leakages into the cockpit.. Wrapping the pipes took a while, but was accomplished with the help of the wife :)
Jan 6-7 2017
Build Time Today: 10.5 hours
Total Build Time: 72 hours
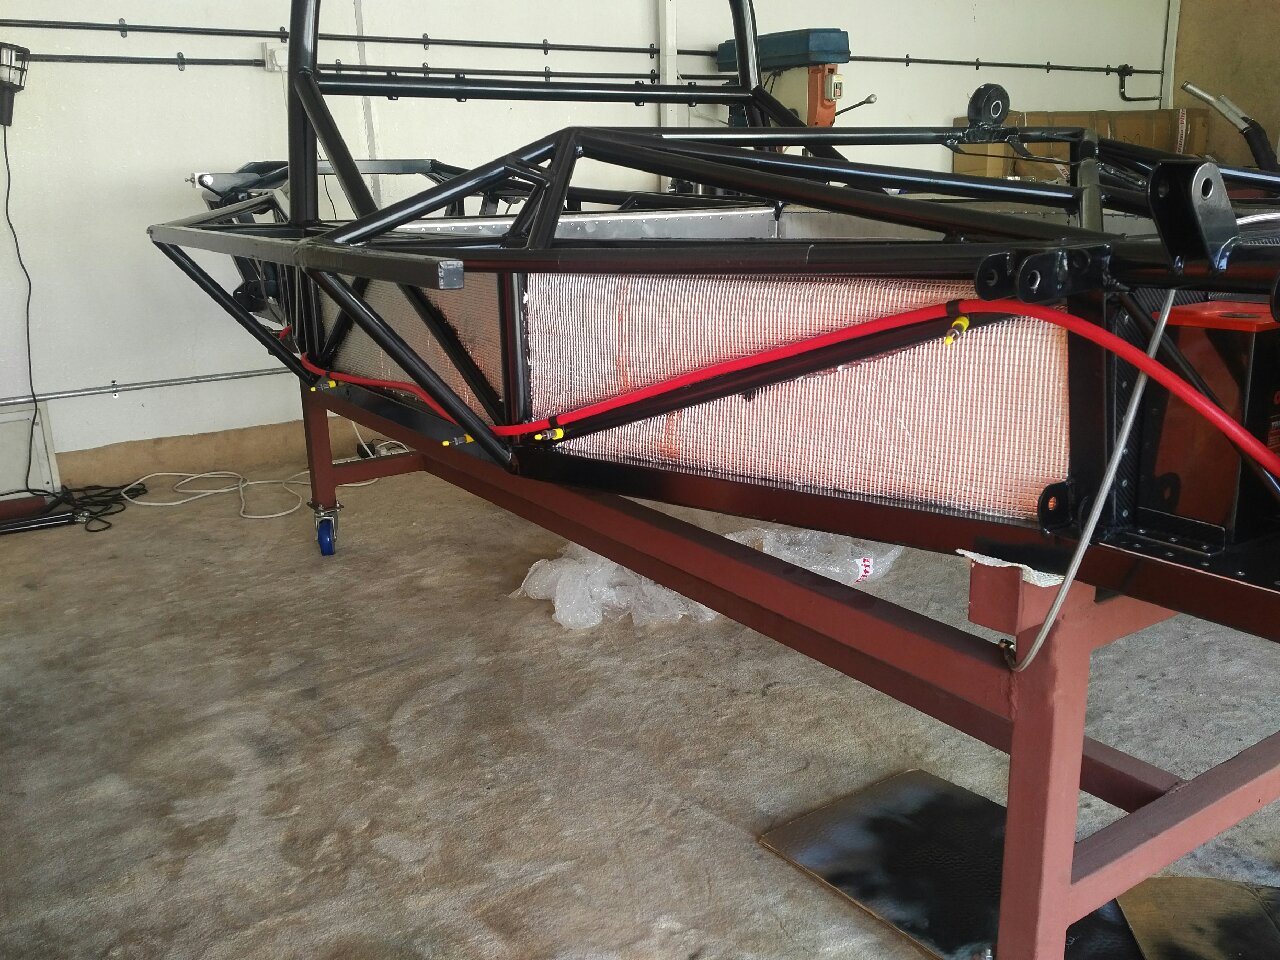
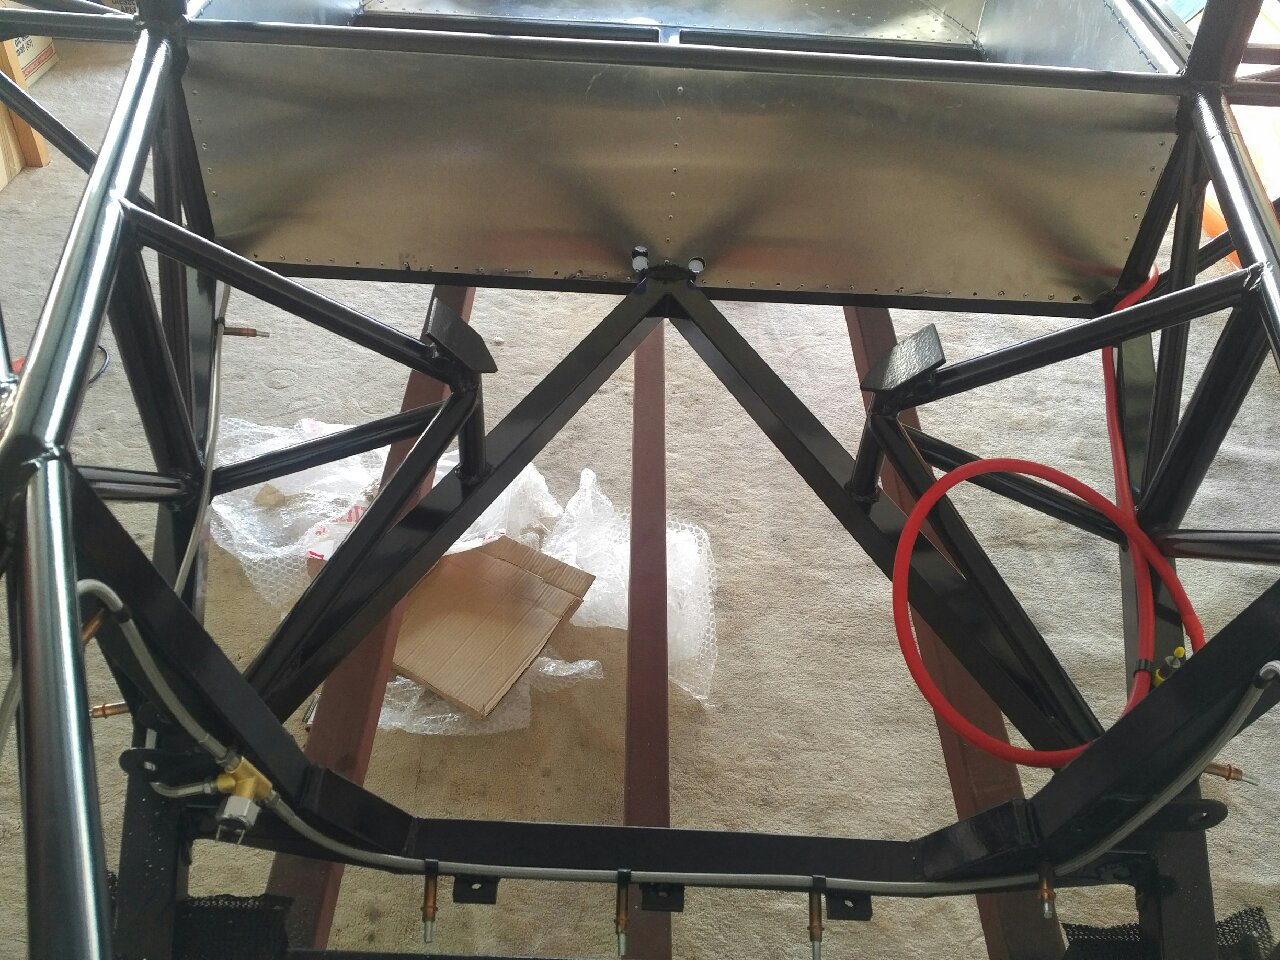
A couple long days in the garage over the weekend - the goal was to do the chassis mods! It took a long time to prep the chassis, cut the old crossmembers out, weld in new supports, grind, sand/clean, prime and paint the modifications... There are three basic areas of modification:
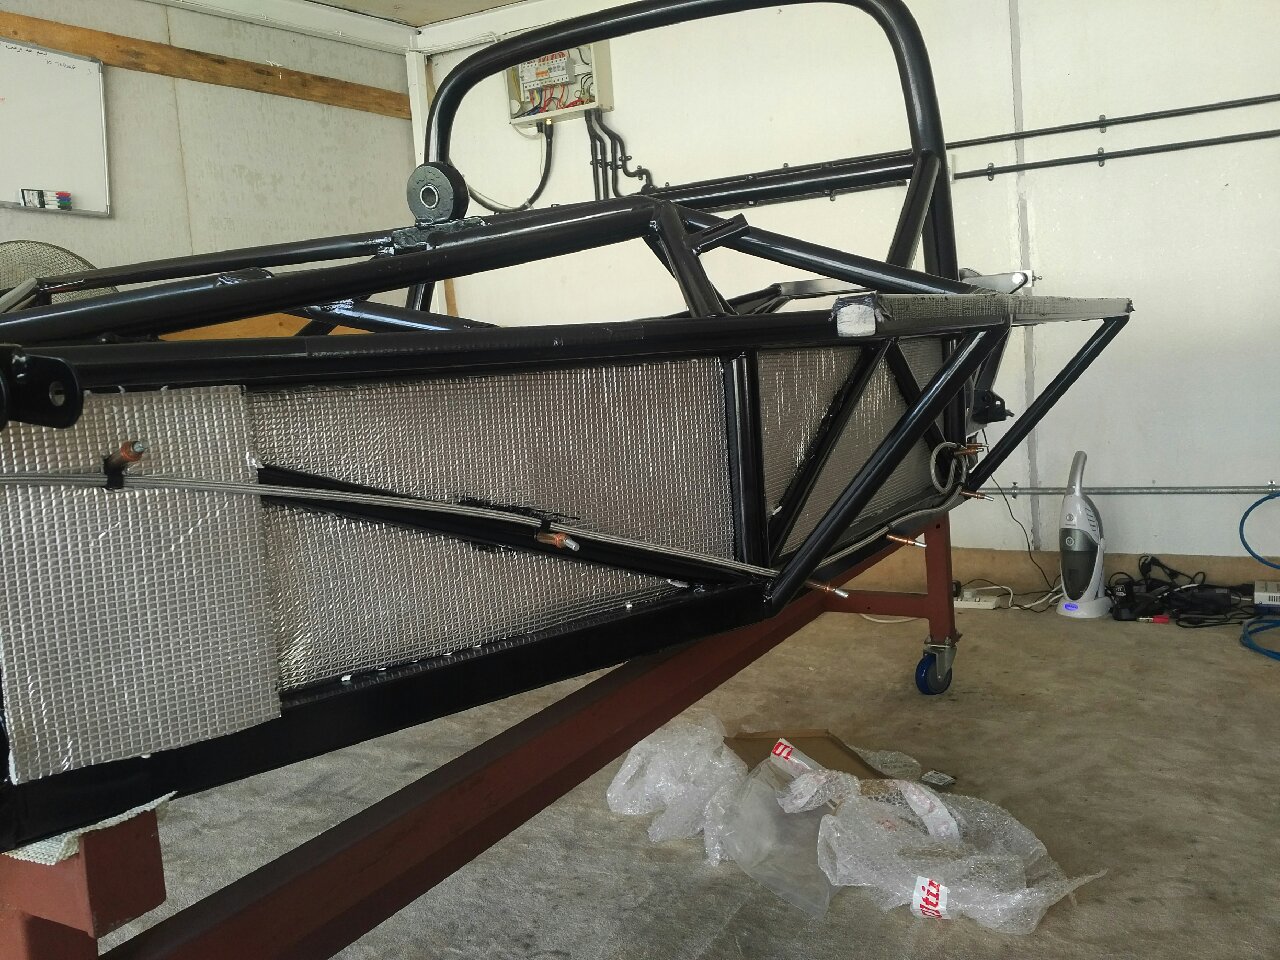
1) The steering column bearing: At the start of the build, I had already modified this area a bit.. the chassis tube has been cut and replaced with the EPAS motor support base... The steering column bearings had been cut out and replaced with a rose joint - however, the rose joint is metal so allows vibrations into the steering column - thus I had to fabricate my own steering bearing support, into which I inserted a NEW Ultima steering nylon bearing (my bearing support allows to remove and install the steering bearing) - this support was then welded onto the chassis while keeping the original Ultima alignment of the column in tact using prior markings...
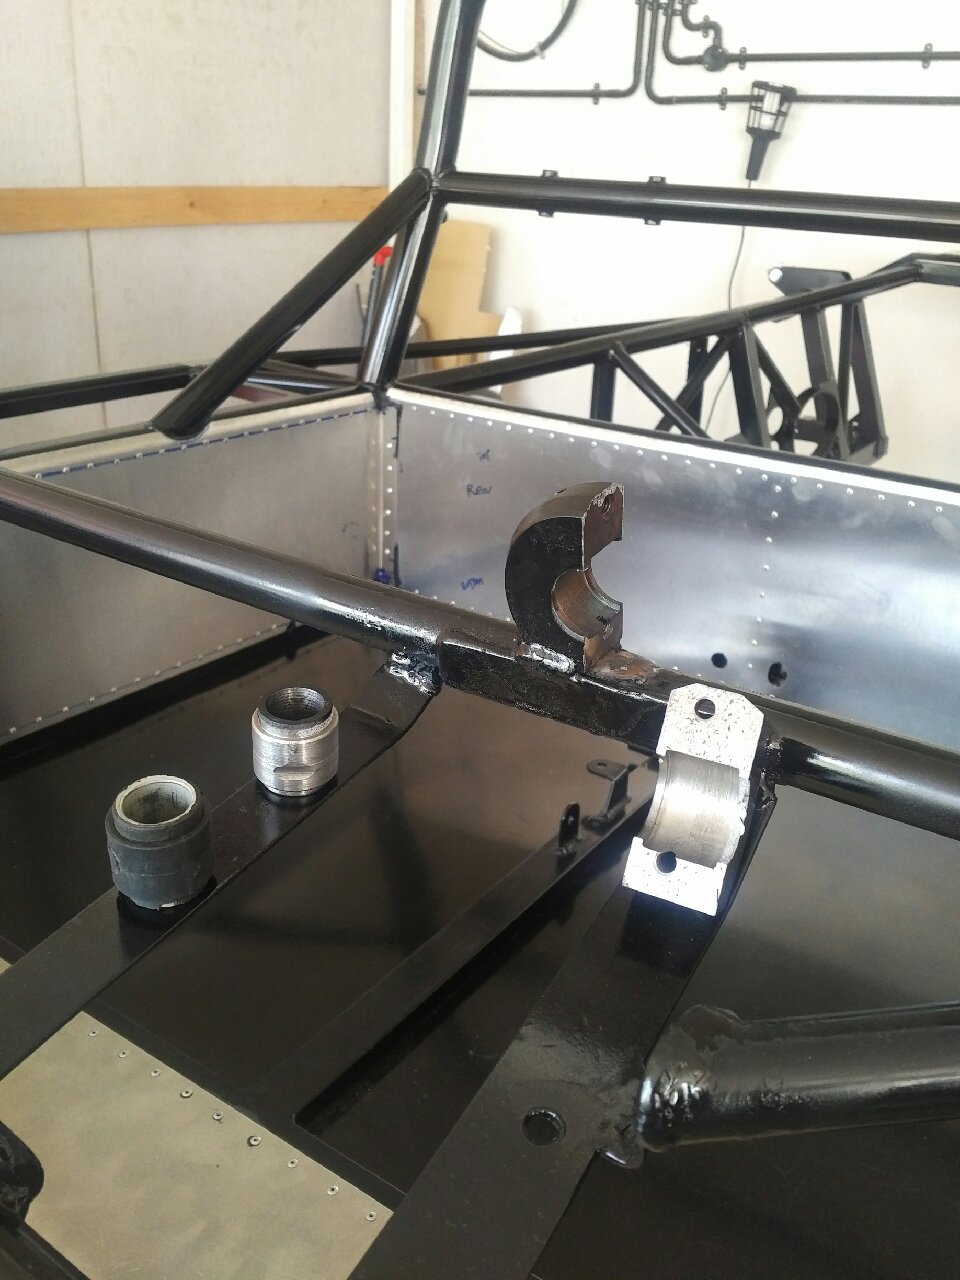
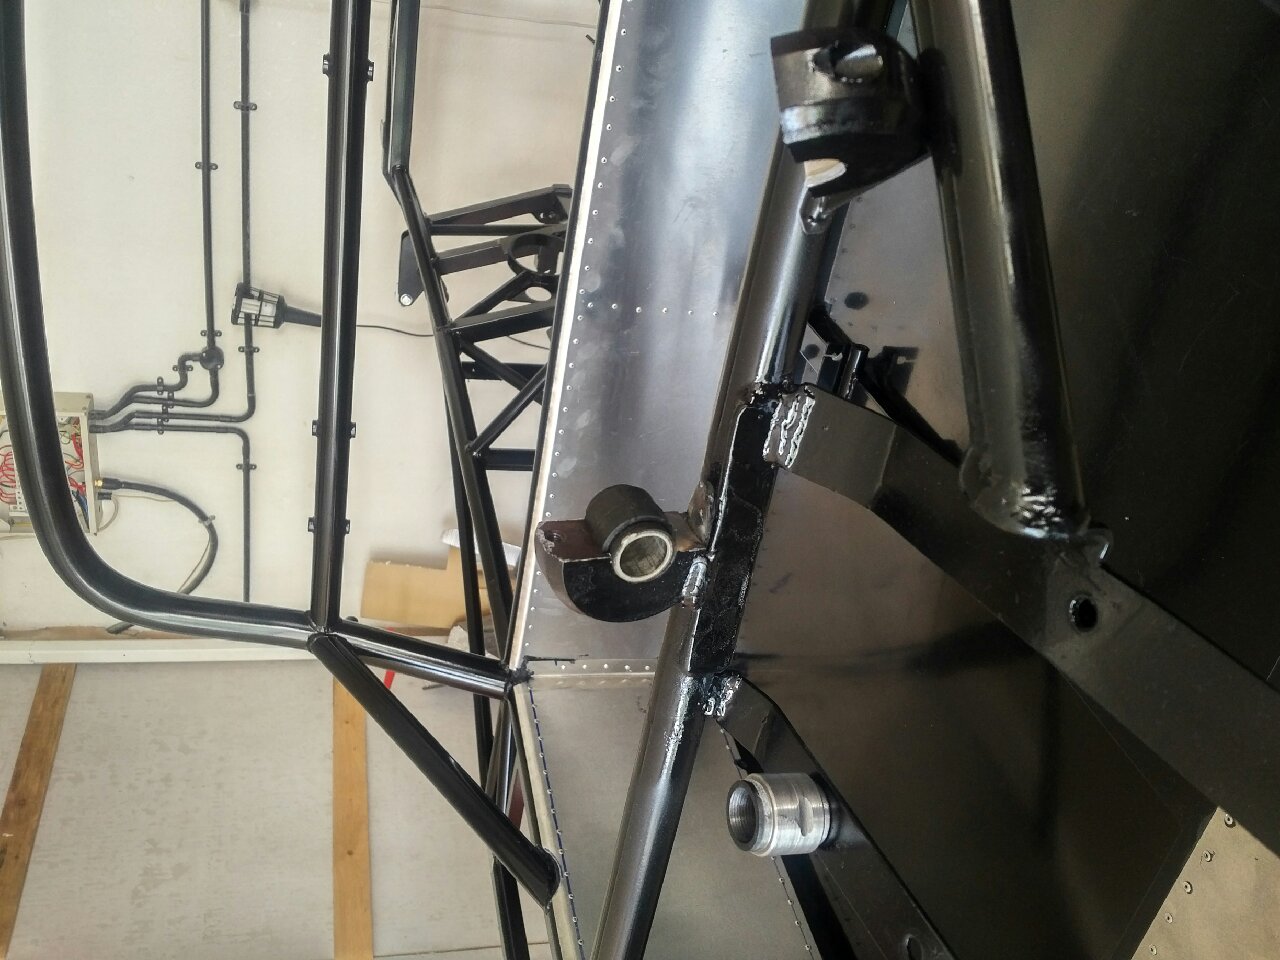
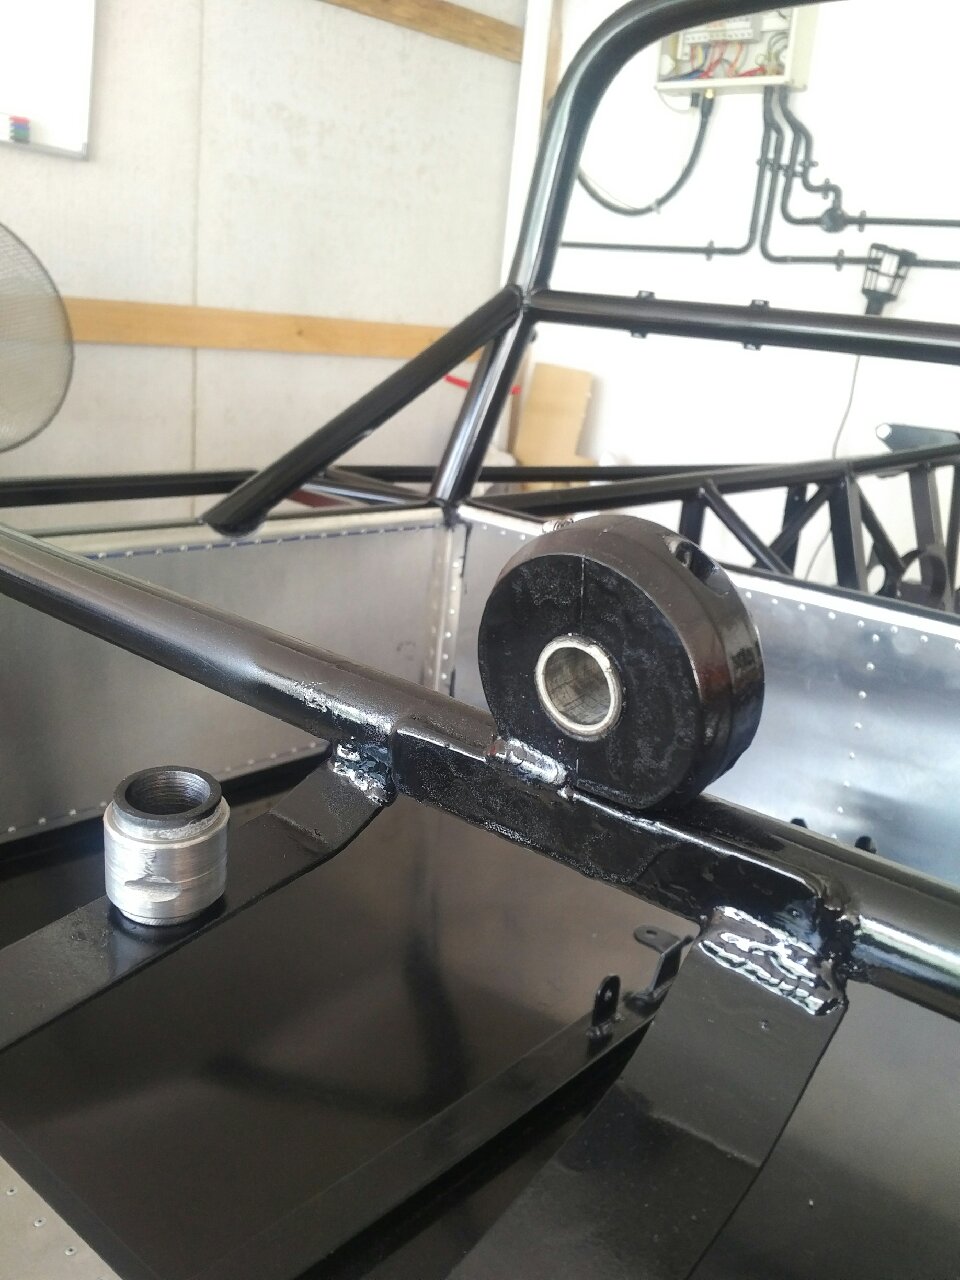
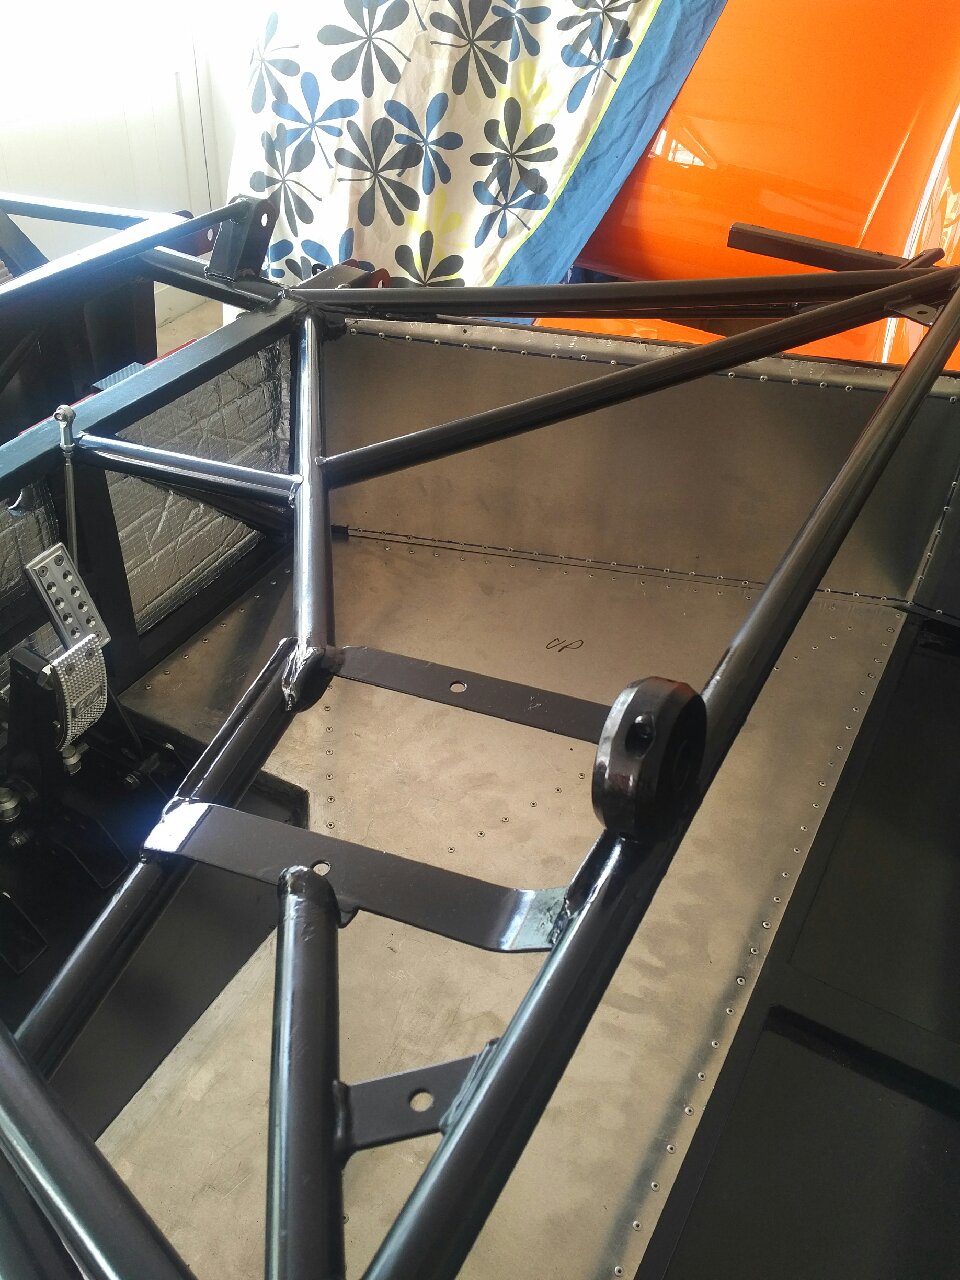
2) The driveshafts for my gearbox will be much lower than factory, so the diagonal cross member interferes the path of the drive shaft. To rectify this, the diagonal cross member was cut halfway, and a circular chassis support ring with support gussets was welded on... The drive shafts will now have place to cross over the chassis through the rings...
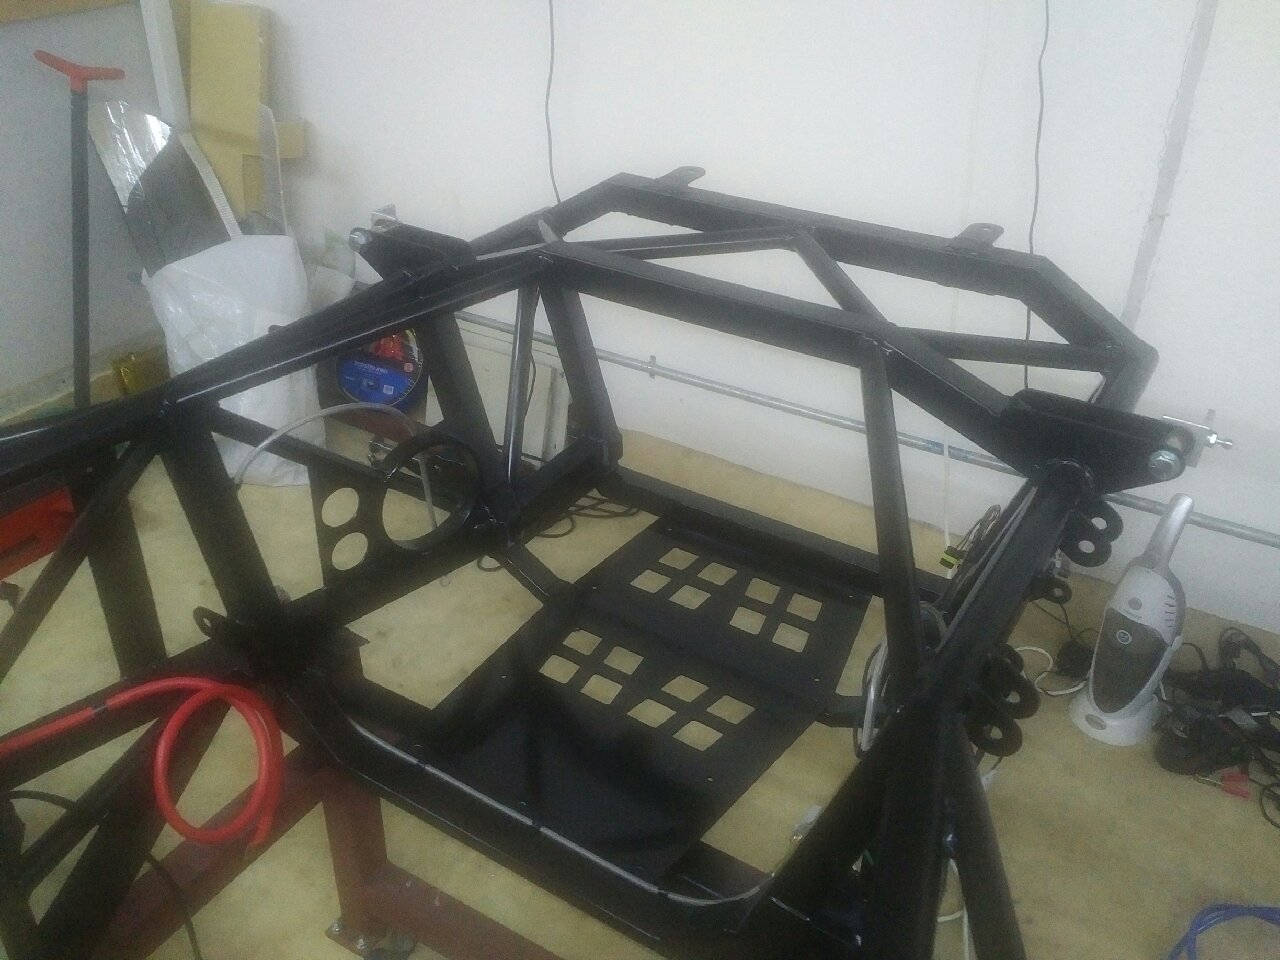
3) The entire lower floor of the gearbox area was cut out, and a removeable subframe will be used to align/position and strenghten the chassis after the gearbox is installed... The gearbox can now be installed from below, rather than from the back or top...
The chassis mods took a long time to get right, and hopefully will be the only time I need to mod the chassis (fingers crossed)
Jan 8 2017
Build Time Today: 3 hours
Total Build Time: 75 hours
Got back to the regular build today - first order of business was to route the brake lines - front and rear brake lines were routed as per factory specifications, and the pressure switch was installed in the 'normal' position on the rear circuit - I plan to use a pedal operated switch for the light, so this will be a redundant switch...
Next, I routed the battery cable to the rear and left it open for final positioning after engine install...
Then, I placed the wrapped coolant pipes and riveted them onto the chassis...

Finally, the loom was opened and laid out on the floor. I then spent quite a bit of time labeling each connection, so that once it is on the chassis I will know which wire is for what connection...
Jan 9 2017
Build Time Today: 3 hours
Total Build Time: 78 hours
The loom was laid on the chassis and the wires were carefully positioned and riveted onto the chassis at intervals - which took a long time :)
I then installed the silicon hose connectors between the coolant pipes and radiator, and also installed the radiator vent pipe... Finally, the horn was bolted on...
Jan 10-11 2017
Build Time Today: 5 hours
Total Build Time: 83 hours
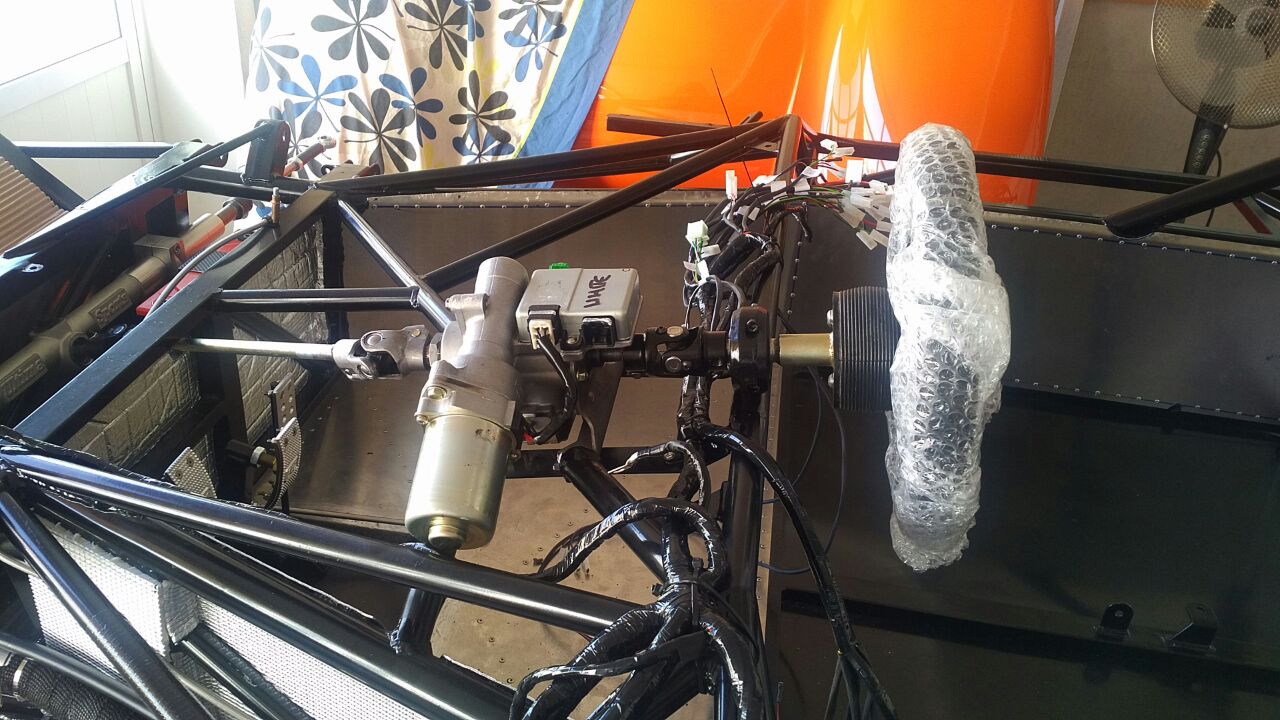
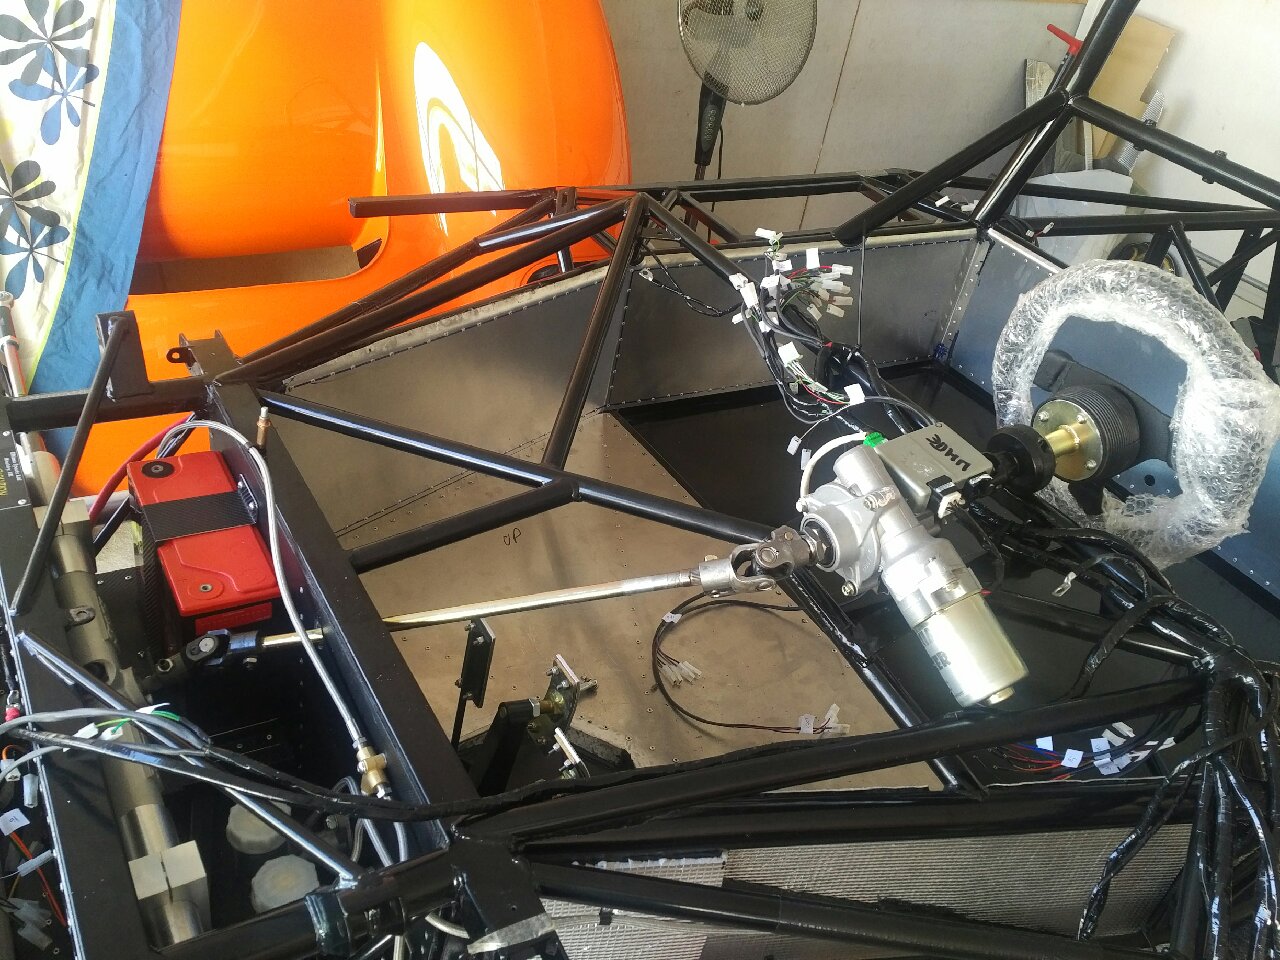
Spent the last couple days getting the steering system installed: first step was to modify the rack for the bump steer kit: the rod ends of the rack were trimmed by 10mm, and then the rose joint end links were screwed onto the rack.. The rose joints will allow to adjust for bumpsteer later on using shims...The rack was installed in the chassis with the help of the wife... Then the EPAS motor was installed with a custom lower steering column, and then the top steering column was installed after installing the steering wheel/boss on the column... The whole system was also aligned so that the rack is centered when the wheel is straight - and that took quite a bit of time to get accurate ...
Jan 12-14 2017
No time to build as work and a small desert holiday come in the way..
Jan 15 2017
Build Time Today: 2 hours
Total Build Time: 85 hours
Back home after a night in the desert... really small job taken care off today: testing the EPAS motor... The wires were connected as per the instructions, and the motor was tested in both directions with no/medium/max assist set via the control knob - the motor spins at different speeds so the EPAS appears to be working on the bench!
I also installed the LS throttle sender - much quicker this time around as I knew what I was doing, and having the correct rivnut tool also helps ALOT!
Jan 16-17 2017
No build work...
Jan 18, 2017
Build Time Today: 3 hours
Total Build Time: 88 hours
Back to the build today... First started the day with installing the hand brake lever and cables... The handbrake is the new EVO style staineless version - and looks very nice! The parts were opened and the floating bar installed in the lever, and then the lever onto the chassis... The handbrake cables were threaded through the ally panel holes and installed into the lever, and the cable ends in the engine bay were left for future routing...

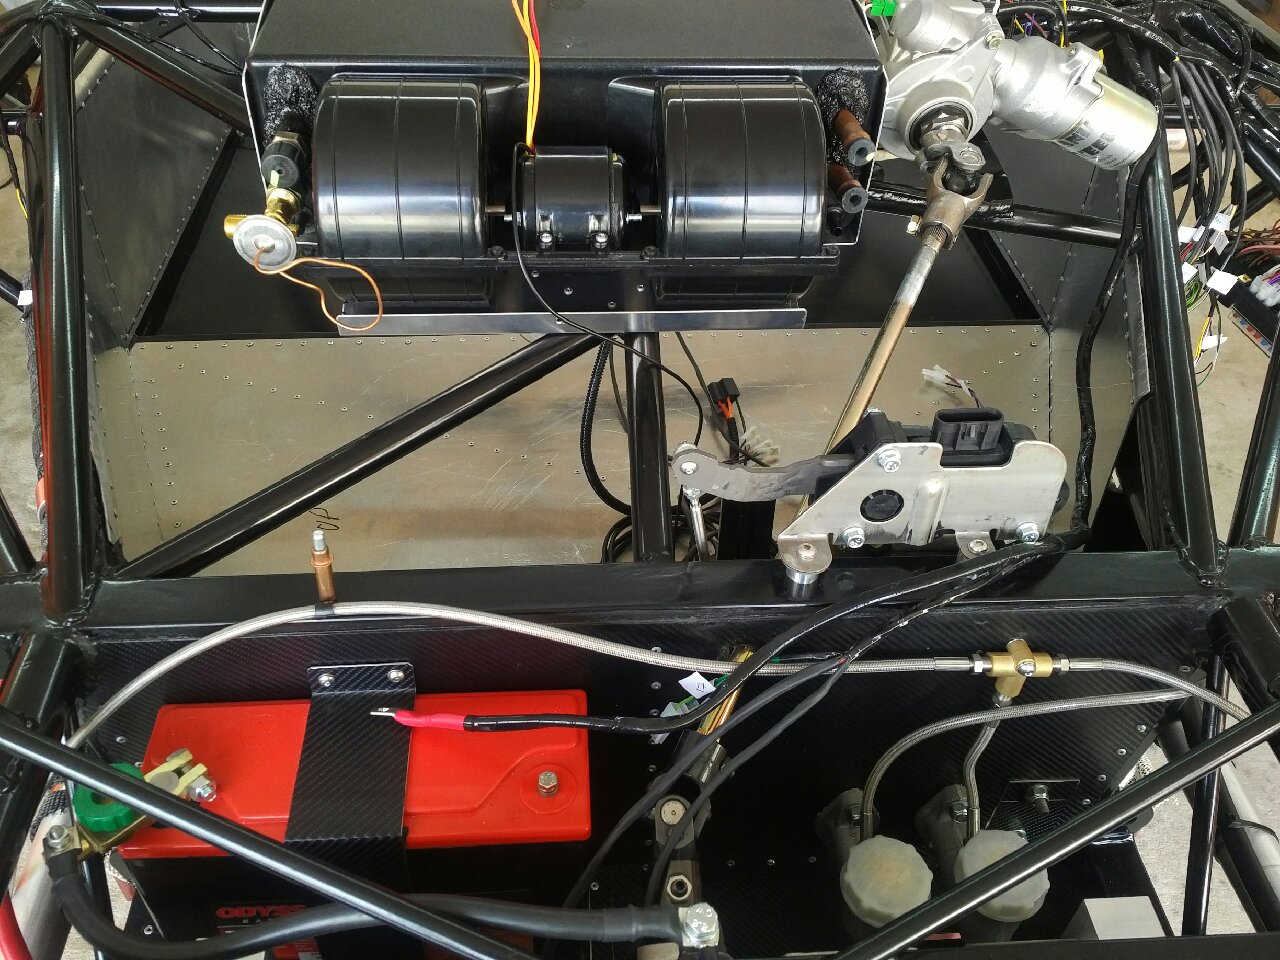
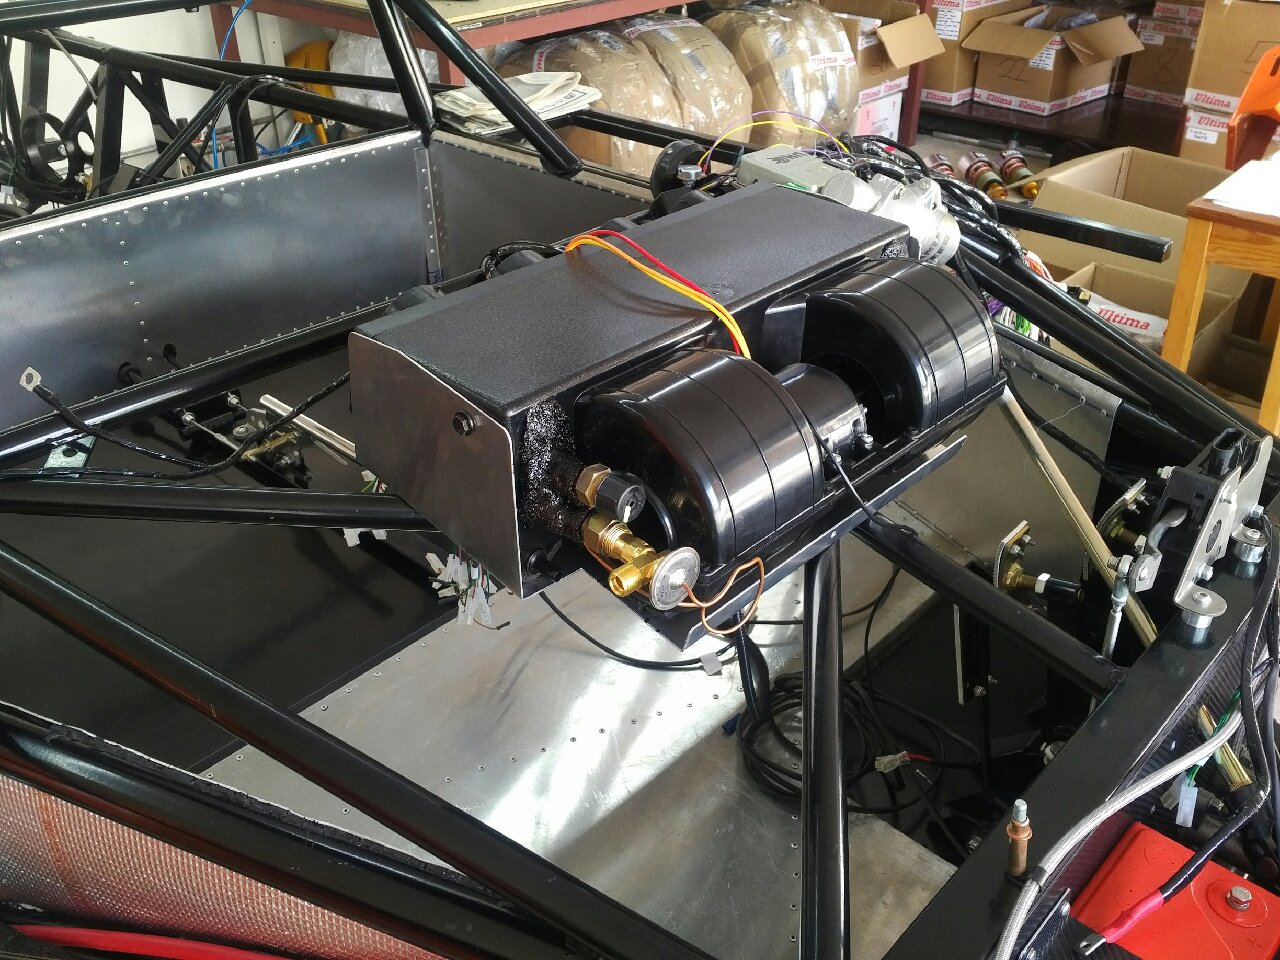
I then started work on the AC - the base plate was installed after careful measurement, and the blower unit was bolted ontop with the addition of some foam tape... The two long hoses were routed through the side pod area, and measurements were taken for where to cut the hose to add the custom high/low AC ports... The hoses will later be removed and taken to the shop for fitting...
I also installed the brake pedal light switch - a little switch which should light up the brake circuit with the slightest press of the pedal...

Jan 19, 2017
Build Time Today: 2 hours
Total Build Time: 90 hours
I started work on the luggage containers today... Normally, it would be time to install the wishbones and uprights, but I am still waiting for some wishbone parts, so that is on hold for the time being...
The luggage containers took a while to fit, because quite a bit of material had to be cut away from various corners to make it fit... once both luggage containers were fit, I marked the chassis lines..
I also took a little bit of time to make the cill cover templates, so I will be able to work on the luggage containers and cill covers together...
Jan 20-21, 2017
Build Time Today: 5 hours
Total Build Time: 95 hours
I spent all the time getting the luggage containers ready for riveting - the luggage containers were drilled for rivets, then those holes were drilled in the chassis and the holes waxoyled... The EVO also has additional luggage container supports the are drilled into the bottom side of the containers, and are drilled into the chassis side next to the floor pan...

Additional holes were drilled in the luggage pods for the AC hoses (forgot to do that yesterday) and also holes for the PVC pipe at the bottom to allow for passage from front to back in the future..
The pods will now be sent for trimming before being installed later this week...
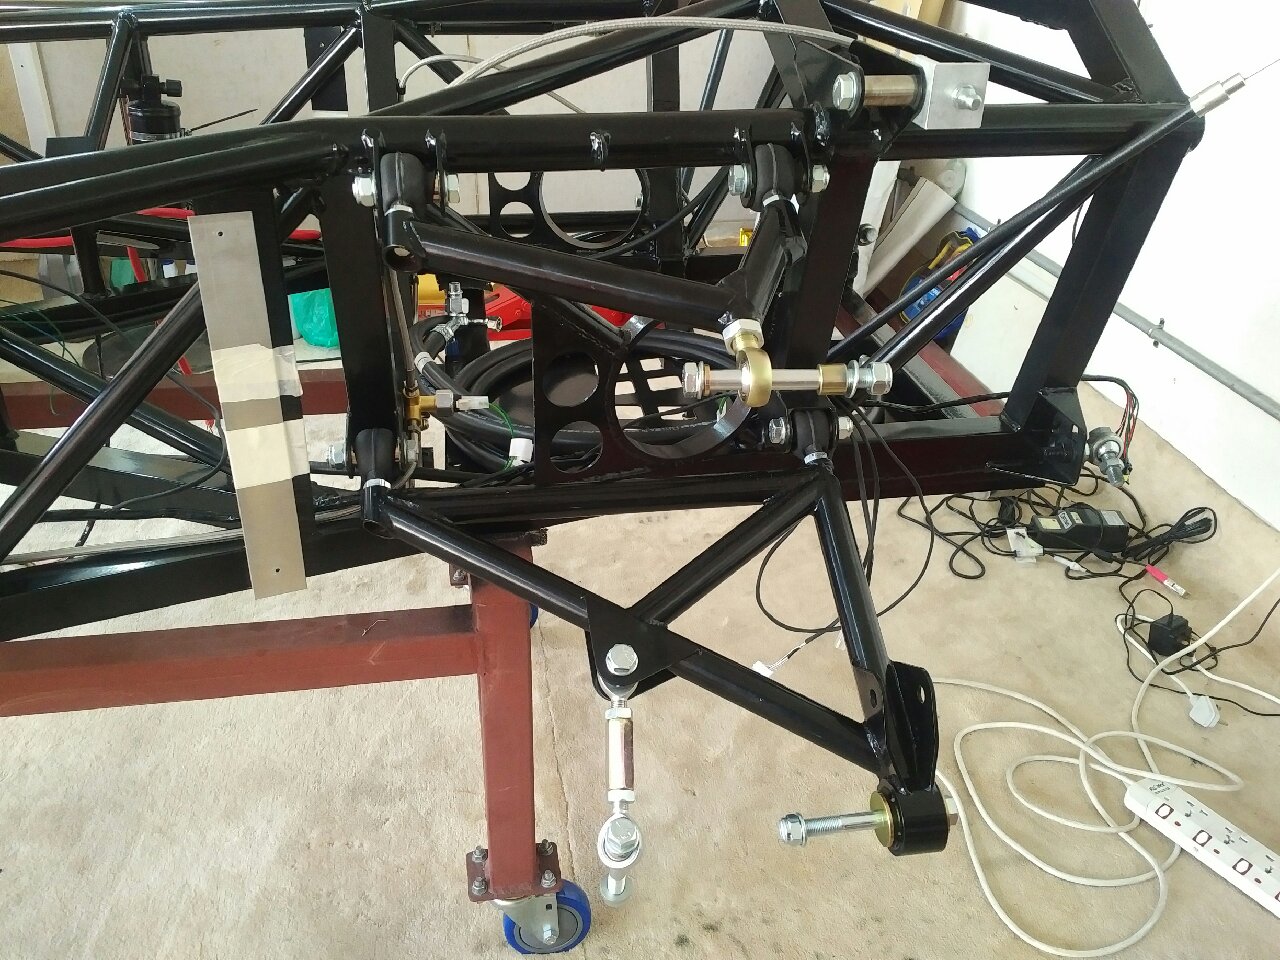
I then started work on the rear wishbones... I have ordered the rose jointed wishbones this time, so the prep work involved installation of rubber boots onto the rose joints - this is again a custom boot I have ordered that should help keep dust and dirt out of the rose joint, and hopefully improve life... The rose joints were removed from the wishbone, boot installed, and rose joint reinstalled onto the wishbone.. I did this for all 4 rose joints of the lower rear wishbones, and then installed one lower wishbone to the chassis - it took a long time as I still had to part the chassis apart to get the rose joint in, and it was hard installing spacers while having the wishbone in one hand and the bolt in the other - try holding four things at one time with 2 hands!!
Jan 22, 2017
Build Time Today: 1 hours
Total Build Time: 96 hours
I spent a little time in the workshop getting the remaining rear wishbones installed.. Didn't take too much time...

Jan 23, 2017
Build Time Today: 3 hours
Total Build Time: 99 hours
First job of the day was getting the rear uprights installed - although a fairly straight forward task, it took a while to do since I was working alone - an extra pair of hands would have made this task MUCH quicker... anyway - I had to grind a little bit off the spacer at the top since they would not fit (off by about 0.5mm)... Once the three bolts for the uprights were on, they were tightened (but not torqued), since I will first do the alignment before torquing the wishbones/uprights/dampers to spec...
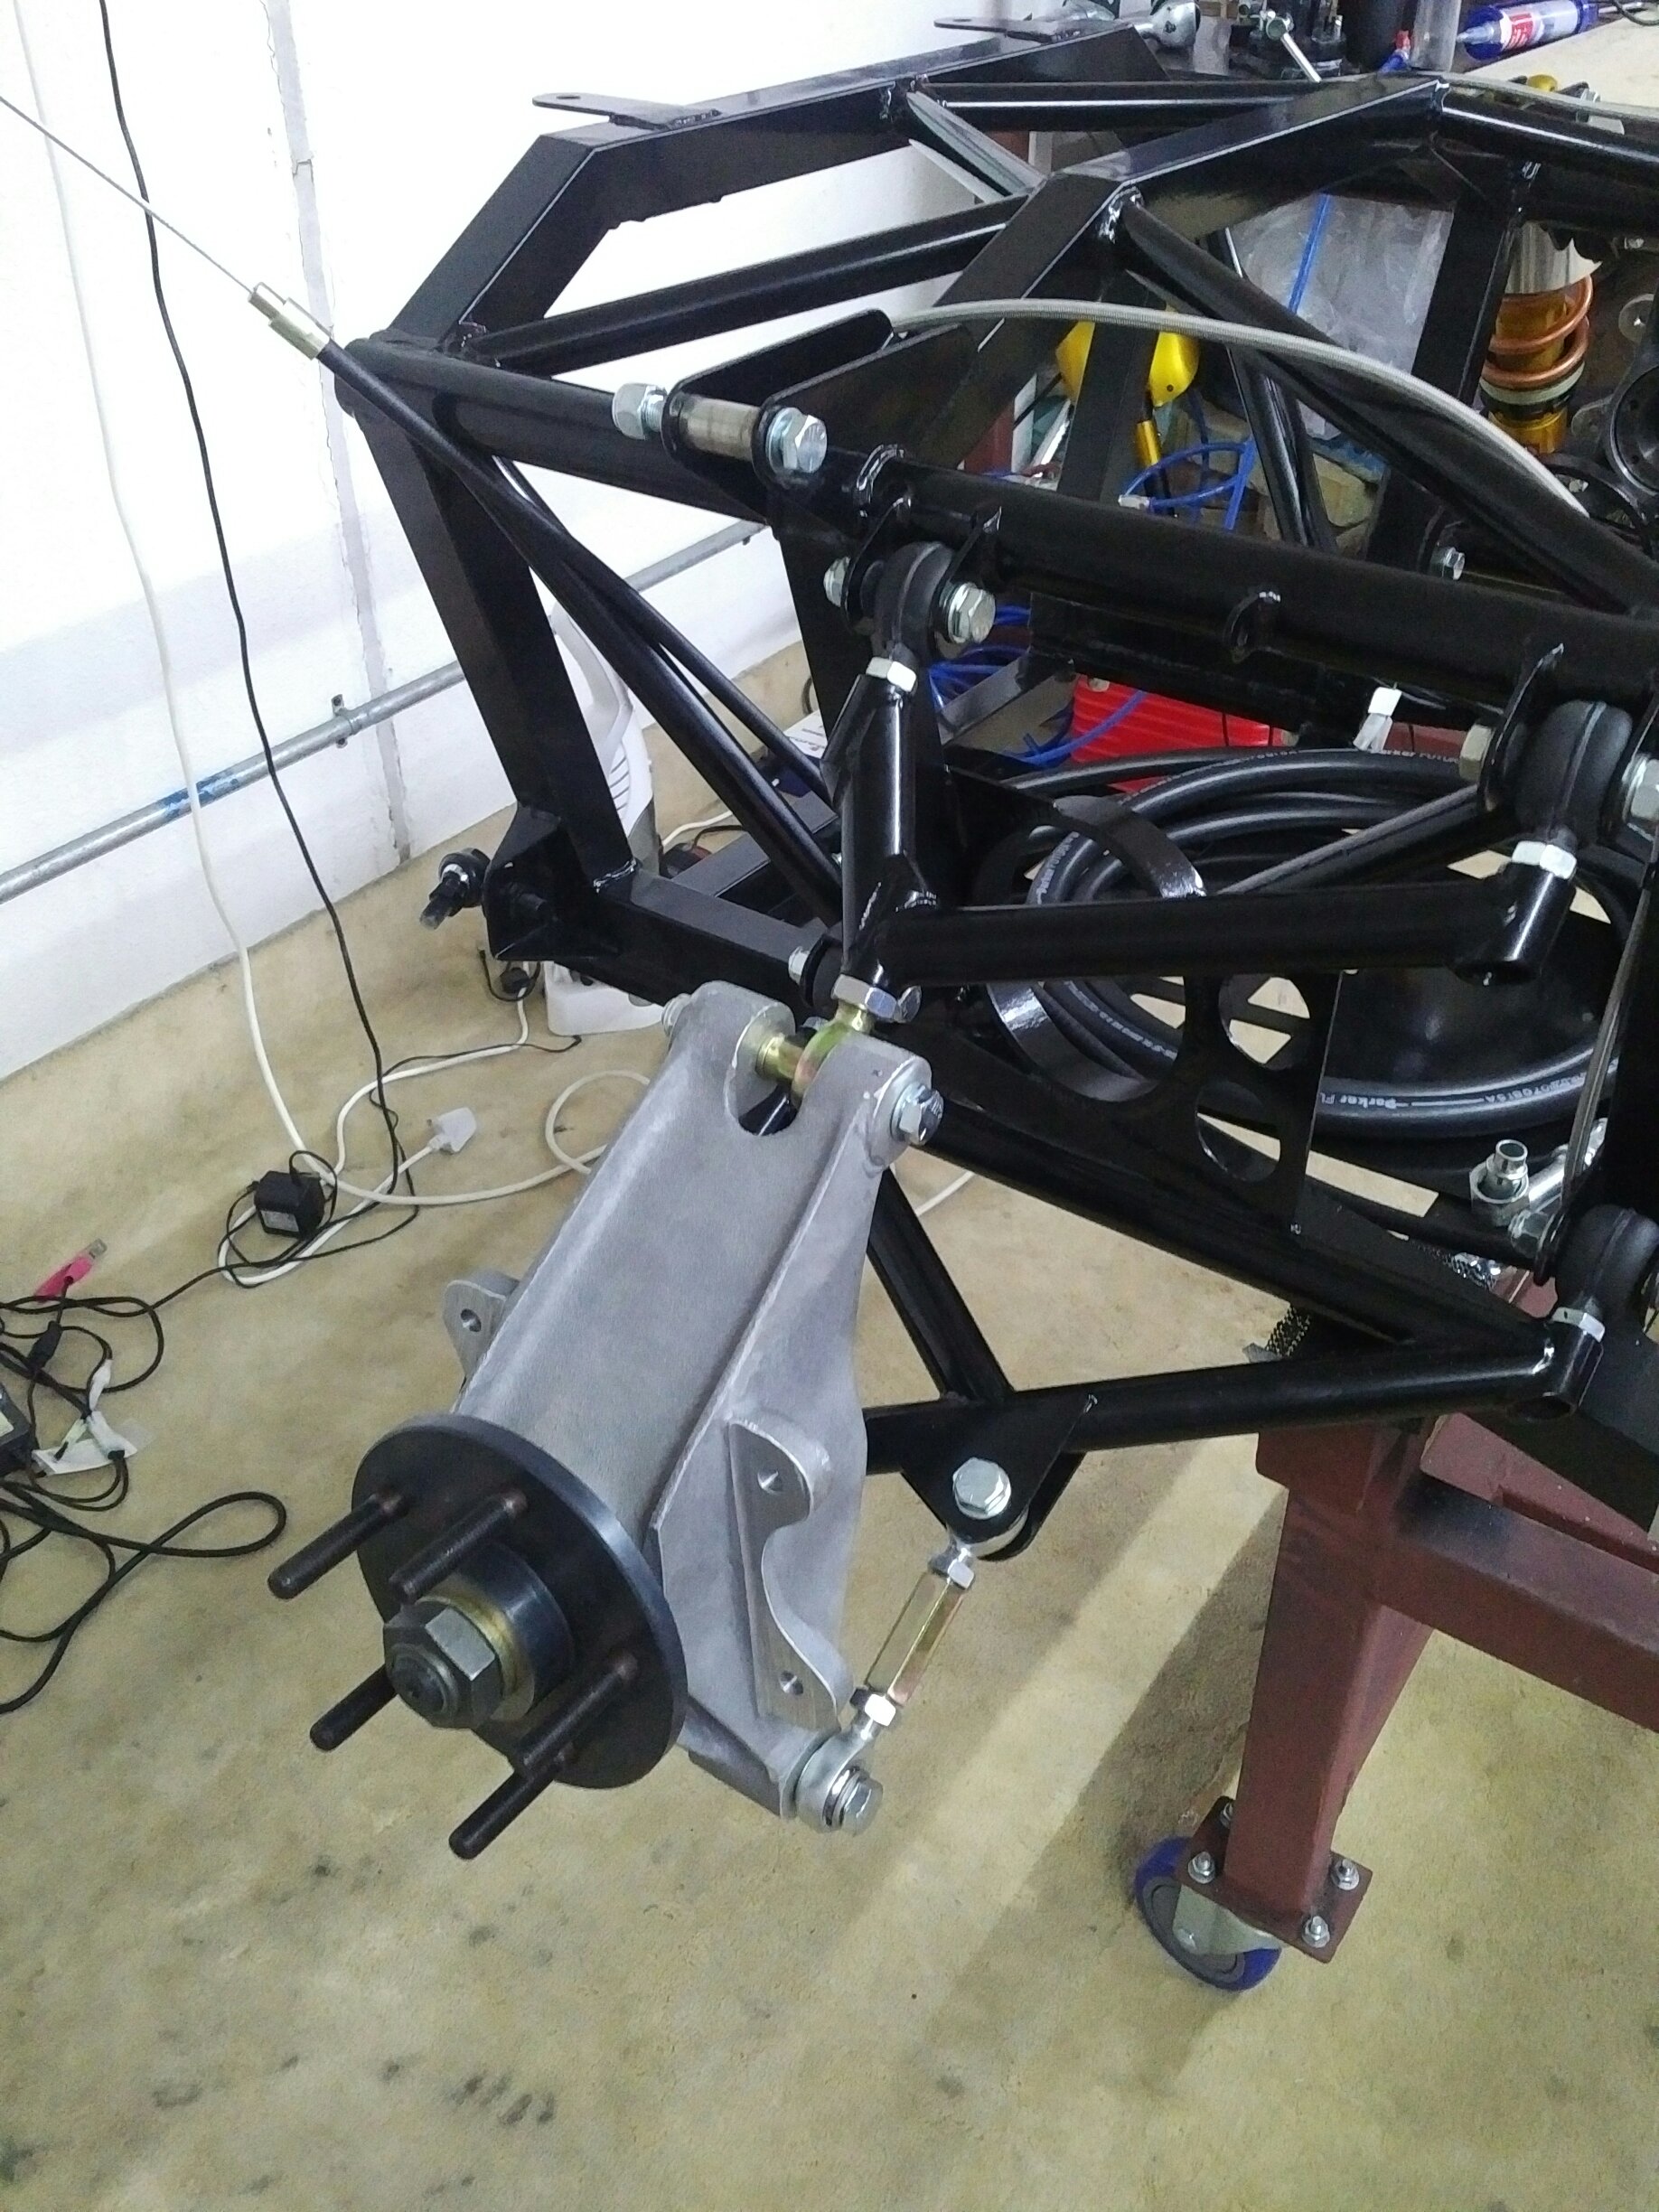
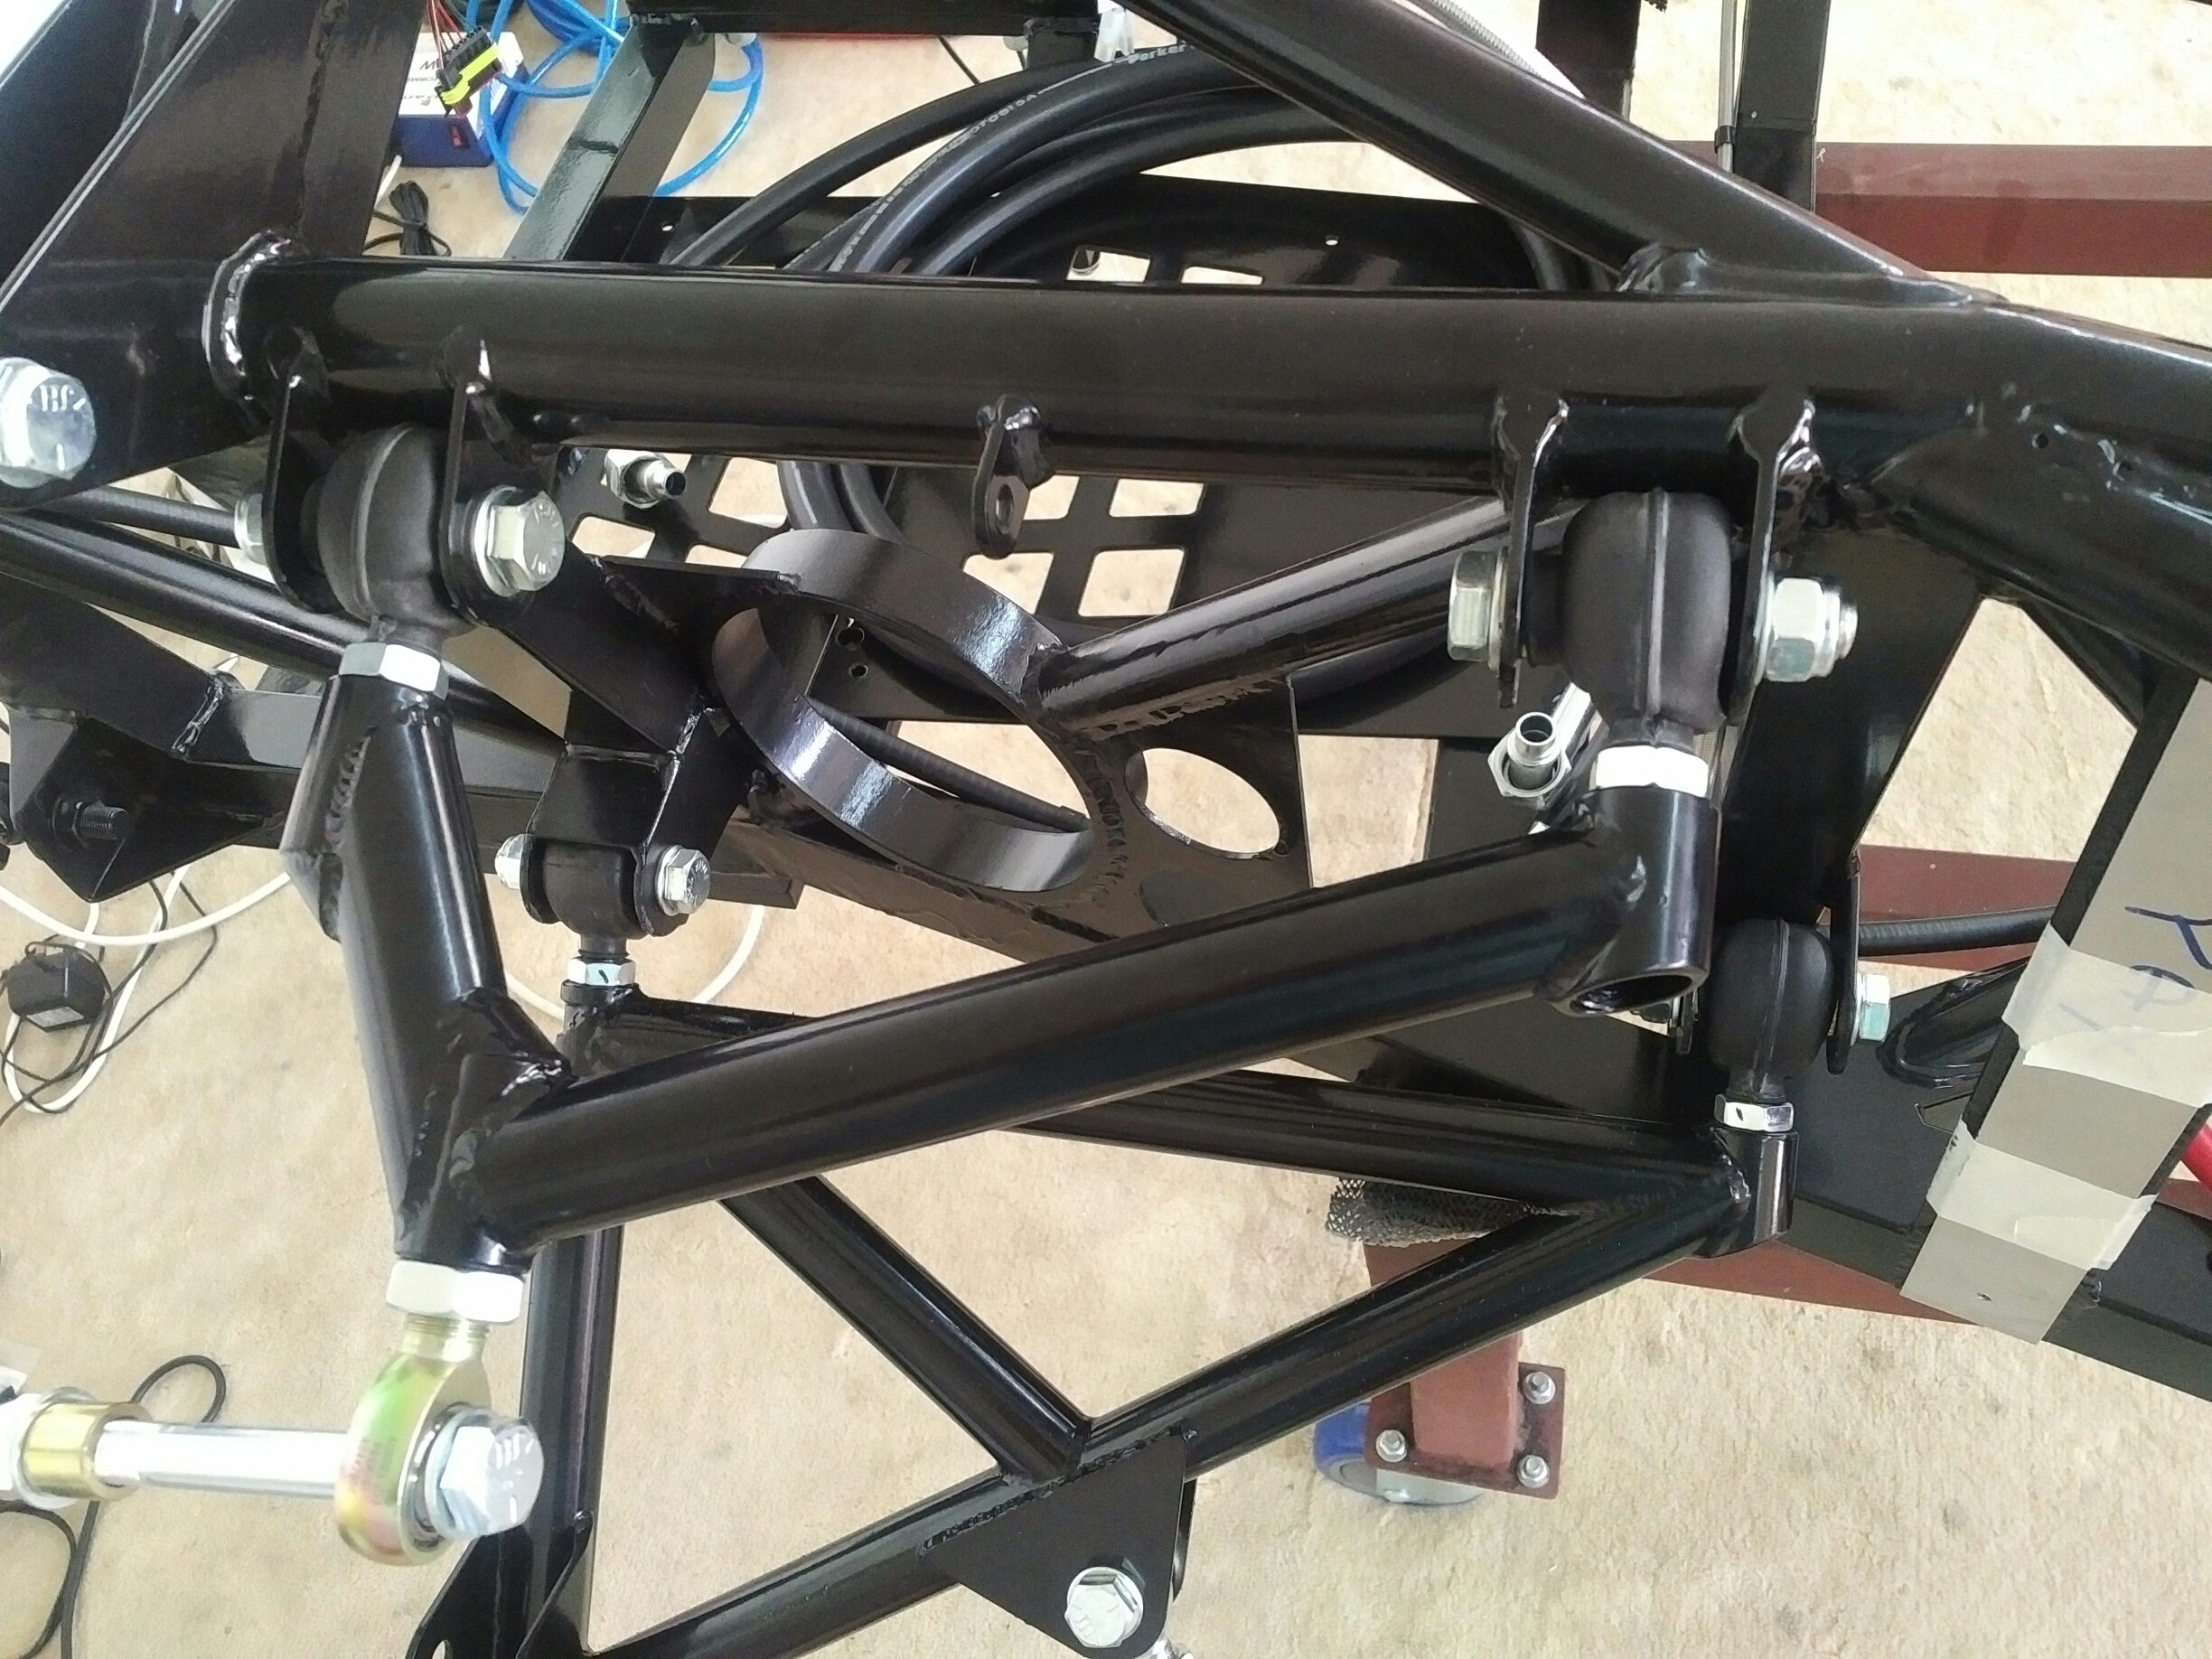
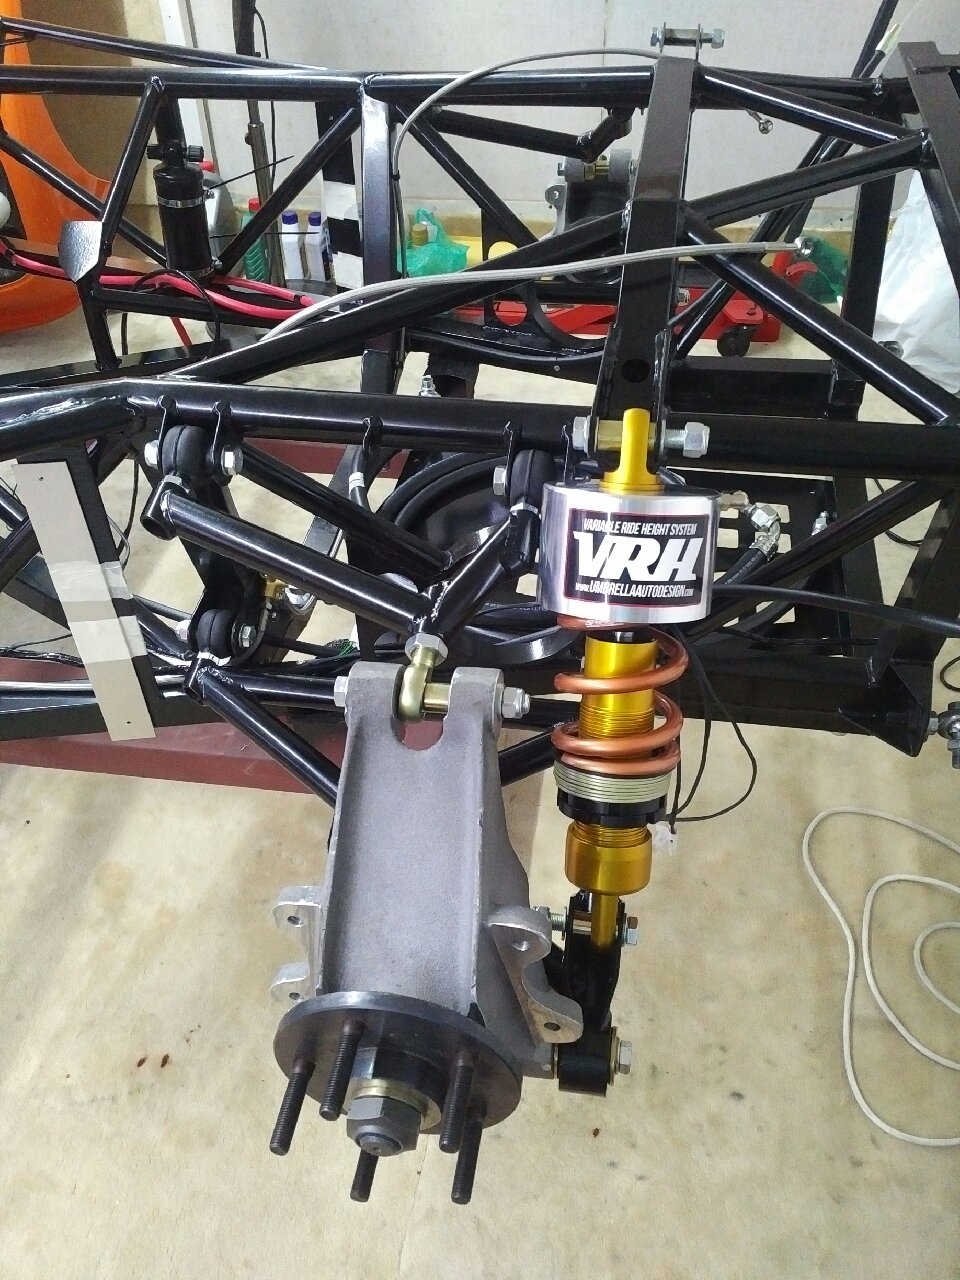
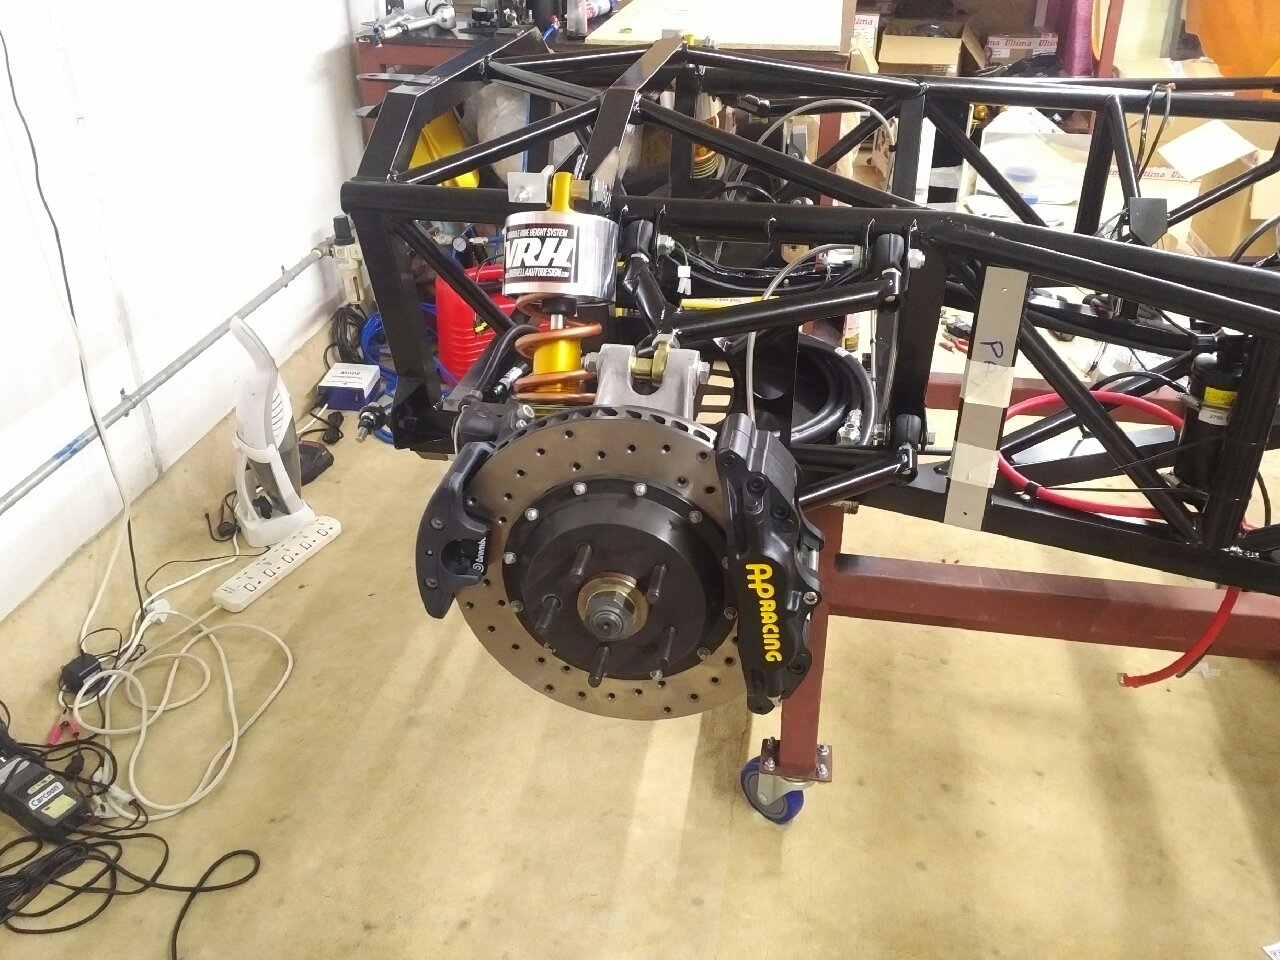
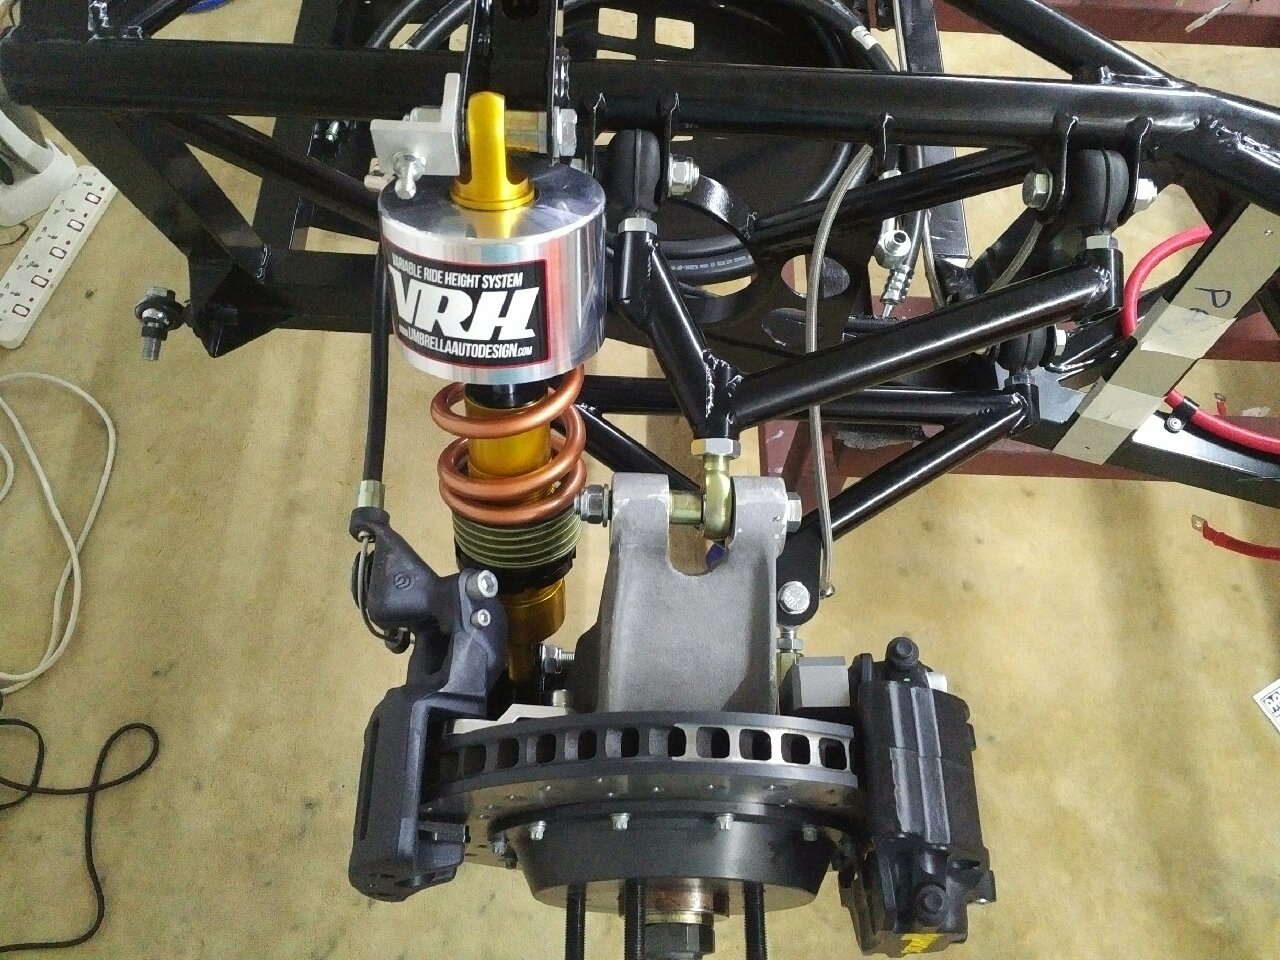
After the uprights, I decided to work on the dampers - here again I am doing a custom application: the Ultima factory supplied dampers were sent to a company in WA to get a custom lift kit installed - I should be able to get about 2" lift when required with the push of a button, allowing me to use the Ultima on Dubai roads where bumps use to scrape the old CanAm due to ground clearance issues... The custom kit took almost 6 months to get ready! Luckily, I had the factory send the dampers directly to WA in August last year, so the lift kit (with dampers) was ready by the time I was ready to install it (FYI: I received the lift kit this afternoon!)...
The damper was installed on the driver side with the factory supplied spacers - however, I feel the spacers are positioning the dampers too close to the chassis/wishbones bolts - the lift kit has a 'cup' which is within 1mm of the wishbone bolt - so I will get new spacers machined tomorrow to see if I can move the dampers away by 3-4mm... One side was installed to test, and now I will get the required spacers before continuing...

Jan 24-26, 2017
Build Time Today: 8 hours
Total Build Time: 107 hours
A cumulative update for the past few days - where work has not really moved foward...
First item was to machine the required spacers to move the damper a little to the rear, which I did at my work machine shop... Those spacers were used to install the damper, and the new spacers have given me just enough space behind the cup to be comfortable... Being successfully installed, I installed the damper on the other side as well...
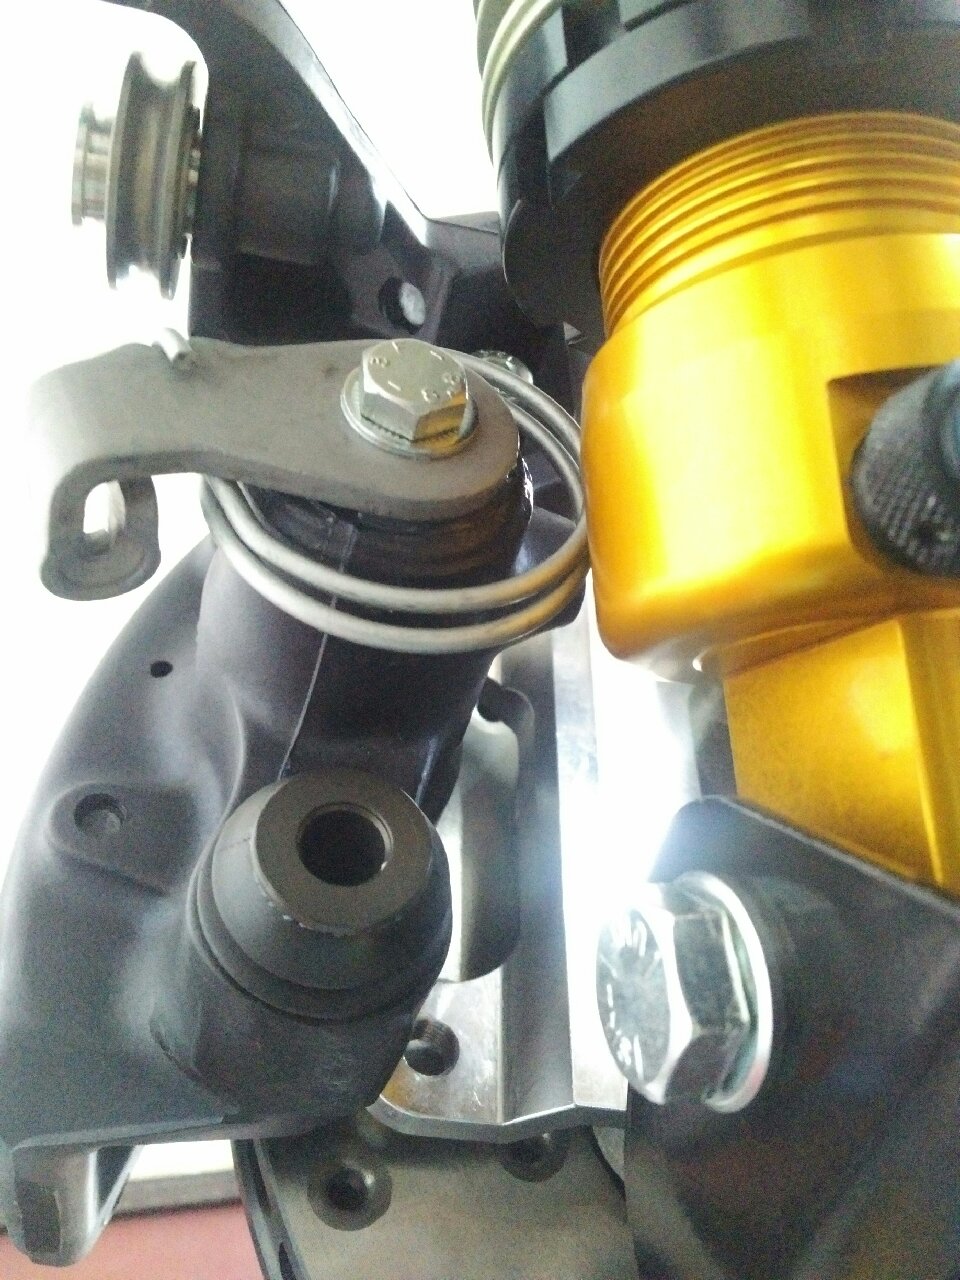
I then started working on the rear rotors - they were a lot easier to put on than last time, and went on without much effort... I then dry fitted the handbrake and brake calipers, and this is where things got 'interesting'.. I now have the following issues to deal with:
1) The handbrake caliper won't sit flush to the caliper bracket because the damper is touching the caliper spring... I have put this question out on the forum and to the factory...
2) The handbrake cable appears to be too long... even after adjusting it to its shortest lenght at the lever end, the nipple end is too long to fit on the caliper...
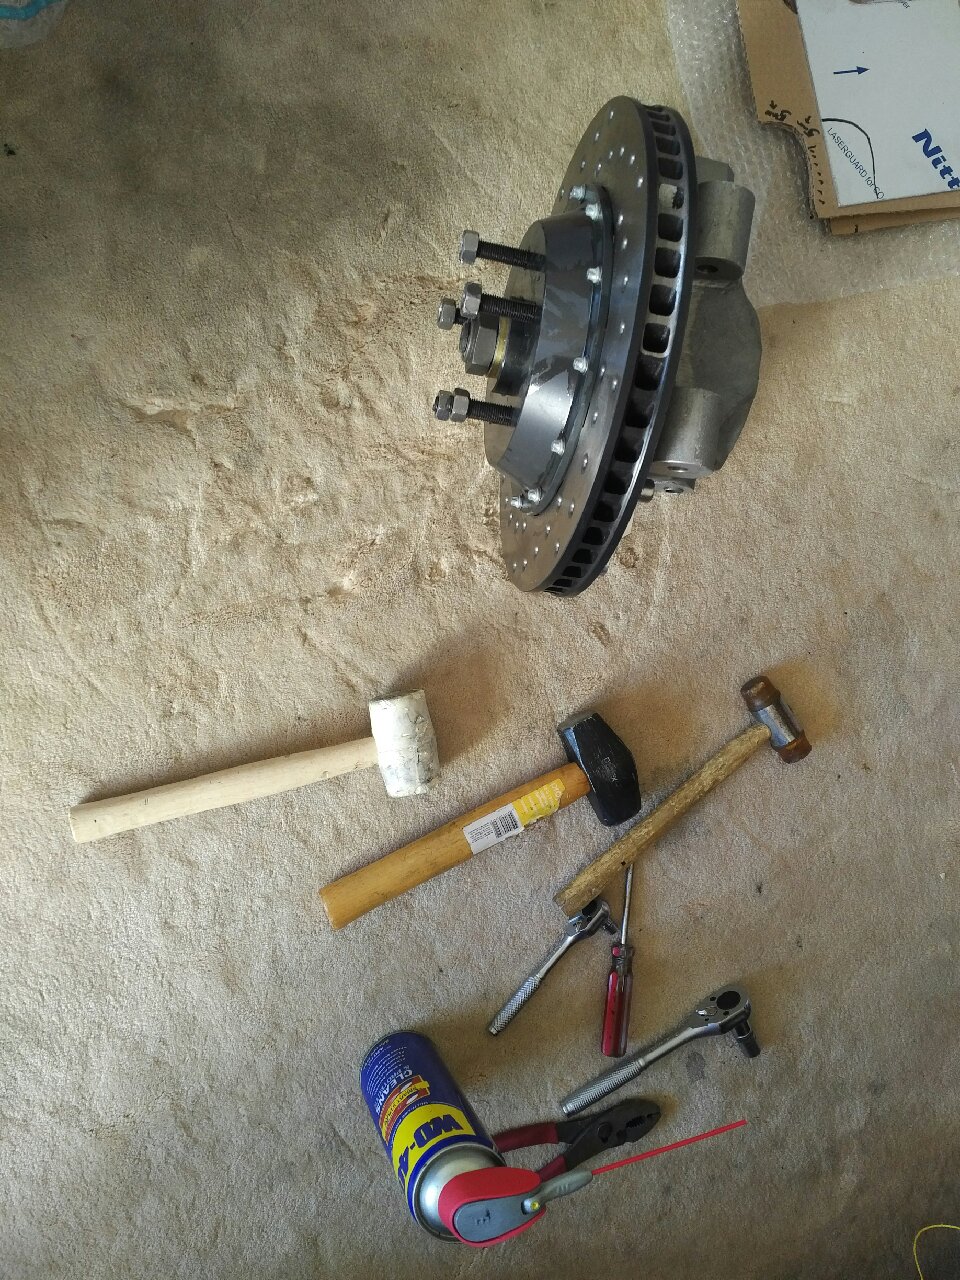
3) I tried to take the rotors off to loctite the caliper bracket bolts, but both rear rotors are stuck!!
Over the next 2 days, I was able to 'solve' the above issues by:
1) The handbrake caliper spring touching the damper is a known issue - apparently it will sort itself out once the car is on the ground, and the hub moves away a little... however, I still cannot install the caliper in the current situation because the spring will not let the caliper sit flush to the bracket...
2) The factory will send me new cables as the current ones have been manufactured (by their supplier) incorrectly...
3) I have tried everything to remove the rotors - WD40, releasing agent, rubber mallet, bolt removal method (from youtube), hammer, etc... They will not budge.. I have tried heating and cooling, but still no luck... Quite a bit of time has been spent on this as I don't want to damage anything, so working slowly and calmly (as possible) to get it removed...
Jan 27-30, 2017
No build work as I am out of town on a business trip...
Jan 31, 2017
Build Time Today: 3 hours
Total Build Time: 110 hours
Back home today, and back to the build...
First job was getting the rotors off - during my trip, I was able to purchase a 'drum removal' tool that is used to remove stuck brake drums from trucks... it is pretty heavy duty, and was used to successfully remove the rotors! Once off, I looked at the rotor and hub and figured that the rotor had stuck to the hub on the center hole...
The caliper bracket bolts were installed using loctite... The rotor was reinstalled after using sandpaper to remove a fine coating off the rotor and hub at the mating surface... Copper ease was also used to prevent further sticking... The AP brake caliper was installed and brake pads and anti rattle clip installed...
The handbrake caliper was installed by undoing the top upright bolt, and swinging the upright to a horizontal position.. the caliper was installed, and then the whole assembly pulled back up to vertical and bolted to the top wishbone again... This took time to figure out and install, so hopefully the other side tomorrow will be easier...
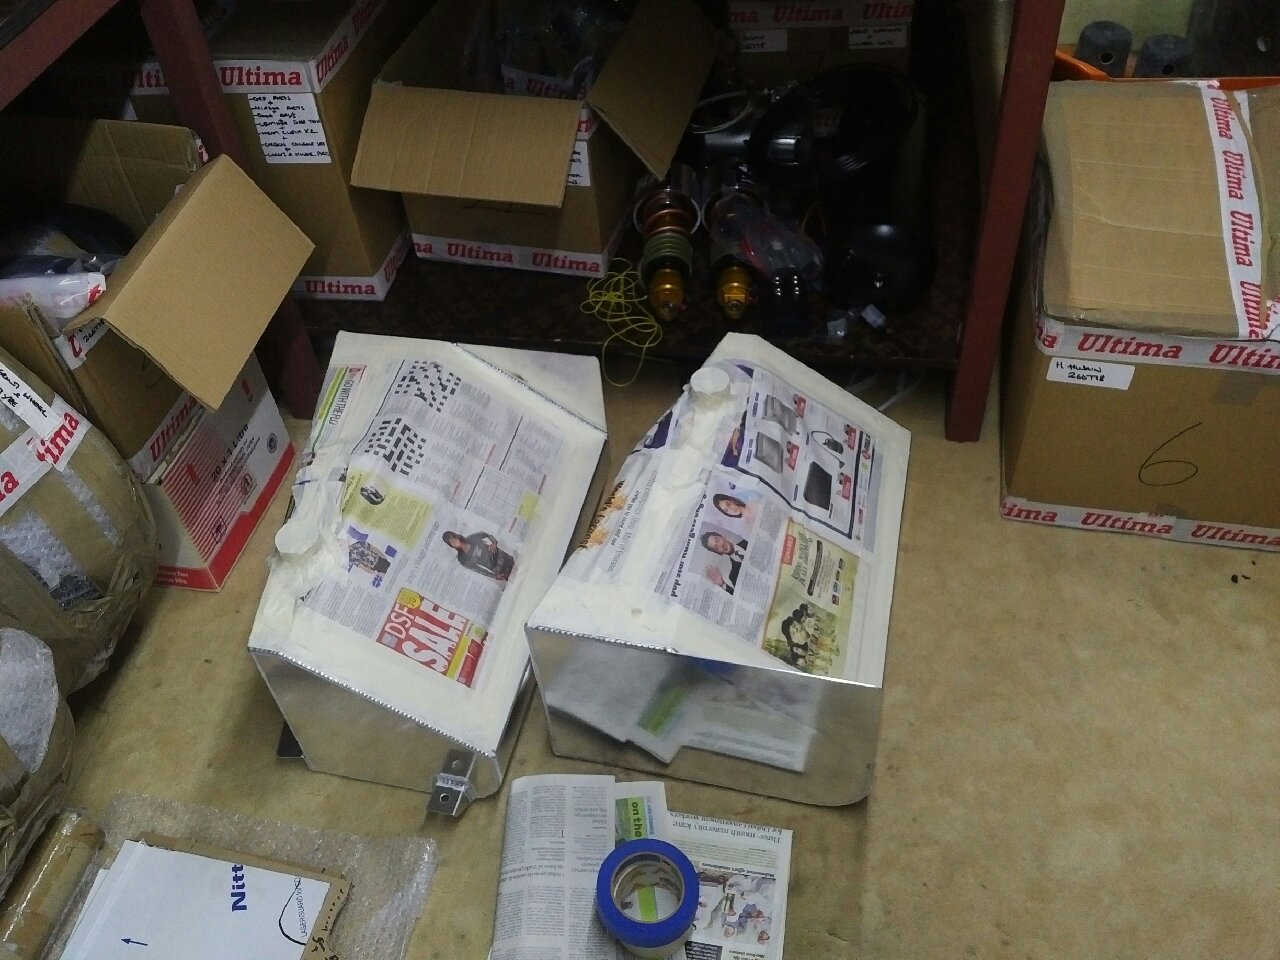
I also spent a little time prepping the fuel tanks for painting - the top and engine facing sides were taped away to protect from paint...